
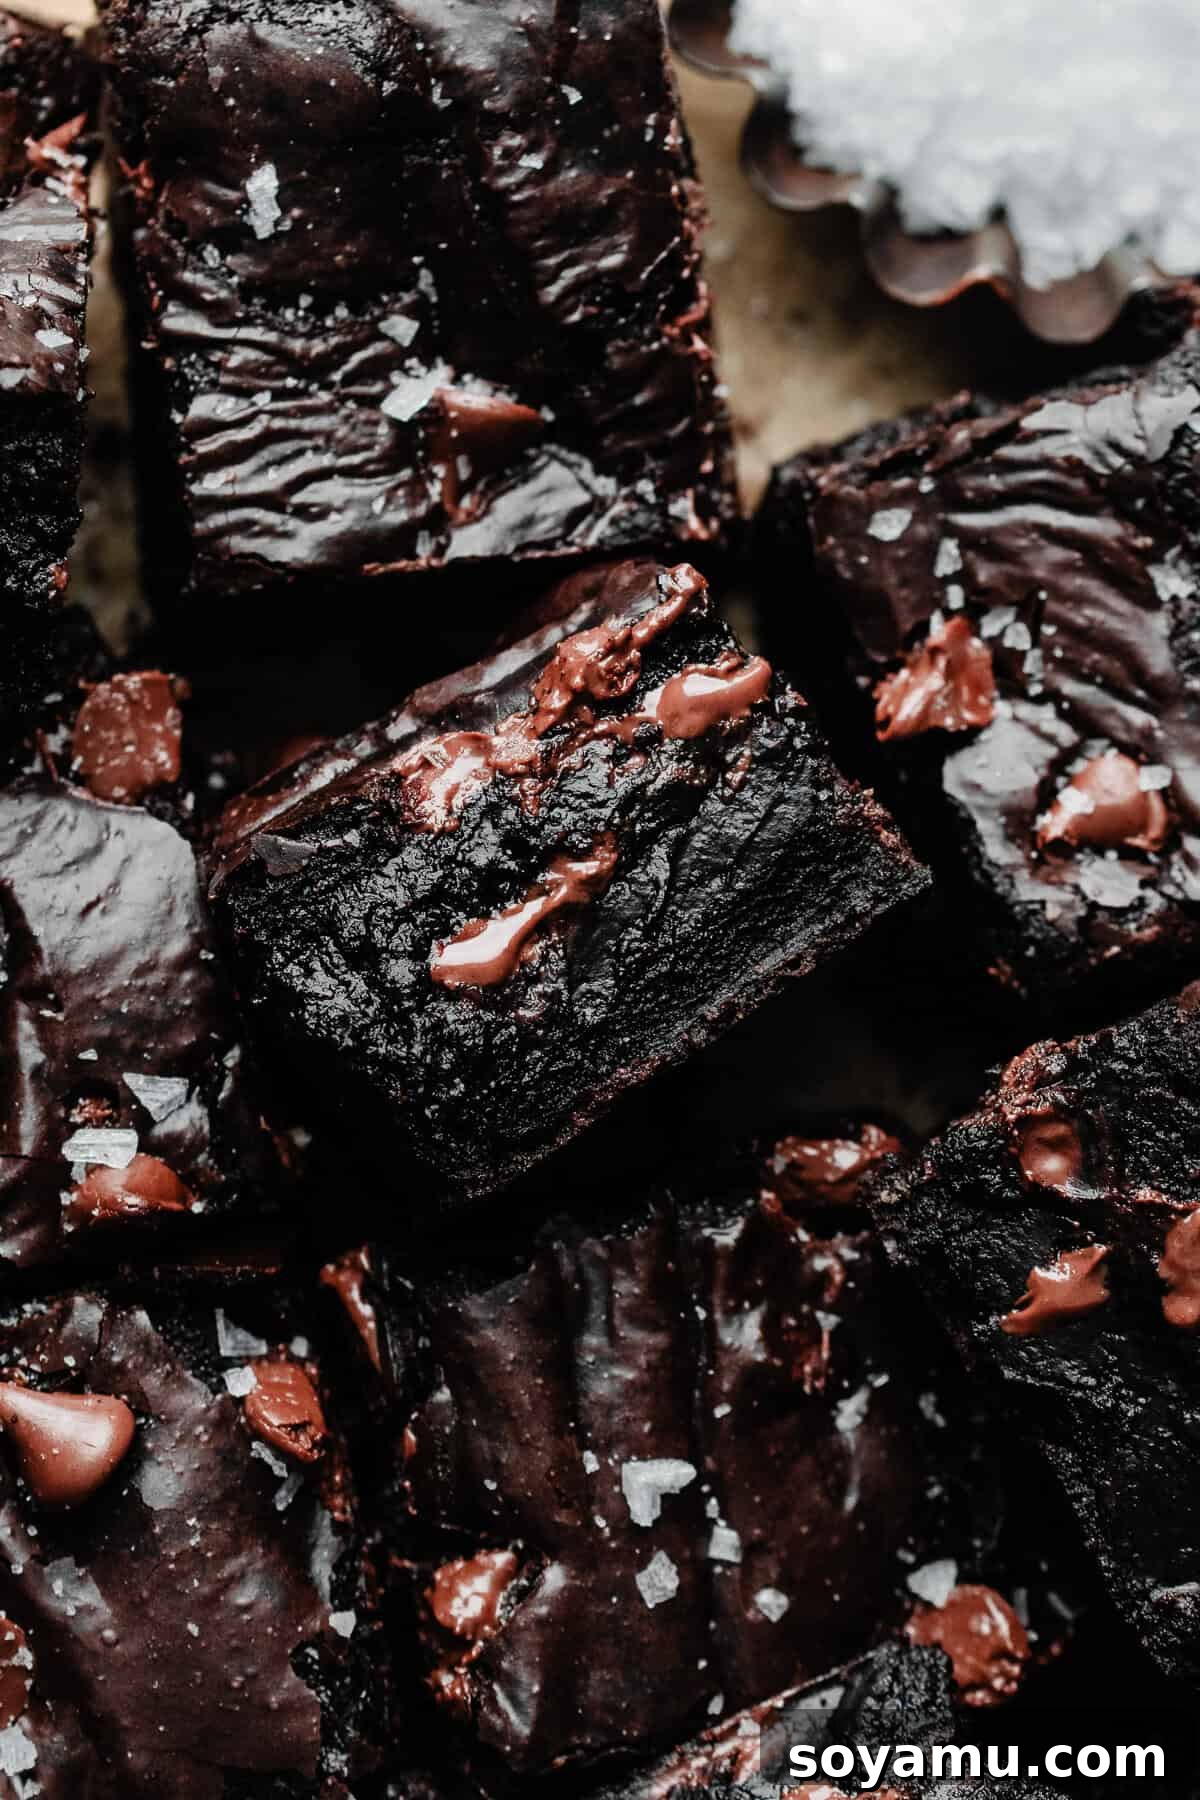
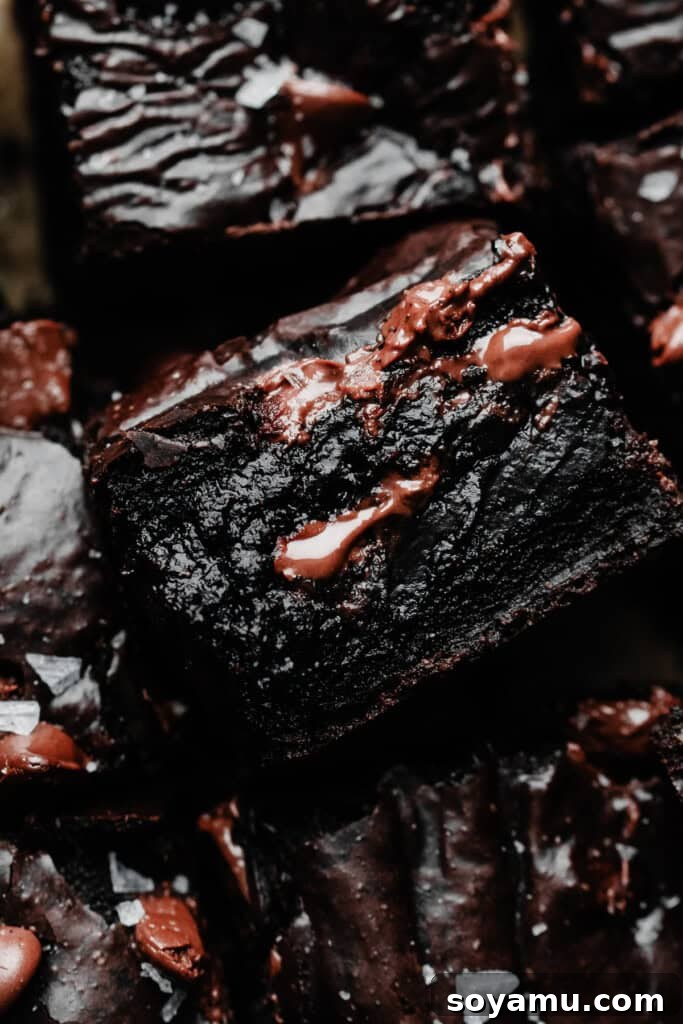
Prepare to be amazed by these incredible Gluten-Free Brownies – a truly rich, intensely fudgy, and utterly decadent chocolate experience complete with that coveted crackly top. Packed with generous amounts of chocolate chips, these brownies are so profoundly satisfying that even the most discerning palates would never suspect they’re gluten-free! With just a few basic pantry staples and the magic of almond flour, you’re just moments away from creating these irresistible bites of pure heaven right in your own kitchen.
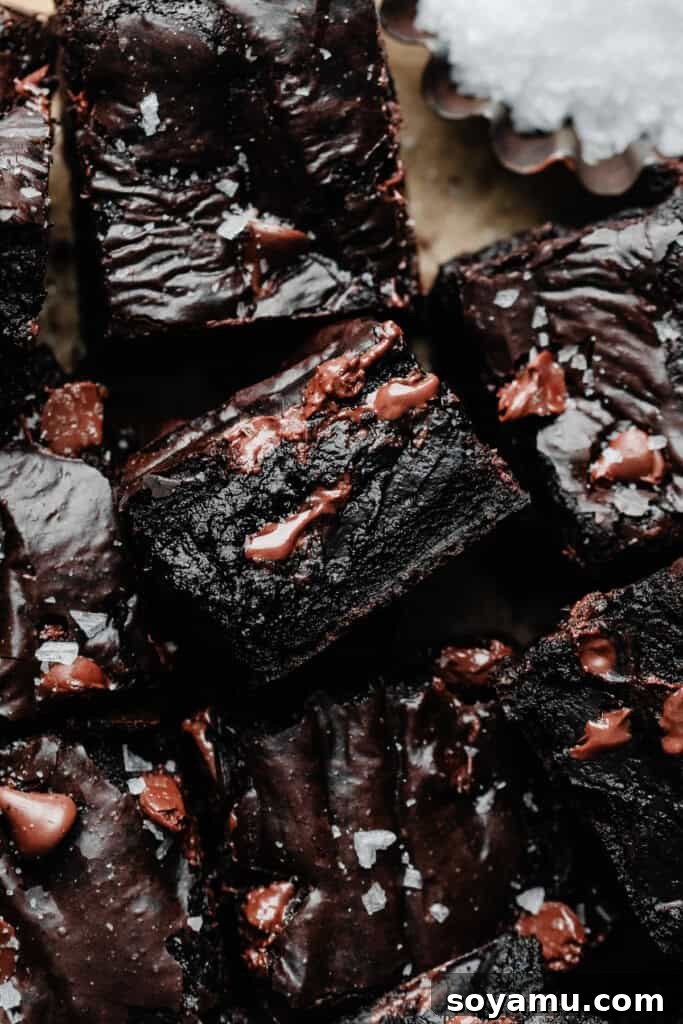
Whether you follow a gluten-free diet or not, this brownie recipe is an absolute must-try. It’s not just a “good for gluten-free” recipe; it’s simply a fantastic brownie recipe, period. The process is remarkably simple, yielding the most intensely fudgy gluten-free brownies you’ll ever taste. And let’s be honest, who can possibly resist the allure of warm, gooey brownies, especially when crowned with a generous scoop of mint chocolate chip ice cream or a drizzle of rich caramel sauce? This recipe promises a dessert experience that caters to everyone, delivering pure chocolate bliss without compromise.
Why You’ll Fall in Love with These Gluten-Free Brownies:
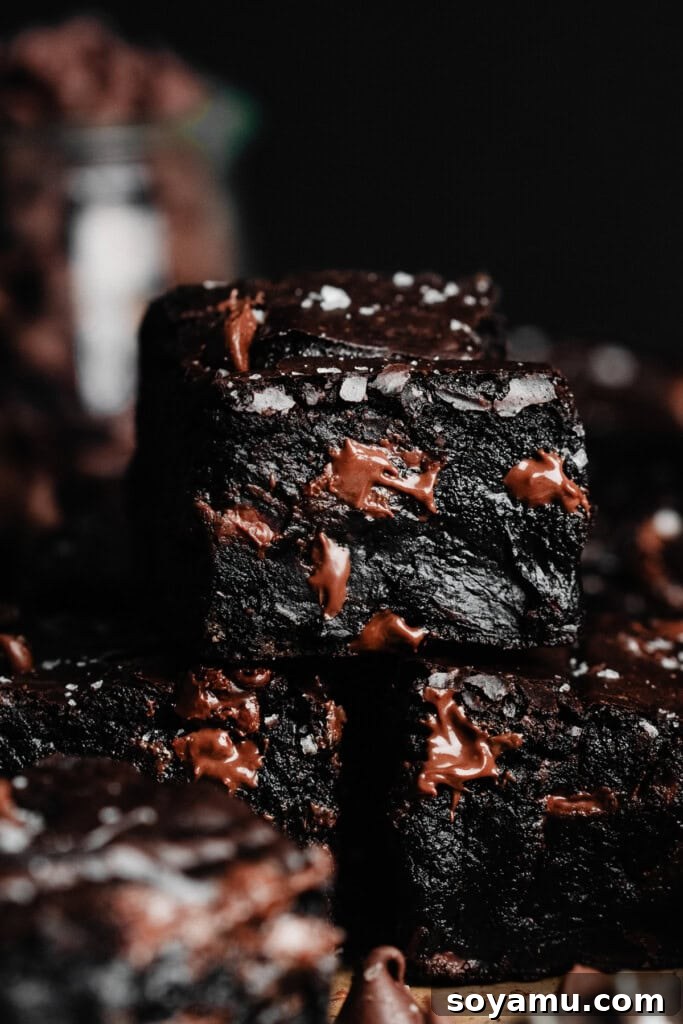
- Unrivaled Fudgy Texture: These aren’t just any brownies; they are the epitome of fudginess. Each bite delivers a rich, chewy, and dense chocolate experience that melts in your mouth, bursting with deep cocoa flavor. The texture is so perfectly balanced, it stands proudly against any traditional brownie, making it a true chocolate lover’s dream – and completely gluten-free!
- Effortlessly Gluten-Free: We’ve made going gluten-free simple and delicious. By expertly substituting traditional all-purpose flour with fine almond flour, this recipe achieves a flawless texture without any complex gluten-free flour blends. It’s an easy, straightforward swap that ensures a consistently moist and tender crumb every time.
- Kitchen-Friendly Ingredients: Despite being a specialized gluten-free recipe, you won’t need to hunt for obscure items. This recipe relies on basic, readily available ingredients that are likely already in your pantry. Think butter, chocolate, sugar, and eggs – making it an accessible and convenient bake for anyone craving homemade brownies.
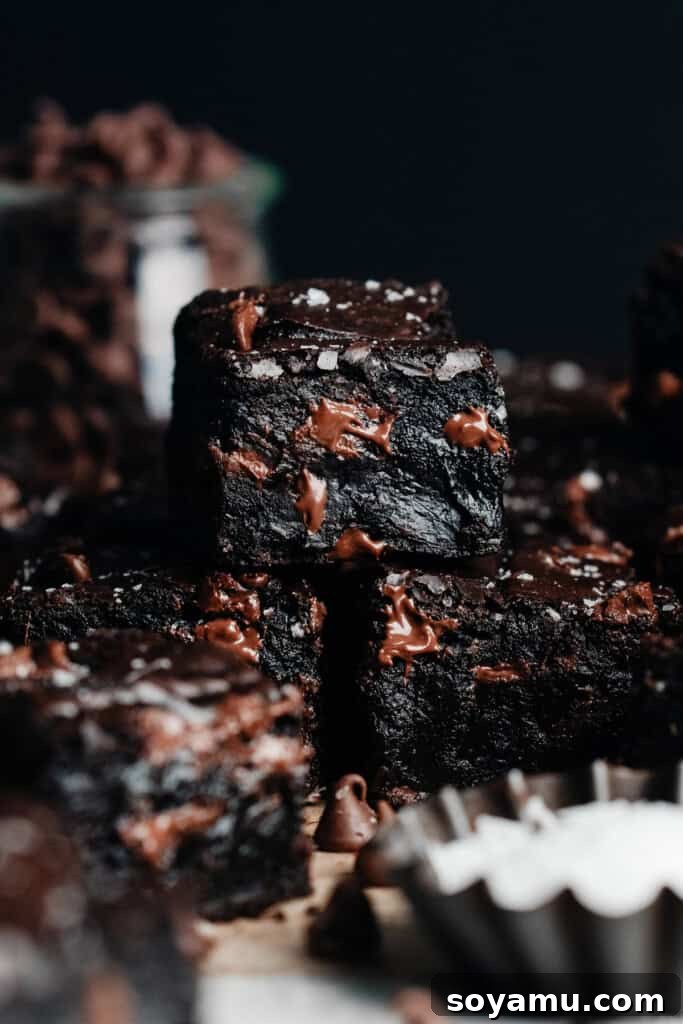
- That Signature Crackly Top: One of the hallmarks of a truly excellent brownie is its delicate, crinkly top. This recipe consistently delivers that beautiful, slightly crisp crust that perfectly contrasts with the soft, fudgy interior, adding another layer of texture and visual appeal to your homemade treats.
- Crowd-Pleasing Decadence: These brownies are so unbelievably rich and satisfying, they’re guaranteed to be a hit with everyone, regardless of dietary preferences. They’re the ideal dessert for potlucks, parties, or a cozy night in, proving that gluten-free can be just as, if not more, delicious than traditional baked goods.
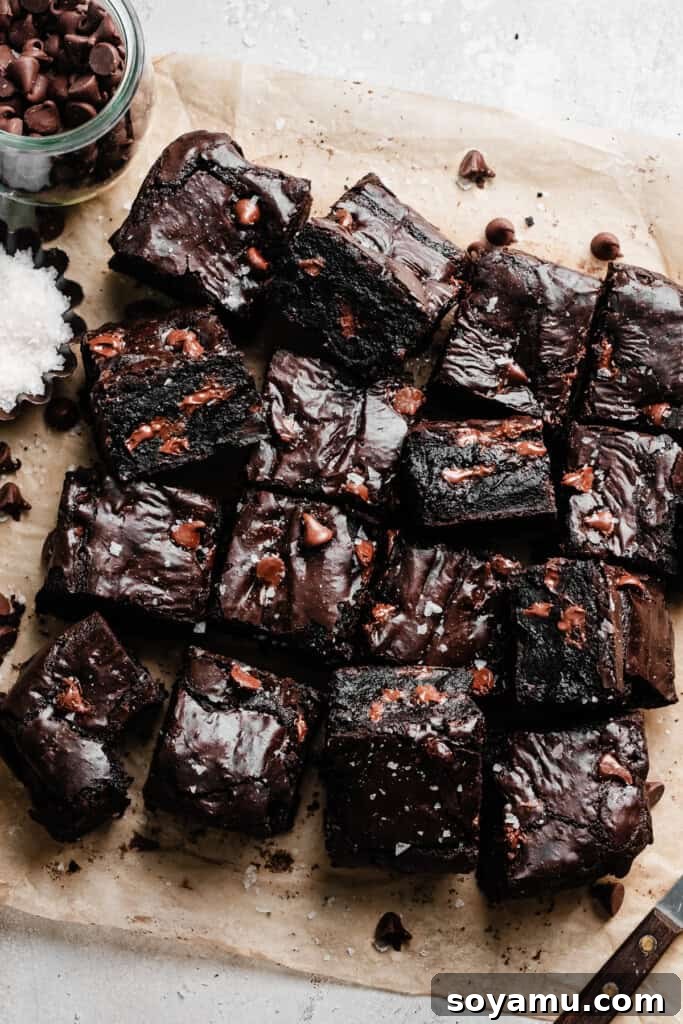
Essential Ingredient Overview:
Crafting the perfect gluten-free brownie begins with understanding the role of each high-quality ingredient. Here’s what you’ll need and why it matters:
- Butter: For the most exquisite flavor depth, I always opt for salted butter. The hint of salt truly enhances the chocolate’s richness. However, feel free to use unsalted butter if that’s your preference or if you need to precisely control the salt content in your recipe. If going dairy-free, a high-quality vegan butter or coconut oil makes an excellent substitute.
- High-Quality Chocolate: The heart of any great brownie lies in its chocolate. Premium baking chocolate bars are highly recommended for their superior melting consistency and intense flavor. In a pinch, high-quality semi-sweet chocolate chips can also be used, but aim for the best quality you can find for truly exceptional results.
- Pure Vanilla Extract: Do not underestimate the power of pure vanilla extract. It doesn’t just add flavor; it rounds out and amplifies the chocolate notes, creating a more complex and harmonious taste profile. Always choose real vanilla extract over artificial for the best possible outcome.
- Cocoa Powder: Yes, we’re doubling down on chocolate here! Using both melted chocolate and cocoa powder is a secret to achieving that deep, multi-layered chocolate flavor that defines a truly fudgy brownie. I believe in never skimping when it comes to chocolate, and this combination ensures maximum richness.
- Almond Flour: This is the star ingredient that makes these brownies wonderfully gluten-free. Almond flour provides a rich, moist texture and a delicate flavor that complements the chocolate beautifully. Ensure you use finely milled almond flour for the smoothest batter and best results. For those who can enjoy gluten, you might also love my Fudgy Brown Butter Brownies!
- Eggs: Eggs are crucial for structure, moisture, and binding the ingredients, contributing to the brownies’ signature fudgy chewiness. Ensure they are at room temperature for optimal emulsification with the other ingredients, leading to a smoother, more uniform batter.
- Sugars (Granulated & Powdered): This recipe employs a blend of granulated and powdered sugar. Granulated sugar provides sweetness and helps achieve that desirable crackly top, while powdered sugar contributes to the moist, tender crumb and smooth texture of the brownie batter, preventing any graininess.
- Salt: A small amount of salt is vital. It doesn’t just add flavor; it balances the sweetness and significantly enhances the chocolate notes, making them taste even more pronounced and delicious.
- Optional Chocolate Chips: While the brownies are already packed with chocolate, an extra cup of semi-sweet or dark chocolate chips folded into the batter takes them to another level of chocolatey indulgence, adding pockets of molten goodness throughout.
Creative Ingredient Variations and Dietary Adaptations:
This gluten-free brownie recipe is wonderfully versatile, allowing for simple modifications to suit various dietary needs or personal taste preferences. Don’t be afraid to experiment and make these brownies uniquely yours!
- Dairy-Free Delight: Transforming these brownies into a dairy-free treat is surprisingly straightforward. Simply swap the salted butter for an equal amount of your preferred vegan butter or virgin coconut oil. Ensure you also use dairy-free chocolate chips or baking chocolate. The result will be equally rich, fudgy, and absolutely delicious, catering perfectly to those with dairy sensitivities. For more dairy-free friendly baking, try my Giant Chocolate Peanut Butter Chip Cookies, which also use almond flour and can easily be made dairy-free!
- Almond Flour Alternatives: While this recipe is perfected with almond flour for its unique moisture and texture, some bakers might wonder about other gluten-free flours. A cup-for-cup gluten-free flour blend *might* work in this recipe as a direct substitute, but please note that I’ve only extensively tested this recipe using almond flour. Different GF blends can behave differently, so results may vary in terms of texture and moisture. If you experiment, a slight adjustment to liquid might be needed.
- Exciting Mix-Ins: Elevate your almond flour brownies by incorporating your favorite mix-ins! The possibilities are endless:
- More Chocolate: Beyond semi-sweet, try dark chocolate chips for an extra intense flavor, or even white chocolate chips for a delightful contrast.
- Candy Creations: Chop up your favorite candy bars like M&M’s, Snickers, or Reese’s Peanut Butter Cups for bursts of unexpected flavor and texture.
- Nutty Additions: Toasted chopped pecans, walnuts, or even macadamia nuts can add a wonderful crunch and nutty dimension to your brownies.
- Fruity Twists: Dried cranberries, cherries, or even orange zest can introduce a bright, complementary flavor.
- Sweet Swirls: A swirl of peanut butter, caramel, or even a dollop of cream cheese can create stunning visual and taste variations.
I recommend adding about 3/4 to 1 cup of chocolate chips, nuts, or other mix-ins to ensure every bite has that delightful “extra somethin'” that truly perfect brownies possess.
Crafting Your Gluten-Free Brownies: A Step-by-Step Guide:
Follow these detailed steps to achieve perfectly fudgy, crackly-topped gluten-free brownies every single time. Precision and care will yield the most delicious results.
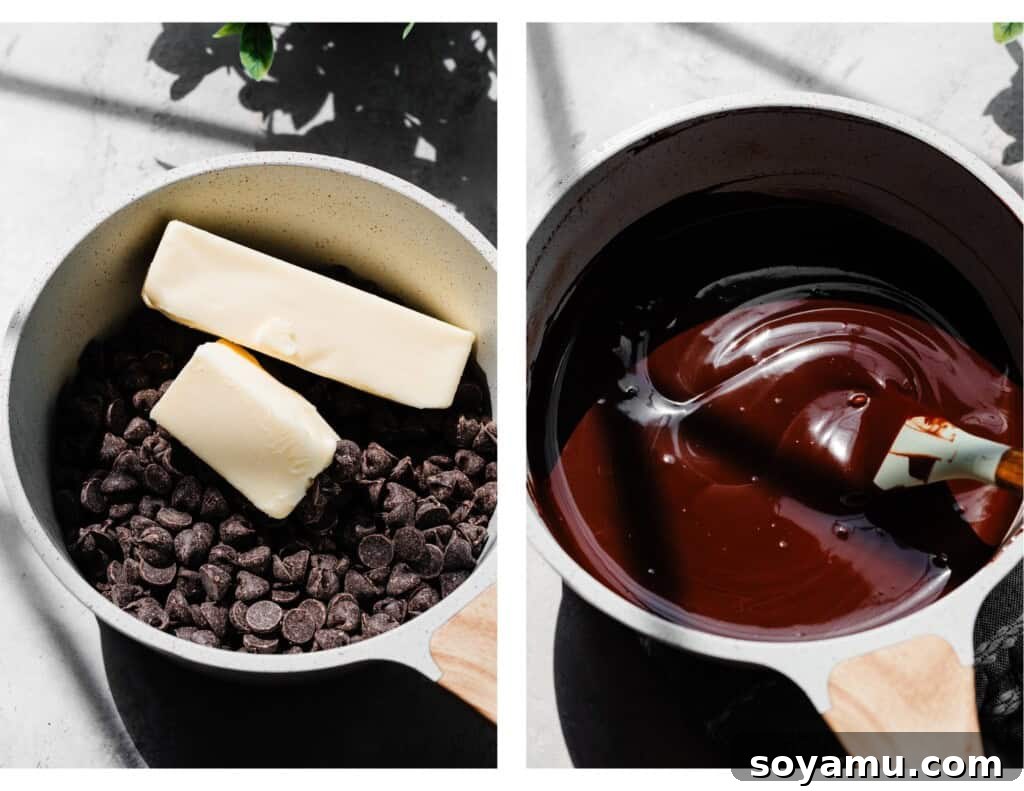
Step 1: Prepare the Chocolate Base. Begin by melting your chosen chocolate and butter together in a small, microwave-safe bowl. Heat in short bursts of 30 seconds, stirring thoroughly after each interval, until the mixture is beautifully smooth and free of lumps. The key is gentle melting to prevent scorching. Once melted, whisk in the cocoa powder until fully incorporated, creating a rich chocolate paste. Set this aside to cool slightly while you prepare the wet ingredients.
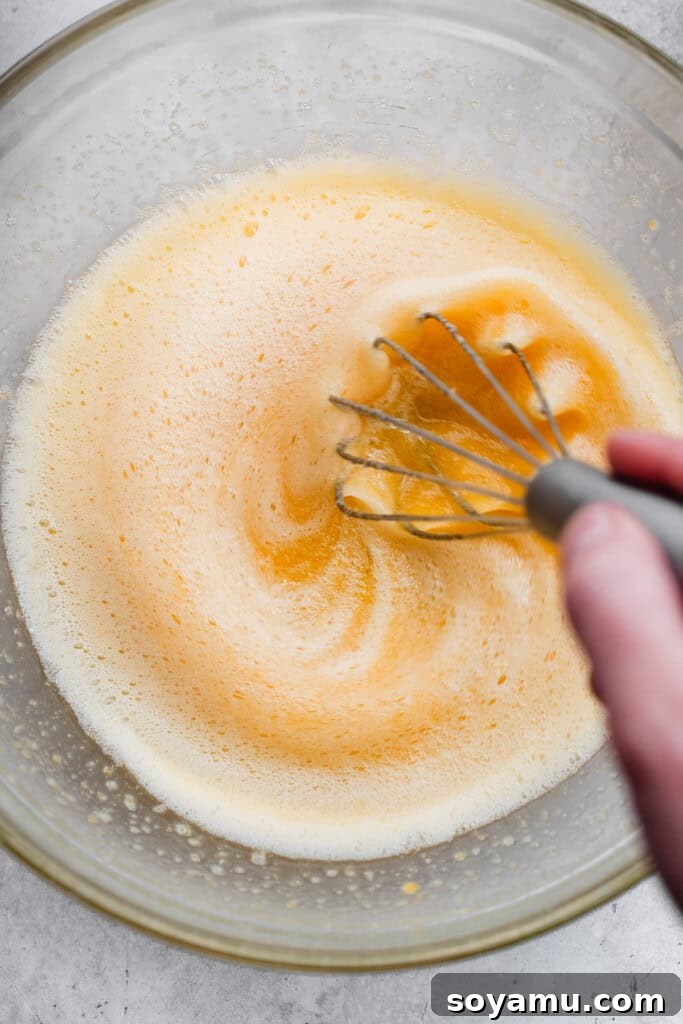
Step 2: Whisk Eggs and Sugar to Perfection. In a separate medium or large mixing bowl, combine the room-temperature eggs with the granulated sugar. Whisk vigorously for 1-2 minutes. This step is crucial for dissolving the sugar crystals, which contributes significantly to the brownies’ crackly top and chewy texture. You’ll know the sugar is dissolved when you rub a small amount of the mixture between your fingers and it feels completely smooth, without any grittiness. Next, whisk in the powdered sugar and pure vanilla extract until just combined.
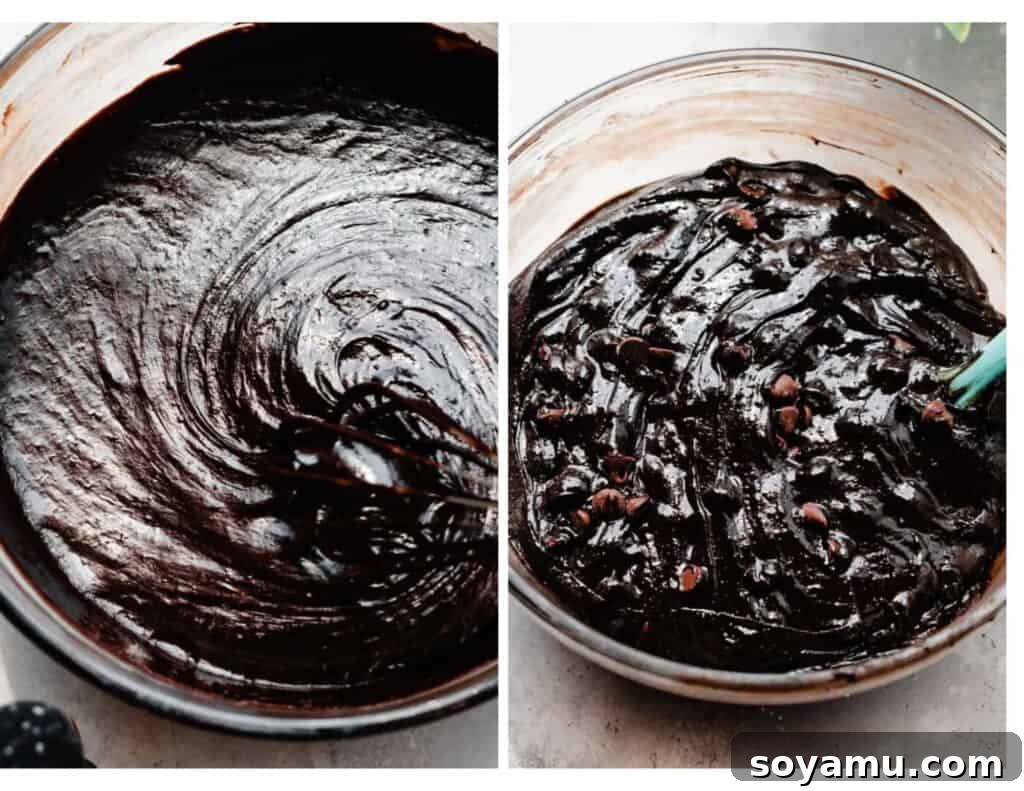
Step 3: Gently Combine All Ingredients. Carefully fold the slightly cooled chocolate mixture into the whisked egg and sugar mixture. Use a spatula to combine them gently but thoroughly, ensuring no streaks of chocolate remain. Overmixing here can lead to tougher brownies. Finally, gradually fold in the almond flour and salt until just incorporated. If adding optional chocolate chips or other mix-ins, gently stir them in now, distributing them evenly throughout the batter.
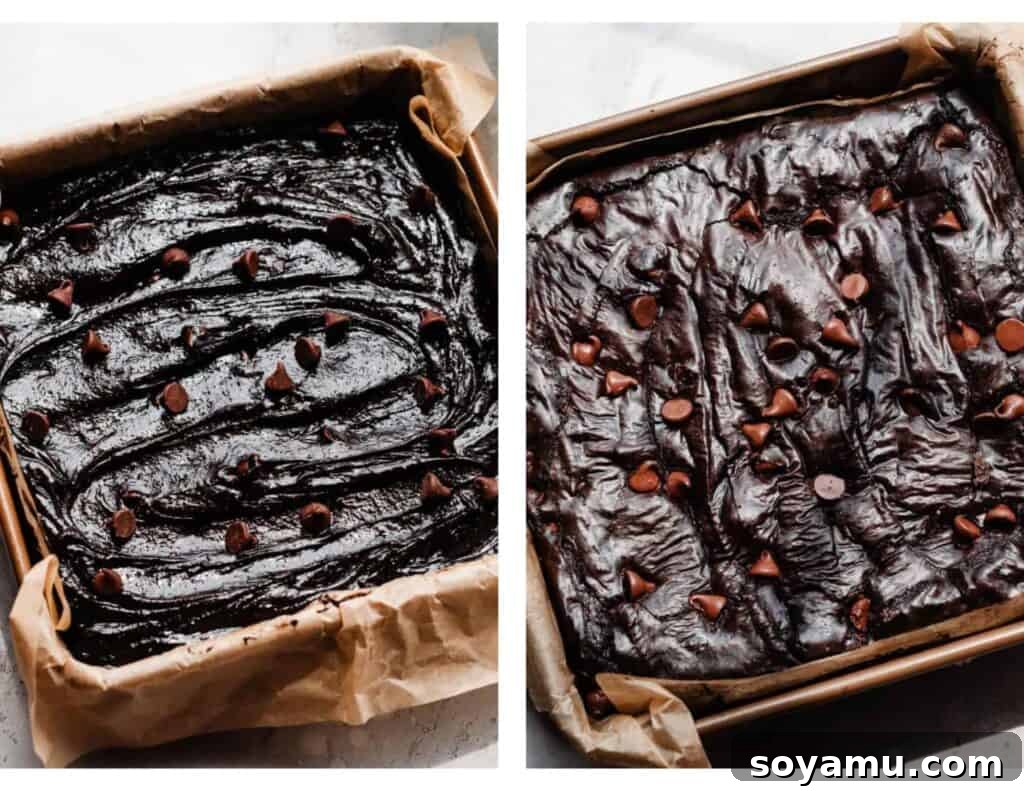
Step 4: Bake to Fudgy Perfection. Pour the decadent brownie batter into your meticulously prepared 9×9 inch baking pan (lined with parchment paper and greased). Spread the batter evenly with an offset spatula. Bake as directed in the recipe card below, being extremely careful not to overbake. A toothpick inserted into the center should emerge with moist, thick batter and a few fudgy crumbs, not entirely wet batter, and the edges should be nearly clean. Remember, brownies continue to set as they cool, so slightly underbaked is better than overbaked for maximum fudginess.
Serving & Storing Your Delectable Gluten-Free Brownies:
The hardest part of baking these brownies might just be waiting for them to cool! While it’s incredibly tempting to dive in immediately, allowing your baked brownies to cool in the pan for at least 30 minutes to 1 hour is crucial for them to properly set and achieve their ultimate fudgy texture. If you desire neat, clean slices (perfect for presentation!), I recommend letting them cool completely to room temperature, then covering the pan tightly with foil and refrigerating them overnight. They won’t dry out in the fridge and will yield beautifully sharp cuts. However, if presentation isn’t your top priority and instant gratification is, warm brownies straight from the oven with a scoop of ice cream are pure bliss!
To store any cooled leftovers, place them in an airtight container at room temperature for up to 4-5 days. For extended freshness, they can be kept in the refrigerator for 5-6 days. You can also freeze individual slices, wrapped tightly in plastic wrap and then foil, for up to 3 months. Thaw at room temperature or gently warm in the microwave for a quick treat.
Expert Success Tips for Flawless Gluten-Free Brownies:
Achieving brownie perfection, especially with a gluten-free twist, comes down to a few key techniques. Heed these expert tips to ensure your brownies are nothing short of spectacular every single time.
- Do Not Overbake: This is arguably the most critical rule for fudgy brownies. Brownies continue to cook and set as they cool. Overbaking will result in dry, cakey brownies, which defeats the purpose of a truly fudgy treat. Aim for a toothpick inserted in the center to come out with moist crumbs and a little thick batter, not completely clean. The edges should appear set, but the center should still look slightly underdone when you pull them from the oven.
- Choose Your Pan Wisely: The type of baking pan you use significantly impacts heat distribution and baking time. Avoid glass pans, as they conduct heat poorly and can lead to uneven baking. Ceramic and metal pans are your best allies for most baking endeavors, including these brownies, as they provide even heat distribution for a consistent bake. A light-colored metal pan is generally preferred as it prevents the edges from over-browning.
- Adjust Yield as Needed: These brownies are incredibly rich, so a small square goes a long way. Feel free to slice them into smaller pieces to stretch the yield, making them perfect for sharing or savoring over time. This also allows for portion control while still enjoying the full decadent experience.
- Invest in an Oven Thermometer: Many home ovens are not calibrated accurately, often running hotter or cooler than the set temperature. An affordable oven thermometer is an indispensable tool for accurate baking. Keeping one in your oven at all times will help you monitor its true temperature, ensuring your brownies bake perfectly without guesswork.
- Use a Kitchen Scale for Accuracy: Especially with gluten-free flours like almond flour, measuring by volume (cups) can be notoriously inconsistent. A food scale is the most reliable way to ensure your dry ingredients, particularly flour, are measured to the precise weight specified in the recipe. This accuracy is paramount for achieving the perfect texture and consistency.
- Room Temperature Eggs: Ensuring your eggs are at room temperature allows them to emulsify more effectively with the fats in the butter and chocolate. This creates a smoother, more uniform batter, which in turn leads to a more consistent and fudgy brownie texture.
- Cooling is Key for Slicing: While it’s tempting to cut into warm brownies, for clean, crisp slices, patience is a virtue. Allow them to cool completely, or even chill them in the refrigerator, before cutting. This firms up the chocolate and makes for picture-perfect squares.
Frequently Asked Questions About Gluten-Free Brownies:
Absolutely! This recipe is quite flexible. To halve it, simply divide all ingredient quantities by two and bake the brownies in a standard loaf pan (approximately 9×5 inches). You’ll need to adjust the baking time down to about 18-20 minutes, then add more time as needed, checking for doneness as indicated in the recipe card. To double the recipe, multiply all ingredients by two and bake in a larger 9×13 inch pan. The baking time for a doubled recipe should be quite similar to the original, typically ranging from 35-45 minutes, but always rely on visual cues for doneness to ensure perfect fudginess.
Yes, you can certainly prepare these brownies in advance. While all brownies are arguably at their peak freshness and flavor when enjoyed shortly after baking (once cooled sufficiently to set, of course!), these gluten-free brownies hold up beautifully. They can be stored in an airtight container at room temperature for several days, and some even find their texture improves slightly overnight as the flavors meld. For best results if making ahead for an event, bake them the day before and allow them to cool completely before storing.
The most common culprit for cakey brownies is overbaking. Almond flour can absorb moisture differently than wheat flour, so it’s even more crucial not to overdo it in the oven. Ensure you pull the brownies when a toothpick inserted into the center still has moist crumbs attached, and the edges are just set. Another factor could be too much flour or insufficient fat; always use a kitchen scale to measure almond flour accurately for the best fudgy texture.
Special Tools to Enhance Your Brownie Baking:
While this recipe can be made with basic kitchen equipment, a couple of specific tools can significantly improve your baking experience and the final outcome of your gluten-free brownies.
- 9×9 Metal Pan: A sturdy metal 9×9 square pan is truly ideal for this recipe. Metal pans conduct heat efficiently and evenly, contributing to a consistent bake and that sought-after crackly top without overcooking the edges. Its size is perfect for the quantity of batter, ensuring the right brownie thickness.
- Offset Spatula: An offset spatula is an unsung hero in the kitchen. It makes spreading thick brownie batter into the corners of your pan an absolute breeze, ensuring an even layer for uniform baking. Beyond brownies, it’s incredibly versatile for frosting cakes, spreading batters for bars, and various other delicate culinary tasks, making it a valuable addition to your utensil drawer.
More Irresistible Brownie Recipes to Explore:
If you’ve fallen in love with these fudgy gluten-free brownies, you’re in for a treat! Our collection features a wide array of brownie recipes, each promising a unique and delightful chocolate experience. Dive into these other favorites:
- Biscoff Stuffed Brownies: Imagine classic fudgy brownies with a hidden core of creamy, spiced Biscoff cookie butter – an unexpected delight!
- 5-Ingredient Brownies: For those moments when you need quick, minimal effort, yet maximum chocolatey satisfaction, these incredibly simple brownies are your go-to.
- Gooey S’mores Brownies: Recreate the campfire magic with layers of graham cracker, molten chocolate, and toasted marshmallows atop a rich brownie base.
- Black Forest Brownies: A sophisticated twist featuring dark chocolate brownies, tart cherries, and a hint of kirsch, echoing the classic cake.
- Fudgy Red Velvet Oreo Brownies: Indulge in vibrant red velvet brownies generously studded with crunchy Oreo pieces for a festive and delightful treat.
- Layered Mint Chocolate Brownies: A refreshing combination of rich chocolate brownies, a cool mint layer, and a luscious chocolate ganache – a mint chocolate lover’s dream.
- Fudgy Triple Chocolate Skillet Brownie: Perfect for sharing (or not!), this warm, gooey skillet brownie is loaded with three types of chocolate and served right from the pan.
- Salted Caramel Pretzel Brownies: A glorious symphony of sweet, salty, and crunchy, these brownies combine fudgy chocolate with ribbons of caramel and salty pretzel bits.
Did you try this amazing recipe? We’d love to hear from you!
Please share your experience by leaving a comment and a star rating below. Your feedback is invaluable to us and helps our small business grow immensely! Thank you for baking with us!
Fudgy Gluten-Free Brownies
Stephanie Simmons
10 mins
30 mins
40 mins
9 to 18 brownies
Ingredients
- 3/4 cup (12 tbsp or 170 grams) salted butter, melted (can substitute oil for dairy-free)
- 2 cups (12 ounces or 365 grams) semi-sweet chocolate (use dairy-free if needed – chips or baking bars are both fine!)
- 1/2 cup (60 grams) cocoa powder (see notes below for types)
- 4 large eggs, at room temperature
- 1 cup + 1 tbsp (228 grams) granulated sugar
- 1 and 1/2 cups (173 grams) powdered sugar
- 1 tsp vanilla extract (see note below)
- 1 cup (84 grams) almond flour
- 1/4 tsp salt
- 1 cup (183 grams) chocolate chips, optional
Instructions
-
Prep: Preheat your oven to 350° F (175°C). Lightly spray a metal 9×9 inch baking dish with non-stick spray, then line it with parchment paper, allowing an overhang on two sides to create “handles” for easy removal later.
-
Make the Chocolate Mixture: In a small, microwave-safe bowl, combine the melted butter and semi-sweet chocolate. Heat in 30-second intervals in the microwave, stirring thoroughly after each interval, until the chocolate is mostly melted. Continue stirring until any remaining lumps have dissolved and the mixture is completely smooth and glossy. Whisk in the cocoa powder until fully combined. Set this rich chocolate mixture aside to cool slightly to avoid cooking the eggs prematurely.Ingredients: 3/4 cup salted butter, 2 cups semi-sweet chocolate, 1/2 cup cocoa powder
-
Finish the Batter: In a large mixing bowl, add the room-temperature eggs and granulated sugar. Whisk vigorously for approximately 1-2 minutes until the sugar is fully dissolved. You can test this by rubbing a small amount of the mixture between your fingers – it should feel entirely smooth, not gritty. Next, whisk in the powdered sugar and vanilla extract until just combined. Pour the slightly cooled chocolate mixture into the egg and sugar mixture, and whisk until smooth and well integrated. Finally, gently fold in the almond flour and salt using a spatula until the dry ingredients are just combined and no streaks of flour remain. If desired, stir in 1/2 cup of optional chocolate chips now. Be careful not to overmix.Ingredients: 4 large eggs, 1 cup + 1 tbsp granulated sugar, 1 and 1/2 cups powdered sugar, 1 tsp vanilla extract, 1 cup almond flour, 1/4 tsp salt, 1 cup chocolate chips (optional)
-
Bake: Pour the luscious batter into your prepared 9×9 inch pan and spread it evenly. Bake for 36 to 41 minutes. The key to fudgy brownies is not to overbake! A toothpick inserted into the center should come out with moist, thick batter and a few fudgy crumbs (a mix of thick batter & moist crumbs is ideal), but it shouldn’t have all wet batter. A toothpick inserted near the edge will be almost clean. The brownies will continue to set as they cool, achieving that perfect fudgy consistency.
Note: Some bakers worry about “underbaked” or “raw” brownies. For peace of mind, you can use an instant-read food thermometer to check the center; once the brownies reach 160℉ (71°C), the eggs are fully cooked and safe to consume. This means fudgy brownies are perfectly safe and delicious, not “raw.” -
Serve + Store: Allow the brownies to cool completely in the pan for at least 1 hour before attempting to remove and slice them. For the cleanest cuts, let them cool to room temperature, cover tightly with foil, and refrigerate overnight. Store any cooled leftovers in an airtight container at room temperature for 4-5 days, or in the fridge for up to 5-6 days.
Notes
Slicing Neat Brownies: For beautifully clean and sharp brownie slices, patience is key. Allow the brownies to cool completely to room temperature in the pan. Then, cover the pan tightly with foil and refrigerate the brownies overnight. Chilling them firms up the chocolate and makes them much easier to cut into perfect squares without crumbling. If you’re not concerned about perfect edges, feel free to dig in while they’re still warm – they are incredibly delicious that way too!
Vanilla & Gluten Concerns: There’s a slight debate regarding vanilla extract and gluten in some highly sensitive individuals, as some brands might contain trace amounts of gluten-containing alcohols. If you have extreme gluten sensitivity or Celiac disease, for absolute safety, I recommend ensuring your vanilla extract is certified gluten-free, or leaving it out.
Nutrition: The provided nutrition information below includes the optional chocolate chips, offering a comprehensive estimate for those tracking dietary intake.
Nutrition
, Calories: 738 kcal
, Carbohydrates: 81 g
, Protein: 9 g
, Fat: 45 g
, Saturated Fat: 23 g
, Polyunsaturated Fat: 1 g
, Monounsaturated Fat: 9 g
, Trans Fat: 1 g
, Cholesterol: 126 mg
, Sodium: 223 mg
, Potassium: 387 mg
, Fiber: 6 g
, Sugar: 68 g
, Vitamin A: 612 IU
, Calcium: 88 mg
, Iron: 4 mg
Nutrition information is automatically calculated and should be considered an approximation.
Enjoyed this recipe? Leave a comment below!