
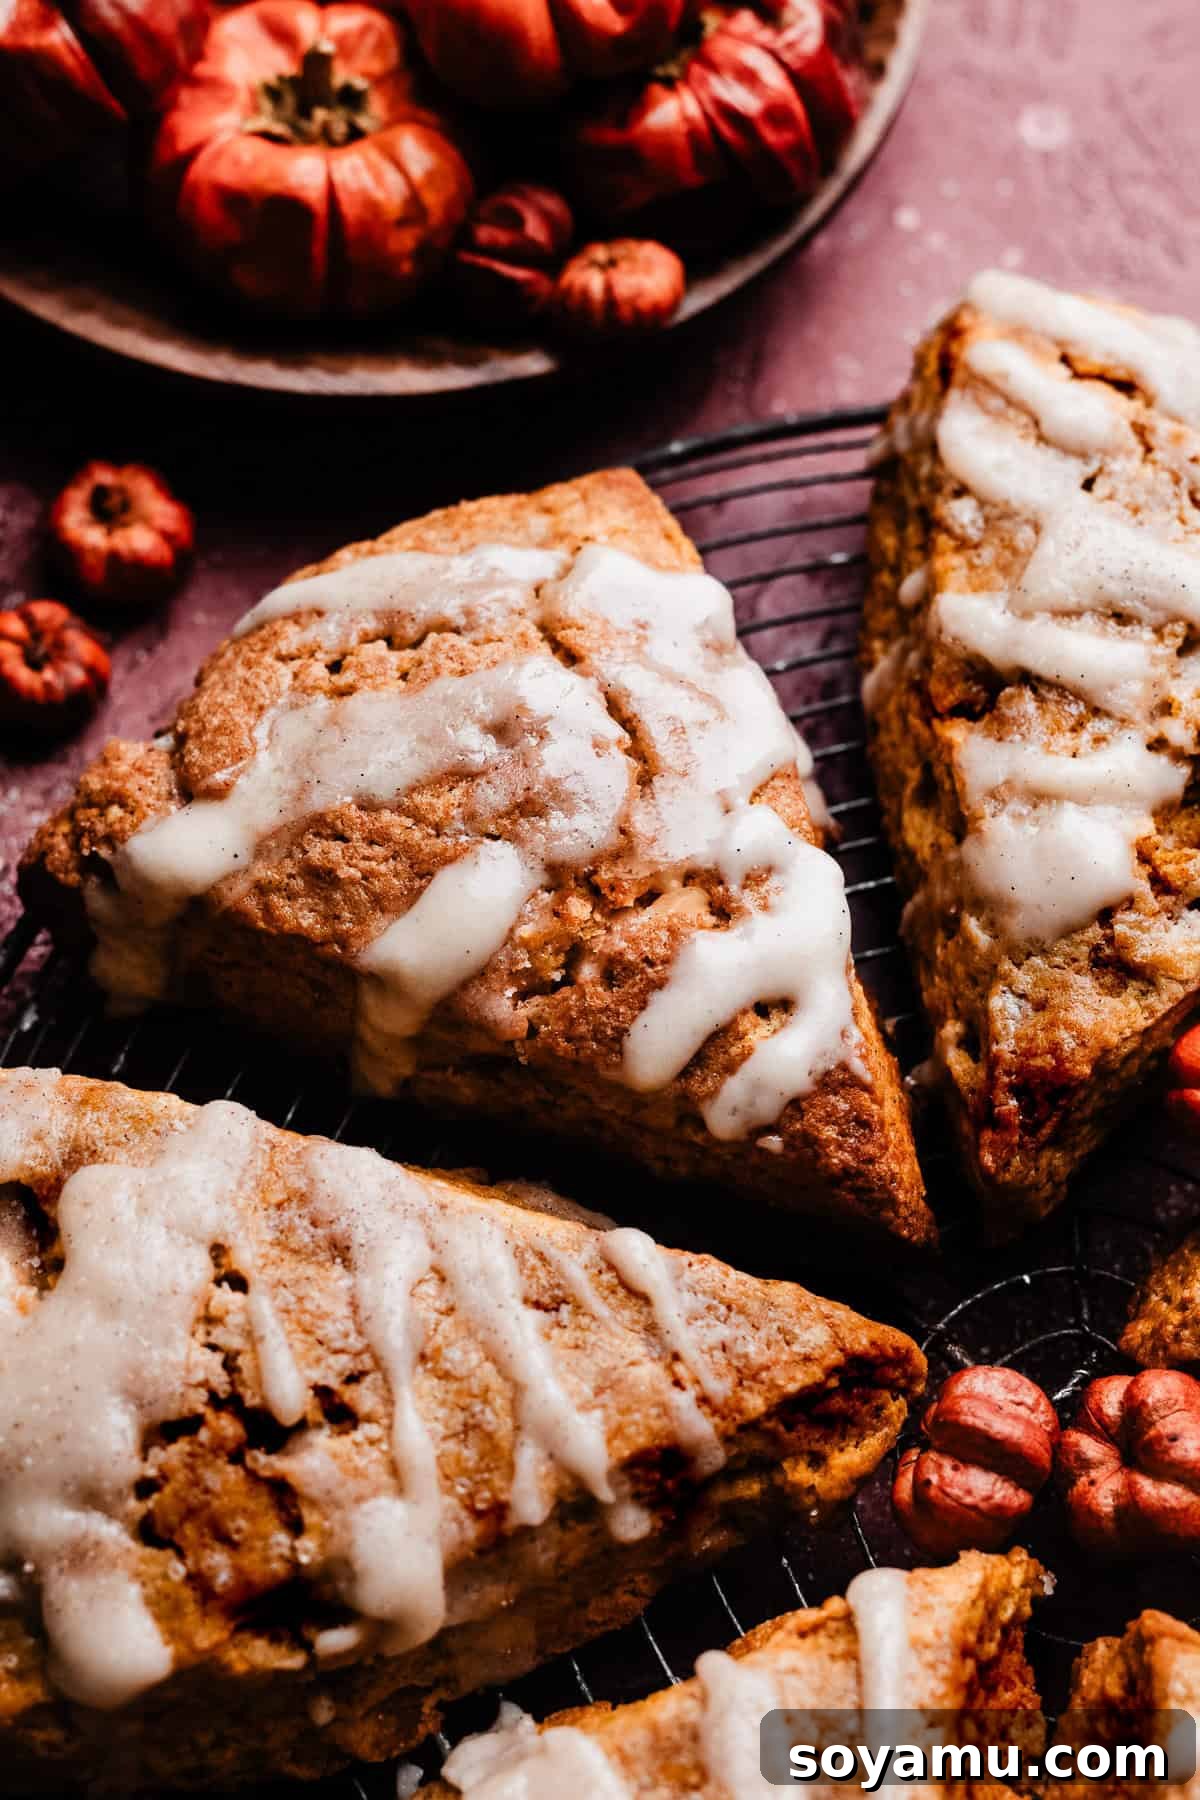
Delicious Pumpkin Scones with Maple Glaze: The Ultimate Fall Treat
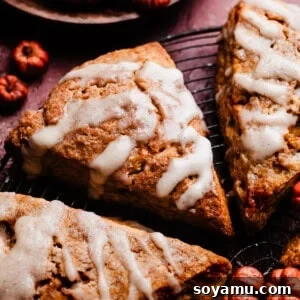
As the leaves begin to turn and a crispness fills the air, there’s nothing quite like the comforting aroma of freshly baked goods. And when it comes to capturing the essence of autumn, these **Pumpkin Scones with Maple Glaze** are absolutely unparalleled. They embody everything we adore about the fall season, delivering a perfect blend of warmth, spice, and tender sweetness in every single bite. Imagine a scone with a beautifully crisp exterior that gives way to a supremely tender, flaky interior, bursting with real pumpkin flavor and a harmonious blend of cozy fall spices. This recipe promises a truly delightful experience, perfect for those brisk autumn mornings or a relaxed weekend brunch.
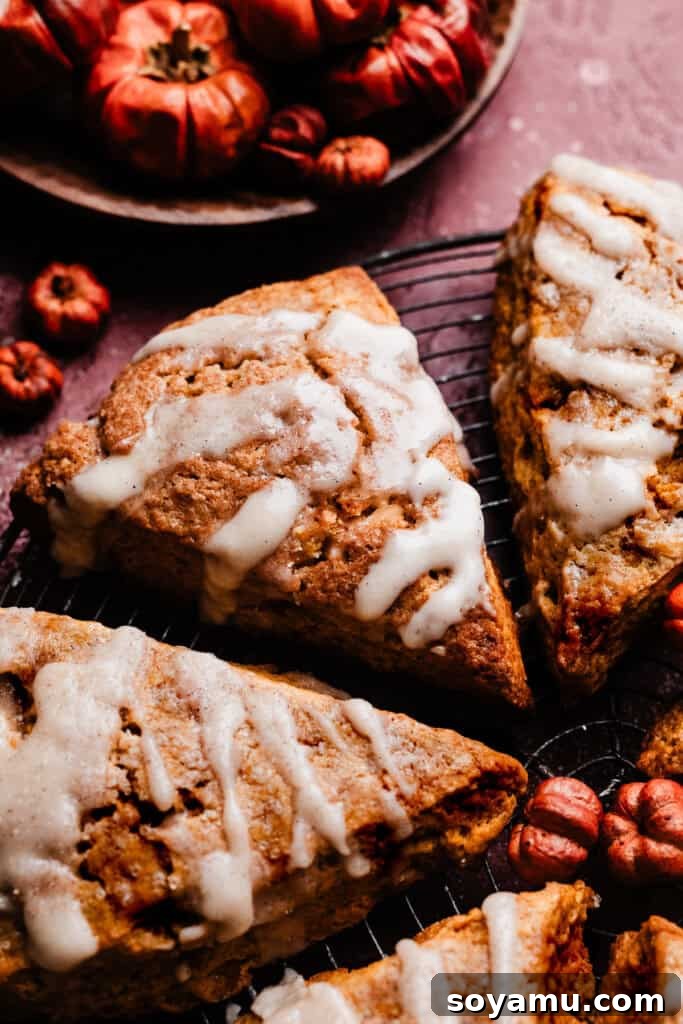
This beloved recipe first debuted in September 2019 and has since been refined. We’ve updated the photography and made slight tweaks to the method, notably swapping milk for heavy cream in the dough to achieve an even more tender and luxurious scone texture.
Why You’ll Fall in Love with These Pumpkin Scones
These aren’t just any scones; they are a celebration of autumn, crafted to perfection. Here’s why these Pumpkin Scones are destined to become your new favorite fall tradition:
- Authentic Pumpkin Flavor in Every Bite: Unlike many recipes that offer a hint of pumpkin, ours are truly packed with the deep, earthy sweetness of real pumpkin puree. Complemented by a carefully balanced blend of aromatic fall spices, each scone delivers an authentic taste that perfectly captures the spirit of pumpkin season. It’s a flavor profile that speaks of cozy evenings and crisp days.
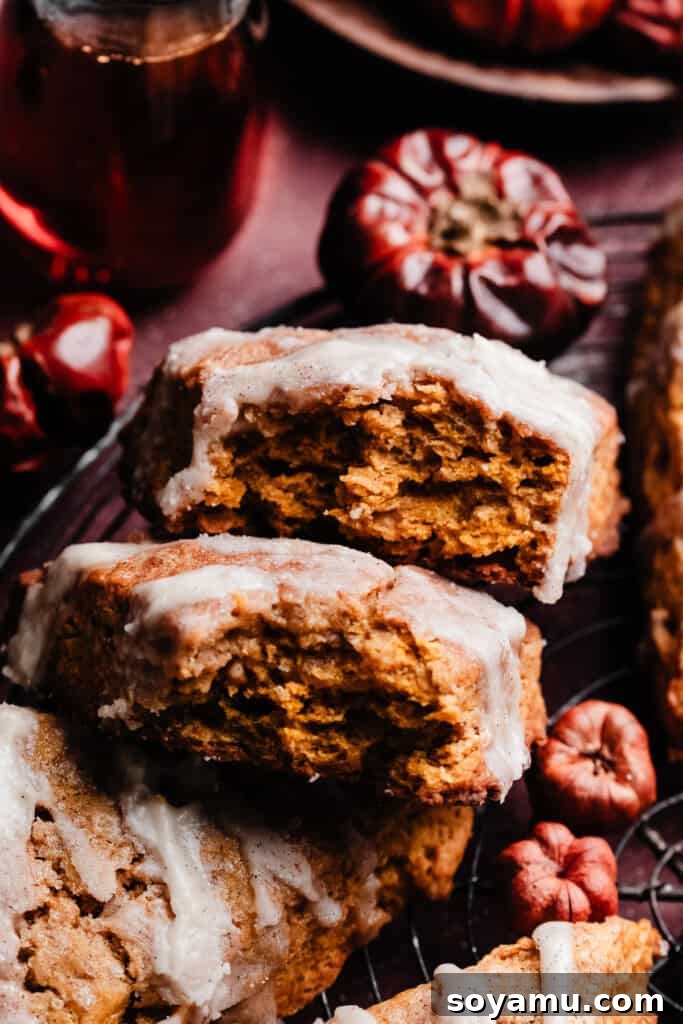
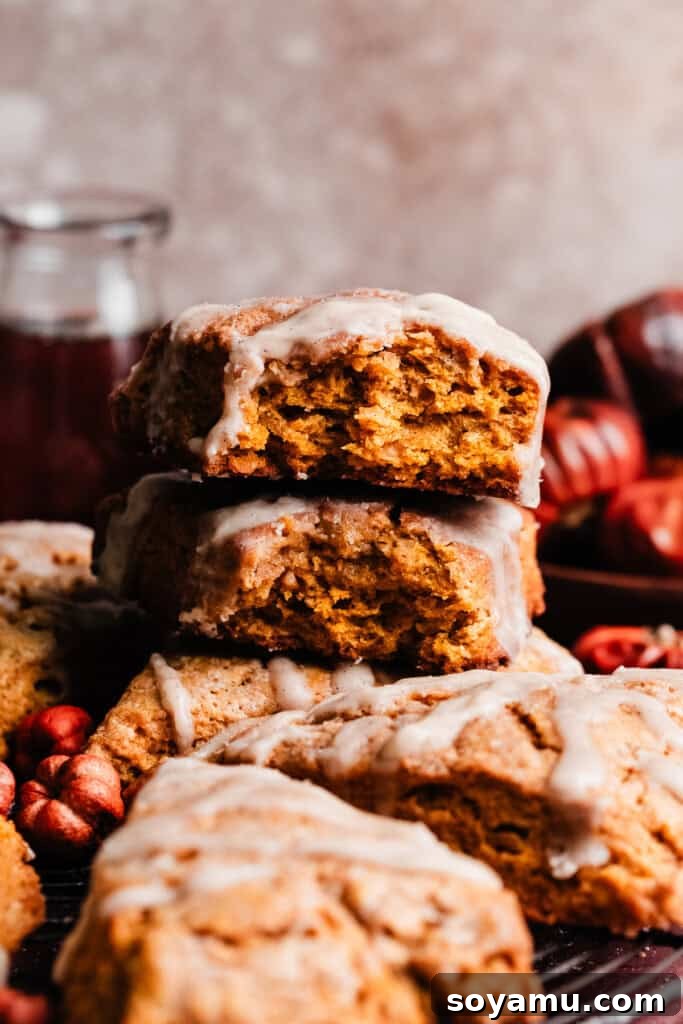
- Remarkably Flaky and Tender Texture: The hallmark of an exceptional scone lies in its texture. These pumpkin scones achieve a coveted balance: a delightful crispness around the edges that provides a satisfying bite, followed by an incredibly tender, flaky interior. This exquisite texture is the result of using cold butter and heavy cream, ensuring light layers that melt in your mouth.
- Decadent Buttery Maple Glaze: What’s a perfect scone without an equally perfect topping? Our buttery maple glaze is the crown jewel of this recipe. Its rich, sweet, and slightly tangy notes beautifully complement the pumpkin and spice flavors, elevating these scones from simple baked goods to a truly gourmet experience. The glaze adds an extra layer of moisture and an irresistible finish that will have you reaching for another.
Key Ingredients for Perfect Pumpkin Scones
Crafting the best pumpkin scones starts with understanding the role of each ingredient. Below is a detailed overview to guide you:
- Pumpkin Puree: We rely on canned pumpkin puree for consistency and ease. You’ll typically find it in the baking aisle during the fall months. It’s crucial to buy 100% pure pumpkin puree and not pumpkin pie filling, which contains added sugars and spices that will alter the recipe. For optimal results, we highly recommend blotting your pumpkin puree to remove excess moisture—a step that significantly contributes to the scones’ crisp texture. While many brands work well, Libby’s is a popular choice for its reliability. Avoid organic canned pumpkin if it appears overly watery, as this can affect the dough’s hydration.
- High-Quality Butter: Cold butter is the secret to flaky scones. We prefer using salted butter for its superior flavor, which enhances the overall richness of the scones. However, unsalted butter can be used if preferred; simply add an extra pinch of salt to the dry ingredients. Ensure your butter is very cold and cut into small pieces before incorporating it into the flour mixture.
- All-Purpose Flour: The foundation of our scones. Proper measurement of flour is paramount. For the most accurate results, use a kitchen scale to weigh your flour. If measuring by volume, always spoon the flour into your measuring cup and then level it off with a flat utensil. Scooping directly from the bag can compact the flour, leading to too much flour and a dry, dense scone.
- Aromatic Fall Spices: This blend is what truly makes these scones taste like autumn. Our recipe features a delightful combination of **cinnamon, nutmeg, ginger, and ground cloves**. These spices work in harmony to create the classic, cozy pumpkin pie flavor profile that makes these scones so irresistible. Ensure your spices are fresh for the most vibrant flavor.
- Heavy Cream: Our secret to an incredibly tender scone. Substituting traditional milk with **heavy cream** adds a richer fat content, which yields a more luxurious and moist crumb. Keep it cold until ready to use, as cold liquids are essential for scone making.
- Sugars: A blend of light brown sugar and granulated sugar provides the perfect level of sweetness and contributes to the scone’s texture and golden-brown crust.
- Baking Powder & Salt: These leavening agents ensure a good rise and light texture. Salt balances the sweetness and enhances all the flavors.
- Egg & Vanilla Extract: The egg adds richness and helps bind the dough, while a generous amount of vanilla extract deepens the flavor profile, complementing the pumpkin and spices beautifully.
Recipe Substitutions & Variations: Customize Your Scones
While this recipe is perfect as written, here are some ideas for dietary adjustments or creative additions:
- Gluten-Free Alternative: This recipe has not been tested with gluten-free flour. Scone recipes can be particular with gluten-free flours due to differences in absorption and structure. If you experiment, a 1:1 gluten-free baking flour blend (one containing xanthan gum) would be the most likely candidate, but results may vary.
- Dairy-Free Option: To make these scones dairy-free, you can substitute the heavy cream with a trusted dairy-free heavy cream alternative (such as full-fat coconut cream or a plant-based heavy cream blend) and use a high-quality dairy-free butter substitute. Always use brands you’ve had success baking with before, as results can differ between products.
- Add-ins: Feel free to fold in a half cup of chocolate chips (dark or white), chopped pecans, or dried cranberries for extra texture and flavor.
- Spiced Glaze: Infuse your maple glaze with a tiny pinch of extra cinnamon or a touch of bourbon for an even deeper, more complex flavor.
How to Master This Pumpkin Scone Recipe: Step-by-Step Guide
Creating these beautiful pumpkin scones is a rewarding process. Follow these detailed steps for the best results:
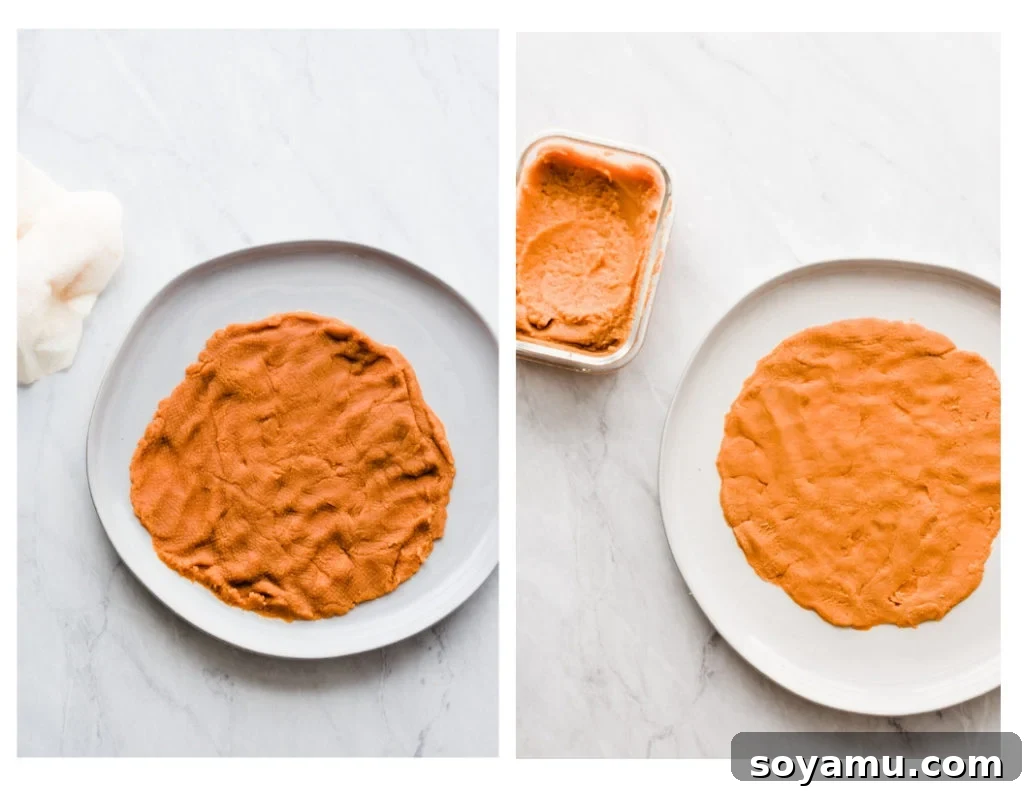
Step 1: Blot the Pumpkin Puree – The Moisture Secret. This initial step is absolutely critical for achieving that desirable crisp and flaky scone texture. Measure out your canned pumpkin puree onto a large dinner plate. Using several sheets of paper towel, firmly blot the pumpkin to absorb as much excess moisture as possible. Repeat this process at least four times with fresh paper towels until the pumpkin is noticeably drier and denser. This ensures your scones won’t be cakey or overly moist. Weighing the pumpkin after blotting (aim for 76-80 grams from 166 grams initially) is the most accurate way to ensure success. Set the blotted pumpkin aside.
Step 2: Combine Dry Ingredients & Incorporate Cold Butter. In a large mixing bowl, whisk together the all-purpose flour, salt, baking powder, cinnamon, nutmeg, ginger, ground cloves, light brown sugar, and granulated sugar until well combined. Next, add your very cold, cubed salted butter into the dry mixture. Using a pastry blender, two forks, or your fingertips, cut the butter into the flour until the mixture resembles coarse meal with some pea-sized and smaller butter pieces dispersed throughout. It’s important not to overmix here; visible flecks of butter are key to flakiness.
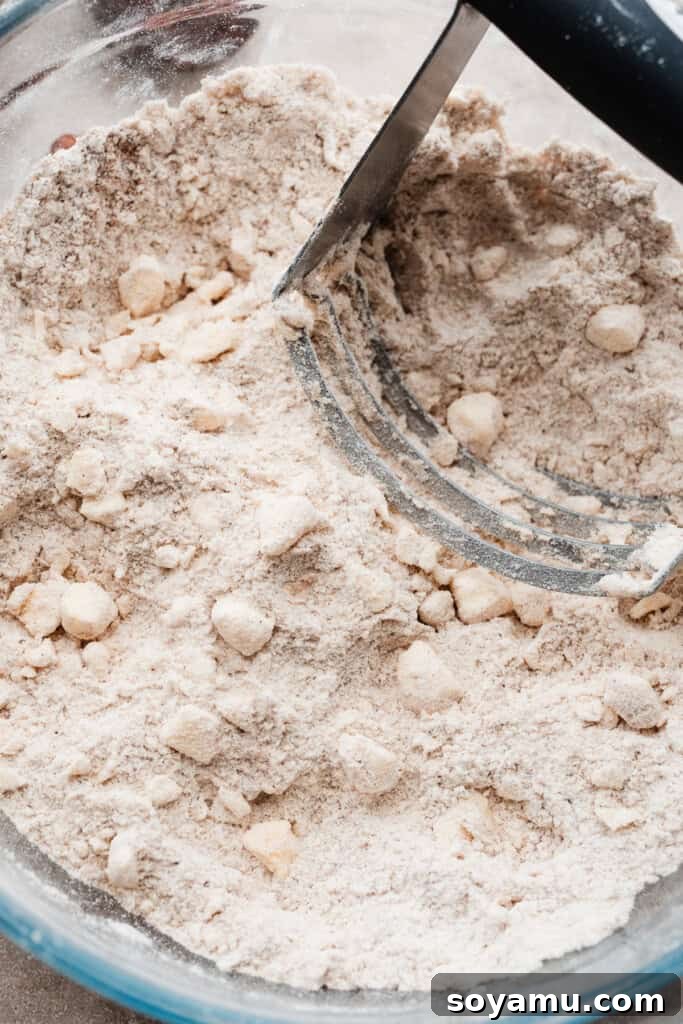
Step 3: Gently Add Wet Ingredients to Form the Dough. In a separate small bowl or liquid measuring cup, whisk together the blotted pumpkin puree, cold large egg, cold heavy cream, and vanilla extract until smooth. Create a well in the center of your dry ingredients and pour in the wet mixture. Using a spatula or your hands, gently stir and fold the ingredients until a shaggy dough begins to form. Avoid overmixing, as this can develop the gluten too much, leading to tough scones. If there are a few stubborn dry crumbs at the bottom, add a few extra drops of cold heavy cream until just combined. Gather the dough into a cohesive ball with lightly floured hands.
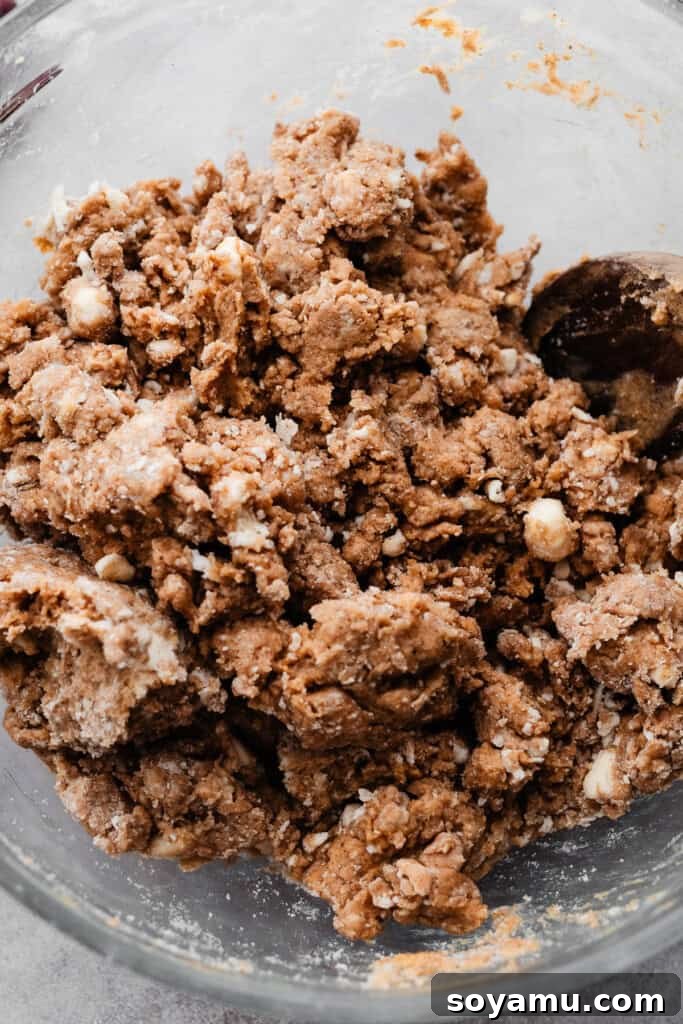
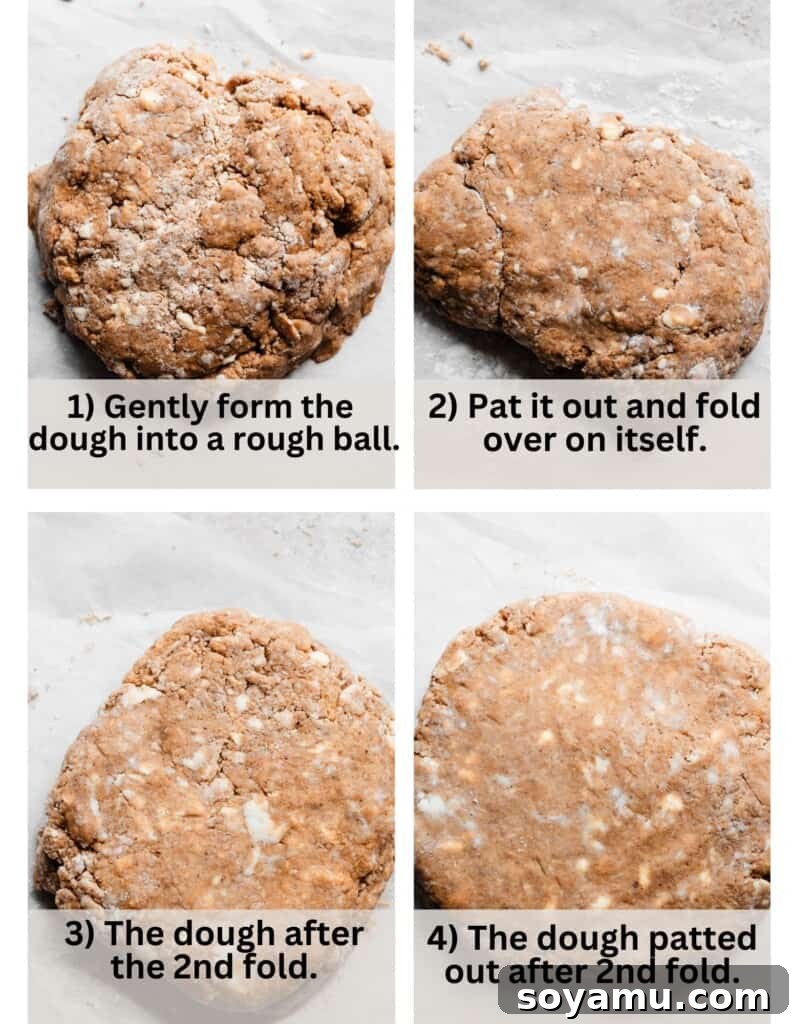
Step 4: Fold, Shape, and Chill the Scones for Maximum Flakiness. Turn the dough ball out onto a lightly floured surface. Gently flatten it into a rough rectangle, approximately 3/4 inch thick. To create those coveted flaky layers, perform a few “folds.” With the long side of the rectangle positioned vertically, fold one end down a third of the way, then fold the other end over it, like folding a letter. Gently pat it back out to a 3/4-inch thick rectangle. Rotate the dough 90 degrees so the long side is now horizontal and repeat the folding process once more. This technique creates internal layers that expand during baking, resulting in a super flaky texture. After the folds, gently press the dough into an 8-inch disc. Spray a sharp knife with a little cooking spray to prevent sticking, then slice the disc into 8 equal wedges. Arrange the scones on a baking sheet lined with parchment paper, cover lightly with a kitchen towel, and chill in the refrigerator for at least 15 minutes. This chilling period is crucial; it helps the butter firm up, preventing the scones from spreading too much and ensuring they hold their shape beautifully while baking. Preheat your oven to 400°F (200°C) during this chilling time.
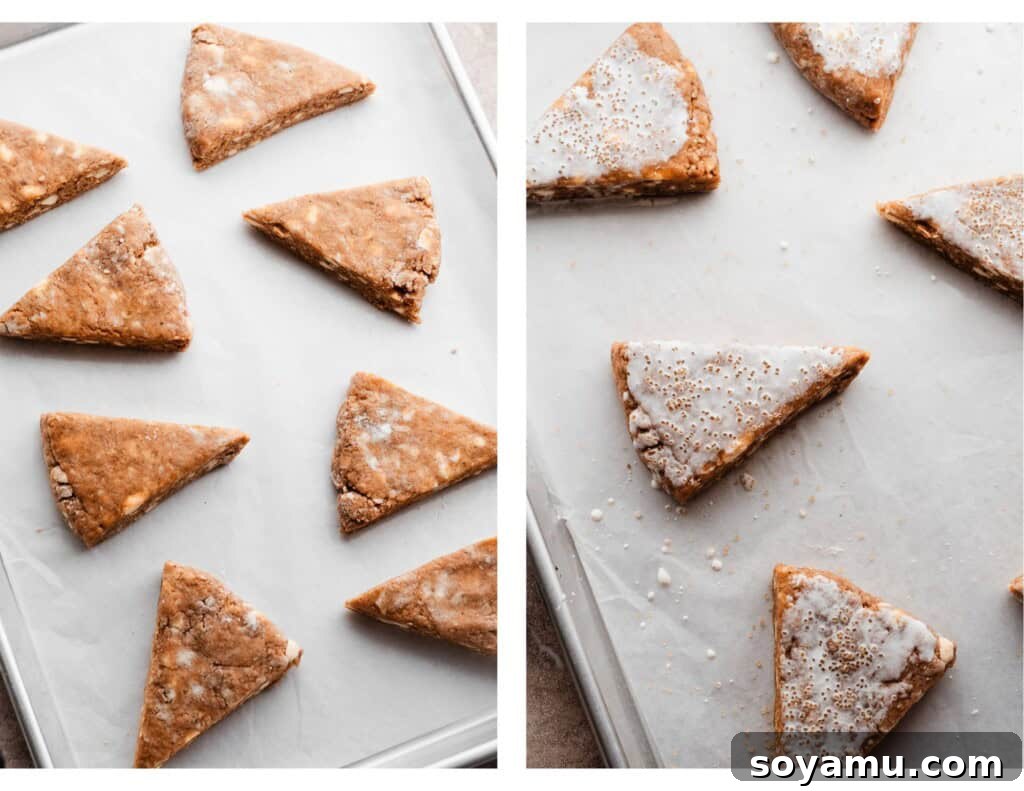
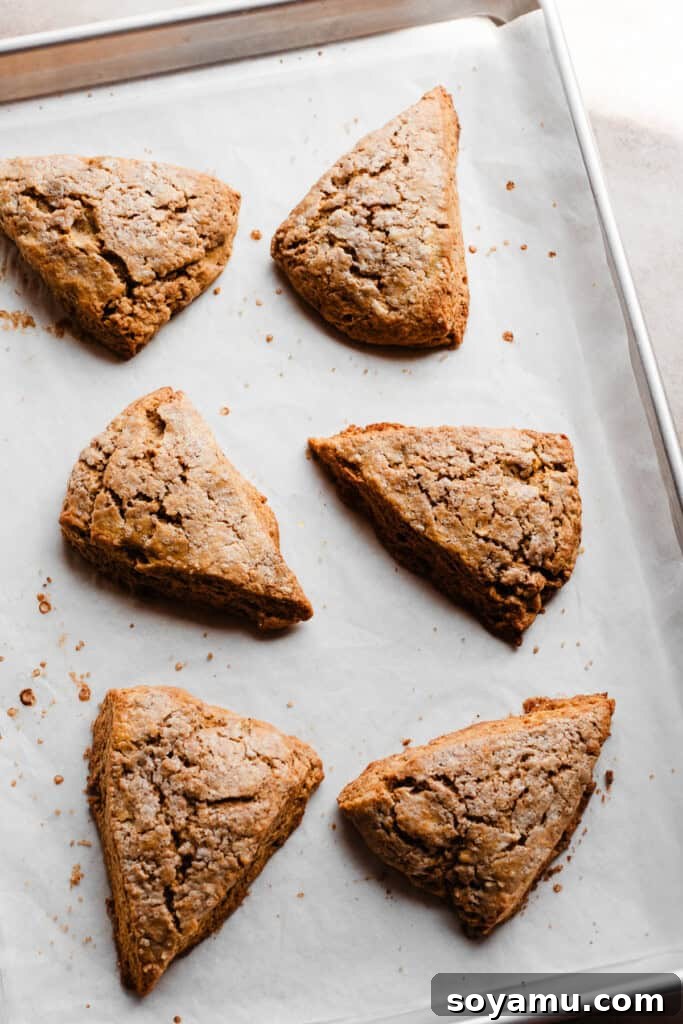
Step 5: Bake to Golden Perfection. Once chilled, brush the tops of your scones with a little extra heavy cream and sprinkle generously with raw sugar for a delightful crunch and sparkle. A dusting of cinnamon sugar is another fantastic option for an added layer of flavor. Bake in your preheated 400°F (200°C) oven for 20 to 25 minutes, or until the scones are golden brown on top and cooked through. They should feel firm to the touch, and you can gently peek inside one to ensure it’s no longer doughy. While they bake, proceed to make the irresistible maple glaze.
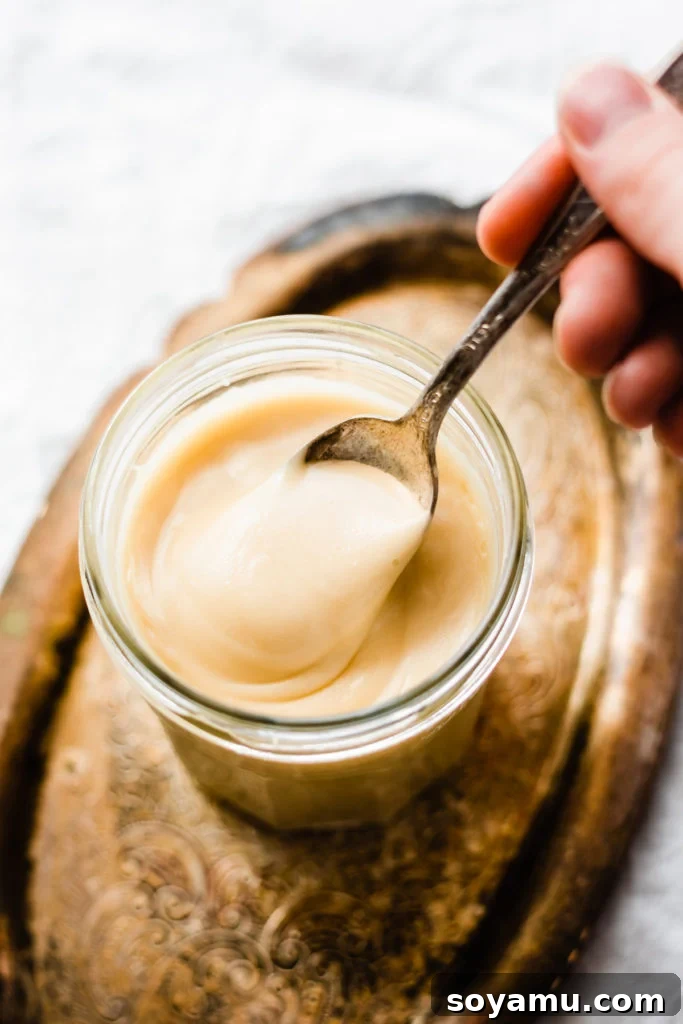
Step 6: Drizzle with Irresistible Maple Glaze. While the scones are still warm, prepare the luscious maple glaze. In a small bowl, whisk together the melted salted butter, pure maple syrup, a tiny pinch of salt, powdered sugar, vanilla extract, and optional bourbon. Continue whisking until the glaze is smooth and free of lumps. The warmth of the scones will allow the glaze to melt slightly, creating a beautiful sheen and ensuring it adheres perfectly. Drizzle generously over the warm scones and get ready to enjoy!
Serving and Storing Your Pumpkin Scones
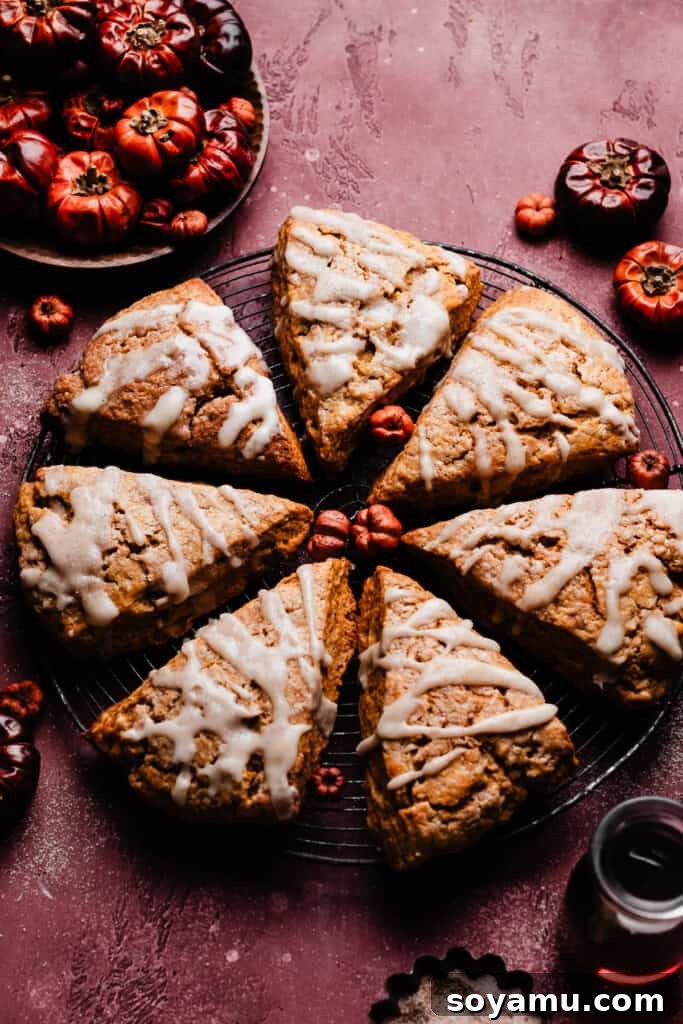
These pumpkin scones are truly at their peak when served warm, fresh from the oven, and generously coated with the maple glaze. Pair them with a steaming cup of coffee, a robust tea, or even a glass of warm apple cider for the ultimate fall experience. You can drizzle the glaze over them as they cool slightly on the baking sheet or a wire rack, or for a truly indulgent treat, dunk each scone directly into the glaze! Trust us, we’ve tested this method, and it receives our highest recommendation.
While best enjoyed on the day they’re baked for optimal crispness and flakiness, any leftover scones can be stored in an airtight container in the refrigerator for 1-2 days. To refresh them, gently reheat in a toaster oven or microwave until warmed through. The glaze can be stored separately in the fridge and gently reheated or brought to room temperature before serving.
If you’re a scone enthusiast, don’t forget to explore our other fantastic recipes like Blueberry Scones and Strawberry Scones!
Expert Baking Tips for Scone Success
Achieving perfect scones consistently requires a few key practices. Here are some expert tips to guide you:
- Invest in an Oven Thermometer: Your oven’s internal thermometer might not be accurate. An oven thermometer is an inexpensive tool that provides the true temperature inside your oven, which is crucial for precise baking. Consistent oven temperature ensures even baking and proper rise.
- Utilize a Kitchen Scale for Accuracy: Baking is a science, and precise measurements yield consistent results. A food scale is invaluable for measuring dry ingredients like flour. Measuring flour by volume (cups) can vary significantly depending on how it’s scooped and packed, leading to vastly different amounts. Weighing ensures you have the exact quantity needed, preventing dry or overly wet dough.
- Keep Ingredients Cold: This is perhaps the most important rule for flaky scones. Ensure your butter, heavy cream, and egg are all thoroughly chilled. Cold fat melts slower in the oven, creating pockets of steam that result in those desirable flaky layers.
- Avoid Overworking the Dough: Handle the scone dough as little as possible. Overmixing develops the gluten in the flour, which can lead to tough, dense scones rather than light and tender ones. Mix until just combined.
- Don’t Skip the Chilling Step: The 15-minute chill time before baking is essential. It allows the butter to firm up again, preventing the scones from spreading too much when they hit the hot oven and contributing significantly to their shape and flakiness.
- Use Fresh Spices: Older spices lose their potency. For the most vibrant and fragrant pumpkin flavor, ensure your cinnamon, nutmeg, ginger, and cloves are relatively fresh.
Frequently Asked Questions (FAQs) About Pumpkin Scones
Yes, this recipe is quite adaptable and can easily be doubled or halved. When doubling, ensure you have enough space on your baking sheets; you’ll likely need two separate pans to avoid overcrowding and ensure even baking. When halving, simply divide all ingredient quantities by two. Be mindful of baking times, as a smaller batch might bake slightly faster.
While canned pumpkin puree offers great convenience and consistent moisture levels, you can use homemade pumpkin puree. However, homemade puree tends to be significantly more watery. If using fresh pumpkin, you’ll need to cook and puree it, then reduce it down further or blot it even more rigorously than specified in the recipe to remove excess liquid. The key is to achieve a very thick, almost pasty consistency to prevent your scones from becoming too wet and dense.
Dry and crumbly scones are typically a result of too much flour or overmixing. Ensure you measure your flour accurately, preferably by weight with a kitchen scale. Overmixing develops the gluten, making the dough tough and preventing it from absorbing moisture properly. Mix just until the ingredients are combined and a dough forms, even if it looks a bit shaggy.
Yes, you can prepare the scone dough up to the point of slicing the wedges. Place the unbaked scones on a parchment-lined baking sheet and cover them tightly with plastic wrap. You can refrigerate them for up to 24 hours or freeze them for up to 2-3 weeks. If baking from frozen, you may need to add an extra 2-5 minutes to the baking time. Brush with cream and sprinkle sugar just before baking.
Special Tools for Scone Perfection
- Pastry Cutter: A pastry cutter (also known as a pastry blender) is a fantastic tool for efficiently cutting cold butter into dry ingredients. Its blades help incorporate the butter without warming it too much with your hands, which is crucial for flaky scones. If you don’t have one, two forks or your fingertips can be used, but work quickly to keep the butter cold.
More Irresistible Pumpkin Recipes to Love
If you’re a fan of pumpkin, you’ll adore these other fall-inspired treats:
- Pumpkin Snickerdoodles with Rum Caramel
- Pumpkin Cupcakes with Brown Butter Cream Cheese Frosting
- Pumpkin Swirl Cheesecake
- Pumpkin Bread with Pecan Streusel & Maple Glaze
- Pumpkin Scones with Bourbon Vanilla Glaze
- Pumpkin Whoopie Pies
- Pumpkin Pasties with Maple Glaze
Did you enjoy this recipe? We’d love to hear from you!
Please consider leaving a comment and a star rating below to let us know how your Pumpkin Scones turned out. Your feedback helps our small business immensely!
Rating: 5 out of 5 stars from 7 votes
Pumpkin Scones with Maple Glaze
By Stephanie Simmons
Pumpkin Scones are everything we love about fall wrapped up one cozy package! These scones are crisp outside, and perfectly tender & flaky inside. They’re packed full of real pumpkin and cozy fall spices. Bake a warm pan of these scones for all the crisp, fall mornings to come!
Prep Time: 15 mins
Cook Time: 32 mins
Scones Chilling: 15 mins
Total Time: 1 hr 2 mins
Servings: 8 scones
Pin Recipe |
Print Recipe
Ingredients
For the Pumpkin Mixture
- 2/3 cup (166 grams before blotting, 80 grams after) canned pumpkin (puree)
- 1/4 cup + 1 tbsp (70 mL) cold heavy cream
- 1 large cold egg
- 1 tbsp vanilla extract
For the Dry Ingredients
- 2 cups (260 grams) all-purpose flour, spooned & leveled or weighed out
- 1/2 tsp salt
- 2 1/2 tsp baking powder
- 1 3/4 tsp cinnamon
- 1 tsp nutmeg
- 1 tsp ginger
- 1/4 tsp ground cloves
- 1/2 cup (110 grams) light brown sugar, packed
- 3 tbsp (40 grams) granulated sugar
- 1/2 cup + 1 tbsp (127 grams) cold salted butter
For Topping:
- 1-2 tbsp (15-30 grams) extra heavy cream, for brushing scones
- Raw sugar, for sprinkling on scones
For the Maple Glaze
- 1/4 cup (57 grams) salted butter, melted
- 2 tbsp (30 grams) maple syrup
- Pinch of salt
- 1 cup (115 grams) powdered sugar
- 2 tsp bourbon (Optional)
- 1 1/2 tsp vanilla extract
Unit System: US Customary – Metric
Instructions
- Prep: Line a baking sheet with parchment paper.
- Blot the Pumpkin: Measure out 2/3 cup (166 grams) of canned pumpkin onto a large dinner plate and blot it with paper towels to absorb excess moisture (do this four times). This is SUPER important for a crisp texture. After blotting, you should have 1/3 cup or 76-80 grams of pumpkin. Weigh this for best results! Set aside.
- Make the Scones: In a small bowl, whisk together the egg, blotted pumpkin, heavy cream, and vanilla. In a large bowl, whisk the dry ingredients together (including the sugars). Cut the cold butter into large chunks, and use a pastry blender or your hands to cut it into the dry ingredients until you have blueberry to pea-sized crumbs, coated in flour. Gently stir in the wet ingredients until a dough forms. Using floured hands, gently form the dough into a ball. Flick a few extra drops of heavy cream into the bottom of the bowl if there are some stubborn dry crumbs left behind.
- Form the Scones: Place the ball of dough on a lightly floured countertop and gently flatten it into a rectangle about 3/4″ thick. With the long side positioned vertically, fold each end down in thirds like a letter so they overlap in the center. With lightly floured hands, gently flatten the dough back out to 3/4″ and rotate the dough 90 degrees, so the long side is horizontal. Fold each end of the long sides in to the center again, so they overlap. Gently press the dough back out to a disc that’s about 8″ across. Spray a large knife with cooking spray and slice into 8 equal pieces. Place on the prepared pan and cover gently with a kitchen towel and chill in the fridge or freezer for 15 minutes. Preheat your oven to 400℉ (200°C) while the scones chill.
- Bake: Brush the tops of the chilled scones with heavy cream & sprinkle on raw sugar for extra crunch. Cinnamon sugar is also delicious! Bake for 20 to 25 minutes. Make the glaze while they bake (see below). The scones will be crisp on the outside, and you can gently lift one open to make sure it’s cooked through in the center.
- Make the Glaze: Melt the butter. Whisk in the maple syrup, then the powdered sugar. Next, whisk in the bourbon (if using) and vanilla, and a tiny pinch of salt.
- Serve + Store: Drizzle glaze over the scones after they’ve cooled on the pan (or a rack) for 5-10 minutes, and dig in! Scones are best while they’re still warm out of the oven, but they can be stored in an airtight container in the fridge for 2-3 days. Store any extra glaze in the fridge.
- Make-Ahead Tips: Scones can be made & frozen (without heavy cream on top) in an airtight container. Bake from frozen, topping with heavy cream & sugar just before baking. Bake for an extra 1-2 minutes as needed. Glaze can be made up to 2 days ahead and stored in the fridge. Gently reheat until it’s drizzle-able again.
Nutrition
Serving: 1 scone,
Calories: 462 kcal,
Carbohydrates: 63 g,
Protein: 5 g,
Fat: 21 g,
Saturated Fat: 13 g,
Polyunsaturated Fat: 1 g,
Monounsaturated Fat: 5 g,
Trans Fat: 1 g,
Cholesterol: 77 mg,
Sodium: 432 mg,
Potassium: 134 mg,
Fiber: 2 g,
Sugar: 37 g,
Vitamin A: 3854 IU,
Vitamin C: 1 mg,
Calcium: 120 mg,
Iron: 2 mg
Nutrition information is automatically calculated, so should only be used as an approximation.