
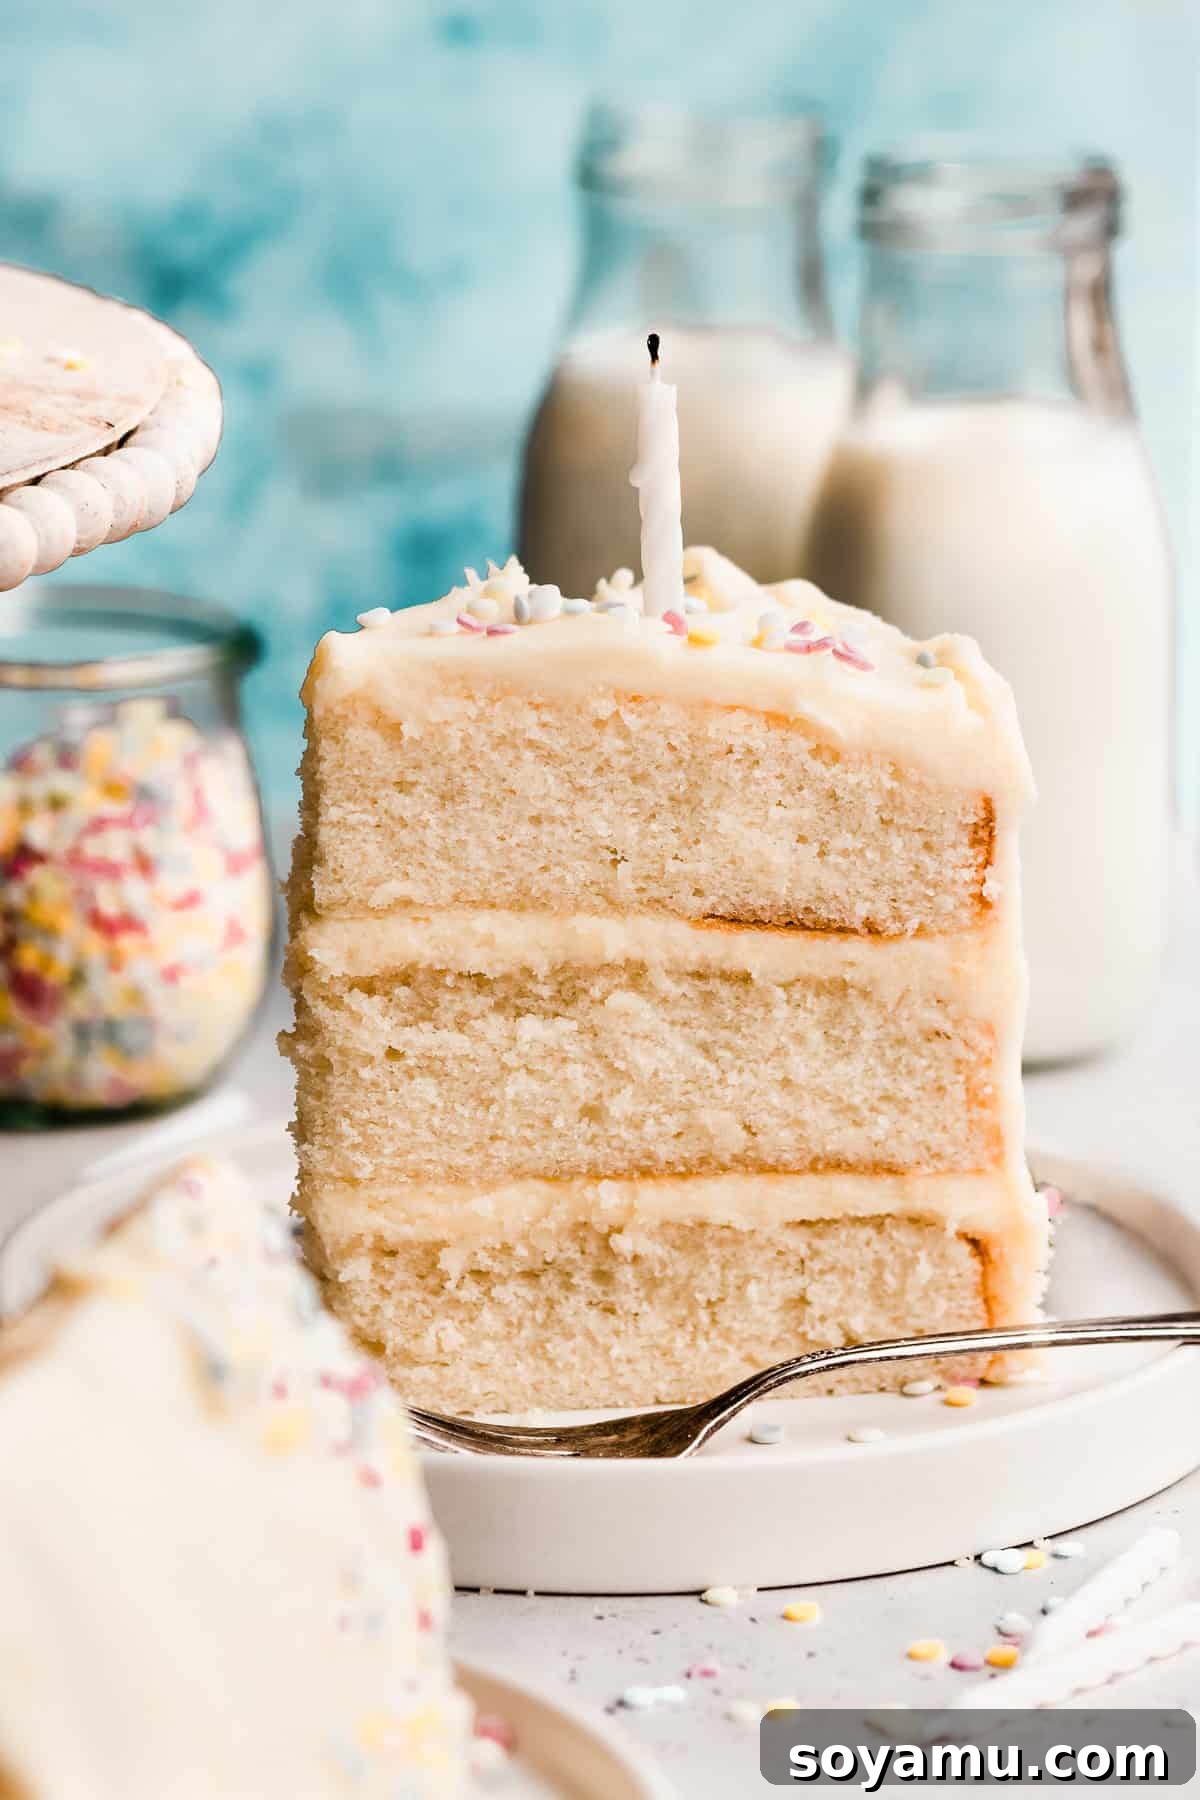
Baking a truly perfect white cake is an art, and with this ultimate guide, you’re about to master it! This isn’t just any white cake; it’s a classic dessert renowned for its delicate, velvety texture and exquisite buttery vanilla flavor. Each slice promises a light, moist crumb, generously frosted with a rich, creamy vanilla cream cheese frosting that perfectly balances sweetness. Whether you’re planning a grand birthday party, an intimate anniversary, or simply craving a delightful homemade treat, this recipe, packed with invaluable success tips, guarantees flawless results every single time. Prepare to impress your guests and delight your palate with a cake that’s not only beautiful but also unbelievably delicious.
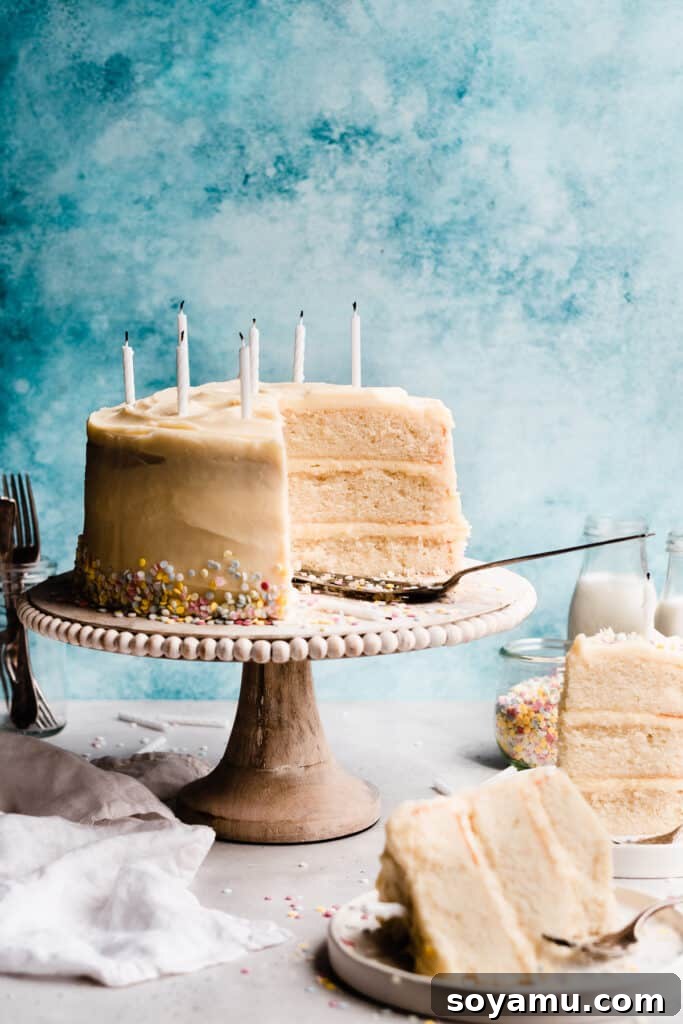
Why You’ll Fall in Love with This White Cake Recipe:
- Unforgettable Classic Flavor: Many believe white cake lacks flavor, but this recipe redefines expectations. It delivers a deeply satisfying buttery vanilla profile that truly shines, making it a timeless favorite. The secret lies in using high-quality ingredients and specific techniques that amplify the natural vanilla notes.
- Exquisitely Velvety Texture: Prepare for a cake that is exceptionally light, tender, and boasts a melt-in-your-mouth velvety crumb. This delicate texture is achieved through the precise balance of ingredients and careful mixing methods, setting it apart from denser cake variations. It’s the kind of cake that practically floats off your fork.
- Surprisingly Easy to Master: Don’t let the elegant appearance fool you. With our clear, step-by-step instructions and proven success tips, baking this tender and flavorful white cake from scratch becomes an enjoyable and straightforward process. We’ve broken down every stage to ensure even novice bakers can achieve professional-level results consistently.
- Versatile for Any Occasion: From elaborate wedding receptions and festive birthday celebrations to simple family gatherings, this white cake is incredibly versatile. Its elegant simplicity makes it the perfect canvas for various decorations and flavor variations, adapting beautifully to any event or personal preference.
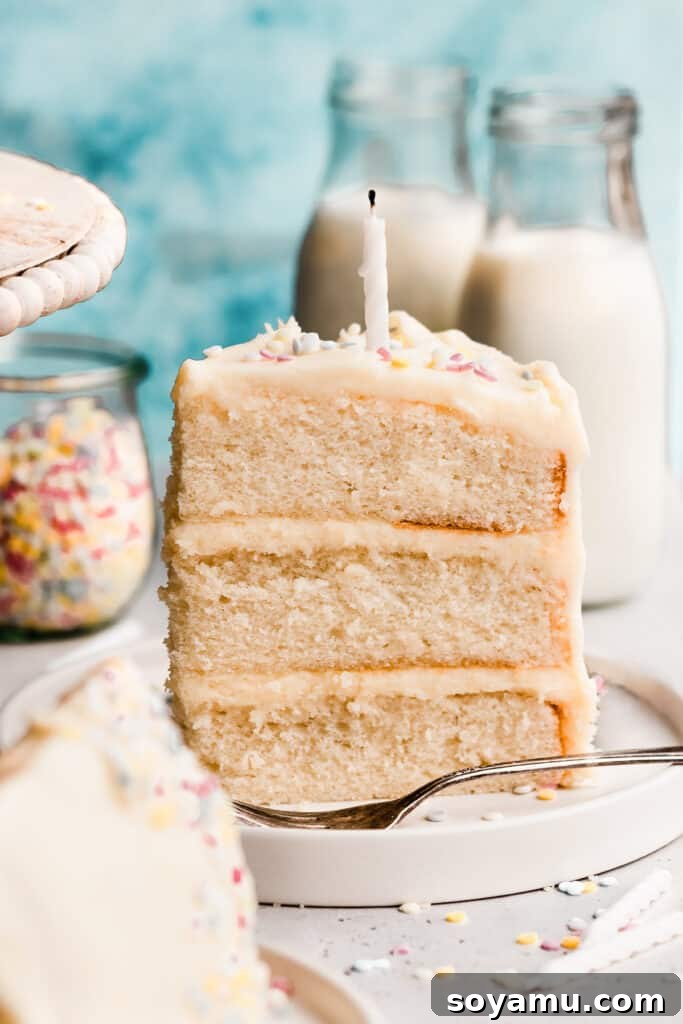
Key Ingredients for Your Perfect White Cake:
Understanding the role of each ingredient is crucial for achieving that signature velvety texture and rich flavor. Here’s a detailed look at what makes this white cake truly special:
- Butter (Salted or Unsalted): While salted butter is my personal preference for an added depth of flavor, unsalted butter works equally well. Just remember to add a pinch more salt to the recipe if using unsalted. Butter contributes significantly to the cake’s rich flavor and tender crumb. Ensure it’s softened to room temperature for optimal creaming.
- Egg Whites: The secret to a perfectly white cake lies in using only large egg whites, omitting the yolks entirely. This not only gives the cake its characteristic pristine white color but also lends a wonderfully light and airy texture. Room temperature egg whites whip up better and incorporate more smoothly into the batter.
- Full-Fat Sour Cream: Don’t skip this! Full-fat sour cream is a game-changer for moisture and tenderness. Its acidity reacts with the baking soda, contributing to a light and fluffy crumb, while the fat content ensures a moist cake that stays fresh longer. Always use it at room temperature for seamless integration into the batter.
- Cake Flour: For an unparalleled delicate and light crumb, cake flour is highly recommended. It has a lower protein content than all-purpose flour, resulting in a softer, less dense cake. When measuring, always spoon and level your flour; scooping directly can compact it, leading to too much flour and a dry cake. For reference, 1 cup of cake flour typically weighs around 110 grams, whereas 1 cup of all-purpose flour is denser, weighing about 130 grams.
- Pure Vanilla Extract: Since this cake’s flavor profile relies on simple, high-quality ingredients, using real vanilla extract is paramount. Avoid imitation vanilla; the authentic aroma and taste of pure vanilla extract elevate the entire cake experience to a new level.
- Vegetable Oil: The combination of both oil and butter provides the best of both worlds. While butter delivers that essential rich flavor, vegetable oil ensures the cake remains incredibly moist and tender. Oil also helps prevent the cake from drying out quickly, keeping it soft for days.
Exciting Recipe Variations to Explore:
This classic white cake recipe serves as a fantastic foundation, ready for you to customize and adapt to various tastes and occasions. Here are some delightful variations to inspire your next baking project:
- Flavor Alternatives for the Batter:
- Sprinkle Cake (Funfetti): For a festive twist, fold in 3/4 to 1 cup of your favorite jimmy sprinkles into the batter just before baking. This creates a vibrant funfetti or sprinkle-style cake that’s perfect for birthdays and parties.
- Elegant Almond Cake: Transform this into a sophisticated almond-flavored cake, ideal for weddings or elegant celebrations, by adding 1-2 teaspoons of high-quality almond extract along with the vanilla extract to the batter. The delicate almond essence complements the white cake beautifully.
- Homemade Cake Flour Substitute: If you don’t have cake flour on hand, you can easily make your own. Spoon and level 1 cup of all-purpose flour into a measuring cup, then use a flat edge to level it off. Remove two tablespoons of this flour (spoon and level these too). Replace the removed flour with two tablespoons of cornstarch. Sift this mixture *twice* to ensure the cornstarch is evenly distributed and the mixture is aerated, mimicking the light texture of commercial cake flour. This step is crucial for achieving a light and tender crumb.
- Luscious Jams and Fruit Preserves as Fillings: Elevate your cake with a delicious fruit filling between the layers. After spreading your frosting on the first two layers, pipe a border of frosting around the edge to create a dam. Within this border, spread about 1/4 cup of your favorite jam or fruit preserves. Options like Blueberry Sauce, Raspberry Coulis, or any other fruit filling add a delightful burst of flavor and moisture. For best results and to prevent the cake from sliding, chill the filled layer for 10-15 minutes before stacking the next.
How to Bake this White Cake: A Step-by-Step Guide:
Follow these detailed steps carefully for a smooth baking process and a truly spectacular white cake.
Step 1: Prepare Your Pans and Dry Ingredients.
Begin by ensuring all your cold ingredients, such as butter, egg whites, sour cream, and milk, have reached room temperature. This is a critical step for a smooth, homogenous batter. Preheat your oven to 350°F (175°C). Prepare three 9-inch round cake pans by thoroughly greasing them with shortening, ensuring every surface is covered. Cut parchment paper circles to fit the bottom of each pan (tracing the pan bottom is the easiest method). Place the parchment circles into the greased pans and grease the parchment as well. Finally, dust the entire inside of each pan with flour, tapping out any excess. In a medium-sized bowl, whisk together your dry ingredients: cake flour, baking powder, baking soda, and salt. Set aside.
Step 2: Create the Cake Batter Base.
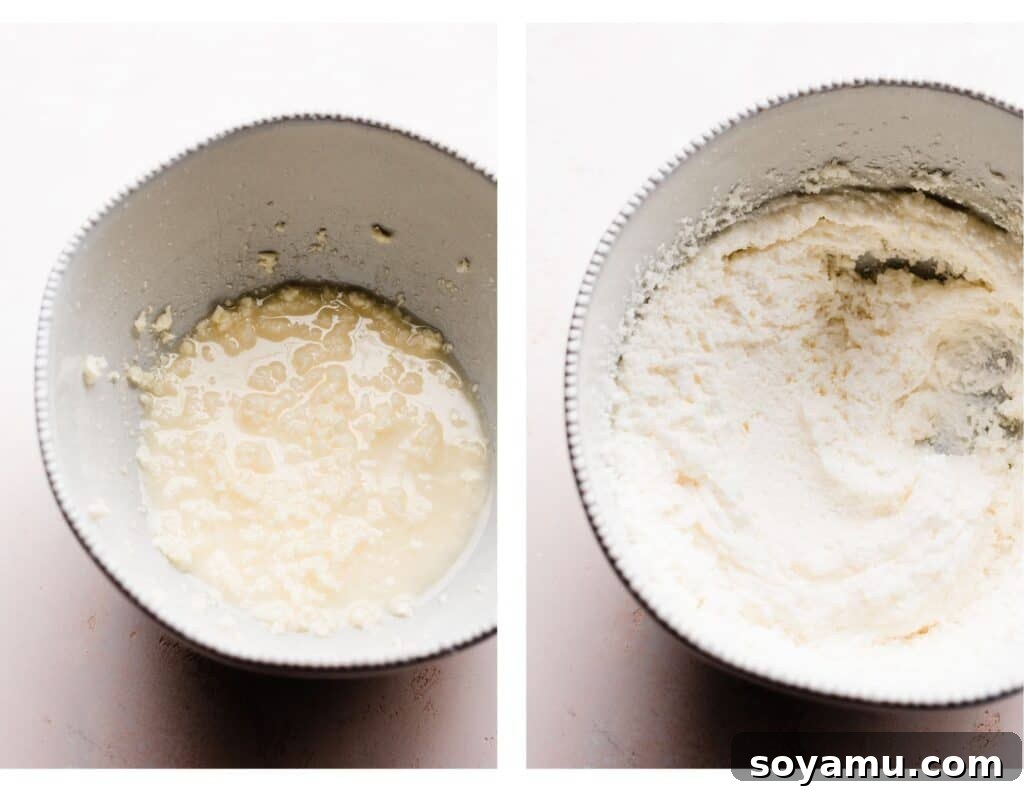
In a large mixing bowl, using an electric mixer or a stand mixer fitted with the paddle attachment, cream the softened butter until it’s smooth and creamy, about 30 seconds. Add the vegetable oil and continue creaming with the butter for another full minute until well combined. Gradually add the granulated sugar and beat the mixture on high speed for two full minutes. The mixture should become light, fluffy, and pale. Throughout this process, remember to scrape down the sides and bottom of the bowl frequently to ensure all ingredients are thoroughly incorporated. Add the egg whites, two at a time, followed by the last one individually, beating on medium speed for 45 seconds after each addition until the mixture is very fluffy. Finally, incorporate the room temperature sour cream and pure vanilla extract, mixing on medium-low speed until just combined. Be careful not to overmix at this stage.
Step 3: Combine Wet and Dry Ingredients.
With the mixer running on low speed, slowly add half of the whisked dry ingredient mixture to the wet ingredients. Mix until just combined, with a few streaks of flour still visible. Then, slowly pour in the room temperature milk. As the milk is almost fully incorporated, add the remaining dry ingredients. Mix on low speed until just a few streaks of flour remain. Turn off the mixer and use a rubber spatula to gently fold in any remaining dry streaks, ensuring not to overmix the batter. Overmixing can develop gluten, leading to a tougher cake.
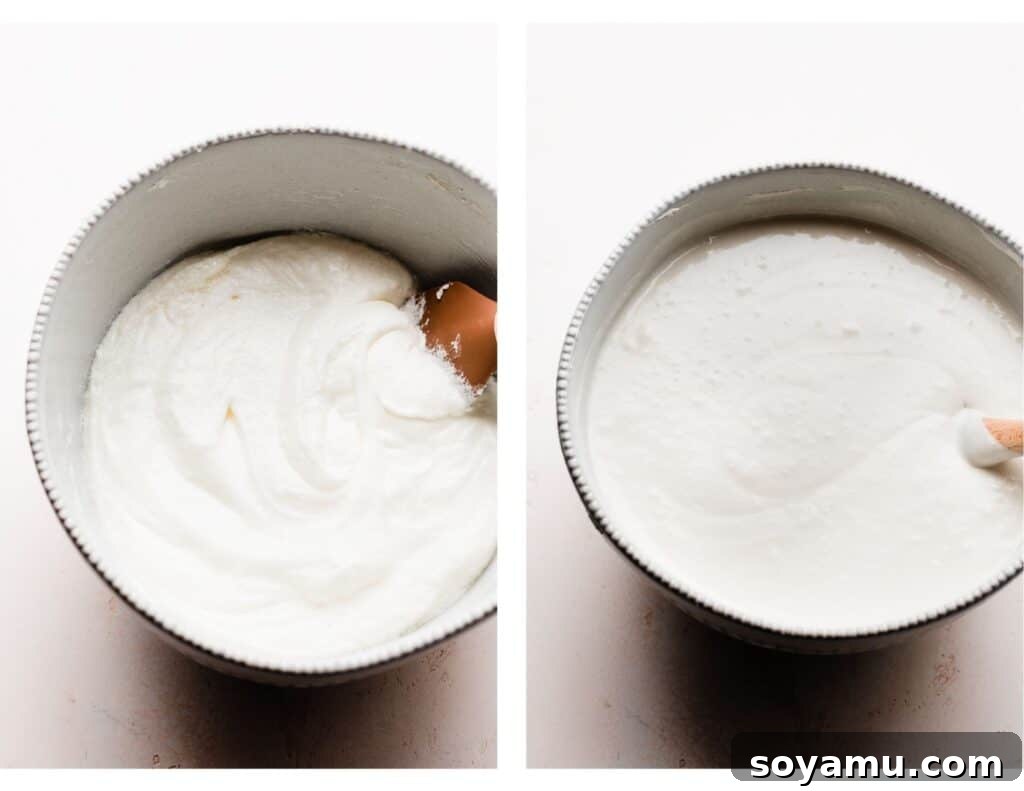
Step 4: Bake the Cake Layers to Perfection.
Divide the prepared cake batter evenly among your three greased, floured, and parchment-lined 9-inch cake pans. For ultimate precision, you can use a kitchen scale to ensure each pan receives the exact same amount of batter. Bake the first two pans together on the same rack, then bake the third pan separately once the first two are done. This method ensures the most even bake and optimal rise for each layer. Bake for approximately 22-26 minutes. To test for doneness, insert a toothpick into the center of a cake; it should come out with moist crumbs attached, and the cake should no longer jiggle when the pan is gently moved. Once baked, let the cakes cool in their pans on a wire rack for precisely 10 minutes. This allows them to set properly before inverting them onto the cooling racks to cool completely. Ensure the cakes are entirely cool before attempting to frost them; otherwise, your frosting will melt.
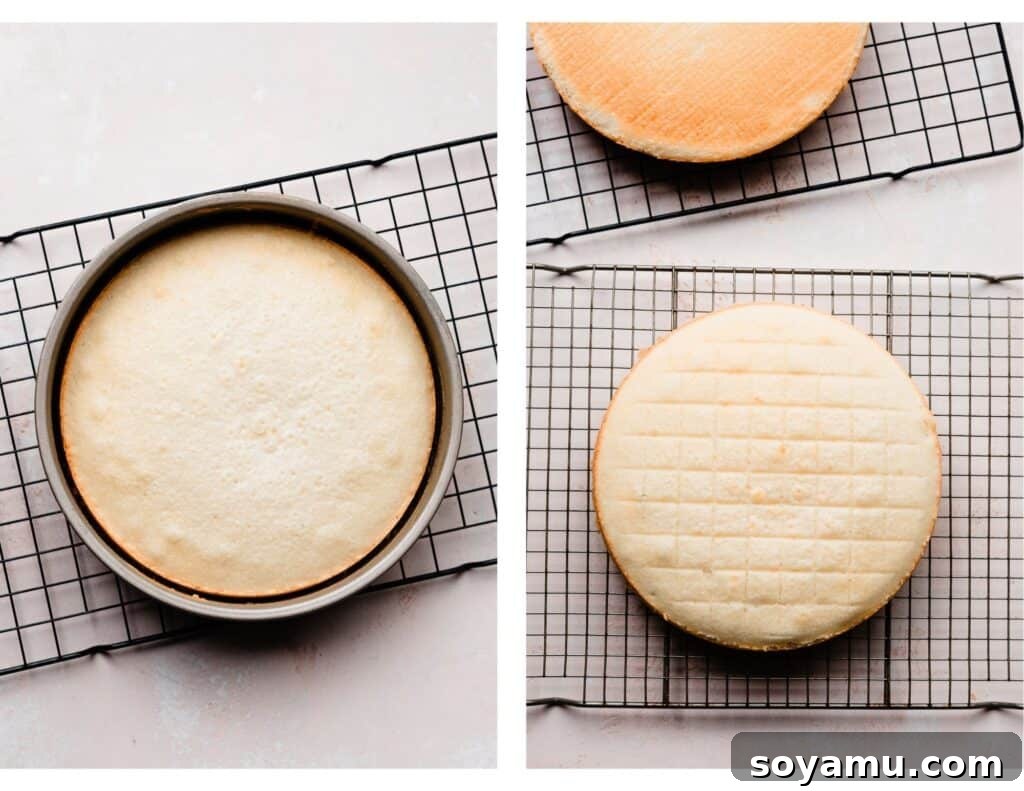
Step 5: Assemble and Frost Your Masterpiece.
While your cake layers are cooling, prepare your rich, creamy vanilla cream cheese frosting. Once the cake layers are completely cool, place your first cake layer on a cake stand or turntable. For easier cleanup, you can protect your cake stand with wax paper strips tucked under the edges of the cake. Use approximately 1 and 1/2 cups of frosting to top this layer, spreading it evenly with an offset spatula. Repeat this process with the second cake layer. Carefully place the final cake layer on top. Apply a thin, even layer of frosting over the entire cake – top and sides. This is your “crumb coat,” which traps any loose crumbs and creates a smooth base. Don’t worry if it’s not perfect at this stage! Chill the cake in the refrigerator for about 30 minutes, or until the crumb coat is set firm. Once chilled, use the remaining frosting to apply a final, thicker layer, smoothing the top and sides with a cake scraper or offset spatula for a professional finish. Chill the entire assembled and frosted cake in the fridge for another 30 minutes to an hour before slicing and serving. This ensures the frosting is perfectly set and the cake holds its shape beautifully.
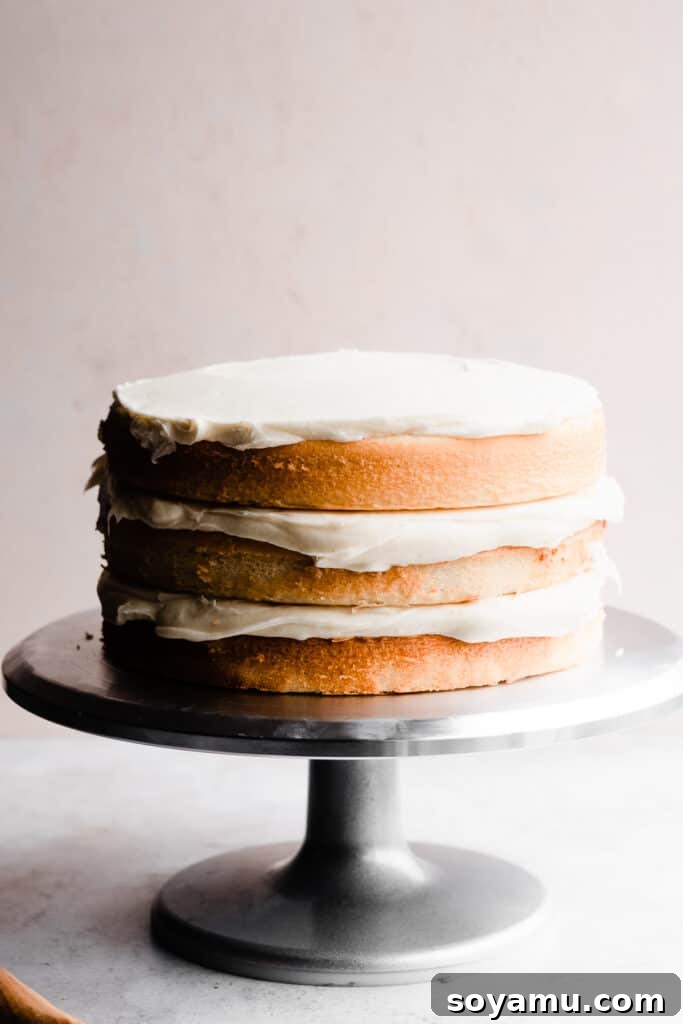
Expert Success Tips for Flawless White Cake:
- Thoroughly Read the Entire Recipe First: Before you even gather your ingredients, take a moment to read the recipe from start to finish. Familiarizing yourself with all the steps, potential pitfalls, and timing will make the baking process much smoother and significantly reduce the chance of errors. Baking a white cake from scratch doesn’t have to be intimidating when you’re well-prepared.
- Stick to the Recipe – Avoid Substitutions (Initially): For your first attempt, it’s highly recommended to follow the recipe exactly as written. This recipe has been tested and perfected with specific ingredient ratios to ensure optimal results. While theoretical substitutions (like a 1:1 gluten-free flour blend or non-dairy alternatives) might work, I cannot guarantee the same tender texture or rich flavor without personal testing. If you do experiment with swaps, please share your results – I love hearing how variations perform!
- Ensure All Cold Ingredients are at Room Temperature: This tip is absolutely non-negotiable for the best texture. Room temperature butter creams smoothly with sugar, creating an airy emulsion that traps air. Cold ingredients, on the other hand, can lead to a lumpy batter, affecting the cake’s final texture and causing it to bake unevenly. Plan ahead and take butter, eggs, sour cream, and milk out of the refrigerator at least 1-2 hours before you begin.
- Invest in a Kitchen Scale: Precision in baking is key, especially with flour measurements. A food scale is the most accurate way to measure flour by weight (grams), as measuring by volume (cups) can vary significantly depending on how you scoop and the specific measuring cup used. This small investment will dramatically improve your baking consistency.
- Verify Your Oven Temperature with an Oven Thermometer: Many home ovens are not calibrated accurately, often running hotter or colder than the set temperature. An oven thermometer provides an accurate reading of your oven’s true internal temperature. Consistent and accurate oven temperature is crucial for even baking, proper rise, and preventing dry or undercooked cakes. Keep one in your oven at all times to monitor its calibration.
- Do Not Overmix the Batter: Once you add the flour, mix only until just combined. Overmixing develops gluten, which can lead to a tough, chewy cake rather than the desired light and velvety crumb. Gentle folding with a spatula for the last few streaks of flour is often sufficient.
- Don’t Rush the Cooling Process: Allow your cake layers to cool completely on a wire rack before frosting. Attempting to frost warm cakes will cause your frosting to melt and slide off, resulting in a messy and unappealing cake. Patience during cooling is a virtue in baking!
Frequently Asked Questions About White Cake:
Yes, absolutely! The primary distinction lies in the egg usage. A true white cake is made exclusively with egg whites, which gives it its signature pure white color and a notably lighter, more delicate texture. A vanilla cake typically incorporates a mix of whole eggs and egg whites, lending a slightly richer flavor and a paler, off-white hue. In contrast, a yellow cake predominantly uses whole eggs, and sometimes additional egg yolks, to achieve its distinctly yellow color and a richer, denser crumb.
While it’s tempting to double a recipe for a larger cake (e.g., a six-layer cake), I generally do not recommend it for most home bakers. The sheer volume of batter can be overwhelming for standard home mixers and oven capacities, often leading to uneven mixing and baking inconsistencies. For larger quantities or more layers, it’s always best to make two separate batches of the cake batter. This ensures each batch is perfectly mixed and baked, maintaining the quality of your cake. (Keep in mind, a six-layer cake is quite substantial! See our yield tips below for maximizing servings from a single batch.)
Yes, halving this recipe should work perfectly fine! You can bake the reduced batter in a 9×9 inch square pan. When choosing your bakeware, metal or ceramic pans are generally preferred as they conduct heat more evenly than glass pans, resulting in a better-baked cake. Alternatively, you can use two 8-inch round cake pans for two slightly smaller layers.
If you opt for traditional triangular slices, this impressive three-layer cake will easily yield 12-16 generous servings. However, if you’re catering to a larger crowd or prefer smaller portions, consider using the method of cutting round cakes into horizontal strips. By slicing the cake into concentric rings and then cutting each ring into 3-4 smaller pieces, you can significantly increase the yield to anywhere from 22-28 slices, or even more if the slices are kept smaller. This method is excellent for parties and events.
Absolutely! This versatile white cake recipe translates beautifully into cupcakes. A full batch will yield approximately 36-40 standard-sized cupcakes. If you halve the recipe, you’ll get around 18-20 cupcakes. Remember to fill your cupcake liners only two-thirds full to prevent overflow and ensure an even bake. Adjust the baking time to 12-18 minutes, or until a toothpick inserted into the center comes out clean.
I find that incorporating cream cheese into buttercream frosting is a wonderful trick to cut through the often-overwhelming sweetness of traditional powdered sugar-based frostings. This addition creates a frosting that is not only incredibly creamy and smooth but also offers a subtle tanginess that perfectly balances the sweetness, preventing that “tooth-aching” sensation many people associate with overly sweet frostings. It also adds an extra layer of richness and a beautiful texture.
Elevate Your Cake with These Decorating Tips:
- Crafting the Silkiest Frosting: The secret to a perfectly smooth and pipeable frosting is proper creaming. Be sure to beat the butter and cream cheese together for a full three minutes, as specified in the frosting recipe. This aeration process ensures a silky-smooth texture, eliminating the need to sift your powdered sugar and yielding a consistently beautiful frosting.
- Achieving a Professional Frosting Finish: More detailed techniques for applying the frosting are integrated into the recipe instructions provided below. Pay close attention to the crumb coat step, which is crucial for a clean final layer. Utilizing an offset spatula and a cake scraper can significantly help achieve smooth, even sides and a flat top.
- Adding Decorative Sprinkles: To recreate the charming sprinkle border around the base of the cake, simply grab a handful of your favorite jimmy sprinkles and gently press them onto the bottom edge of the cake before the frosting has fully set. The slightly tacky frosting will adhere the sprinkles beautifully, adding a festive touch to your finished masterpiece. For a full funfetti effect, you can also press sprinkles onto the sides and top.
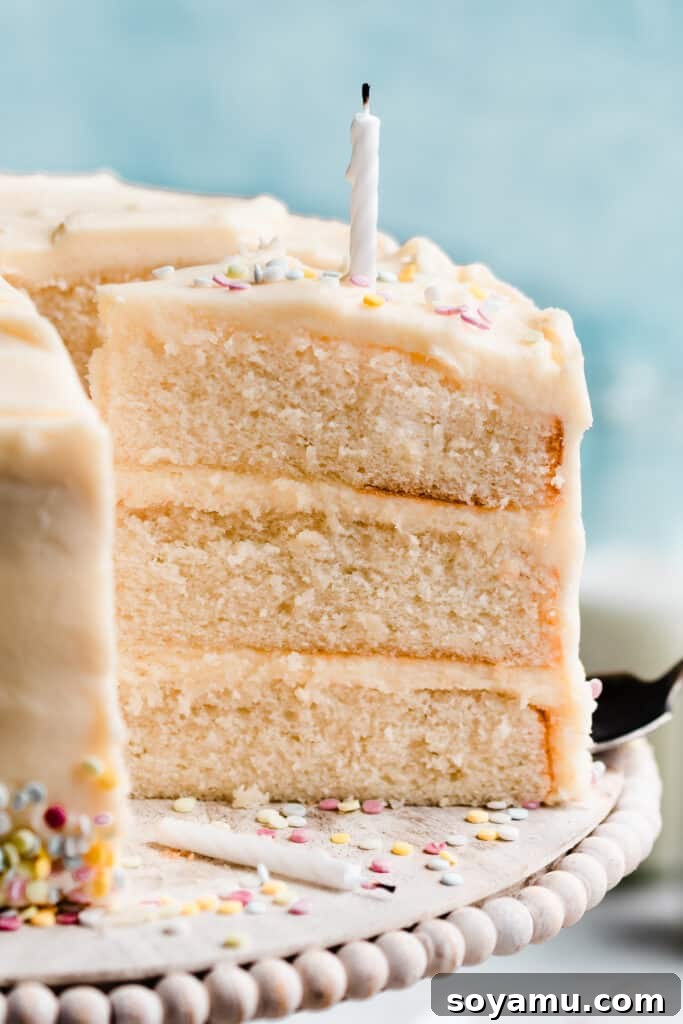
Essential Tools for Your Baking Success:
While not strictly necessary for every baker, certain tools can make the process of baking and decorating this white cake significantly easier and more enjoyable:
- Offset Spatula: An offset spatula is indispensable for smoothly spreading frosting, both for the crumb coat and the final layer. Its angled blade keeps your knuckles clear of the cake surface, allowing for effortless and even application. It’s also great for leveling cake and brownie batters in pans.
- Cake Turntable: If you find yourself baking cakes a few times a year, investing in a cake turntable will revolutionize your frosting experience. It allows you to rotate the cake smoothly, making it incredibly easy to frost the sides evenly and create a flawless finish with minimal effort.
- Piping Bag & Piping Tip: For elegant borders, rosettes, or adding decorative details, a piping bag and tip are essential. I prefer using a reusable piping bag paired with a Wilton 1A or 2A piping tip for classic designs. In a pinch, a sturdy plastic bag with a corner snipped off can serve as a makeshift piping bag.
- Kitchen Scale: As mentioned in our success tips, a digital kitchen scale is paramount for accurate ingredient measurement, especially flour, ensuring consistency and precision in your baking.
- Oven Thermometer: Another crucial tool highlighted earlier, an oven thermometer helps you maintain accurate oven temperatures, which is vital for perfectly baked cake layers.
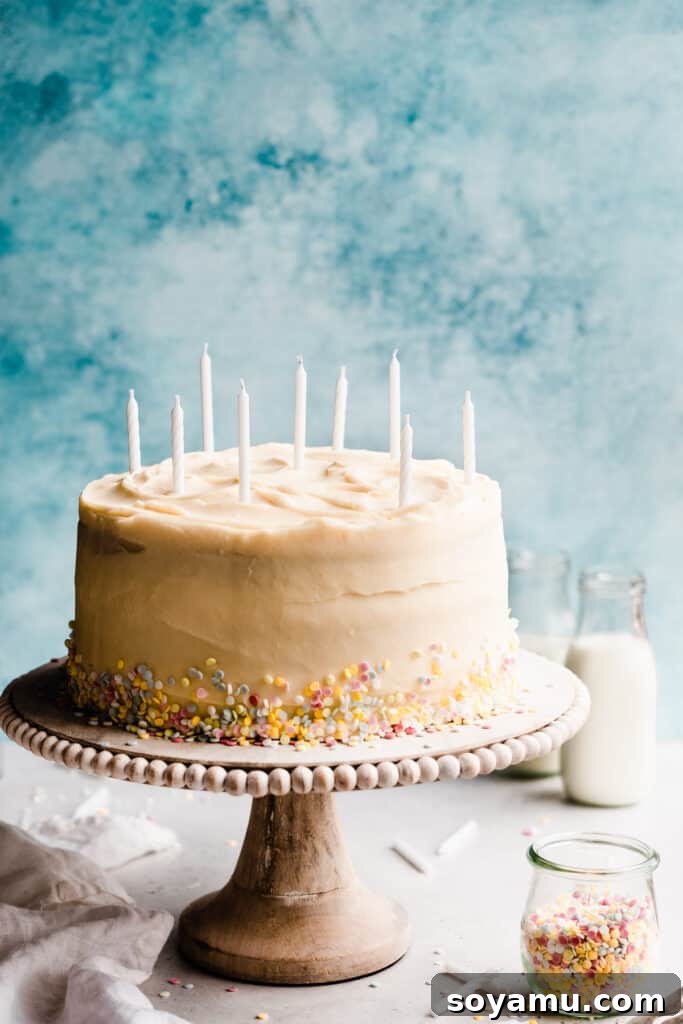
Smart Make-Ahead Strategies:
Planning ahead can significantly reduce stress on the day of your event, and this white cake is surprisingly accommodating:
- Cake Layers: The baked cake layers can be prepared up to 24 hours in advance. Once they are completely cool to room temperature, carefully place each layer on a large dinner plate or a sturdy cookie sheet. Wrap each layer tightly in several layers of plastic wrap to prevent them from drying out. Store these individually wrapped layers at room temperature until you are ready to assemble and frost the cake the following day.
- Frosting: While it’s possible to make frosting ahead, for the freshest and silkiest results, I highly recommend preparing the vanilla cream cheese frosting on the day you plan to assemble the cake. This ensures it’s at its optimal texture for spreading and decorating.
- Assembled Cake: The entire assembled and frosted cake can be chilled in the refrigerator for up to 24 hours before serving. This allows the flavors to meld beautifully and the frosting to set firmly, making for easier transportation and slicing. For optimal taste and texture, this cake is best enjoyed within the first 3 days after assembly.
Optimal Cake Storage for Freshness:
Proper storage is key to keeping your white cake moist and delicious for as long as possible after assembly:
- Initial Chilling (Uncovered): Once your cake is frosted just how you like it, transfer it to the refrigerator, uncovered, for about 30 minutes to an hour. This allows the frosting to “set” or firm up, creating a protective crust.
- Covering and Refrigeration: After the frosting has set, you can easily cover the cake with plastic wrap without disturbing the beautiful decorations. Alternatively, use a cake dome or an airtight cake carrier. Store the covered cake in the refrigerator.
- Longevity: This white cake remains wonderfully moist and flavorful for 2-3 days when stored properly in the refrigerator.
- Post-Slicing Storage: Once the cake has been cut, air exposure can cause it to dry out more quickly. For any leftover slices, press plastic wrap directly onto the cut surfaces or place them in an airtight container before returning to the fridge. This tight seal helps to retain moisture.
- Serving Temperature: For the best flavor and texture, allow the cake to come to room temperature for about 30 minutes before serving. This will soften the frosting and enhance the cake’s delicate crumb.
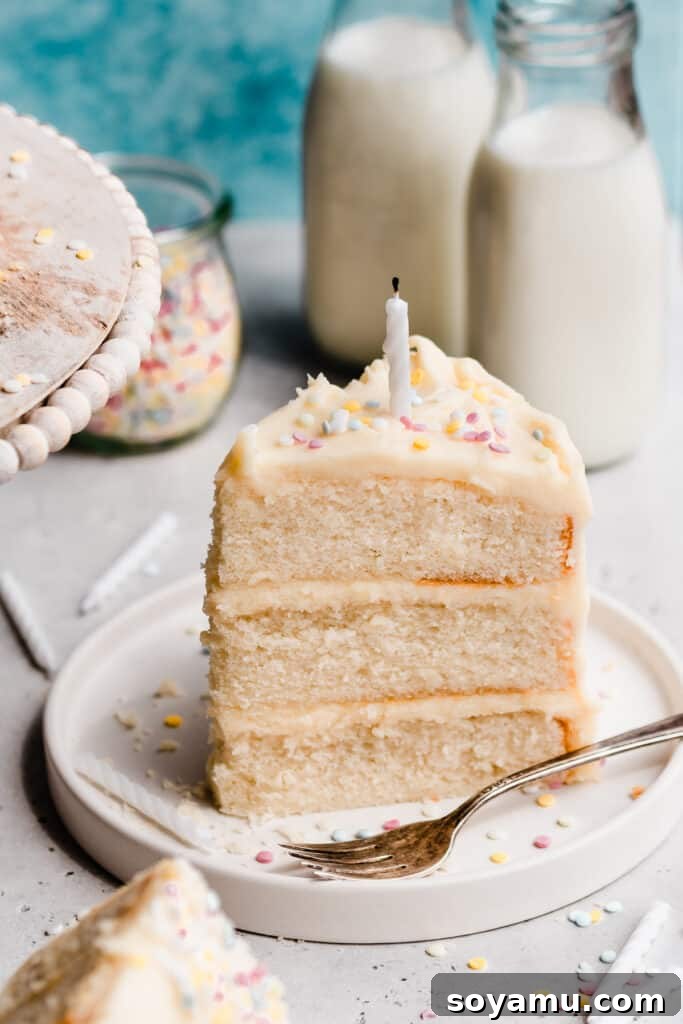
Explore More Celebration Cake Recipes to Love:
- Salted Butterscotch Crunch Cake
- White Forest Cake
- Peach Cobbler Cake with Brown Butter Frosting
- German Chocolate Cake
- Raspberry Chocolate Ganache Cake
- Best Yellow Cake with Chocolate Frosting
- Mojito Cake
Did you bake this incredible white cake? We’d love to hear from you!
Please share your experience and thoughts in the comments section below. Your feedback and ratings truly help our small business thrive and inspire others to bake!
Perfect White Birthday Cake
Stephanie Simmons
2 hours
24 minutes
2 hours
16
to 28 slices
Rate
Ingredients
For the Cake:
- 3 and 1/2 cup cake flour spooned & leveled, 385 grams
- 1 tbsp baking powder
- 3/4 tsp baking soda
- 3/4 tsp salt
- 1/2 cup + 2 and 1/2 tbsp salted butter, softened at room temperature, 148 grams
- 1/2 cup vegetable oil, 116 mL
- 2 and 2/3 cup granulated sugar, 543 grams
- 7 large egg whites, at room temperature
- 1 and 1/2 tbsp vanilla extract
- 3/4 cup full fat sour cream, at room temperature
- 1 and 1/2 cups milk, at room temperature, I used 2% milk – 360mL
For the Frosting:
- 2 cups salted butter, softened at room temperature, 4 sticks, 452 grams
- 6 and 1/2 cups to 7 1/2 cups powdered sugar, 780 to 900 grams
- 2-3 tbsp heavy cream, or milk
- 2 tbsp vanilla extract
- pinch of salt
- 12 ounces full fat block-style cream cheese, softened at room temperature, Note that cream cheese doesn’t need as much time to soften as butter does
Instructions
-
Prep: Make sure all cold ingredients have come to room temperature. Preheat your oven to 350° F. Prepare three 9-inch cake pans. Use a paper towel to rub shortening all over the inside of each pan, coating them evenly and completely. Cut a round of parchment paper to fit inside each (tracing is the easiest way). Place this on top of the greased pan bottom, then grease over the parchment paper as well. Add a handful of flour, and tap the pan around to evenly coat the entire inside with flour, tapping out the excess.
-
Make the Cake Batter: In a medium bowl, whisk together the dry ingredients – flour, baking powder, baking soda, and salt. In a large mixing bowl, cream the softened butter for about 30 seconds, until creamy. Add the vegetable oil and cream together with the butter for 1 minute. Add the sugar and beat on high speed for 2 full minutes. The mixture will be fluffy. Scrape the sides of the bowl down throughout, to ensure everything is combined. Add the egg whites, two at a time and then the last one on it’s own, beating on medium speed between each addition, for 45 seconds. The mixture will be very fluffy. Add the sour cream and vanilla and mix on medium low speed until just combined.
Add half of the dry ingredients with the mixer running on low speed. Add the milk with a few streaks of flour remaining, then when the milk is almost mixed in, add the remaining dry ingredients. When just a few streaks of flour remain, turn off the mixer and use a spatula to make sure everything is combined – don’t over mix! -
Bake: Divide the cake batter evenly between the prepared pans. (You can eyeball this or use a kitchen scale to help with precision.)
Bake the cakes, the first two pans together, and then the 3rd pan on its own after the first two are done. This will ensure the most even bake. Bake the cakes for 22-26 minutes. A toothpick inserted into the center will pull out moist crumbs and the cakes shouldn’t jiggle in the center when you move the pan.
Let cakes cool in the pans on cooling racks for 10 minutes. Then, invert onto cooling racks to cool completely before frosting and assembling. -
Make the Frosting: In a large mixing bowl, cream the softened butter until creamy, 30 seconds to 1 minute. Add the powdered sugar in 3 additions, mixing until smooth between each, adding heavy cream as needed to help it come together. Mix in the vanilla & a pinch of salt. Beat in the cream cheese last, on medium high speed, until completely smooth.
-
Assemble & Frost the Cake: Place the first cake layer on a cake stand protected with wax paper strips, or a turntable. (A turntable is the easiest!) Use 1 and 1/2 cups of frosting to top the layer, spreading it evenly with an offset spatula. Repeat with the second layer. Add the final layer and give the cake a thin layer of frosting on top and on the sides. Use a cake scraper to smooth out and remove excess frosting. This is your crumb coat, so don’t fret if it isn’t perfect. Pop the cake in the fridge for 30 minutes or until the frosting is set. Then, use the remaining frosting to frost the cake, using the cake scraper to smooth the top and sides.
Chill the entire cake in the fridge for 30 minutes, or until the frosting is set before covering it (with plastic wrap or a cake lid) or serving it.
Tip: If your frosting is getting too soft at any point from sitting out, pop it back in the fridge for a bit to firm back up. -
Serve + Store: Serve the cake once it’s chilled as directed above. Slice into as many slices as desired! Store leftovers, tightly covered, in the fridge for 2-3 days. The cake will naturally start to dry out a bit once it’s been cut and put back in the fridge, so just be sure to seal and store it tightly.
-
Make Ahead Tips: The cake layers can be made up to 24 hours in advance. Let cool completely then place each layer on a large dinner plate or a cookie sheet and plastic wrap tightly to seal. Store at room temp, then frost the next day. The assembled cake can be refrigerated for up to 1 day before slicing and serving.
Notes
Filling Variations: Add 1/4 cup of filling between each layer, making sure to pipe a border of frosting on top of the already spread out frosting before adding the filling. Try my Raspberry Coulis, Blueberry Sauce,Orange Curd, Lime Curd, LemonCurd, or 10-Minute Caramel Sauce.
Nutrition
Serving:
1
slice
,
Calories:
861
kcal
,
Carbohydrates:
106
g
,
Protein:
8
g
,
Fat:
46
g
,
Saturated Fat:
25
g
,
Polyunsaturated Fat:
6
g
,
Monounsaturated Fat:
12
g
,
Trans Fat:
1
g
,
Cholesterol:
107
mg
,
Sodium:
573
mg
,
Potassium:
143
mg
,
Fiber:
1
g
,
Sugar:
84
g
,
Vitamin A:
1277
IU
,
Vitamin C:
0.1
mg
,
Calcium:
119
mg
,
Iron:
0.4
mg
Nutrition information is automatically calculated, so should only be used as an approximation.
Like this? Leave a comment below!