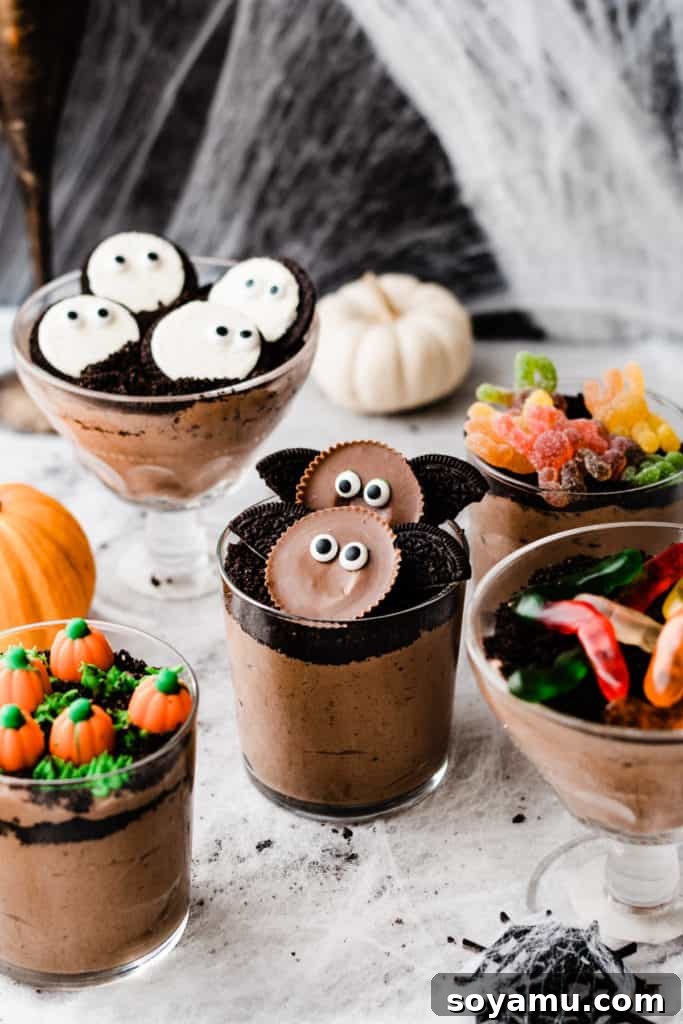
Spooky & Sweet: Easy Halloween Dirt Cups Recipe for a Frightfully Fun Treat!
Get ready to conjure up some magic in your kitchen with these incredibly simple yet delightfully spooky Halloween Dirt Cups! Perfect for celebrating the eerie season at home, at school parties, or as a fun activity with the kids, these treats are guaranteed to be a hit. With just a few staple ingredients and your imagination, you can transform ordinary dessert into an extraordinary Halloween delight that everyone will love.
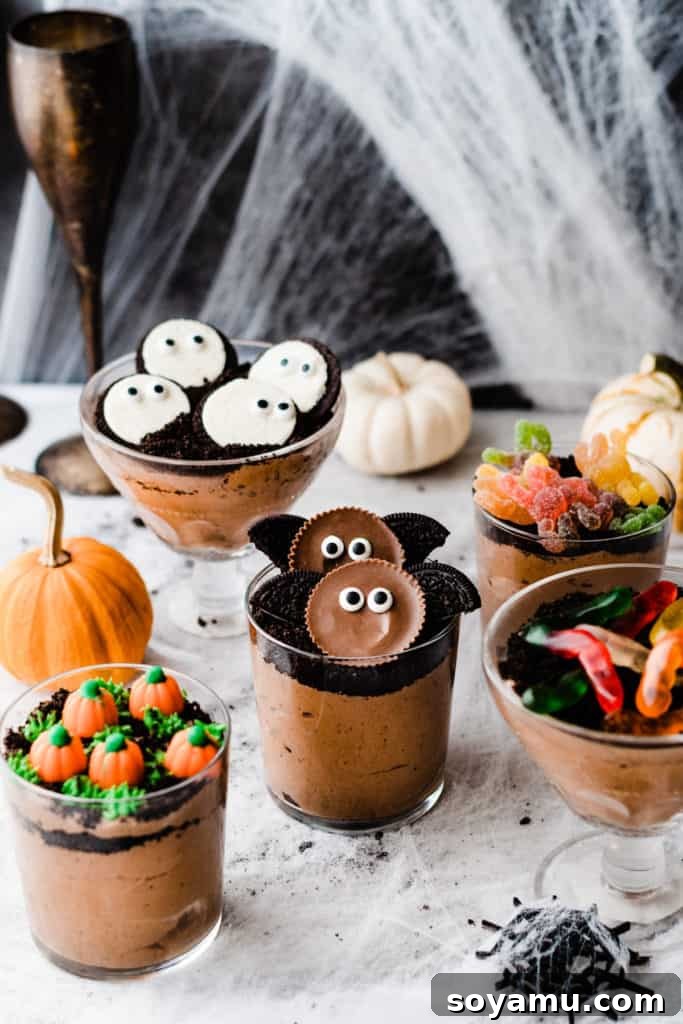
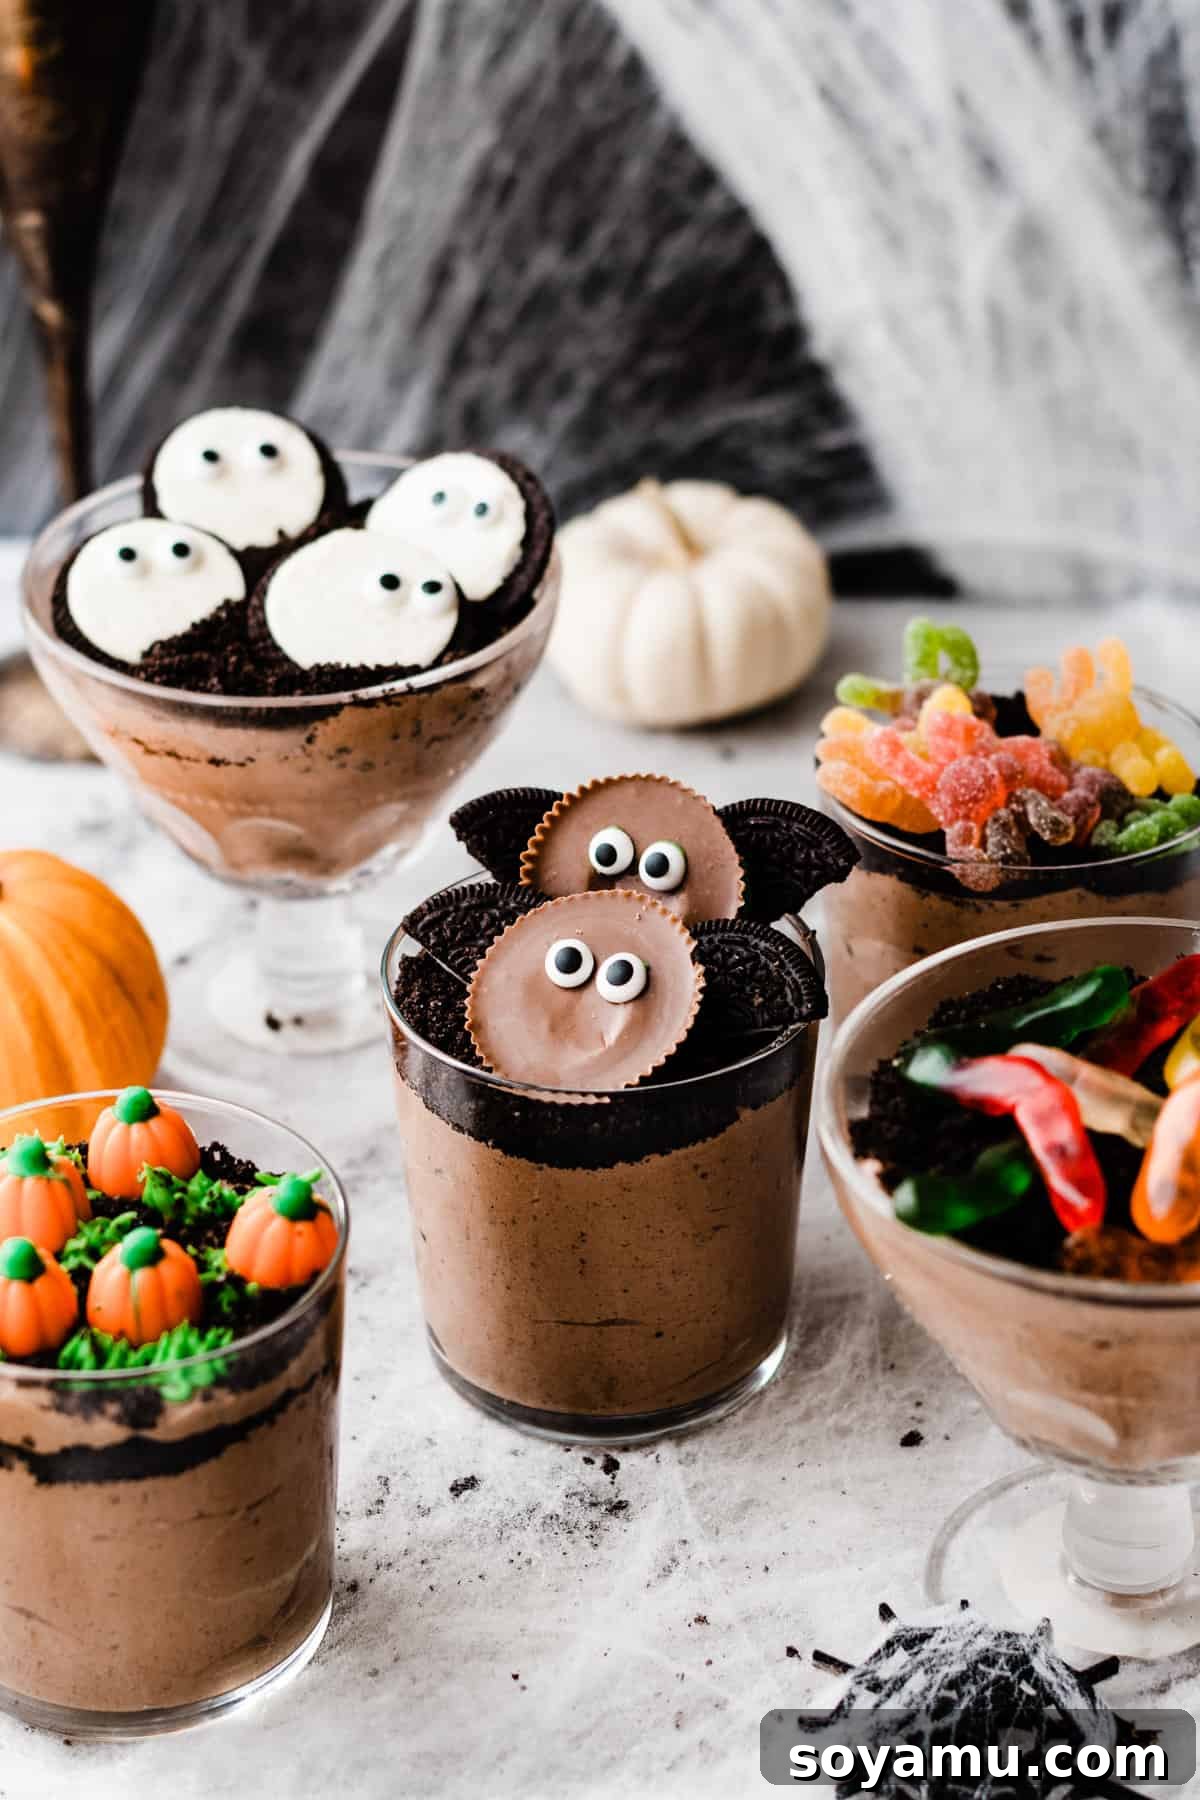
Why These Easy Halloween Dirt Cups Are a Must-Make
There are countless reasons why these Halloween Dirt Cups have become a seasonal favorite. Beyond their irresistible taste, they offer a host of benefits that make them the perfect choice for your festive celebrations:
- Effortlessly Simple: Forget complicated baking or extensive ingredient lists. This recipe is designed for maximum flavor with minimal fuss, making it ideal for even the busiest schedules.
- Kid-Friendly Fun: Both the preparation and the consumption of these dirt cups are a joy for children of all ages. They’ll love helping to crush Oreos and, most importantly, decorating their very own spooky creations.
- Customizable Creativity: The possibilities for decoration are truly endless! Whether you opt for ghosts, bats, pumpkins, or creepy-crawly critters, these cups serve as a blank canvas for your Halloween imagination.
- Deliciously Decadent: Each spoonful is a delightful blend of creamy chocolate pudding and crunchy Oreo “dirt,” creating a texture and flavor profile that’s utterly irresistible.
- Perfect for Parties: Easily scalable to feed a crowd, these dirt cups are a fantastic and thematic addition to any Halloween gathering, school potluck, or festive movie night.
- No-Bake Delight: No oven required! This makes them a great option for warmer climates or simply when you want a quick and refreshing dessert without heating up the kitchen.
The Simple Secret: A Rich and Creamy Chocolate Pudding Base
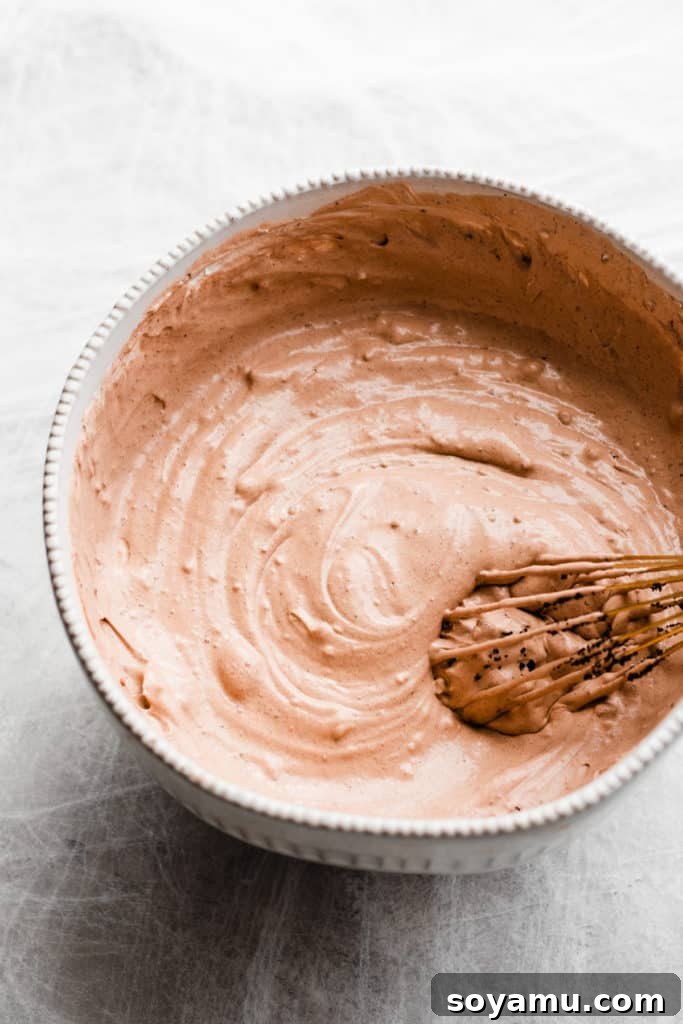
The delicious foundation of these Halloween Dirt Cups lies in their lusciously smooth and rich chocolate pudding base. This isn’t just any pudding; it’s a carefully crafted blend that creates the perfect “earthy” texture and delightful flavor profile. Our base is made using instant chocolate pudding mix, which ensures a quick and easy start, combined with creamy milk for a velvety texture. To this, we fold in fluffy Cool Whip, adding an airy lightness that prevents the pudding from being too dense. The true magic happens when crushed Oreo cookies are mixed directly into the pudding, creating delightful cookie crumbles throughout that perfectly mimic freshly turned “dirt.”
This simple yet effective mixture ensures that every spoonful is packed with flavor and fun. The Cool Whip balances the richness of the chocolate, while the crushed Oreos provide that essential “earthy” texture and classic chocolatey taste. It’s the perfect, irresistible foundation for all your spooky toppings, promising a treat that is both visually appealing and incredibly satisfying.
Essential Ingredients for Your Halloween Dirt Cups
Gathering your ingredients for these spooky Halloween Dirt Cups is a breeze. Most items are readily available at your local grocery store, making this a convenient last-minute treat. Here’s what you’ll need to create about 6-8 individual servings, perfect for a family treat or a small gathering:
- Instant Chocolate Pudding Mix: One 3.9 oz (102g) box. Be sure to grab instant pudding, as this recipe relies on its quick-setting properties. You can choose milk chocolate or dark chocolate, depending on your preference.
- Cold Milk: Approximately 2 cups. For the best consistency and richest flavor, 2% or whole milk is recommended. Ensure it’s cold, as this helps the pudding set properly.
- Frozen Whipped Topping (Cool Whip): One 8 oz (226g) tub, completely thawed. This ingredient adds a delightful lightness and an extra layer of creaminess to your dirt cups.
- Oreo Cookies: One 14.3 oz (406g) package. These iconic chocolate sandwich cookies are central to our “dirt” effect and are also used for several creative decorations.
- Optional Toppings: A wide variety of candies and cookies for decorating, allowing you to personalize each cup to your heart’s content (detailed below).
Step-by-Step Instructions: Assembling Your Spooky Soil
Creating these delightful Halloween Dirt Cups is a straightforward process. Follow these simple steps, and you’ll have a batch of spooky treats ready for chilling in no time:
- Prepare the Pudding: In a large mixing bowl, combine the instant chocolate pudding mix with the cold milk. Whisk vigorously for about 2 minutes, or until the mixture begins to thicken significantly. It should be relatively firm, like traditional pudding.
- Fold in Whipped Topping: Gently, using a spatula, fold in half of the thawed Cool Whip into the prepared pudding. This step lightens the pudding and adds an incredibly smooth, fluffy texture. Avoid overmixing to maintain its airy quality.
- Crush the Oreos: Take approximately 25-30 Oreo cookies. Place them in a large Ziploc bag and seal it tightly, removing as much air as possible. Use a rolling pin or the bottom of a heavy glass to crush the cookies into fine crumbs, resembling dirt. Alternatively, pulse them in a food processor until a fine consistency is achieved. Set aside about 1/2 cup of these crumbs for layering.
- Combine “Dirt” with Pudding: Stir the remaining crushed Oreos directly into the chocolate pudding and Cool Whip mixture. This creates the primary “dirt” filling, complete with delightful cookie crumbles for added texture and authentic appearance.
- Layer Your Cups: Now it’s time to assemble your dirt cups!
- Spoon a generous layer of the chocolate-Oreo pudding mixture into the bottom of individual serving cups, small clear glasses, or mason jars.
- Sprinkle a spoonful of the reserved crushed Oreos on top of the pudding layer. This creates distinct layers and enhances the “dirt” effect.
- Repeat these layers until your cups are nearly full, ensuring you finish with a generous top layer of crushed Oreos to truly mimic freshly disturbed earth.
- Chill Thoroughly: Cover the assembled dirt cups with plastic wrap and refrigerate them for at least 1-2 hours. This crucial step allows the pudding to set completely and ensures all the delicious flavors have time to meld together, resulting in a perfectly chilled and firm dessert.
- Decorate & Serve: Once your dirt cups are thoroughly chilled and set, it’s time for the most exciting part – decorating! Add your creative spooky toppings just before serving to ensure they look their best and retain their texture.
Spooktacular Decoration Ideas: Bring Your Dirt Cups to Life!
This is where your Halloween Dirt Cups truly come alive! Don’t be intimidated by intricate designs; most decorations are surprisingly easy to assemble and offer a fantastic opportunity for creativity, especially if you have little helpers in the kitchen. Here are some fantastic and simple ideas to get you started:
1. Ghoulish Oreo Ghosts
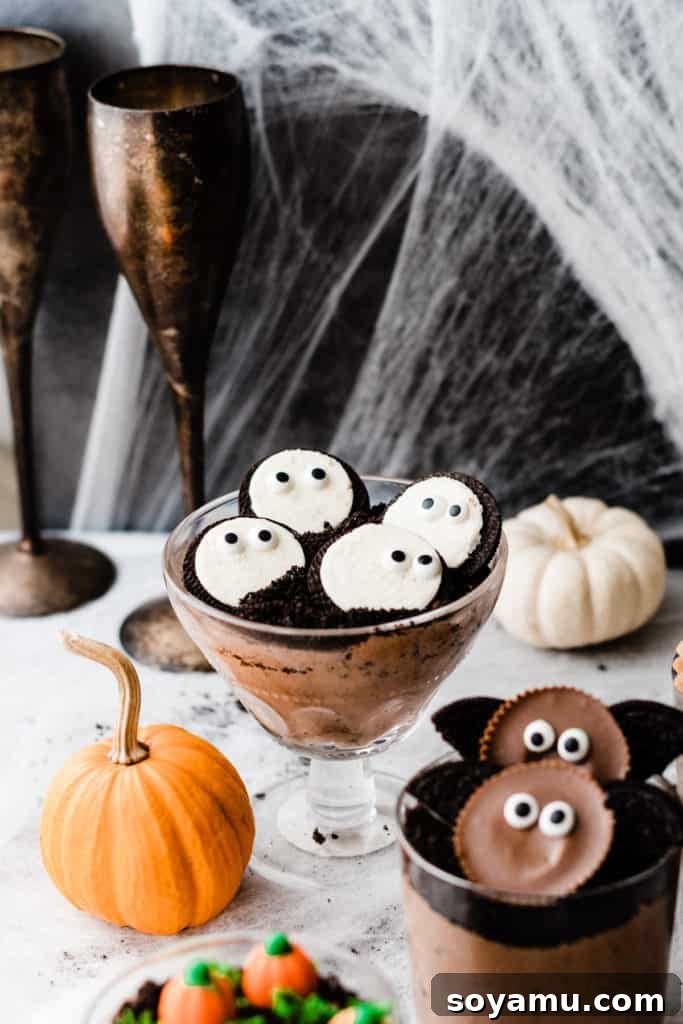
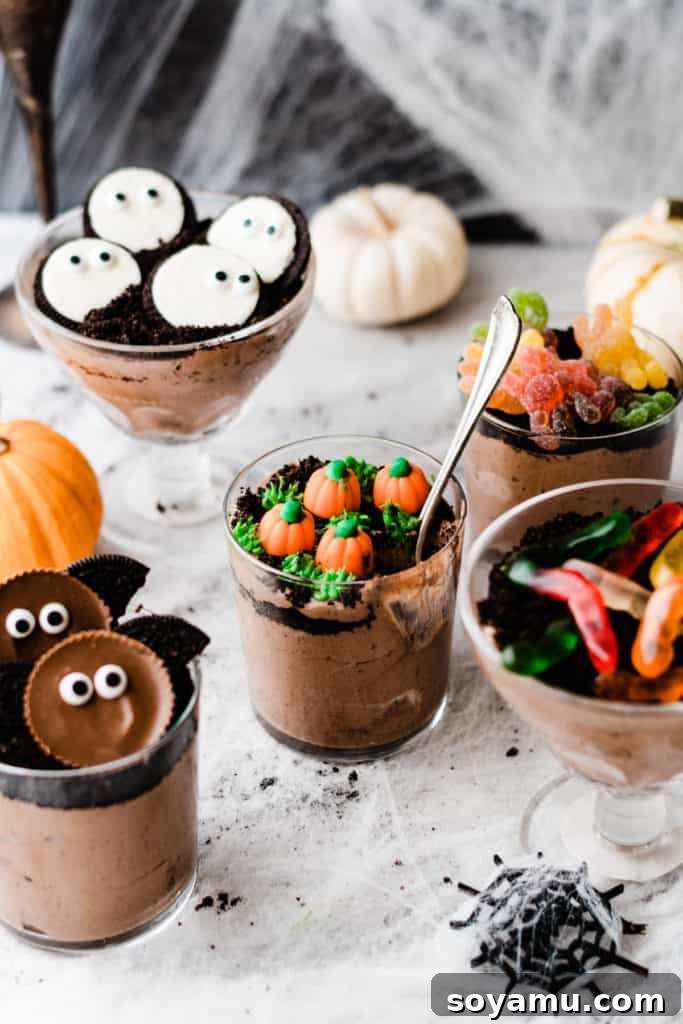
These adorable ghosts are a quintessential Halloween treat and incredibly simple to create. Take an Oreo cookie and gently twist the two halves apart, making sure to keep the white cream filling intact on one side. This cream-filled half will form the body of your ghost. To give your ghost its spectral gaze, simply press two small candy eyeballs or mini chocolate chips onto the cream. You can then place these upright in your dirt cup, so they appear to be floating or peeking out from the “dirt.” For an extra touch of character, a tiny dab of melted white chocolate or a dot of black edible marker can be used to draw a whimsical mouth.
2. Frightful Reese’s Cup Bats
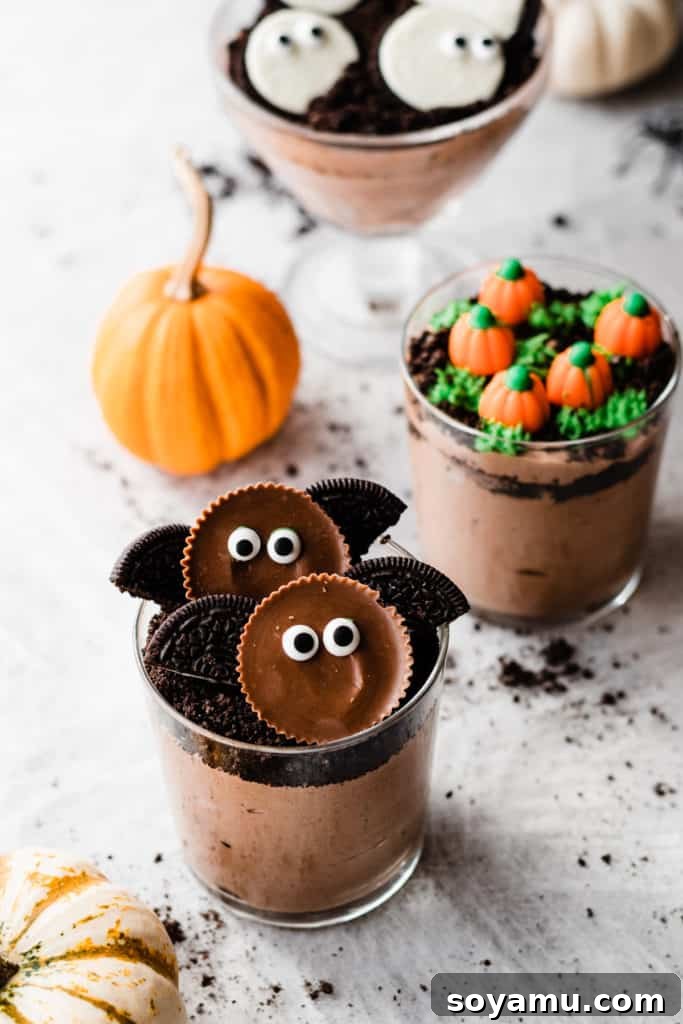
Don’t let the other half of those split Oreos go to waste! They are perfect for crafting spooky bat wings. Carefully slice each cream-less half-Oreo in half again, creating two crescent-shaped “wing” pieces. Next, take a Reese’s Peanut Butter Cup (standard or mini sizes work well, allowing for different bat sizes). Using a small dab of frosting – store-bought black icing in a tube works wonderfully for this – attach the Oreo “wings” to the back of the Reese’s cup. Finish by adding two small candy eyeballs to the front of the Reese’s cup for a truly captivating stare. Position these bats so they appear to be flying or emerging from the dirt, adding a dynamic element to your dessert.
3. Charming Candy Pumpkin Patch
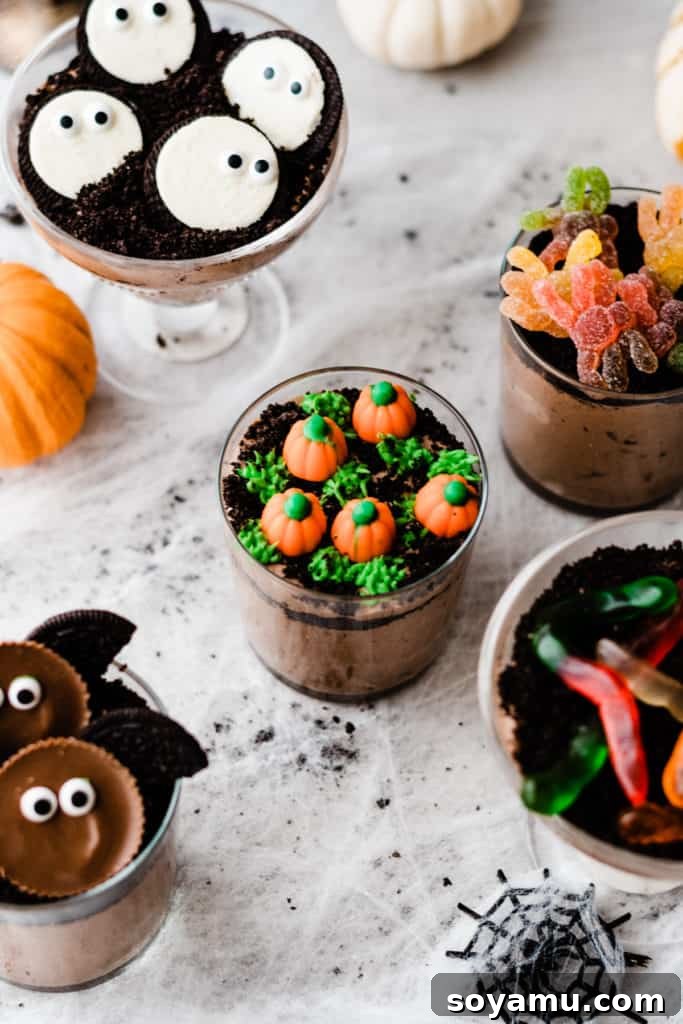
Transform your dirt cup into a miniature autumn wonderland with a charming candy pumpkin patch! Begin by piping some vibrant green frosting onto the top layer of your dirt cup. You can use a piping bag with a small round tip to create grass-like swirls or vines, or simply snip the corner off a Ziploc bag for an easy DIY piping tool. Once your green “grass” is in place, strategically arrange an assortment of small candy pumpkins, candy corn, or other fall-themed candies on top. This creates a vibrant, festive, and utterly delicious “pumpkin patch” look that’s both cute and seasonally appropriate.
4. Creepy-Crawly Gummy Critters
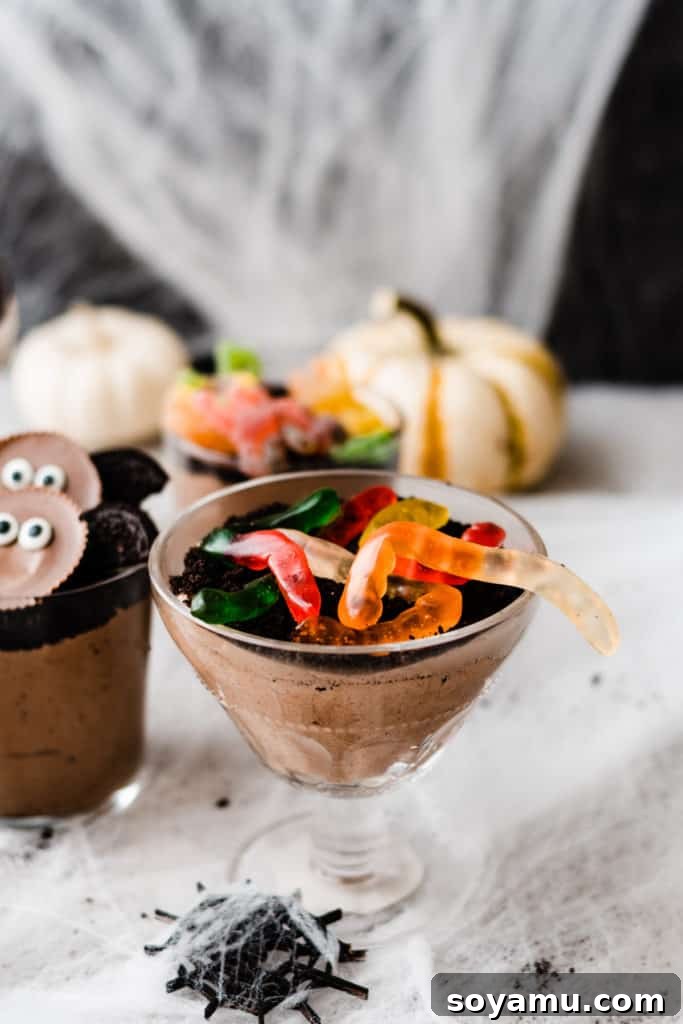
For those who prefer the absolute simplest yet still effectively spooky option, gummy candies are your best friend! This is a fantastic choice for last-minute decorating or when you want to involve very young children in the process. Simply purchase bags of gummy worms, gummy spiders, or even other creepy-crawly gummy creatures from your local candy aisle. Arrange them artfully on top of the crushed Oreo “dirt” layer. Some can be half-buried to appear as if they’re emerging from the ground, while others can be playfully crawling across the surface. Let your imagination guide you – the more unsettling, the better!
More Creative & Easy Topping Ideas:
- Graveyard Scene: Use rectangular cookies like Milano or Pirouette cookies as “tombstones.” Write “RIP” with an edible marker or a tiny amount of black icing.
- Spiderweb Design: Drizzle melted white chocolate or white icing in concentric circles on top of the dirt. Then, use a toothpick to drag from the center outwards, creating a classic spiderweb pattern. Finish with a plastic spider or a gummy spider.
- Witches’ Brew: Tint some extra Cool Whip or homemade whipped cream green with food coloring. Dollop it on top of the dirt, and add a few candy eyeballs to create a bubbling “witches’ brew” effect.
- Chocolate Rocks: Scatter some chocolate rocks or river pebbles candy on top for an extra realistic “dirt” texture.
- Candy Corn Accents: A few strategically placed candy corn pieces can add a classic splash of Halloween color and flavor.
- Mummy Heads: Use large marshmallows. Draw eyes with an edible marker, then wrap thin strips of white fondant or melted white chocolate around them to create mummy bandages.
No matter which decorations you choose, these Halloween Dirt Cups promise to be a fun, cute, and absolutely delicious treat that both adults and kids will adore. They’re a fantastic way to add a festive touch to any Halloween celebration, big or small, and create lasting memories.
Tips for Creating the Best Halloween Dirt Cups
While this recipe is incredibly forgiving, a few expert tips can elevate your Halloween Dirt Cups from great to absolutely spectacular:
- Chill Time is Critical: Do not rush the chilling process. Allowing ample time (at least 1-2 hours) for the pudding to set in the refrigerator is key to achieving a firm, scoopable, and delightful texture.
- Gentle Folding is Key: When incorporating the Cool Whip into the pudding mixture, use a gentle folding motion. Overmixing can deflate the whipped topping, resulting in a denser pudding texture.
- Quality Pudding Matters: While instant pudding mix offers convenience, choosing a good quality brand will significantly impact the overall flavor and richness of your dirt cups.
- Customize Your “Dirt” Consistency: For the crushed Oreos, some people prefer a very fine, flour-like crumb for uniform “dirt,” while others enjoy a mix of fine and slightly larger pieces for a more varied texture. Experiment to find your personal preference!
- Decorate Just Before Serving: For the freshest and most appealing look, add your delicate decorations (especially gummy candies, which can “melt” or get sticky over time, or cookie decorations that might soften) just before you plan to serve.
- Creative Serving Vessels: Don’t limit yourself to regular dessert cups! Small clear plastic cups, charming mason jars, or even brand new, clean mini flower pots with a small piece of foil at the bottom can make excellent and thematic serving containers, truly enhancing the “dirt” theme.
- Storage Savvy: Store any leftover dirt cups covered in the refrigerator. They are typically best enjoyed within 2-3 days for optimal freshness.
Frequently Asked Questions (FAQ) About Halloween Dirt Cups
Got questions? We’ve got answers to help you perfect your Halloween Dirt Cups!
Can I make these Halloween Dirt Cups ahead of time?
Absolutely! The pudding base can be prepared 1-2 days in advance and stored covered in the refrigerator. For the freshest appearance and best texture, it’s highly recommended to add the final crushed Oreo layer and any decorative toppings right before serving.
Can I use homemade pudding instead of instant pudding mix?
Yes, you certainly can! If you prefer to make pudding from scratch, simply ensure it’s cooled completely and has a thick, set consistency before folding in the Cool Whip and crushed Oreos. Adjust the sweetness if necessary, as instant mixes often contain more sugar.
Are there any dairy-free or vegan options for this recipe?
Yes, with a few substitutions, you can easily adapt this recipe to be dairy-free or vegan. Look for dairy-free instant pudding mix (ensure it’s suitable for plant-based milk), use your favorite plant-based milk (like almond, oat, or soy milk), and opt for a dairy-free whipped topping. Most Oreo varieties are surprisingly dairy-free, but always double-check the label for specific dietary needs.
What if I don’t have Cool Whip or prefer a different whipped topping?
You can readily substitute Cool Whip with freshly whipped heavy cream. To do so, whip 1 cup of cold heavy cream with 1-2 tablespoons of powdered sugar (or to taste) until stiff peaks form. Gently fold this into the pudding mixture as directed in the recipe.
How many servings does this recipe typically make?
The recipe as written, using one box of instant pudding and a standard tub of Cool Whip, usually yields approximately 6-8 individual dirt cups. The exact number can vary slightly depending on the size of your chosen serving containers.
Can I use other cookie flavors besides Oreos?
While Oreos are traditional for the “dirt” effect, you can absolutely experiment! Chocolate graham crackers, chocolate wafer cookies, or even different flavored Oreos (like peanut butter or mint) could provide an interesting twist. Just make sure they crush well to create that crumbly “dirt” texture.
Conclusion: Your Spooky Season Just Got Sweeter!
These Halloween Dirt Cups are more than just a dessert; they’re an experience. From the creamy, chocolatey depths to the playful, spooky decorations, they encapsulate the fun and spirit of Halloween in every single bite. Whether you’re hosting a ghoulish gathering, surprising trick-or-treaters with homemade goodies, or simply enjoying a quiet spooky movie night at home, these easy-to-make treats are sure to bring smiles, laughter, and perhaps a few delightful shivers.
So, gather your ingredients, unleash your inner ghoul or goblin, and let your creativity run wild. These Halloween Dirt Cups are a simple, fun, and delicious way to make your spooky season extra special. Have a happy, safe, and utterly delicious Halloween filled with sweet moments!