
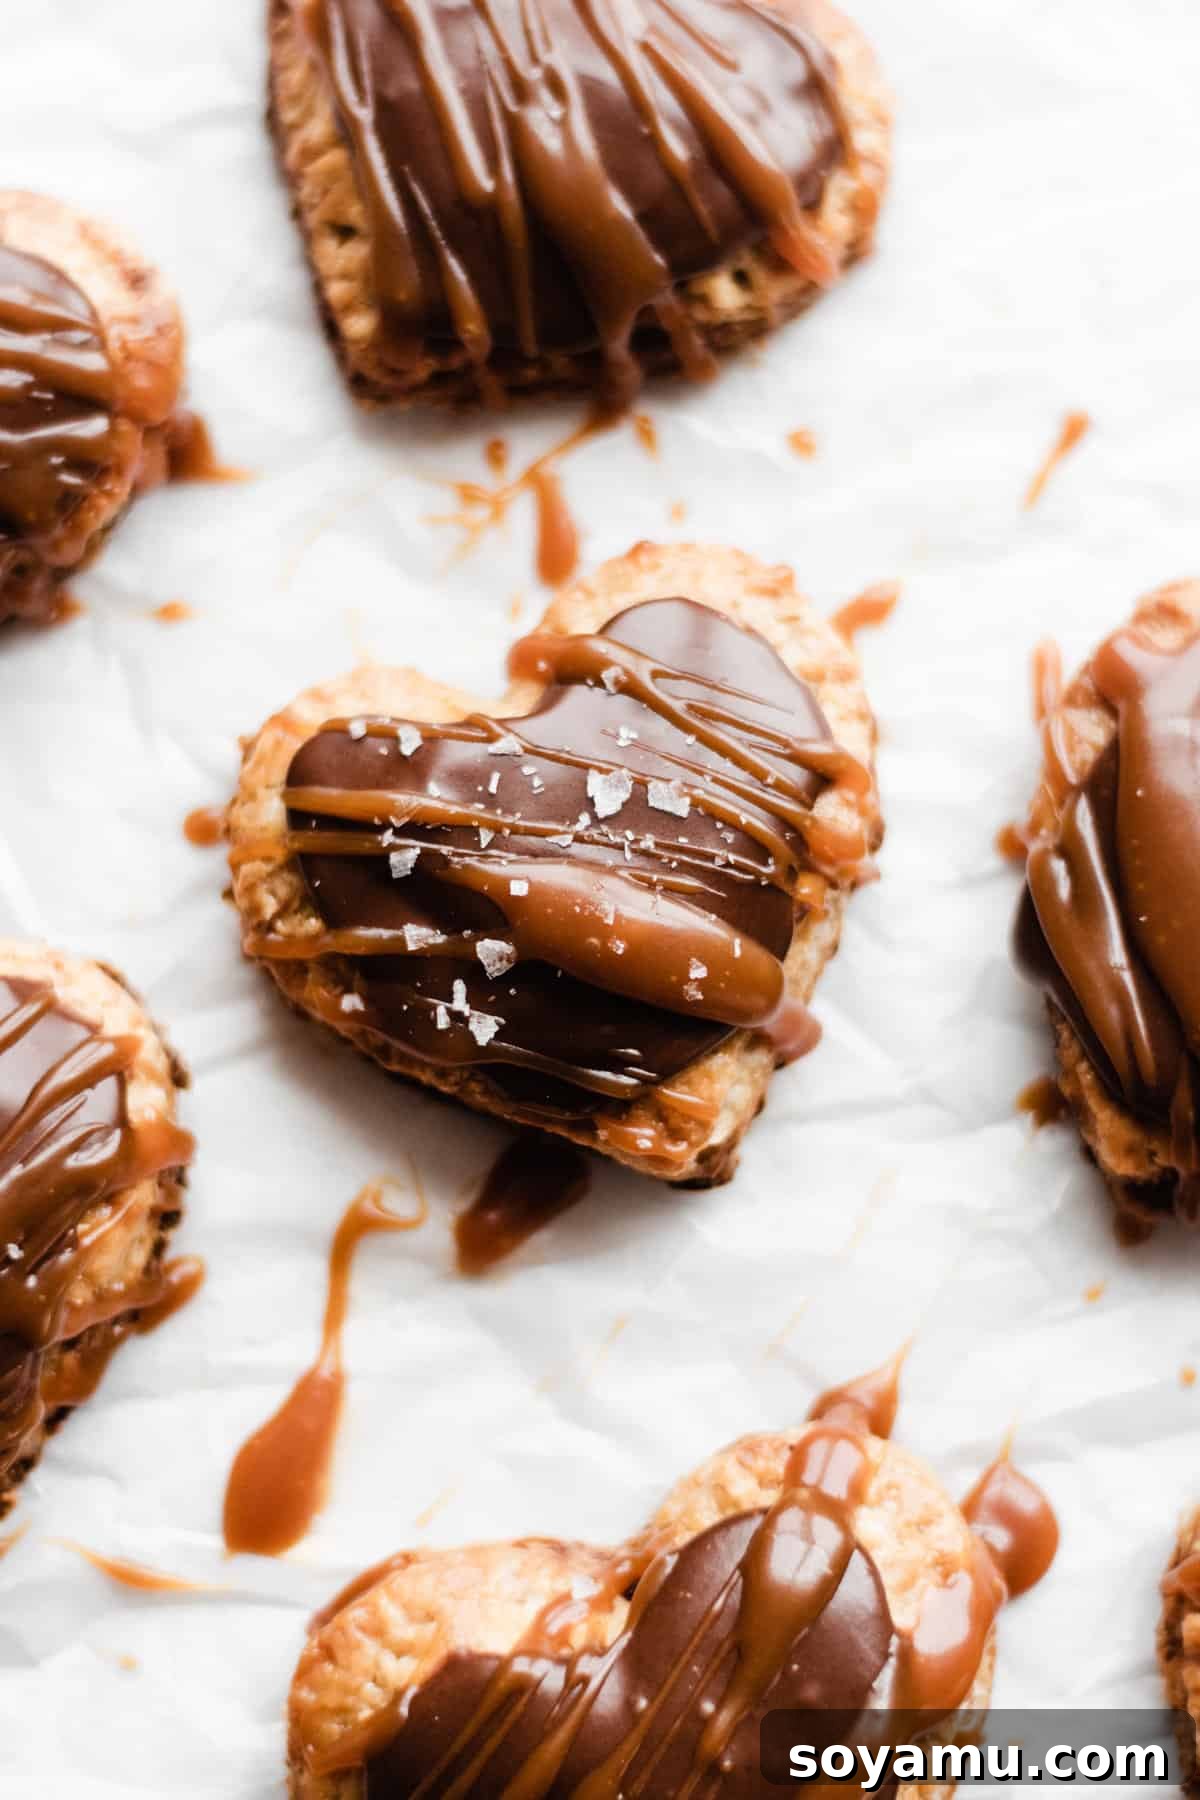
Prepare for an irresistible culinary journey with our **Homemade Nutella Pop Tarts**! These delightful pastries are a testament to the joy of baking from scratch, offering a truly superior experience compared to their store-bought counterparts. Imagine biting into a warm, ultra-flaky crust that gives way to a luscious, creamy Nutella filling. But we don’t stop there – each hand pie is then generously dunked in a simple yet decadent Nutella glaze and finished with a dreamy drizzle of rich salted caramel sauce. The result? The absolute ultimate treat, perfect for celebrating Valentine’s Day, a special weekend breakfast, or simply satisfying that deep craving for something truly extraordinary.
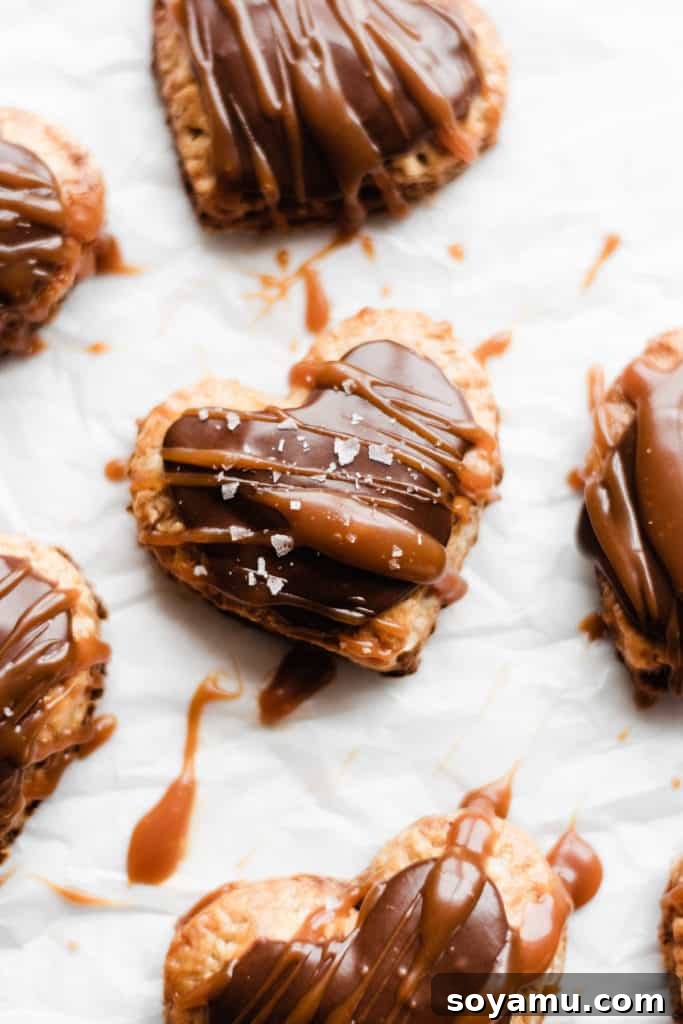
Homemade Nutella Pop Tarts: A Flaky, Chocolate Hazelnut Dream
Forget everything you thought you knew about toaster pastries. These homemade Nutella Pop Tarts redefine indulgence. With a buttery, crisp, and incredibly flaky pie crust embracing a generous layer of warm, gooey Nutella, each bite is pure bliss. The finishing touches – a smooth Nutella glaze and a hint of homemade salted caramel – elevate this simple concept into a gourmet experience. Whether you’re looking for a romantic Valentine’s treat, a special weekend breakfast, or just a truly satisfying dessert, these hand pies are guaranteed to impress with their rich flavor and delightful texture.
Why These Homemade Nutella Pop Tarts Will Steal Your Heart
- **An Unforgettable Taste Experience:** This isn’t just a dessert; it’s a revelation. The delicate layers of the golden-brown crust, created by carefully working cold butter into the dough, provide an unparalleled flakiness. This perfectly complements the rich, melt-in-your-mouth Nutella filling. Add to that the balanced sweetness of the Nutella glaze and the sophisticated sweet-and-salty notes of the caramel, and you have a flavor profile that is utterly swoon-worthy. It’s the kind of treat that creates lasting memories and earns you endless compliments from anyone lucky enough to try one.
- **Far Superior to Store-Bought Varieties:** While convenient, pre-packaged pop tarts simply cannot compare to the authentic, fresh taste and texture of the homemade version. Our recipe delivers a pastry that is light-years ahead in terms of flakiness, flavor depth, and overall quality. You’ll achieve a crisp, tender crust and a rich, creamy filling that tastes genuinely homemade. Plus, there’s an undeniable satisfaction that comes from creating such a delicious treat from scratch in your own kitchen.
- **The Perfect Treat to Share for Any Occasion:** These adorable hand pies, especially when cut into festive shapes like hearts, make them ideal for sharing. Imagine surprising your loved ones with a batch for a special Valentine’s Day breakfast, packing them in lunchboxes for a delightful school or work snack, or bringing them to a brunch gathering. They’re versatile enough to be enjoyed as a decadent breakfast pastry, a comforting afternoon pick-me-up, or a sophisticated dessert, effortlessly making you everyone’s favorite baker.
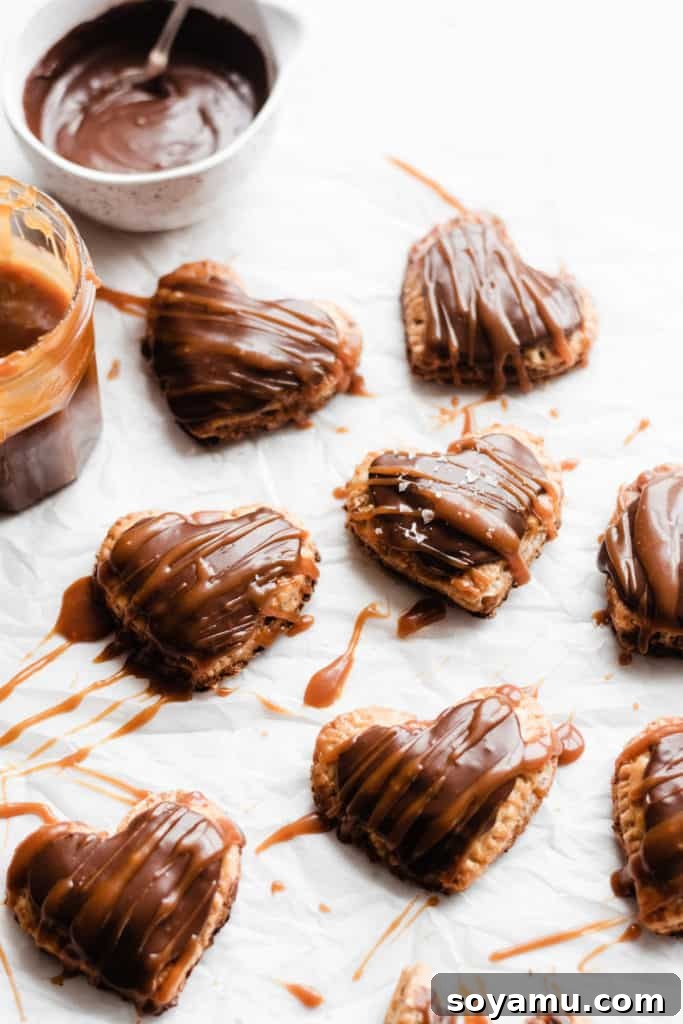
Key Ingredients for Your Nutella Pop Tart Adventure
Creating these delightful Nutella Pop Tarts begins with selecting the right ingredients. Here’s a detailed look at what you’ll need and some tips for achieving the best results:
- **All-Purpose Flour:** This forms the robust yet tender structure of our flaky crust. For precise measurement, spoon your flour into the measuring cup, then level it with a flat utensil. Even better, use a digital kitchen scale for gram measurements, which eliminates common errors. Scooping flour directly from the bag can compact it, leading to excess flour and a potentially dry, tough pastry. Our recipe also includes white whole wheat flour for added texture and nutrition, but you can use all all-purpose flour for a classic result.
- **Cold Salted Butter:** This ingredient is paramount for a truly flaky pie crust. Cold butter, when incorporated into the flour, creates tiny pockets within the dough. As the pop tarts bake, these butter pockets release steam, separating the dough layers and resulting in that coveted airy, crisp, and tender texture. We recommend salted butter for its enhanced flavor, which beautifully balances the sweetness of the Nutella. If using unsalted butter, consider adding an extra pinch of salt to your dough for flavor balance. Always ensure your butter is ice-cold, straight from the fridge, and cut into small pieces before you begin.
- **Creamy Nutella (or Your Favorite Chocolate Hazelnut Spread):** The star of our filling, Nutella delivers that iconic, rich chocolate-hazelnut flavor. You can opt for genuine Nutella or any other high-quality chocolate hazelnut spread you enjoy. The quality of your chosen spread will significantly impact the richness and overall taste of your pop tarts, so select one you truly love.
- **Milk (for the Glaze):** Whole milk is recommended for the glaze as its higher fat content contributes to a richer, smoother, and more luxurious consistency. However, if you prefer, 2% milk or even a non-dairy plant-based milk (such as almond or oat milk) can be successfully used. You may need to slightly adjust the quantity to achieve your desired glaze thickness.
- **Homemade Salted Caramel Sauce (Highly Recommended!):** While a good quality store-bought caramel sauce offers convenience, we wholeheartedly encourage you to try making your own. Our 10-minute Caramel Sauce recipe is incredibly straightforward and practically foolproof. The deep, complex flavor and silky-smooth texture of homemade caramel truly elevate these pop tarts from merely delicious to utterly extraordinary. Once you’ve experienced the homemade difference, you’ll likely never reach for the jarred variety again!
- **Ice Cold Water (for the Dough):** Crucial for pie crust success, just like the butter, the water used in your dough must be ice-cold. This prevents the butter from melting into the flour too quickly, which is vital for forming those distinct, flaky layers that define a perfect pastry.
- **Egg (for Egg Wash):** A simple egg wash, prepared by whisking one egg with a splash of water or milk, serves multiple purposes. It gives the pop tarts a beautiful, glossy golden-brown finish as they bake and helps to seal the edges of the pastries, ensuring the delicious Nutella filling stays securely inside.
Crafting Your Own Homemade Nutella Pop Tarts: A Step-by-Step Guide
Creating these delightful pastries is a rewarding process that yields incredible results. Follow these detailed steps to achieve perfect, flaky, and utterly delicious Nutella Pop Tarts:
Step 1: The Foundation – Master the Flaky Pie Dough
The secret to exceptional pop tarts truly lies in the crust. Our homemade pie dough is designed to be wonderfully flaky, intensely buttery, and deliver an irresistible crispness. If you’re new to making pie crusts from scratch, don’t be intimidated! The core principles are to keep your ingredients cold and work efficiently. For even more in-depth tips and troubleshooting advice, you can consult my dedicated post on How to Make Perfect Pie Crust.
Begin by whisking together your measured flours (whether a blend of white whole wheat and all-purpose, or solely all-purpose) and salt in a large mixing bowl. Next, take your ice-cold salted butter and cut it into tablespoon-sized chunks. Add these cold butter pieces to the flour mixture, tossing gently to ensure each piece is coated. Now, use a pastry cutter (this tool is highly recommended for best results) or two forks to cut the butter into the flour. Work quickly and deliberately until the mixture resembles coarse meal with some distinct pea-sized butter chunks still visible. These small pockets of butter are absolutely crucial for developing the desirable flakiness in your crust.
Gradually drizzle in 1/2 to 2/3 cup of ice-cold water, adding a little at a time and mixing gently with a fork after each addition. Make sure to scrape the bottom of the bowl for any dry spots. Stop adding water when the dough starts to come together easily and forms large clumps. It should feel pliable but should not be sticky or overly wet. A good test is to grab a handful of the dough; if you can squeeze it and it holds its shape, it’s ready!
Gently bring the dough together to form a cohesive ball. You can work it a bit to smooth out some of the cracks, either in the mixing bowl or on a lightly floured counter. Slightly flatten the dough into a 1-inch thick disc. Wrap it tightly in plastic wrap and chill it in the refrigerator for at least 2 hours (or up to 2 days). If you’re in a hurry, you can place it in the freezer for 30-40 minutes. This chilling time is essential for two reasons: it allows the butter to firm up completely, and it gives the gluten in the flour time to relax, which makes the dough much easier to roll out and significantly contributes to its ultimate flakiness.
Step 2: Prepare Your Baking Station and Caramel
While your perfectly prepared pie dough is chilling, take a few moments to get your workspace ready for assembly. Line two large baking sheets with parchment paper or silicone baking mats. This crucial step prevents your delicious pastries from sticking and ensures they bake evenly. This preparation phase is also an excellent time to prepare your easy 10-minute Homemade Salted Caramel Sauce if you’ve opted to make it from scratch. Having your caramel ready will streamline the assembly and decorating process, allowing you to move seamlessly from one step to the next.
Step 3: Rolling Out the Dough and Shaping Your Pop Tarts
Once your dough has thoroughly chilled and rested, remove it from the refrigerator and let it sit at room temperature for about 10 minutes. This slight warming will make it just pliable enough to roll without cracking. Simultaneously, preheat your oven to 375°F (190°C).
Lightly flour a clean counter surface and your rolling pin. Unwrap the chilled dough and gently begin to roll it out in all directions. To prevent the dough from sticking and to ensure an even thickness, make sure to turn the dough every few rolls, re-flouring your counter and rolling pin as needed. Continue rolling until the dough is uniformly thin, approximately 1/8-inch thick. You’ll end up with a fairly large, impressive piece of dough.
Now, it’s time to cut out your individual pop tart shapes! For a wonderfully festive touch, especially if baking for a holiday like Valentine’s Day, I highly recommend using a heart-shaped cookie cutter. Alternatively, you could use a drinking glass for charming round pop tarts or cut out traditional rectangular shapes, similar to those featured in my homemade blueberry pop tarts recipe. Aim for a cookie cutter that is roughly 3 to 3.5 inches across. This size will help you achieve a similar yield (around 18 delicious hand pies) and ensure a consistent bake time. When cutting, try to arrange your shapes as close together as possible to minimize dough scraps and make the re-rolling process more efficient.

Once you’ve cut out your initial shapes, gently gather any dough scraps. Press them back together firmly but without overworking, then re-roll them out. You should be able to re-roll the dough up to two more times to get all the hearts you need. This method ensures you can create approximately 18 individual pop tarts, which means you’ll need 36 heart shapes in total – one for the bottom and one for the top of each delightful pie.
Step 4: Assembling Your Delicious Nutella Pop Tarts
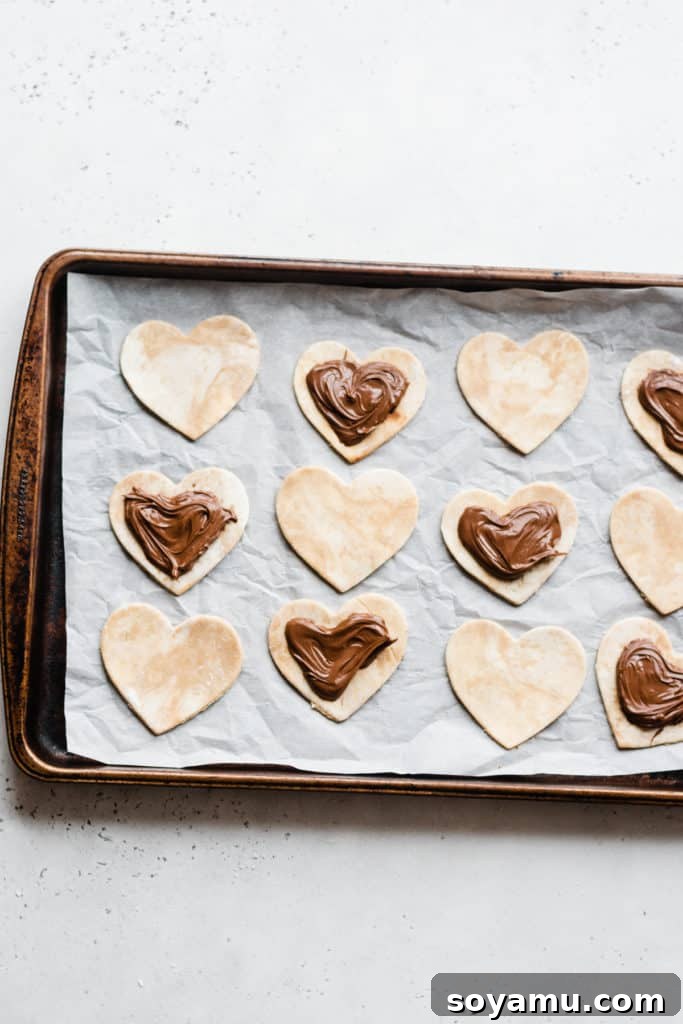
Carefully transfer 12 of your cut-out dough hearts onto one of the prepared baking sheets. This arrangement will allow you to assemble 6 pop tarts at a time. For each bottom heart, spoon a generous tablespoon of Nutella into the center. Be sure to leave a small, clear border around the edges of the dough; this space is crucial for creating a good seal.
In a separate small bowl, whisk together one egg with a splash of water or milk to create your egg wash. Using a pastry brush, lightly brush the exposed edges of each Nutella-topped heart with this egg wash. The egg wash acts as a glue, helping the two layers of dough adhere together securely. Place a second dough heart directly on top of each filled heart. Gently pinch the edges together with your fingertips to seal the Nutella inside and prevent any leakage during baking.
To create that classic pop tart look and ensure an even more secure seal, use the tines of a fork to firmly crimp all around the edges of each pastry. This not only makes them visually appealing but also reinforces the seal. Finally, brush the entire top surface of each assembled pop tart with the remaining egg wash. This last step will give them a beautiful, rich golden-brown sheen and a slightly crisp finish as they bake. For an added touch, you can also gently prick the top of each pop tart a couple of times with a fork to create small steam vents, which helps prevent excessive puffing and ensures even baking.
Step 5: Baking to Golden, Flaky Perfection
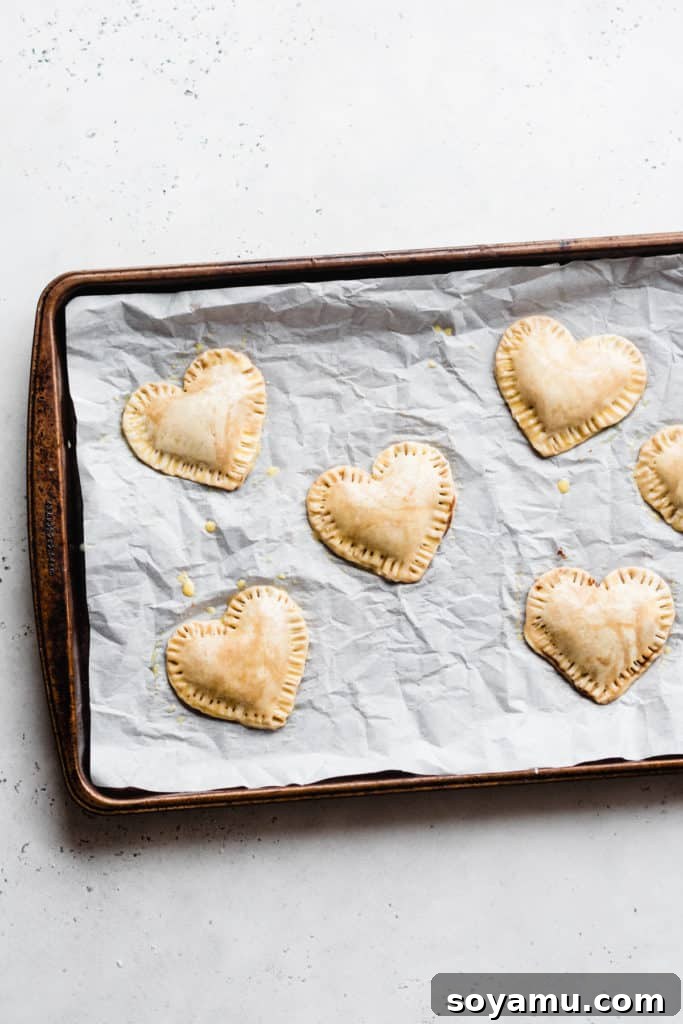
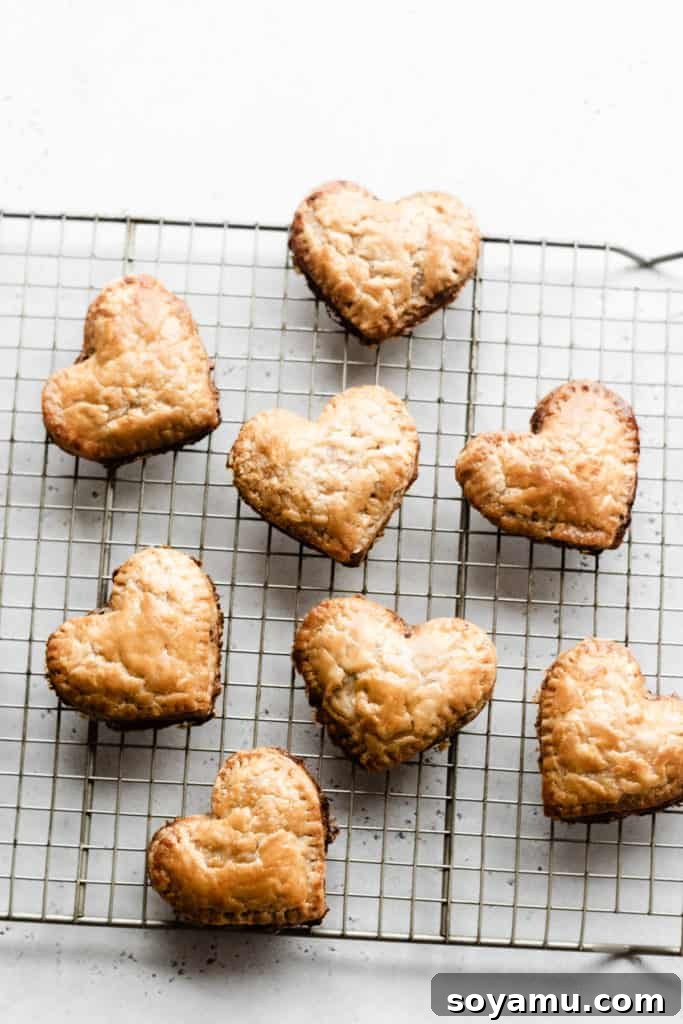
Carefully transfer your baking sheets with the assembled pop tarts into the preheated 375°F (190°C) oven. Bake for approximately 22-25 minutes. The precise baking time may vary slightly depending on your oven and the exact thickness of your dough, so keep a close eye on them. You’re looking for the pastry crust to turn a beautiful, rich golden brown, indicating it’s perfectly cooked and wonderfully flaky. To ensure the bottoms are also crisp and golden, you can gently lift the edge of a pop tart with a cookie spatula to check its underside. Once baked, remove the pop tarts from the oven and transfer them to a wire rack to cool slightly before glazing.
Step 6: Whipping Up the Rich Nutella Glaze
While your pop tarts are baking and beginning to cool slightly, this is the perfect time to prepare the irresistible Nutella glaze. In a small mixing bowl, combine the Nutella, cocoa powder, milk, and powdered sugar. Whisk all the ingredients together vigorously until the mixture is completely smooth, glossy, and free of any lumps. If the glaze appears too thick for easy spreading, you can add a tiny bit more milk, a quarter teaspoon at a time, until you reach your desired consistency. Conversely, if it seems too thin, incorporate a touch more powdered sugar. This simple yet decadent glaze adds an extra layer of chocolate-hazelnut flavor and provides a beautiful, professional-looking finish to your homemade pastries.
Serving Suggestions and Storage Tips
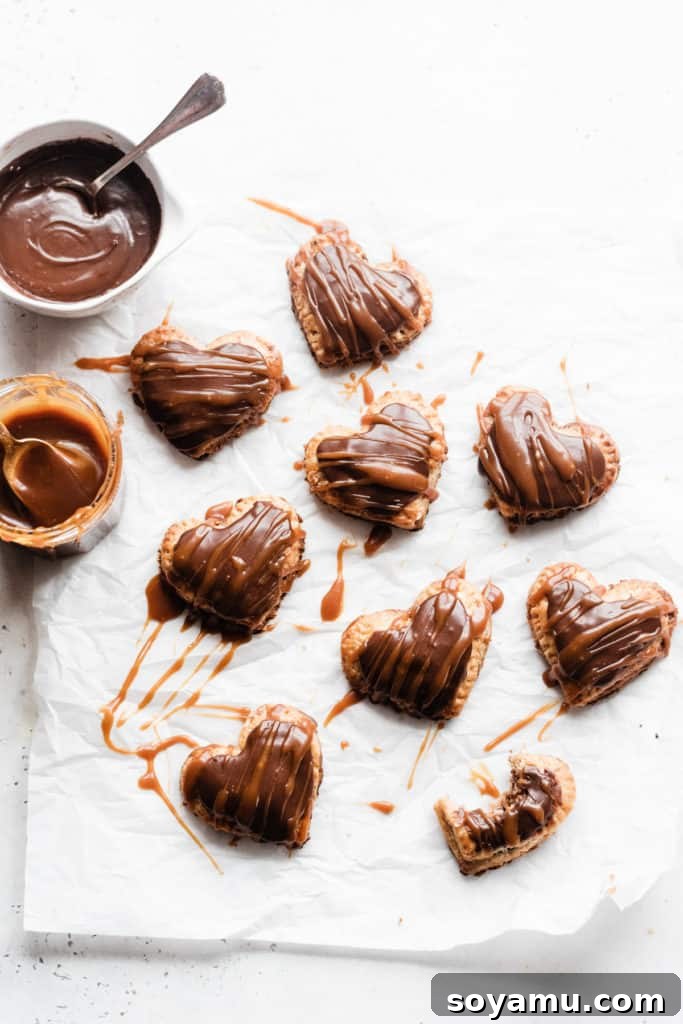
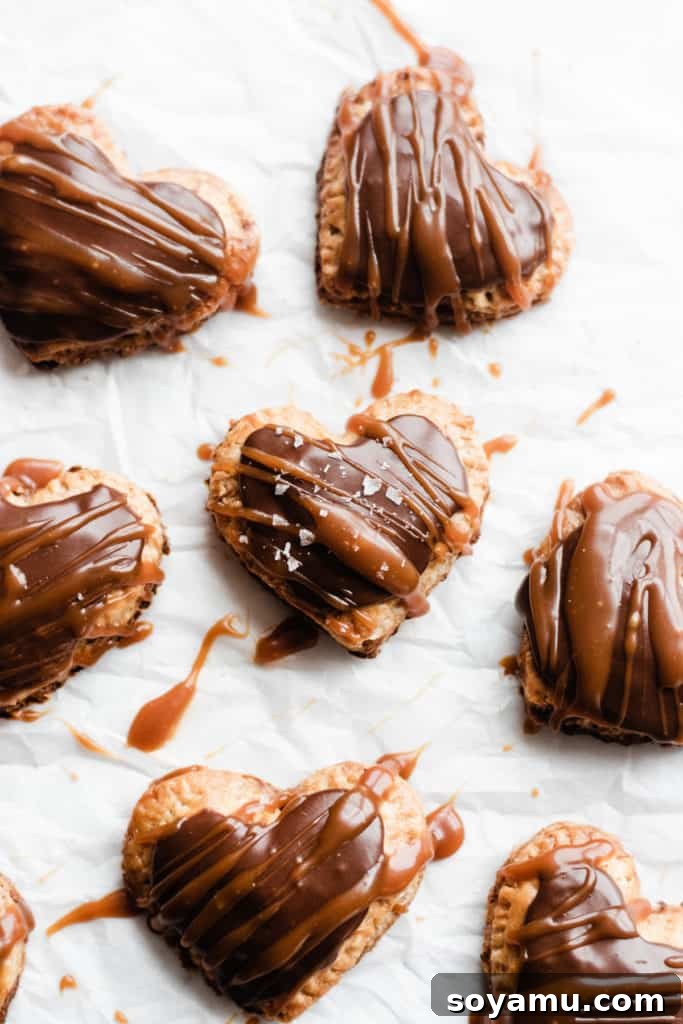
This is a crucial directive: you absolutely *must* make every effort to enjoy these Homemade Nutella Pop Tarts while they are still warm from the oven! The warm, melted, gooey Nutella filling combined with the crisp, flaky crust is at its absolute peak immediately after baking. The experience is truly unparalleled. To serve, spread a generous amount of the warm Nutella glaze evenly over the top of each pop tart, then artfully drizzle with your homemade salted caramel sauce. For an extra touch of gourmet flair and to enhance the flavor profile, consider sprinkling a tiny pinch of flaky sea salt on top – it beautifully amplifies both the caramel and chocolate notes. Then, dive in and savor every heavenly bite!
While they are undoubtedly best enjoyed fresh, any leftovers can be cooled completely to room temperature. Once cool, store them in an airtight container in the refrigerator for 1-2 days. To refresh them and restore some of their warmth and crispness, a quick zap in the microwave or a few minutes in a toaster oven works wonders.
Make-Ahead Marvel: Freezing Homemade Pop Tarts
We understand that creating these incredible homemade pop tarts is a labor of love, and their optimal freshness is paramount. To make them more practical and accessible for busy schedules, you can strategically prepare them in advance and freeze them! Once your pop tarts are fully assembled – meaning they are filled, sealed, and crimped – but *before* you apply the egg wash, arrange them in a single layer on a cookie sheet. Place the sheet in the freezer until the pop tarts are completely solid. Once frozen, you can transfer them to an airtight container, placing sheets of wax paper or parchment paper between layers to prevent them from sticking together. They can be stored safely in the freezer for up to 2 months.
When you’re ready to bake them, there’s no need to thaw! Simply remove them from the freezer, place them directly onto your prepared baking sheets, brush them with the egg wash, and bake as directed in the recipe. Keep in mind that baking from frozen might require an additional few minutes of baking time to ensure they are thoroughly cooked and beautifully golden brown. This invaluable make-ahead tip ensures you can enjoy warm, fresh-from-the-oven Nutella Pop Tarts whenever the craving strikes, without having to commit to the full preparation time on the day you want to indulge.
Expert Baking Tips for Flawless Pop Tarts
Achieving bakery-quality homemade pop tarts is more accessible than you might think, especially with these expert tips and insights:
- **Invest in an Oven Thermometer:** Oven temperatures can be notoriously inaccurate, often running hotter or colder than the set temperature. An inexpensive oven thermometer is an indispensable tool that will accurately tell you the true temperature inside your oven. Consistent and precise oven temperature is vital for successful baking, particularly for delicate pastries like pop tarts that rely on specific heat for proper rise, flakiness, and even browning. Keep one in your oven at all times to continuously monitor its calibration.
- **Measure with a Kitchen Scale for Accuracy:** While cup measurements are provided in recipes, a digital kitchen scale is the gold standard for baking accuracy. Flour, in particular, can vary significantly in weight depending on how it’s scooped (e.g., directly from the bag vs. spooned and leveled). Using a scale ensures you have the precise amount of flour needed, preventing common issues like a dry or tough dough. This small investment can dramatically improve the consistency and quality of all your baking results.
- **Maintain a Cold Dough Environment at All Times:** This is arguably the most critical tip for achieving a truly flaky pie crust. Both your butter and water should be ice-cold when you begin the dough-making process. During mixing and rolling, strive to avoid overworking the dough, as the heat from your hands can prematurely melt the butter. If at any point the dough becomes too warm, soft, or difficult to work with, do not hesitate to pause and pop it back into the refrigerator for 15-20 minutes to re-chill. The colder the dough (and the butter within it) goes into the hot oven, the more steam is rapidly created, which is the magic behind those desirable, airy, distinct layers in your pastry.
- **Don’t Overfill Your Pastries:** While it’s tempting to load up your pop tarts with an abundance of Nutella, overfilling can lead to messy leaks and bursting pastries during baking. Stick to the recommended 1 tablespoon of Nutella per pop tart. This amount provides plenty of creamy filling while allowing for a secure seal around the edges, preventing any delicious Nutella from escaping.
- **Create Steam Vents:** After you have assembled and crimped the edges of your pop tarts, take a fork and gently prick the top of each pastry a couple of times. These small punctures act as vital steam vents, preventing the pop tarts from puffing up excessively and ensuring that the crust bakes evenly and maintains its shape.
Frequently Asked Questions (FAQs) About Nutella Pop Tarts
Can I halve this recipe?
Absolutely! This recipe, as written, yields a generous batch of 18 individual hand pies. If you’re baking for a smaller group, prefer a more manageable quantity, or simply want to enjoy freshly baked pop tarts more frequently, halving the recipe is a fantastic and practical option. Since homemade pop tarts are truly at their best when enjoyed on the same day they’re baked for maximum flakiness and freshness, a smaller batch might be ideal to ensure every single one is savored at its peak.
Can I use store-bought pie dough for Nutella Pop Tarts?
Yes, you absolutely can! While our homemade pie crust provides an unparalleled flaky texture and superior flavor, using ready-made, store-bought refrigerated pie dough is a perfectly acceptable and fantastic shortcut if you’re short on time, looking for a simpler approach, or less confident in making dough from scratch. Just ensure you choose a good quality refrigerated pie crust. Be aware that baking times might vary slightly with commercial doughs, so keep a close eye on your pop tarts until they are beautifully golden brown and cooked through.
What other fillings can I use for homemade pop tarts?
The beauty of homemade pop tarts lies in their incredible versatility when it comes to fillings! While Nutella is an absolute crowd-pleaser, feel free to get creative and experiment with other delicious options. Fruit preserves (like strawberry, raspberry, or apricot jam), apple pie filling, cherry pie filling, or even a simple cinnamon sugar mixture are all fantastic choices. If using fruit fillings, ensure they are not too watery, as excess moisture can lead to a soggy crust. You could also try delightful combinations, such as cream cheese and a berry jam, or a mixture of brown sugar and pecans for a nutty twist!
How do I prevent the Nutella from leaking out during baking?
Several crucial factors contribute to preventing any messy leaks during baking. First and foremost, avoid overfilling the pastries; stick precisely to the recommended 1 tablespoon of Nutella per pop tart. Second, ensure you brush the edges of the bottom dough piece with egg wash before placing the top layer; this acts as an effective glue to bind the two pieces of dough. Third, crimp the edges firmly all around the pastry using a fork to create a strong, sealed border. Lastly, make absolutely certain that your dough is well-chilled when it goes into the hot oven, as cold dough holds its shape much better and is less prone to letting the filling escape.
Essential Equipment for Your Pop Tart Project
A few key kitchen tools will not only make your pop tart baking experience smoother and more enjoyable but also contribute significantly to the success of your pastries:
- **Pastry Cutter:** While it’s possible to use two forks or your fingertips to cut cold butter into flour, a dedicated pastry cutter is by far the most efficient and effective tool. It quickly and evenly distributes the cold butter throughout the flour, which is crucial for achieving that coveted flaky texture in your pie crust.
- **Pastry Brush:** For an even and thorough coating of egg wash, which is essential for a beautiful golden-brown finish and secure seals, a quality pastry brush is indispensable. It allows for precise application without disturbing the delicate dough.
- **Rolling Pin:** A sturdy and comfortable rolling pin is absolutely essential for rolling out your dough to an even thickness. Consistency in thickness is key for uniform baking and flakiness.
- **Cookie Cutters:** While heart shapes are undeniably lovely and perfect for special occasions, having a variety of cookie cutter shapes (such as round, square, or rectangular) can add wonderful versatility to your pop tart creations, allowing for different aesthetics and portion sizes.
- **Baking Sheets & Parchment Paper/Silicone Mats:** These are fundamental for baking. Lining your baking sheets with parchment paper or reusable silicone baking mats prevents your delicious pastries from sticking and ensures easy cleanup.
- **Digital Kitchen Scale:** As mentioned in our expert tips, a digital kitchen scale is highly recommended for accurately measuring dry ingredients like flour, ensuring consistent and optimal results every time.
Explore More Handheld Dessert Creations
If you’ve fallen in love with the delightful experience of making (and devouring!) these Homemade Nutella Pop Tarts, you’re in for a treat with our other equally delicious handheld dessert recipes. We encourage you to explore more from our collection:
- S’mores Pop Tarts
- Homemade Blueberry Pop Tarts
- Strawberry Rhubarb Hand Pies
- Salted Caramel Peach Hand Pies
- Puff Pastry Caramel Apple Turnovers
- Cherry Hand Pies
- Homemade Chocolate Cake Pops
Did you make this recipe? We’d love to hear from you!
Please consider leaving a comment and a star rating below to share your experience with this recipe. Your valuable feedback helps our small business immensely and assists other home bakers in discovering and enjoying these delicious treats.
Homemade Nutella Pop Tarts with Nutella Glaze
Warm, ultra-flaky pastries filled with creamy Nutella, topped with a simple Nutella glaze and a drizzle of homemade salted caramel. The ultimate dessert or special breakfast treat that’s far superior to store-bought versions!
Yields: 18 pop tarts
Prep time: 45 minutes
Cook time: 22-25 minutes
Dough Chilling: 2 hours (or 30-40 minutes in freezer)
Total time: Approximately 3 hours 9 minutes (including essential chilling time)
Author: Stephanie Simmons
Ingredients
For the Flaky Pie Crust
- 1 cup (130 grams) white whole wheat flour (all-purpose flour can be substituted)
- 1 cup (130 grams) all-purpose flour, spooned & leveled or weighed
- ¾ tsp salt
- ½ cup + 6 tbsp (14 tbsp or 198 grams) cold salted butter, cut into tablespoon-size chunks
- ½ to ⅔ cup ice cold water
For the Creamy Nutella Filling
- 1 cup + 2 tbsp Nutella (or your favorite chocolate hazelnut spread)
For the Decadent Nutella Glaze
- 3 tbsp Nutella
- 1 tbsp cocoa powder
- 2 tbsp milk (whole milk recommended for richness)
- ¾ cup + 1 tbsp (93 grams) powdered sugar
Optional Toppings
- 1 batch salted caramel sauce (homemade recipe linked here)
- Flaky sea salt, for an exquisite flavor balance
Instructions
- Make the Pie Dough: In a medium mixing bowl, whisk together the flours and salt. Add the cold, tablespoon-sized butter chunks, tossing them to coat thoroughly. Use a pastry cutter or two forks to cut the butter into the flour until the mixture resembles coarse meal with some pea-sized butter bits remaining. Gradually add the ice-cold water, a little at a time, mixing gently with a fork after each addition until the dough just comes together into large clumps. Form the dough into a 1-inch thick disc, wrap it tightly in plastic wrap, and chill in the refrigerator for 2 hours (or 30-40 minutes in the freezer). This chilling step is vital for a flaky crust.
- Prepare Your Station: Line 2 large baking sheets with parchment paper or silicone baking mats. Prepare the homemade salted caramel sauce (if you are using it) while the dough chills, ensuring it’s ready for assembly.
- Roll Out the Dough: Preheat your oven to 375°F (190°C). Remove the chilled dough from the fridge and let it sit at room temperature for about 10 minutes to soften slightly. Beat one egg with a splash of water or milk to create the egg wash. On a lightly floured surface, roll out the dough to an even 1/8-inch thickness, turning and re-flouring as needed to prevent sticking. Use a 3-3.5 inch cookie cutter (such as a heart shape) to cut out your desired shapes. Gently press dough scraps back together and re-roll up to two additional times to get approximately 36 shapes (enough for 18 pop tarts).
- Assemble the Pop Tarts: Arrange 12 dough shapes on a prepared baking sheet (this will make 6 pop tarts). Spoon 1 tablespoon of Nutella onto the center of each bottom dough piece, leaving a small border around the edges. Brush these edges with the prepared egg wash. Place a second dough shape directly on top, gently pinch the edges to seal, and then firmly crimp all around the edges with a fork to create a secure seal and classic look. Brush the entire top surface of each assembled pop tart with egg wash. (Optionally, gently prick the tops a couple of times with a fork to create steam vents).
- Bake: Transfer the baking sheets to the preheated oven. Bake for 22-25 minutes, or until the pastry crust is beautifully golden brown and visibly flaky. You can gently lift the edge of a pop tart with a cookie spatula to check if the bottom is also golden and crisp. Once baked, carefully transfer them to a wire rack to cool slightly.
- Make the Glaze: While the pop tarts are baking and cooling, prepare the glaze. In a small bowl, whisk together the 3 tbsp Nutella, 1 tbsp cocoa powder, 2 tbsp milk, and ¾ cup + 1 tbsp powdered sugar until the mixture is completely smooth and creamy.
- Serve & Store: For the ultimate experience, spread a generous amount of Nutella glaze on top of each warm pop tart. Drizzle with salted caramel sauce and sprinkle with flaky sea salt, if desired. Serve and enjoy immediately! Store any cooled leftovers in an airtight container in the refrigerator for 1-2 days to maintain freshness.
- Make-Ahead & Freezing Tips: The pie crust can be made in advance, wrapped tightly, and frozen for up to 2 months. Thaw it overnight in the refrigerator before rolling out and using. For even greater convenience, fully assembled (but unbaked and un-eggwash-ed) pop tarts can be frozen flat on a cookie sheet until solid, then transferred to an airtight container with parchment paper between layers. To bake from frozen, simply brush with egg wash and bake as directed, adding a few extra minutes to the baking time as needed.
Notes
For more detailed assistance and troubleshooting tips specific to perfecting your pie crust, we highly recommend referring to our comprehensive guide: “How to Make Perfect Pie Crust.” This resource covers common challenges and provides solutions to ensure your crust is always flaky and delicious.
Nutrition Information (Approximate per Pop Tart)
Please note: Nutrition information provided below is an automatic calculation and should be used as an approximation. Actual values may vary based on specific ingredients and preparation methods.
- Serving: 1 pop tart
- Calories: 220 kcal
- Carbohydrates: 28g
- Protein: 3g
- Fat: 11g
- Saturated Fat: 9g
- Polyunsaturated Fat: 0.2g
- Monounsaturated Fat: 1g
- Trans Fat: 0.2g
- Cholesterol: 14mg
- Sodium: 147mg
- Potassium: 104mg
- Fiber: 2g
- Sugar: 16g
- Vitamin A: 161 IU
- Calcium: 31mg
- Iron: 1mg