
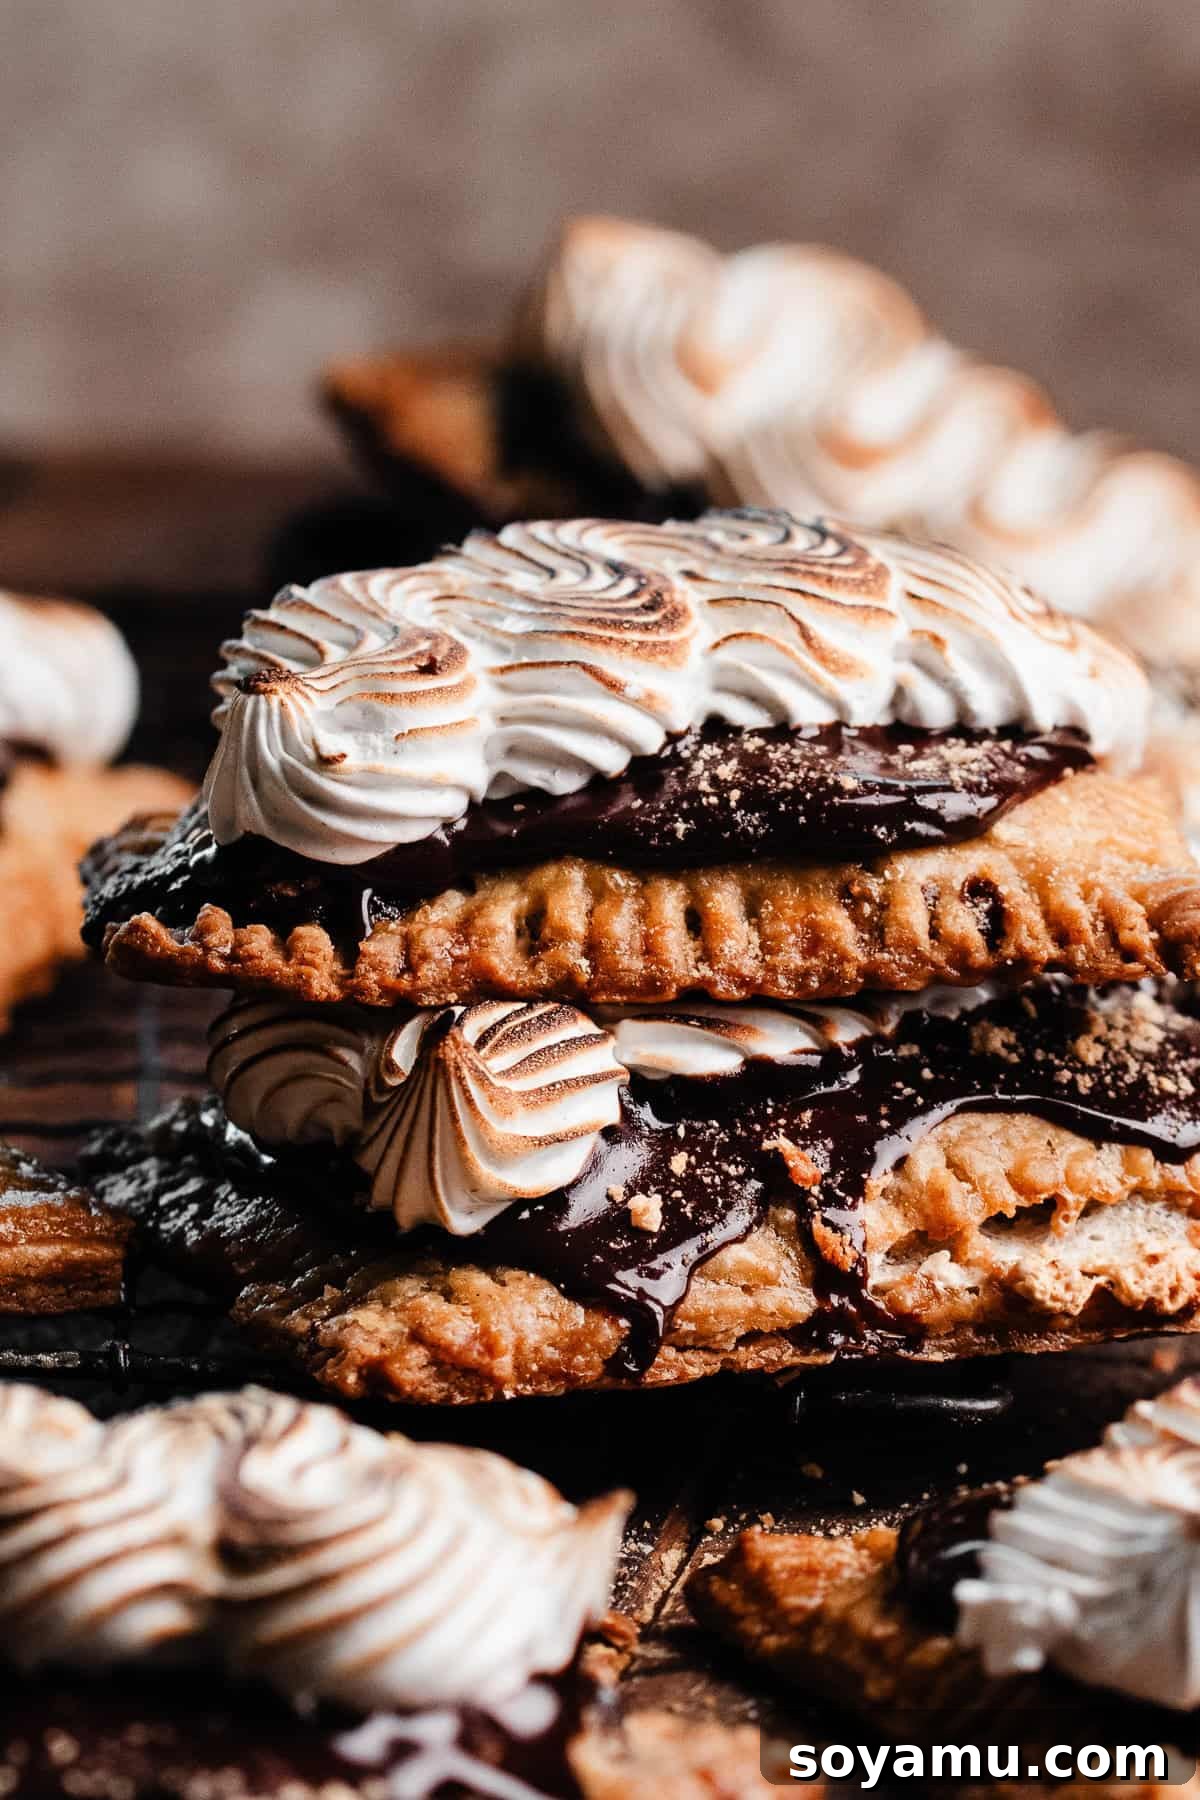
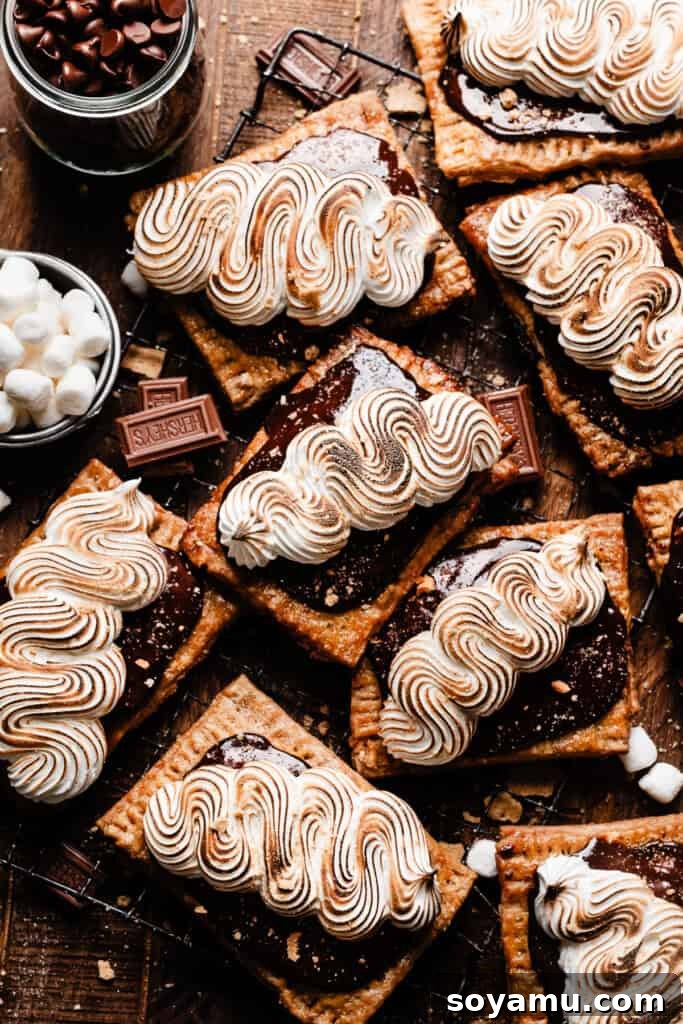
S’mores Pop Tarts are an irresistible fusion that captures the beloved essence of campfire s’mores and the nostalgic charm of classic breakfast pastries. Imagine a perfectly flaky, all-butter pie crust, infused with the delightful flavor of graham crackers. Inside, a luscious, rich chocolate fudge filling awaits, baked to perfection. But the indulgence doesn’t stop there! Each pop tart is generously frosted with more of that decadent fudge, then crowned with swirls of homemade, perfectly toasted marshmallow cream. A final sprinkle of graham cracker crumbs adds the ultimate touch, making every bite a trip down memory lane. These aren’t just pop tarts; they’re a gourmet s’mores experience designed to delight your taste buds and bring back cherished childhood memories.
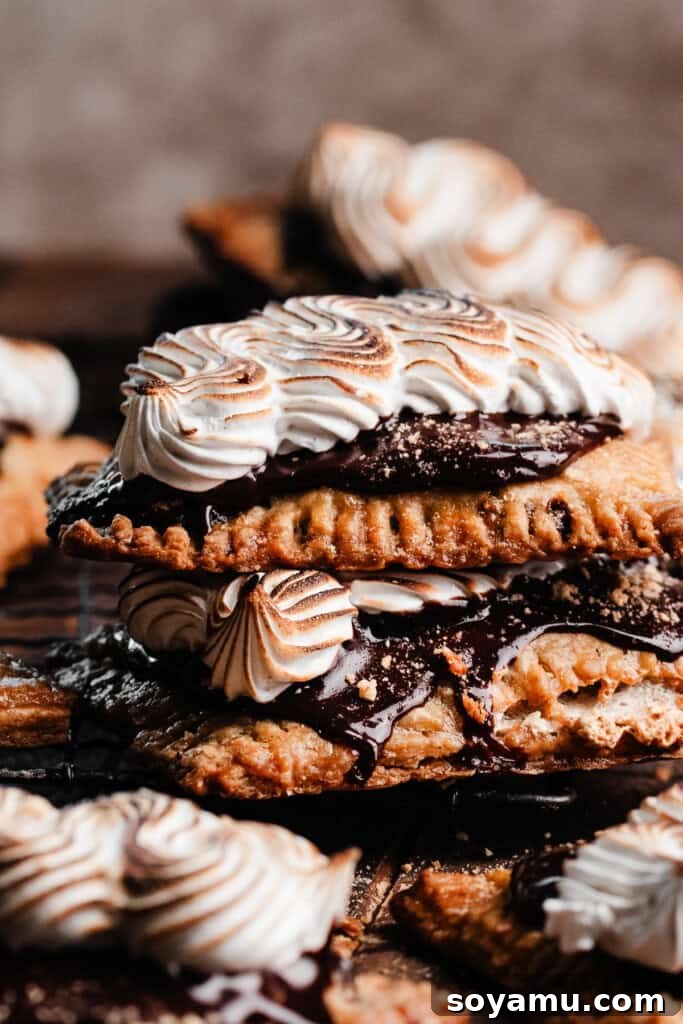
Why You’ll Fall in Love with These Homemade S’mores Pop Tarts
Step aside, store-bought treats! These homemade S’mores Pop Tarts offer all the comforting nostalgia of your favorite childhood snacks, but without any artificial flavors or preservatives. Every element is crafted to perfection, promising a truly decadent experience that the entire family will adore. Here’s what makes them an absolute must-try:
- Flaky Graham Cracker Pie Crust: We elevate the classic pie crust by substituting a portion of the flour with finely ground graham cracker crumbs. The result is a tender, buttery, and incredibly flaky crust that boasts a subtle, authentic graham cracker flavor – the perfect foundation for our s’mores creation.
- Rich Chocolate Fudge Filling: Forget thin, watery fillings. Our decadent chocolate fudge filling comes together in mere minutes on the stovetop. It’s rich, smooth, and deeply chocolatey, serving double duty as both the delightful center of the pop tart and a luxurious glaze on top.
- Cloud-Like Toasted Marshmallow Cream: The crowning glory of these pop tarts is the homemade marshmallow cream. Crafted using the Swiss meringue method, it’s surprisingly simple to make and transforms this dessert into a truly gourmet experience. Light, airy, and perfectly sweet, a quick toast with a kitchen torch unlocks that iconic s’mores flavor and aroma.
- A Taste of Childhood, Elevated: These pop tarts bring together the best of both worlds – the beloved flavor profile of s’mores and the convenience of a handheld pastry. They’re perfect for breakfast, a delightful snack, or an impressive dessert that will have everyone asking for more.
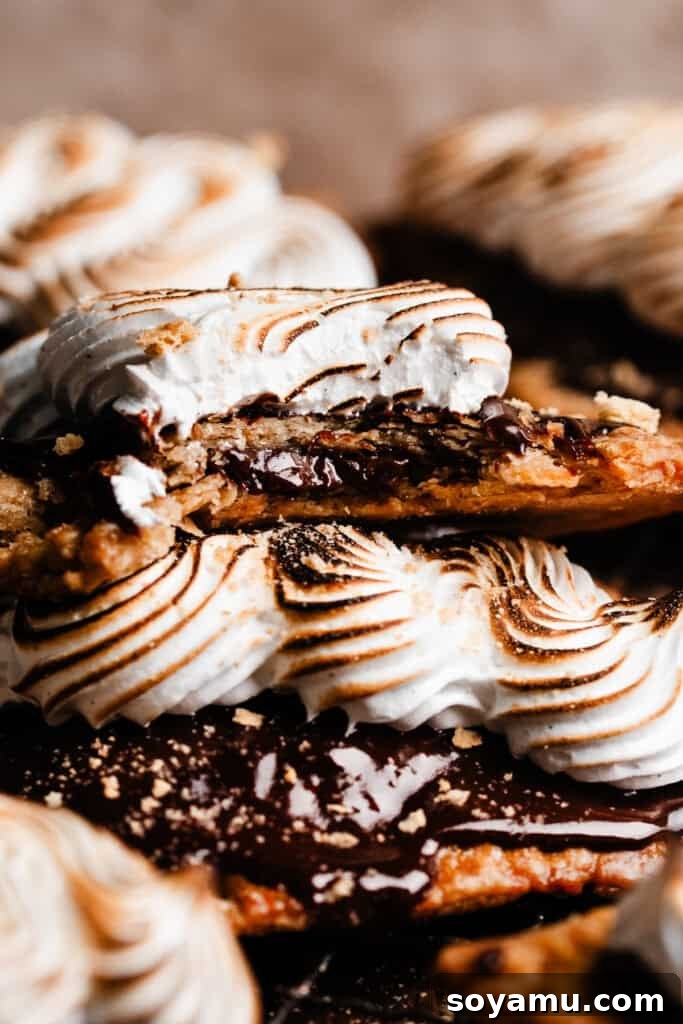
Ingredient Overview: Crafting Your S’mores Pop Tarts
To create these extraordinary S’mores Pop Tarts, you’ll need a selection of high-quality ingredients. While the full recipe with precise measurements and detailed instructions can be found in the recipe card at the bottom of this post, let’s take a closer look at the key components and why they matter for the perfect outcome.
- All-Purpose Flour: The foundation of our flaky crust. For best results and to avoid a dry pastry, always measure your flour correctly. Spoon it into the measuring cup and level it with a flat utensil, or even better, use a kitchen scale for precise weighing. Scooping directly from the bag can compact the flour, leading to an excess amount.
- Cold Butter: Both for the crust and the fudge filling, cold butter is essential. In the pie crust, cold butter creates pockets of steam during baking, which results in those coveted flaky layers. I prefer using salted butter for its enhanced flavor, but unsalted butter works perfectly fine if that’s your preference; just be sure to adjust any added salt in the recipe accordingly.
- Milk Chocolate: For that truly authentic s’mores experience, milk chocolate is key for the fudge filling. You can use milk chocolate chips for convenience or finely chopped milk chocolate bars for a smoother melt. Feel free to use your favorite brand; the quality of your chocolate will directly impact the richness of your filling.
- Milk: Any type of milk – dairy or non-dairy – will work beautifully for the fudge filling, providing the necessary liquid for a smooth, creamy consistency.
- Graham Cracker Crumbs: These are crucial for infusing our pie crust with that signature graham cracker flavor. You can purchase pre-made graham cracker crumbs for ease, or make your own by pulsing whole graham crackers in a food processor until they form fine crumbs.
- Large Eggs: Eggs play a vital role in both the marshmallow cream (egg whites for Swiss meringue) and as an egg wash for the pop tart crust, contributing to color and a beautiful sheen. Ensure your egg whites are at room temperature for the best meringue results.
- Vanilla Extract: Always opt for real vanilla extract (or vanilla bean paste for an even richer flavor) to enhance all the sweet notes in both the fudge filling and the marshmallow cream. It makes a significant difference compared to artificial alternatives.
- Granulated Sugar & Brown Sugar: Granulated sugar is vital for the marshmallow cream, while brown sugar adds depth and a hint of molasses to the chocolate fudge, complementing the s’mores profile.
- Cocoa Powder: Used in the fudge filling, unsweetened cocoa powder intensifies the chocolate flavor, giving it a rich, dark hue and a more complex taste.
- Salt & Cream of Tartar: A pinch of salt balances the sweetness in both the crust and the fillings. Cream of tartar is a secret weapon in Swiss meringue, helping to stabilize the egg whites and achieve that perfect, fluffy consistency.
Tailor-Made: Creative Recipe Variations for Your S’mores Pop Tarts
While I highly recommend making all components of these S’mores Pop Tarts from scratch for the ultimate flavor and texture, I understand that time isn’t always on our side. The beauty of this recipe lies in its flexibility; each key element – the crust, the chocolate filling, and the marshmallow topping – can be adapted with a store-bought shortcut if you’re in a pinch. If you need to cut corners, I’d prioritize swapping the marshmallow first, then the chocolate, and the pie dough as a last resort, as the homemade crust truly makes these pop.
- Gluten-Free Option: Although I haven’t personally tested a gluten-free version of my specific pie dough, you can easily adapt this recipe by using your favorite gluten-free pie dough recipe. Many excellent store-bought gluten-free pie crusts are also available and would work well here.
- Dairy-Free Adaptation: For a dairy-free version, you would need to replace the butter in both the crust and the fudge, as well as the milk. If you’ve had success using dairy-free butter alternatives in pie dough, feel free to try it here. Alternatively, opt for your preferred store-bought dairy-free pie dough and use a plant-based milk and dairy-free chocolate for the filling.
- Shortcut Pie Crust: Store-bought pie dough is a convenient alternative to homemade. Keep in mind that it won’t have the graham cracker flavor, but it will still provide a flaky base. You could also experiment with store-bought puff pastry for an even quicker preparation, which would yield a slightly different but equally delicious texture.
- Quick Chocolate Filling: If making the fudge filling seems too time-consuming, you can use pre-made chocolate bars. Simply break about three squares of a Hershey’s milk chocolate bar (or similar) onto the center of each pop tart before baking. For the topping, a simple chocolate glaze made from powdered sugar, cocoa, and a splash of milk would work as a speedy substitute.
- Easy Marshmallow Cream: Store-bought marshmallow creme (like Fluff) can replace the homemade Swiss meringue. Be aware, however, that its consistency is typically too soft to be piped into intricate swirls. You would likely need to simply spread it onto the pop tarts.
- Whole Wheat Flour Boost: For those looking to incorporate a healthier twist, you can swap out 1 cup of the all-purpose flour for white whole wheat flour in the crust recipe. This adds a nutty flavor and fiber without making the crust too dense or dry. Swapping all the flour for regular whole wheat flour might result in a drier, tougher crust.
How to Make This S’mores Pop Tart Recipe: A Step-by-Step Guide
Creating these delightful S’mores Pop Tarts involves several distinct steps, each contributing to the overall success of the final product. Follow this detailed guide for a smooth and enjoyable baking process.
Step 1: Prepare the Flaky Graham Cracker Pie Dough.
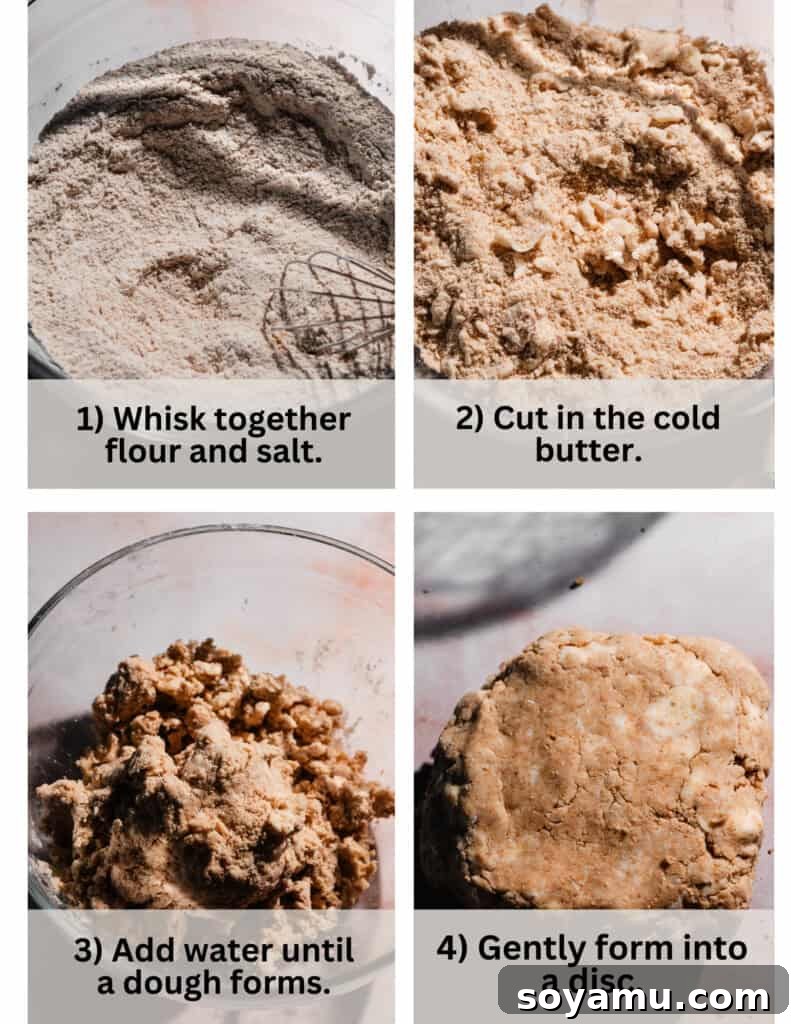
Begin by combining the all-purpose flour, graham cracker crumbs, and salt in a large mixing bowl. Next, cut in the very cold, cubed butter. You can use a pastry blender, your fingertips, or a food processor for this step. Work quickly until the mixture resembles coarse meal with some pea-sized butter pieces still visible – these are crucial for flakiness. Gradually add ice-cold water, a tablespoon at a time, mixing just until the dough comes together. Be careful not to overmix, as this can lead to a tough crust. Gently gather the dough into a ball, then flatten it into two equal discs. Wrap each disc tightly in plastic wrap and chill in the refrigerator for a minimum of 3 hours, or ideally, for about 24 hours. This chilling period is essential for the butter to firm up and for the gluten to relax, preventing shrinkage during baking and ensuring maximum flakiness.
Step 2: Craft the Rich Chocolate Fudge Filling.
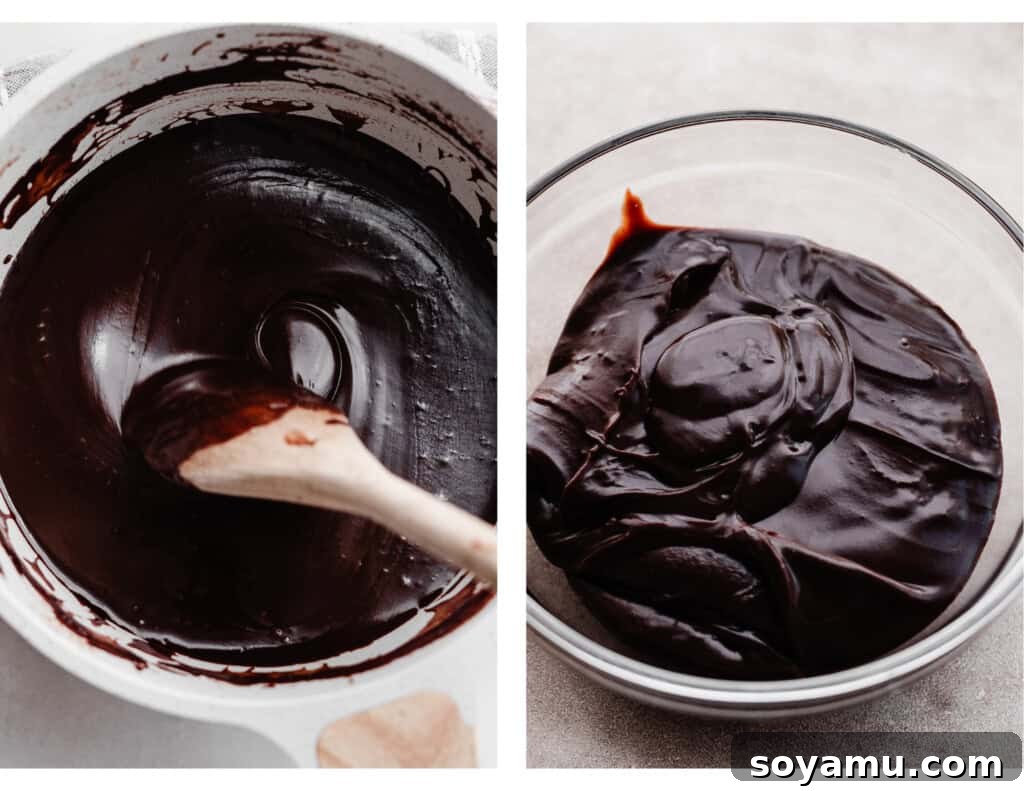
While your pie dough is chilling, prepare the irresistible chocolate fudge filling. In a small saucepan, combine the milk chocolate chips, cocoa powder, brown sugar, milk, and a pinch of salt. Place the saucepan over medium heat. Stir continuously to prevent scorching, allowing the chocolate to melt and the mixture to thicken. This should take approximately 5 minutes. The filling is ready when it’s thick enough to coat the back of a wooden spoon and leaves a clear trail when you run your finger through it. Remove from heat and stir in the vanilla extract and butter until fully incorporated and smooth. Transfer the fudge to a small bowl and let it cool completely in the refrigerator until it becomes firm. A firm filling is much easier to work with when assembling the pop tarts.
Step 3: Roll and Cut the Chilled Pie Dough.
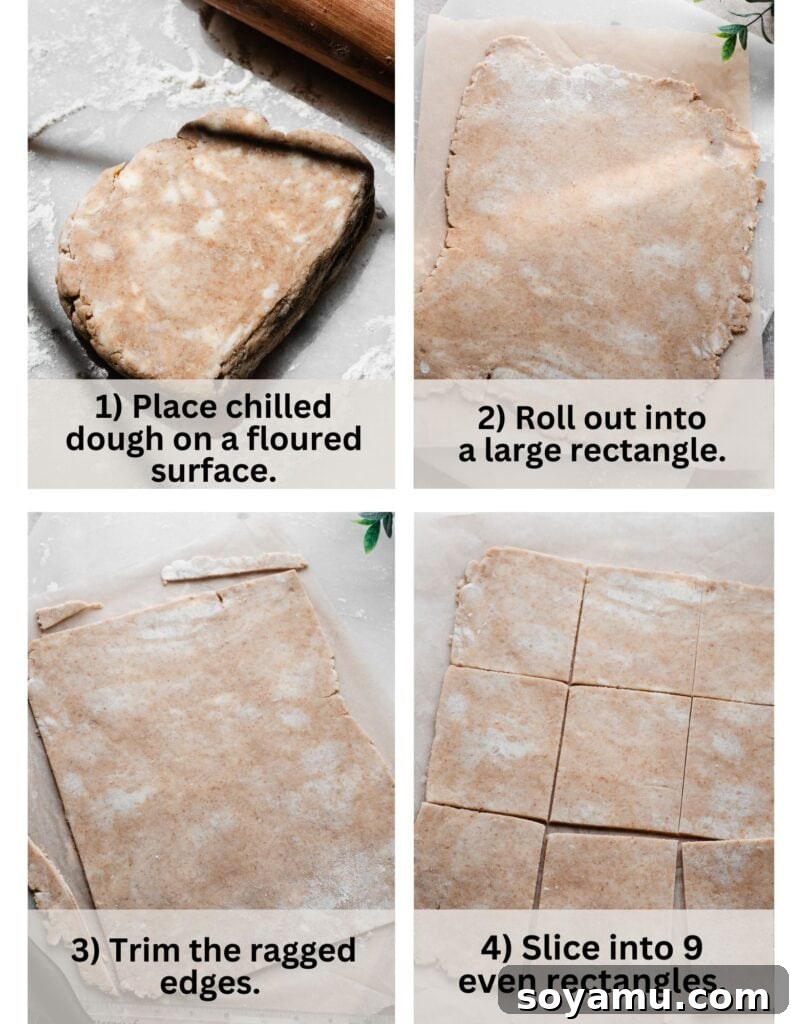
Once the dough has thoroughly chilled, it’s time to roll it out. Take one disc of dough from the fridge, keeping the other refrigerated to maintain its cold temperature. Lightly flour your work surface and rolling pin. Begin rolling out the dough, turning it frequently and reflouring as needed to prevent sticking. Patience is key here; you want to achieve an even thickness of about 1/8 inch. Once rolled to approximately 12 inches across, trim the ragged edges to form a rough rectangle. Then, using a ruler or a steady hand, cut the large rectangle into nine smaller, roughly even rectangles (around 3 x 4.5 inches each). Don’t worry if they’re not perfectly uniform – homemade adds to the charm! Carefully transfer these cut dough pieces to a parchment paper-lined baking sheet and return them to the refrigerator while you repeat the process with the second dough disc.
Step 4: Assemble and Bake Your Pop Tarts.
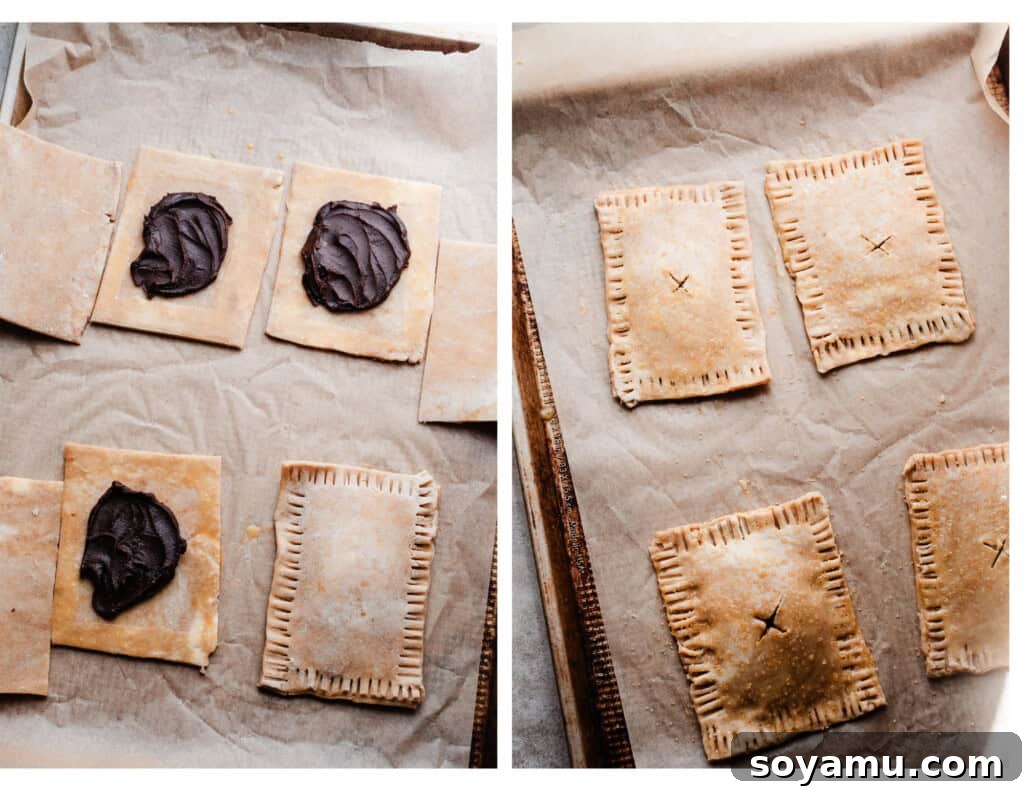
Preheat your oven to 375°F (190°C). Beat one large egg in a small bowl to create an egg wash. Arrange half of your dough rectangles (enough for 4 pop tarts, so 8 pieces) on a parchment paper-lined baking sheet, leaving some space between each. Spoon about 1 tablespoon of the now-firm chocolate fudge filling onto the center of four of the dough pieces, spreading it slightly but ensuring a clear border around the edges. Brush the exposed edges of these dough pieces with the egg wash – this acts as your ‘glue’ to seal the pop tarts. Carefully place a second dough rectangle on top of each filled piece, aligning the edges. Gently press down around the filling to remove any air pockets and then firmly pinch the edges together to seal. For a classic look and extra security, use the tines of a fork to crimp all the way around the sealed edges. Finally, cut a small vent slit in the top of each pop tart to allow steam to escape during baking. Brush the tops with more egg wash and sprinkle a little raw sugar for added crunch and sparkle. Crucially, return the entire baking sheet to the fridge for a final “safety chill” of 10-20 minutes. This last chill ensures the butter in the dough stays cold, guaranteeing maximum flakiness. Bake for 19-24 minutes, or until the crust is beautifully golden brown and firm to the touch. A small amount of filling may bubble out through the vents, which is perfectly normal. Transfer the baked pop tarts to a wire rack to cool completely before decorating.
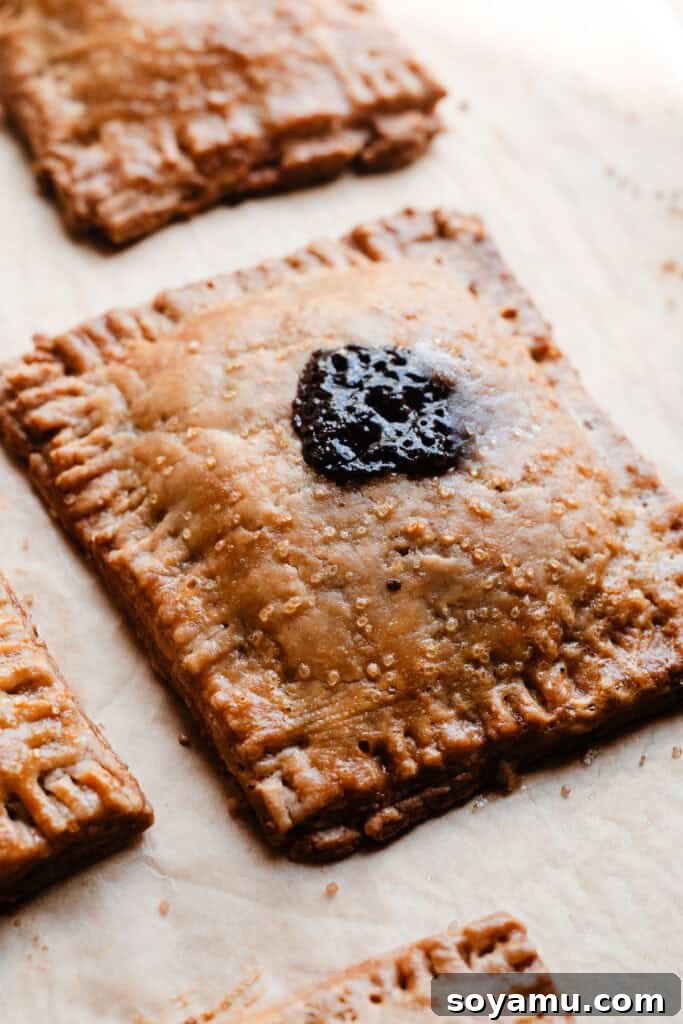
The freshly baked pop tarts will emerge from the oven golden brown and wonderfully crisp, with hints of the rich chocolate filling peeking through the vent slits. The aroma alone is utterly intoxicating, a promise of the deliciousness to come.
Step 5: Prepare the Homemade Marshmallow Cream.
For the ultimate s’mores experience, making your own Swiss Meringue (marshmallow cream) is incredibly rewarding and easier than you might think! It’s a key component that truly elevates these pop tarts. Follow my detailed Homemade Swiss Meringue recipe, which walks you through each step with helpful photos and expert success tips. Remember, Swiss meringue should be made just before you intend to use it, as it is most stable and pipeable when fresh.
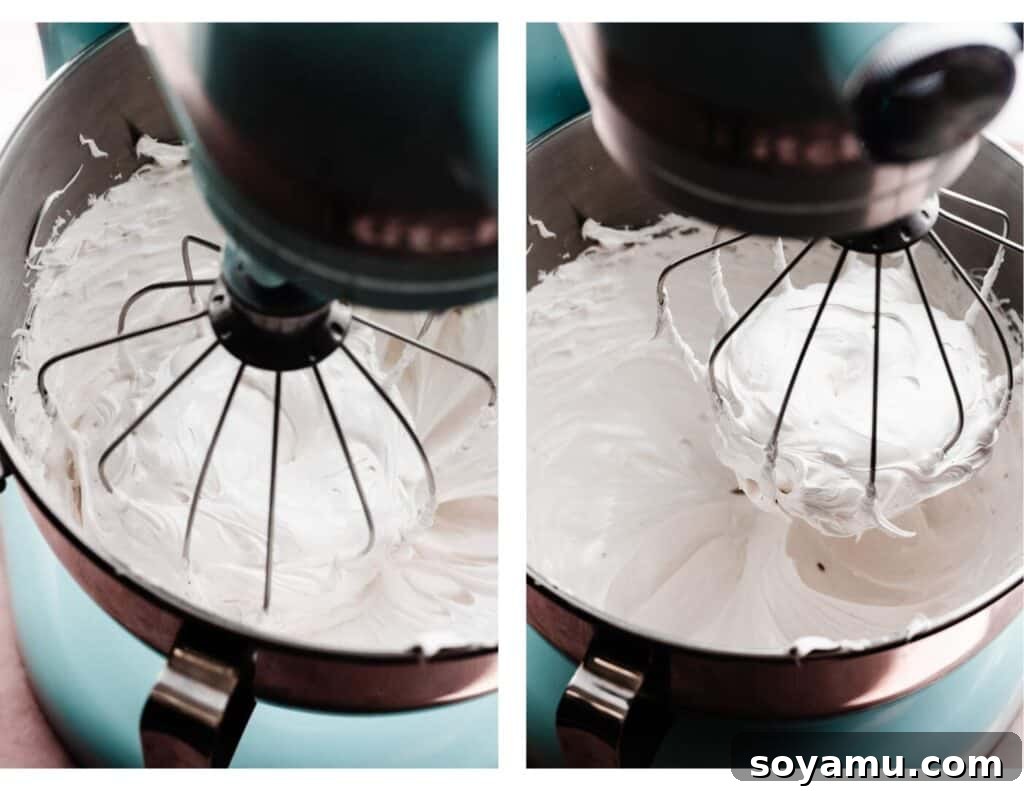
Step 6: Decorate Your Masterpiece.
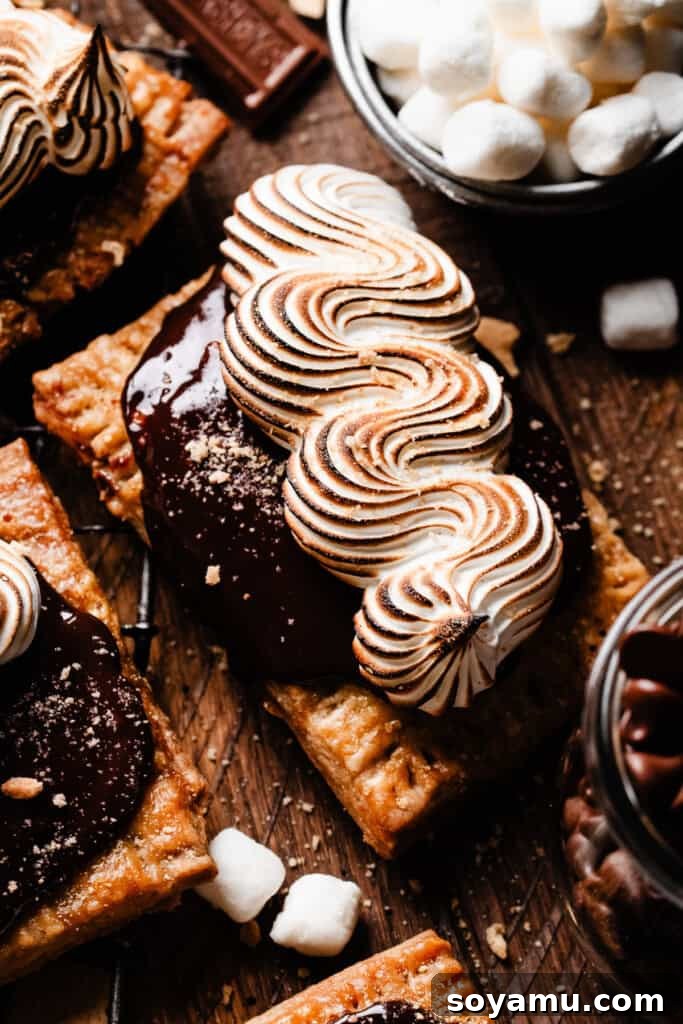
Once the pop tarts have cooled completely (you can speed this up in the fridge if desired), retrieve the remaining chocolate fudge filling. If it’s too firm, gently soften it in the microwave for a few seconds until spreadable. Spread a thin, even layer of this chocolate fudge over the tops of the cooled pop tarts. Immediately place the iced pop tarts back into the fridge for a few minutes to allow the chocolate topping to firm up. This is a crucial step: a cold, solid chocolate base prevents a messy situation when you toast the marshmallow later. Once the chocolate is set, transfer your freshly made marshmallow cream to a piping bag fitted with your desired tip (a Wilton 6B star tip works wonderfully for beautiful swirls). Pipe generous swirls or dollops of marshmallow cream onto each pop tart. Finally, use a kitchen blow torch to gently toast the marshmallow until it’s beautifully golden brown and slightly caramelized, mimicking that campfire char. Finish with a final sprinkle of extra graham cracker crumbs for texture and visual appeal. Your S’mores Pop Tarts are now complete!
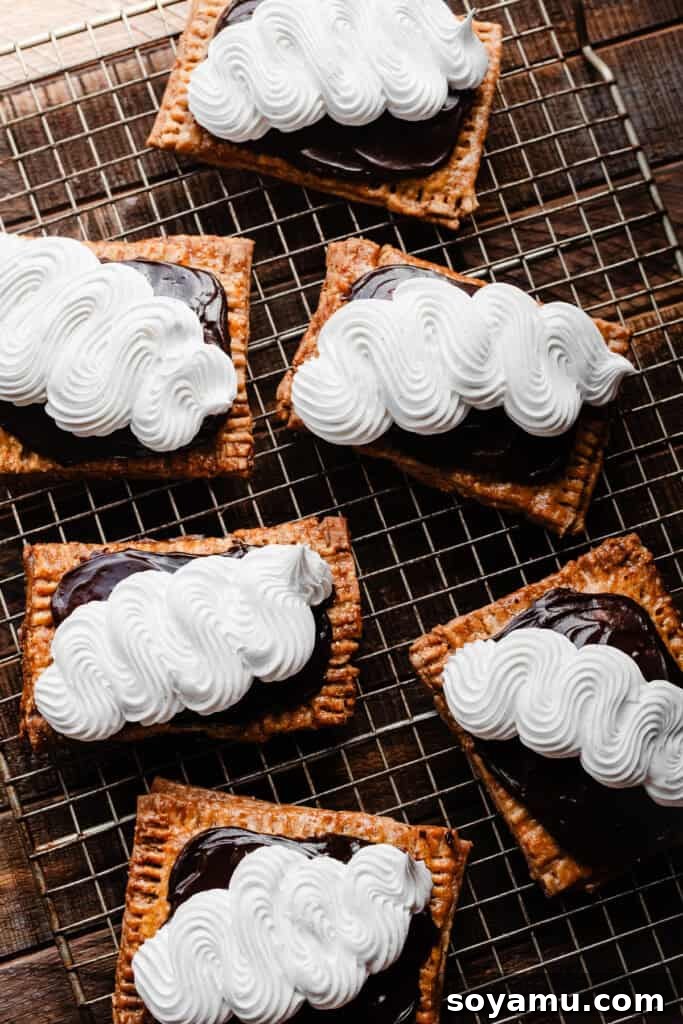
Serving & Storing Your S’mores Pop Tarts
These homemade S’mores Pop Tarts are best enjoyed immediately after adding and toasting the marshmallow cream. The warm, gooey marshmallow paired with the rich chocolate and flaky crust is an unparalleled experience. They make an exceptional breakfast treat, a satisfying afternoon snack, or a unique dessert. For the ultimate indulgence, serve them alongside a tall, ice-cold glass of milk. While it’s unlikely you’ll have many leftovers, any remaining pop tarts can be stored in an airtight container in the refrigerator for 2-3 days. Storing them chilled helps to maintain the crispness of the pie crust. Keep in mind that the marshmallow topping may soften over time, but the flavors will still be delightful.
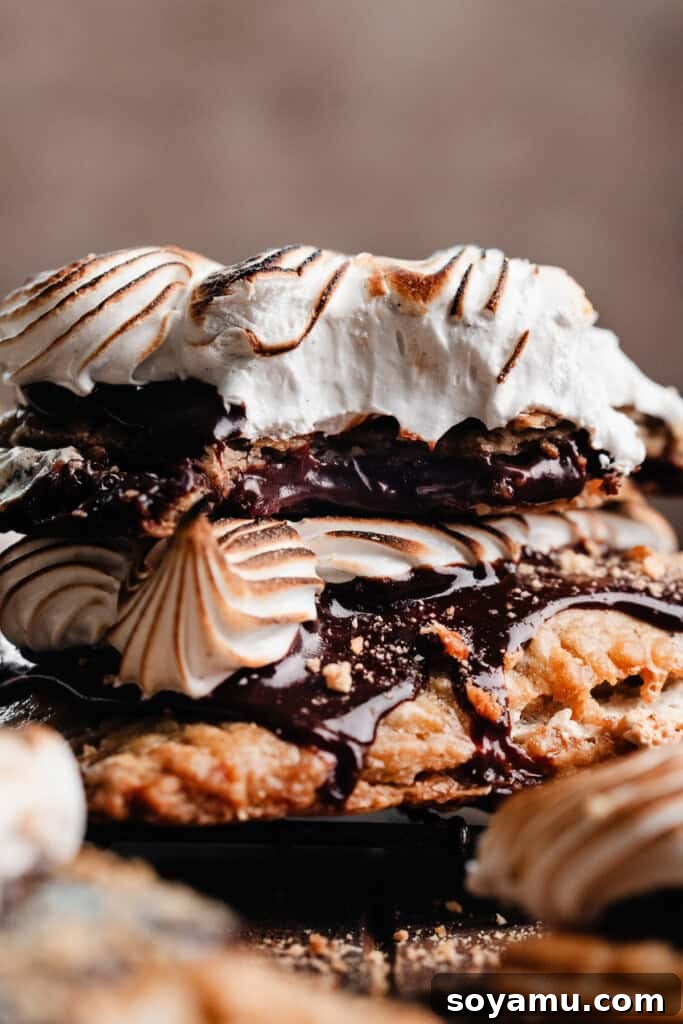
Unlock Perfection: Essential Baking Tips for S’mores Pop Tarts
Achieving bakery-quality S’mores Pop Tarts at home is entirely possible with a few expert tips. These foundational baking principles will ensure your crust is flaky, your filling is perfect, and your overall result is nothing short of amazing.
- The Golden Rule: Keep it Cold! This is the single most important tip for working with pie dough. From start to finish, you want to keep your butter and dough as cold as possible. The magic of flaky layers happens when the cold butter in the dough hits the hot oven, creating steam that puffs up the layers. If the butter melts before baking, you’ll end up with a tough, less flaky crust. Don’t hesitate to return your dough to the fridge or even the freezer for a few minutes if it starts to feel warm or sticky during rolling and assembly. Patience here truly pays off!
- Invest in an Oven Thermometer: Many home ovens are not calibrated accurately, meaning the temperature you set might not be the actual temperature inside. An oven thermometer is an inexpensive tool that will tell you your oven’s true temperature, ensuring your baked goods cook evenly and perfectly. Accurate oven temperature is vital for the proper baking of pie dough and the setting of the filling.
- Precision with a Kitchen Scale: While cup measurements are provided, a food scale is the most accurate way to measure dry ingredients like flour. The density of flour can vary significantly depending on how it’s scooped, leading to inconsistent results. Weighing ingredients ensures you’re using the exact amount specified, which is crucial for the delicate balance of pie dough.
- Don’t Overwork the Dough: After adding water to the pie dough, mix just until it comes together. Overworking the dough develops too much gluten, resulting in a tough, chewy crust rather than a tender, flaky one. Handle the dough as little as possible.
- Chill is Your Friend, Always: In addition to chilling the main dough discs, consider chilling the cut dough rectangles, and even the assembled pop tarts before baking. Each chill phase helps the butter solidify and the dough relax, contributing to a superior final texture.
- Proper Cooling is Key: While it’s tempting to decorate immediately, allow your baked pop tarts to cool completely on a wire rack. This allows the crust to set fully and prevents the chocolate fudge from melting into a messy puddle when applied.
- Parchment Paper for Easy Cleanup: Always line your baking sheets with parchment paper. It prevents sticking, ensures even baking, and makes cleanup incredibly easy.
Frequently Asked Questions About S’mores Pop Tarts
Absolutely! This recipe is quite flexible. You can easily double all the ingredient quantities to make a larger batch of S’mores Pop Tarts for a crowd, or halve them if you’re just looking for a small, indulgent treat. Just be sure to scale all ingredients proportionally.
Yes, certain components can be prepared in advance, making the assembly process quicker on baking day. The pie dough can be made up to 2 days ahead and stored tightly wrapped in plastic in the refrigerator, or frozen for up to 2 months. The chocolate fudge filling can also be prepared up to 3 days in advance and stored in an airtight container in the fridge. However, the homemade Swiss meringue (marshmallow cream) should be made just before you intend to pipe and toast it, as it is most stable when fresh.
While homemade truly offers the best flavor and texture, I completely understand that life gets busy! No judgment here if you need a shortcut. I’ve listed several store-bought substitutions for each element (crust, chocolate, marshmallow) earlier in this post, under the “Recipe Variations” section. Feel free to mix and match homemade and store-bought components to fit your schedule and skill level.
No blow torch? No problem! You can achieve a similar toasted marshmallow effect by placing the pop tarts under a broiler (grill) for a very short period. Keep a close eye on them, as marshmallow can burn quickly. Broil for 30-60 seconds, or until lightly golden, watching constantly. Alternatively, you can serve the marshmallow cream untoasted; it will still be delicious!
Special Tools to Enhance Your Baking Experience
While not all these tools are strictly necessary, they can significantly ease the process and improve the final outcome of your S’mores Pop Tarts. Consider these additions to your kitchen arsenal:
- Kitchen Blow Torch: In my opinion, this is a kitchen essential for any baker! It’s perfect for achieving that beautiful, caramelized toasted marshmallow or meringue effect on many desserts. Beyond these pop tarts, it’s fantastic for crème brûlée, or topping other s’mores-inspired treats like my S’mores Tart or S’mores Cake.
- Pastry Cutter: A pastry cutter makes incorporating cold butter into flour a breeze, ensuring those crucial small butter pieces for a flaky crust. It’s an invaluable tool for making pie doughs, scone and biscuit doughs, and even fruit crisp toppings.
- Rolling Pin: A good quality rolling pin is essential for evenly rolling out your pie dough.
- Piping Bag and Star Tip (e.g., Wilton 6B): While you can spread the marshmallow, a piping bag with a star tip creates beautiful, professional-looking swirls that elevate the presentation.
- Kitchen Scale: As mentioned in our expert tips, a kitchen scale is the most accurate way to measure ingredients, especially flour, ensuring consistent results every time.
- Oven Thermometer: To ensure your oven is truly heating to the correct temperature, an oven thermometer is highly recommended for all baking projects.
Indulge Further: More S’mores Recipes to Love
If you’re a true s’mores enthusiast, the deliciousness doesn’t have to end with these pop tarts! Explore these other fantastic s’mores-inspired recipes from my collection:
- Gooey Caramel S’mores Bars
- No-Bake S’mores Pie
- Marshmallow Stuffed S’mores Cookies
- Gooey S’mores Brownies
- S’mores Stuffed Skillet Cookie
- Skillet S’mores Dip
Did you make this delicious recipe? We’d love to hear from you!
Please consider leaving a comment and a star rating below. Your feedback helps my small business immensely and guides other bakers in their culinary adventures. Simply click the little stars in the header of the recipe card below to share your experience and rating. Thank you for your support!
S’mores Pop Tarts
Stephanie Simmons
1 hour
20 minutes
35 minutes
1 hour
55 minutes
11
pop tarts
Ingredients
For the Crust
- 2 cups all-purpose flour, spooned & leveled or weighed out, 260 grams
- 1 cup graham cracker crumbs, 130 grams (about 8-9 sheets of graham crackers)
- 1 cup + 2 tbsp salted butter, cold & cubed, 254 grams
- 7-8 tbsp ice cold water, 112 mL
- 3/4 tsp salt
For the Chocolate Fudge Filling
- 3 tbsp cocoa powder
- 3 tbsp brown sugar, 35 grams
- 1 cup milk chocolate chips, or Hershey’s bar pieces! 184 grams
- 1/2 cup milk, Any type of milk works here
- pinch of salt
- 1 tsp vanilla extract
- 2 tbsp salted butter
For Pop Tart Assembly
- 1 large egg, for egg wash
- 2-3 tbsp sugar, for sprinkling on top of pop tarts
Marshmallow Cream
- 2 large egg whites, at room temperature, Separate your eggs before bringing them to room temperature – they separate much easier when cold!
- 1 cup granulated sugar, 210 grams
- 1/2 tsp cream of tartar
- 1/8 tsp salt
- 1 tbsp vanilla bean paste, or vanilla extract
For Topping
- extra sprinkle of graham cracker crumbs
Instructions
-
Make the Graham Cracker Pie Dough: Prepare the dough according to the “For the Crust” ingredients above. Combine dry ingredients, cut in cold butter until pea-sized crumbs form, then gradually add ice water until a dough just comes together. Form into two discs, wrap tightly in plastic wrap, and chill in the refrigerator for at least 3 hours (or ideally 24 hours).
-
Make the Chocolate Fudge Filling: In a small saucepan, combine all “Chocolate Fudge Filling” ingredients except the 2 tbsp salted butter and vanilla extract. Cook over medium heat, stirring continuously, for about 5 minutes until the mixture thickens and coats the back of a spoon. Remove from heat, stir in vanilla and the remaining 2 tbsp butter. Transfer to a small bowl and cool completely in the fridge until firm.
-
Assemble the Pop Tarts: Preheat oven to 375℉ (190°C). Beat 1 large egg in a small bowl for egg wash. On a lightly floured surface, roll out one dough disc to about 1/8-inch thickness (approx. 12 inches across). Trim edges to form a rectangle, then cut into 9 smaller rectangles (approx. 3 x 4.5 inches each). Repeat with the second dough disc. Transfer dough rectangles to a parchment-lined baking sheet and chill.
Place half of the dough rectangles (bottom crusts) on a parchment-lined baking sheet. Spoon about 1 tbsp of the chilled fudge filling onto the center of each, leaving a border. Brush the edges with egg wash. Place the remaining dough rectangles (top crusts) over the filling, press down to seal, then crimp the edges with a fork. Cut a vent slit in the top of each. Brush tops with egg wash and sprinkle with sugar. Chill the assembled pop tarts for 10-20 minutes.
-
Bake: Bake for 19-24 minutes, or until the crust is lightly golden brown and firm when tapped. Transfer to a cooling rack and cool completely before frosting.
-
Make the Marshmallow & Finish Decorating: Once pop tarts are completely cool, spread a thin layer of the remaining chocolate filling on top (gently soften in microwave if needed). Pop iced pop tarts into the fridge to firm up the chocolate topping. Meanwhile, make the homemade marshmallow topping by following a Swiss meringue recipe. Transfer to a piping bag fitted with a star tip (e.g., Wilton 6B) and pipe onto the chilled, iced pop tarts. Use a kitchen torch to toast the marshmallow, then sprinkle on extra graham cracker crumbs.
-
Serve + Store: Enjoy immediately! Store any leftovers in an airtight container in the fridge for 2-3 days to maintain crust crispness.
Nutrition
Serving:
1
pop tart
,
Calories:
480
kcal
,
Carbohydrates:
60
g
,
Protein:
5
g
,
Fat:
26
g
,
Saturated Fat:
15
g
,
Polyunsaturated Fat:
1
g
,
Monounsaturated Fat:
5
g
,
Trans Fat:
1
g
,
Cholesterol:
68
mg
,
Sodium:
407
mg
,
Potassium:
171
mg
,
Fiber:
1
g
,
Sugar:
36
g
,
Vitamin A:
622
IU
,
Calcium:
48
mg
,
Iron:
2
mg
Nutrition information is automatically calculated, so should only be used as an approximation.