
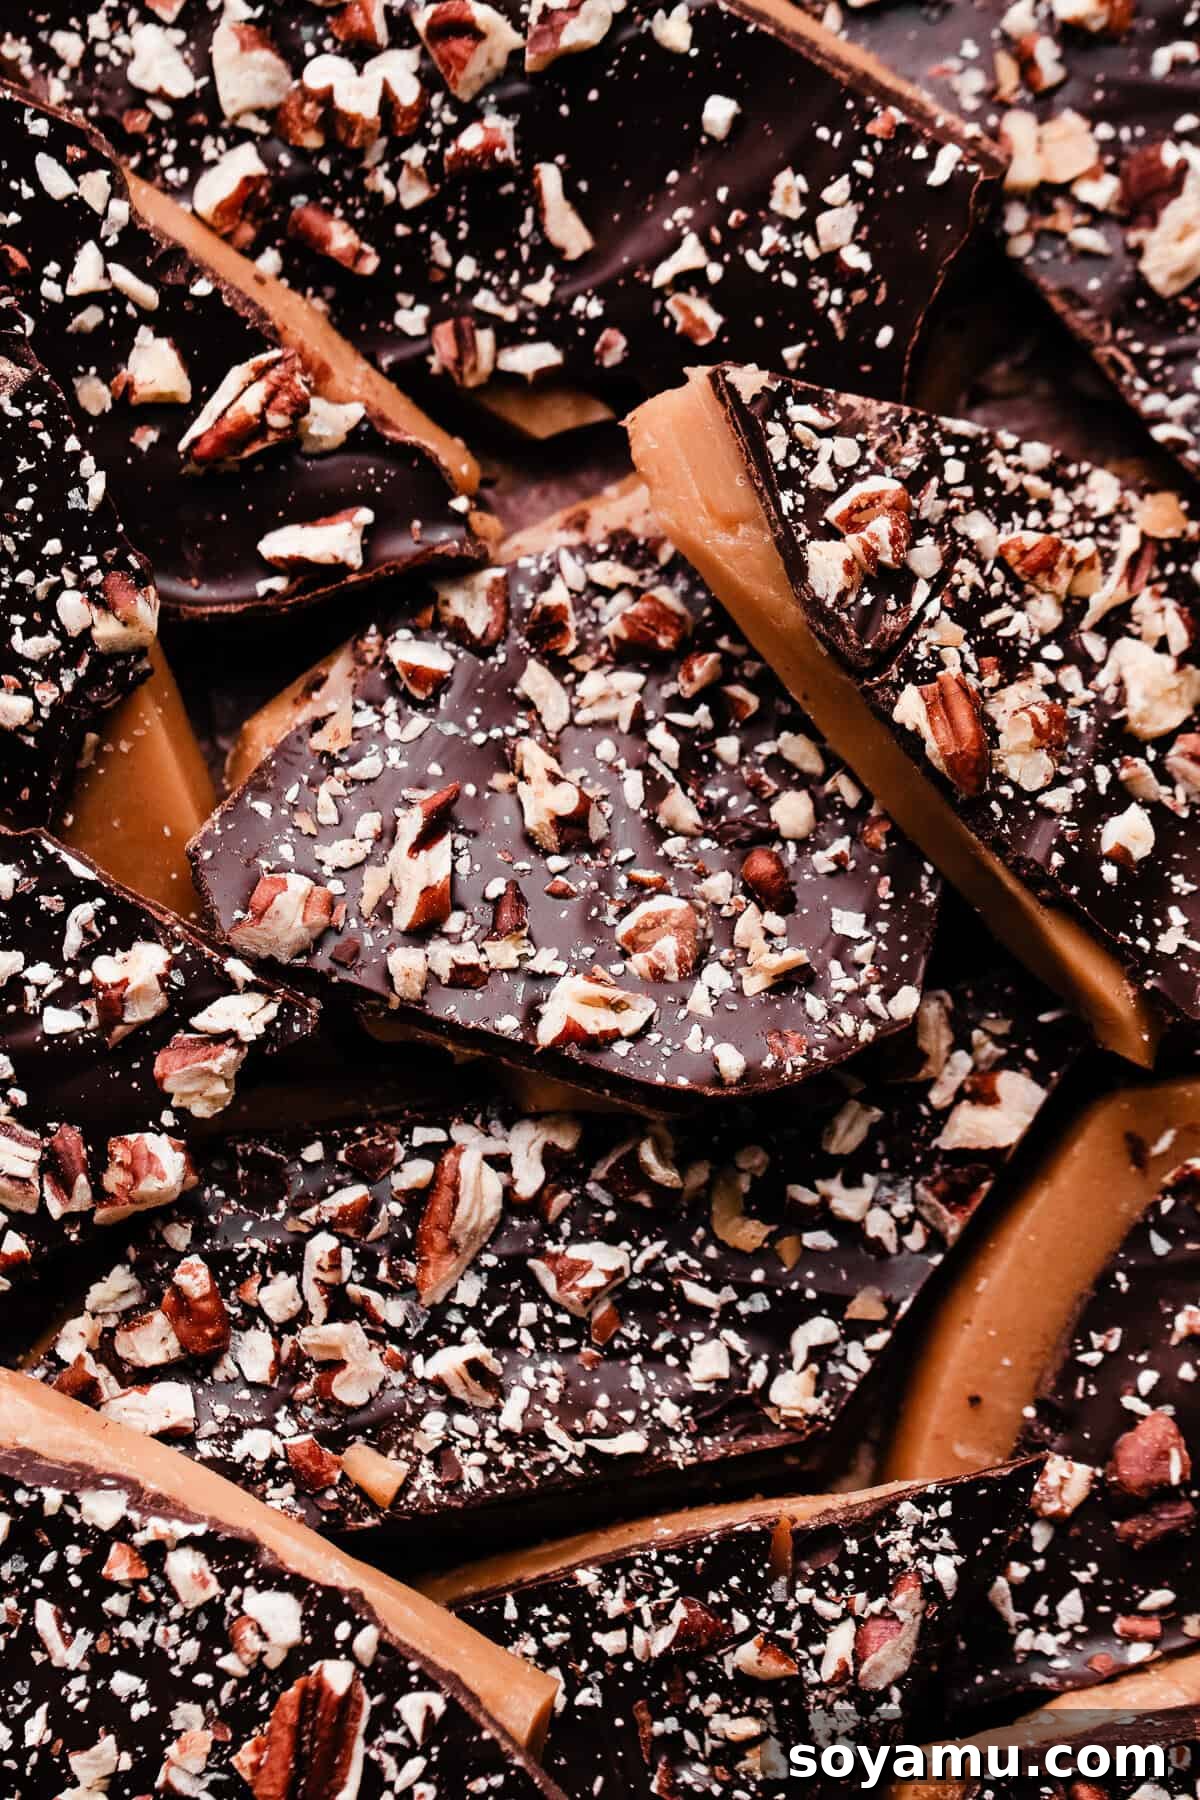
Homemade Toffee is an incredibly rewarding confectionery to create right in your own kitchen. Far from being a complicated candy-making endeavor, this delightful treat comes together surprisingly quickly with just 5 simple ingredients. Whether you’re looking to impress guests with a festive dessert, assemble a thoughtful homemade gift, or simply indulge in a classic buttery caramel crunch, our quick, no-bake toffee recipe is your perfect solution. Get ready to enjoy rich, buttery layers topped with decadent chocolate and crunchy nuts – a truly irresistible combination that promises joy with every bite.
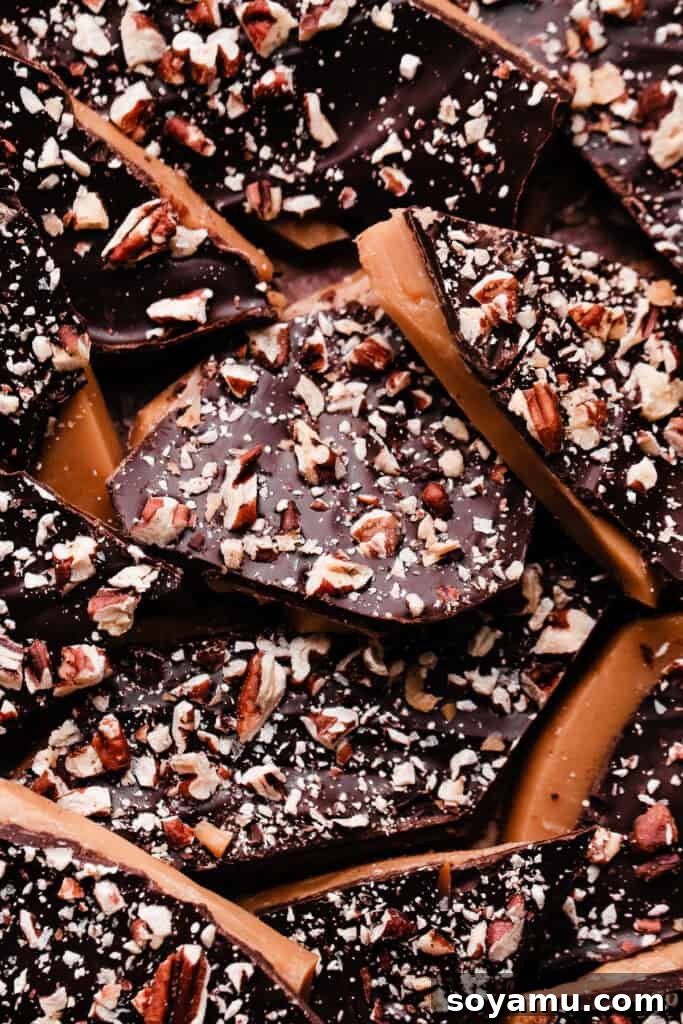
Easy Homemade Toffee: Your Go-To Recipe for a Classic Sweet Treat
Welcome to the ultimate guide for crafting perfect homemade toffee. Forget bland store-bought versions; the satisfaction of making your own English toffee from scratch is unparalleled. This recipe isn’t just easy; it’s designed to be foolproof, ensuring a delicious outcome even if you’re new to the art of candy making. We’ll walk you through every step, from selecting the best ingredients to achieving that ideal hard-crack stage, and even offer creative variations to make it uniquely yours. Prepare to unlock the secrets to a delightful confection that will charm friends and family alike.
Why This Homemade Toffee Recipe Will Become Your Favorite
There are countless reasons to adore this homemade toffee, making it a staple in your recipe collection. It’s more than just a sweet treat; it’s an experience waiting to happen. Here’s why you’ll fall in love with making it:
- Effortlessly Simple & Quick: Don’t let the term “candy making” intimidate you! This recipe truly is a simple, no-bake, two-step process. You’ll masterfully cook a sugar mixture on the stovetop until it reaches the perfect temperature, then pour it onto a pan. The final touch involves adding luscious chocolate and a sprinkle of chopped nuts. It’s surprisingly straightforward and delivers maximum flavor with minimal fuss, making it perfect for last-minute treats or holiday preparations.
- Infinitely Customizable: One of the joys of homemade treats is the ability to tailor them to your preference. With this toffee, you’re in control! Want a thicker, more substantial bite? Use a smaller pan. Prefer a delicate, thinner crunch? Opt for a larger baking sheet. Beyond thickness, explore different types of chocolate, a variety of nuts, or even a sprinkle of sea salt for an elevated gourmet touch. This versatility ensures you can always create a toffee that perfectly suits the occasion or your craving.
- Completely Foolproof for Beginners: We understand that candy-making can sometimes feel daunting due to the precision required. However, this particular toffee recipe is designed for success. By following our clear instructions and using a reliable instant-read thermometer, you’ll find it practically impossible to mess up. Say goodbye to sticky situations and grainy textures, and hello to perfectly golden, crisp, and buttery toffee every single time.
- The Perfect Gift: Few presents are as thoughtful and appreciated as a homemade one. English toffee makes an absolutely exquisite homemade gift, ideal for holidays, hostess gifts, teacher appreciation, or just to show someone you care. Package a handful of these golden shards in a charming container, a decorative jar, or arrange them beautifully on a small plate, tied with a festive bow, and watch smiles light up!
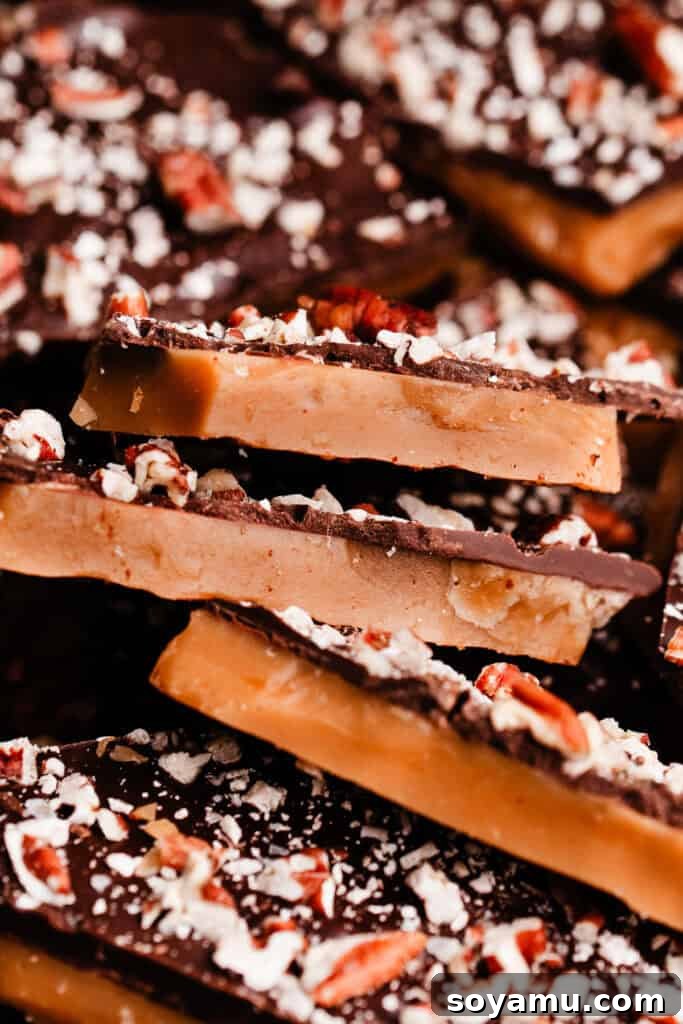
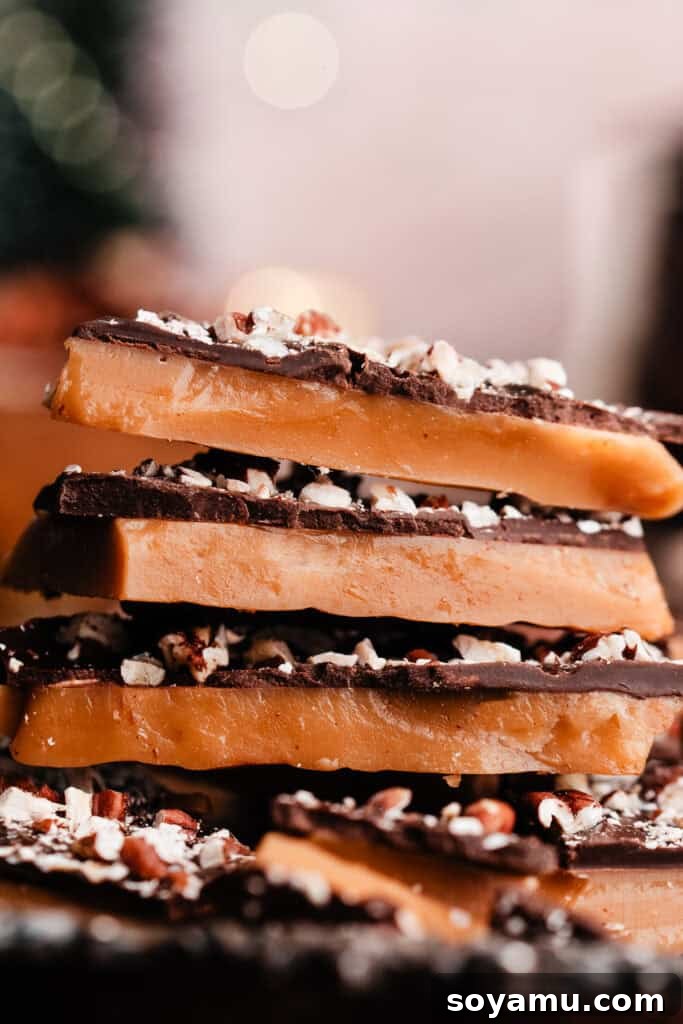
- Superior Taste and Texture: Unlike many store-bought options that can be overly sweet or lack depth, homemade toffee offers an unparalleled richness. The combination of slow-cooked butter and sugar creates a deep caramel flavor, while the distinct hard-crack stage ensures a satisfyingly brittle snap. Topped with smooth, melted chocolate and crunchy nuts, it’s a symphony of textures and flavors.
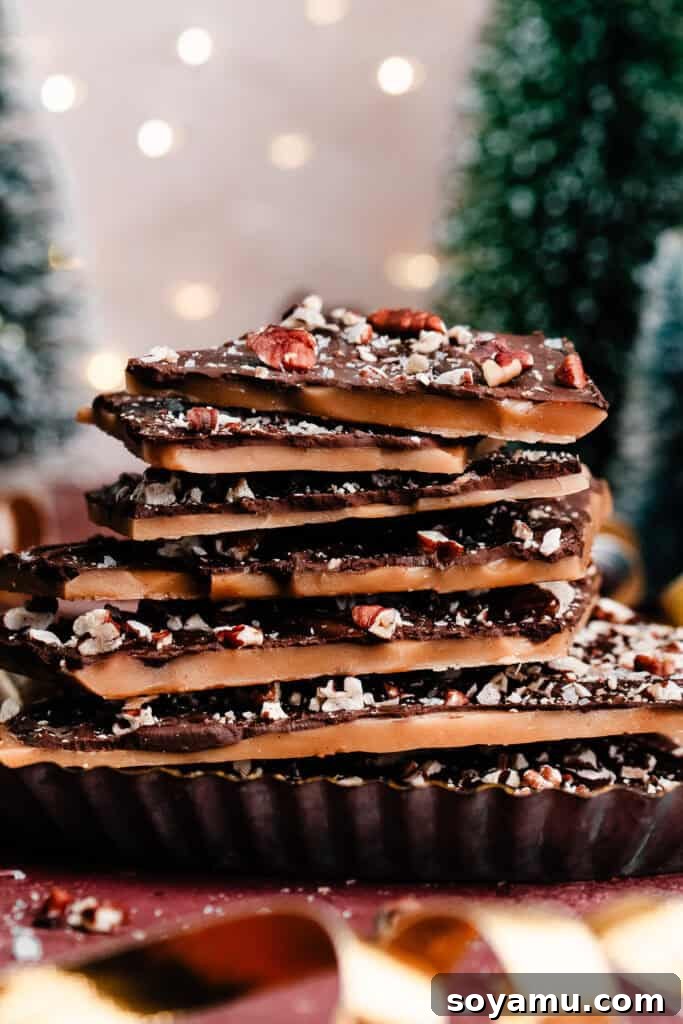
Unveiling the Simple Ingredients for Irresistible Toffee
One of the true beauties of this homemade toffee recipe lies in its elegant simplicity. You don’t need a pantry full of exotic items; just a few quality ingredients are enough to create a truly spectacular treat. Each plays a crucial role in achieving that perfect buttery, crunchy texture and rich flavor. While the full recipe with precise measurements and detailed instructions can be found in the recipe card below, let’s dive into the core components you’ll be using and why they are so important:
- Butter – The Heart of Toffee: For this recipe, we strongly recommend using salted butter. In our extensive testing, salted butter consistently provides the most balanced and rich flavor, perfectly complementing the sweetness of the sugar. The touch of salt in the butter helps to cut through the richness and enhance the overall taste, creating a more complex and satisfying experience. If you only have unsalted butter, simply increase the added salt slightly to achieve that desired balance.
- Pecans – The Crunch Factor: While optional, adding chopped pecans elevates this toffee to classic English toffee status. The nutty crunch provides a wonderful textural contrast to the smooth, hard caramel. For an even more profound depth of flavor, take a few extra minutes to toast your pecans before adding them. This simple step unlocks their inherent oils, intensifying their nutty aroma and taste, which truly makes a significant difference in the final product. Of course, if you have other favorite nuts or prefer a nut-free version, this is an easy element to customize or omit entirely.
- Semi-Sweet Chocolate – The Decadent Topping: The luscious layer of melted chocolate is what truly crowns this toffee. Semi-sweet chocolate is an excellent choice as it provides a delightful balance – not overly bitter and not excessively sweet – making it a perfect partner for the rich buttery toffee base. You can use high-quality semi-sweet chocolate chips for convenience, or for a smoother melt and potentially superior flavor, opt for a chopped semi-sweet chocolate bar. Remember, the quality of your chocolate will directly impact the taste and texture of your finished toffee, so choose a brand you genuinely enjoy!
- Granulated Sugar – The Sweet Foundation: This is the primary component of our toffee, and it transforms from fine crystals into the glorious caramel base when heated. Its fine grain ensures an even melt and contributes significantly to the smooth, hard, and brittle texture once cooled.
- Water – The Essential Catalyst: A small amount of water plays a critical role in the initial stages. It helps to dissolve the granulated sugar crystals evenly when heating, which prevents premature crystallization and ensures a smooth, consistent toffee base. As the mixture cooks, the water evaporates, leaving behind pure, delicious, and perfectly cooked caramel.
- Vanilla Extract – Aromatic Depth: Added at the very end of the cooking process, pure vanilla extract provides a warm, sweet, and aromatic note that beautifully enhances the overall flavor profile of the toffee, adding a layer of sophisticated sweetness that rounds out the buttery caramel.
- Salt – The Flavor Balancer: Even with salted butter, an additional pinch of salt (as specified in the recipe) is crucial. Salt acts as a powerful flavor enhancer, balancing the intense sweetness of the sugar and making all the other flavors in the toffee truly pop. It prevents the toffee from being cloyingly sweet and instead creates a harmonious taste experience.
Unlock Your Creativity: Recipe Substitutions & Exciting Variations
While this classic homemade toffee recipe is perfect as is, it also offers a fantastic canvas for culinary creativity. You can easily adapt it to suit your taste preferences, dietary needs, or holiday themes, making each batch uniquely your own. Here are some popular substitutions and exciting variations to inspire you:
- Nut Swaps and Omitting Nuts:
- Almonds: A fantastic alternative to pecans, chopped almonds offer a slightly different, equally delightful crunch and a distinct nutty flavor that pairs wonderfully with both butter and chocolate.
- Walnuts: For a more robust, earthy flavor profile, consider using chopped walnuts. They add a pleasant bitterness that can beautifully complement semi-sweet or dark chocolate, creating a deeper, more complex taste.
- Macadamias: For a truly luxurious and buttery touch, chopped macadamia nuts offer a rich, creamy, and slightly sweet flavor that will instantly elevate your toffee to gourmet status.
- No Nuts: If you’re catering to allergies, prefer a smoother texture, or simply want a nut-free toffee, feel free to omit the nuts entirely. The toffee will still be incredibly delicious on its own, showcasing its pure buttery goodness.
- Exploring Different Chocolate Choices:
- Dark Chocolate: For a more intense, less sweet profile, swap semi-sweet chocolate for dark chocolate (60-75% cacao). The slight bitterness creates a sophisticated contrast with the rich, buttery toffee.
- Milk Chocolate: If you have a sweeter tooth, prefer a creamier texture, or are making this for children, milk chocolate can be a wonderful, milder alternative to semi-sweet.
- White Chocolate: A layer of white chocolate, perhaps swirled with semi-sweet or dark chocolate, can create a beautiful visual effect and a distinct creamy, vanilla-like flavor. Be mindful that white chocolate is significantly sweeter, so balance it with a touch of flaky sea salt.
- Exciting Flavor Boosters & Toppings:
- Flaky Sea Salt: A generous sprinkle of flaky sea salt over the melted chocolate just before it sets is a true game-changer. It not only enhances all the flavors but also adds a touch of gourmet elegance and a delightful salty crunch.
- Spices: A tiny pinch of ground cinnamon, nutmeg, or even a subtle dash of cayenne pepper (for a surprising, warm kick!) can be stirred into the toffee base along with the vanilla extract for an unexpected and intriguing flavor twist.
- Crushed Peppermint: For a wonderfully festive holiday treat, generously sprinkle crushed peppermint candies or candy canes over the melted chocolate layer.
- Toasted Coconut Flakes: Add a tropical dimension by sprinkling lightly toasted coconut flakes over the chocolate before it sets. This pairs especially well with milk chocolate.
- Mini Chocolate Chips or Sprinkles: For a fun, colorful version, especially appealing for parties or children, add a shower of mini chocolate chips or vibrant sprinkles before the chocolate hardens.
- The Golden Rule for Candy Making: Stick to the Core Recipe:
While nuts and chocolate offer fantastic opportunities for customization, when it comes to the fundamental toffee base (butter, sugar, water), it’s generally best to stick to the recipe as written. Candy making relies on precise ratios and temperatures to achieve the correct texture. Altering the amounts of butter, sugar, or water can significantly impact the final consistency, potentially leading to a toffee that might be too soft, crumbly, grainy, or even scorched. So, feel free to experiment with toppings and flavorings, but trust the foundational ingredients and their proportions!
Crafting Your Toffee: A Detailed Step-by-Step Guide
Making homemade toffee is a delightful culinary adventure, and with our clear, concise steps, you’ll achieve perfection every time. The key is to pay attention to temperatures and to work efficiently once the toffee base is cooked. Here’s how to create your own irresistible buttery crunch:
Step 1: Preparation is Key – Setting Up for Success
Before you even turn on the stovetop, ensure your workspace is completely ready. Candy making moves quickly once the mixture heats up, so having everything prepared in advance (known as “mise en place”) is crucial. First, decide on your desired toffee thickness: for a thinner, crispier toffee, line a large baking sheet (e.g., 9×13 inches) with parchment paper. For thicker, more substantial pieces, use a 9×9 inch square pan, also lined with parchment paper. Parchment paper is essential to prevent sticking and makes for incredibly easy removal and cleanup. Gather all your ingredients, measure them out precisely, and have your instant-read thermometer (or candy thermometer) close at hand. If you plan to toast your pecans, do that first and set them aside to cool completely.

Step 2: Creating the Golden Toffee Base
This is the heart of your toffee, and precision is paramount here. In a medium, heavy-bottomed saucepan, combine the measured butter, granulated sugar, and water. Using a heavy-bottomed pan is crucial as it distributes heat much more evenly than a thin pan, preventing localized scorching. Place the saucepan over medium-high heat. Stir the mixture constantly with a wooden spoon or heat-proof spatula until it comes to a rolling boil and the sugar has completely dissolved. Once boiling, reduce the heat to medium and continue to cook, stirring frequently (but not excessively, to avoid crystallization). The mixture will begin to thicken, bubble, and transform from a pale yellow to a beautiful, rich amber color. This stage typically takes about 11-14 minutes, depending on your stove and pan. It’s crucial to cook the mixture until it reaches precisely 300°F (149°C) on your thermometer, which is known as the “hard crack stage.” This exact temperature ensures your toffee will be perfectly crisp and brittle once cooled, providing that signature satisfying snap. Immediately remove the saucepan from the heat as soon as it hits 300°F, then quickly stir in the vanilla extract and salt. The vanilla adds an aromatic depth that beautifully complements the caramel, and the salt balances the sweetness, enhancing all the flavors.
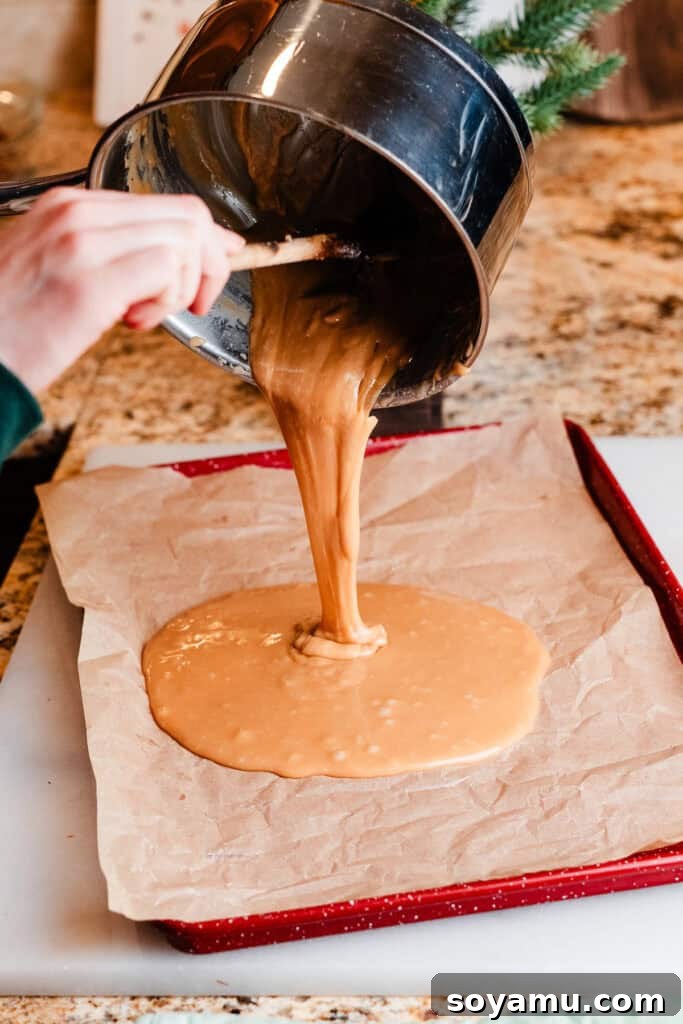
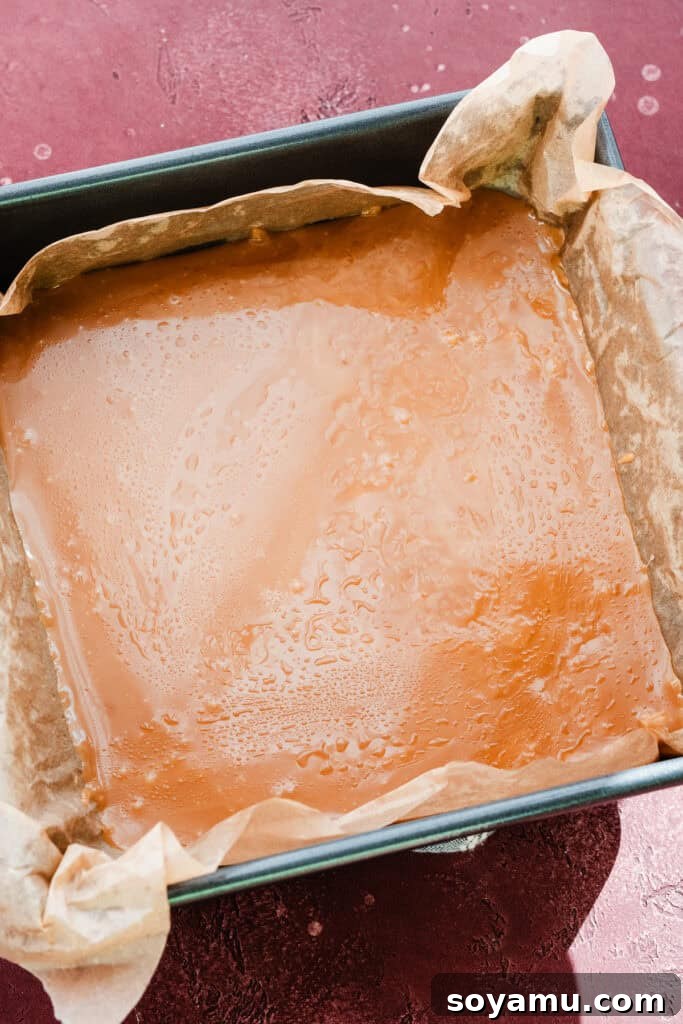
Step 3: Pouring and Spreading the Toffee
Time is of the essence here! As soon as you’ve stirred in the vanilla and salt, immediately and carefully pour the hot toffee mixture onto your prepared parchment-lined pan. Be cautious, as the sugar is extremely hot. If you used a large cookie sheet for a thinner toffee, use an offset spatula or the back of a spoon to quickly and evenly spread the toffee into a uniform, thin layer. For a thicker toffee, simply pour it into your lined 9×9 inch pan and gently tilt the pan from side to side to allow the toffee to self-level and fill the base. Work swiftly, as the toffee begins to set very quickly once removed from the heat and will become difficult to spread.
Step 4: The Decadent Chocolate & Nut Topping
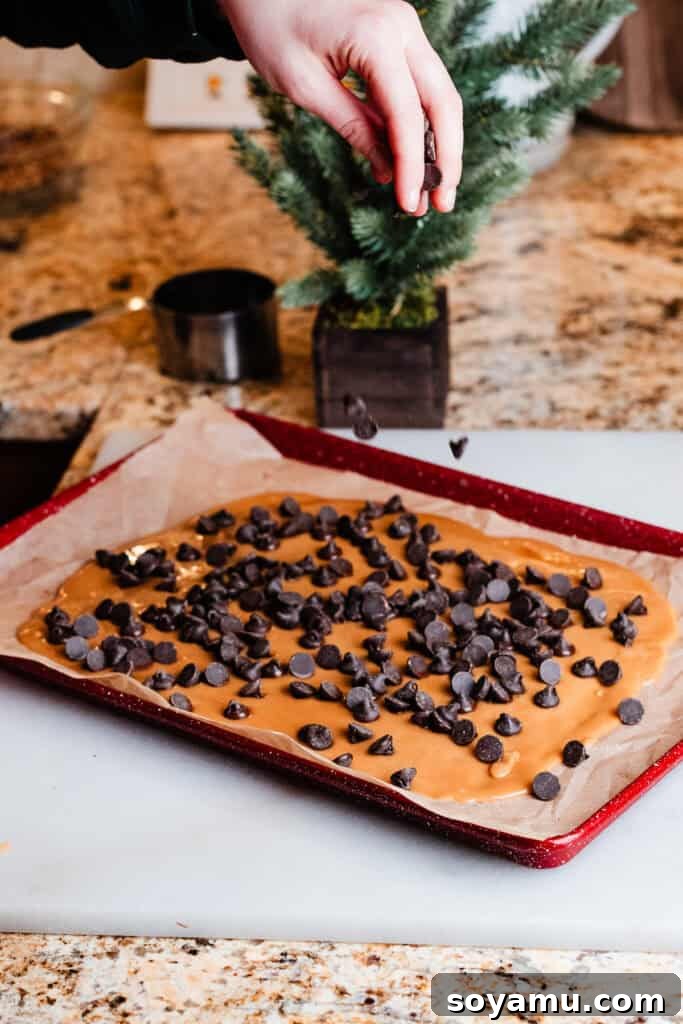
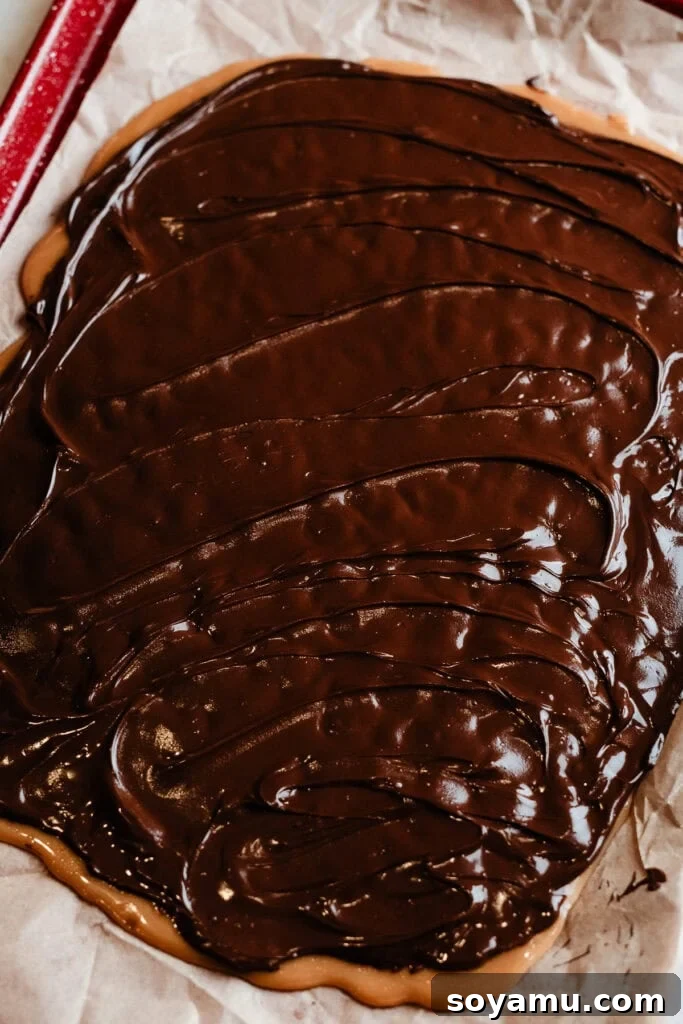
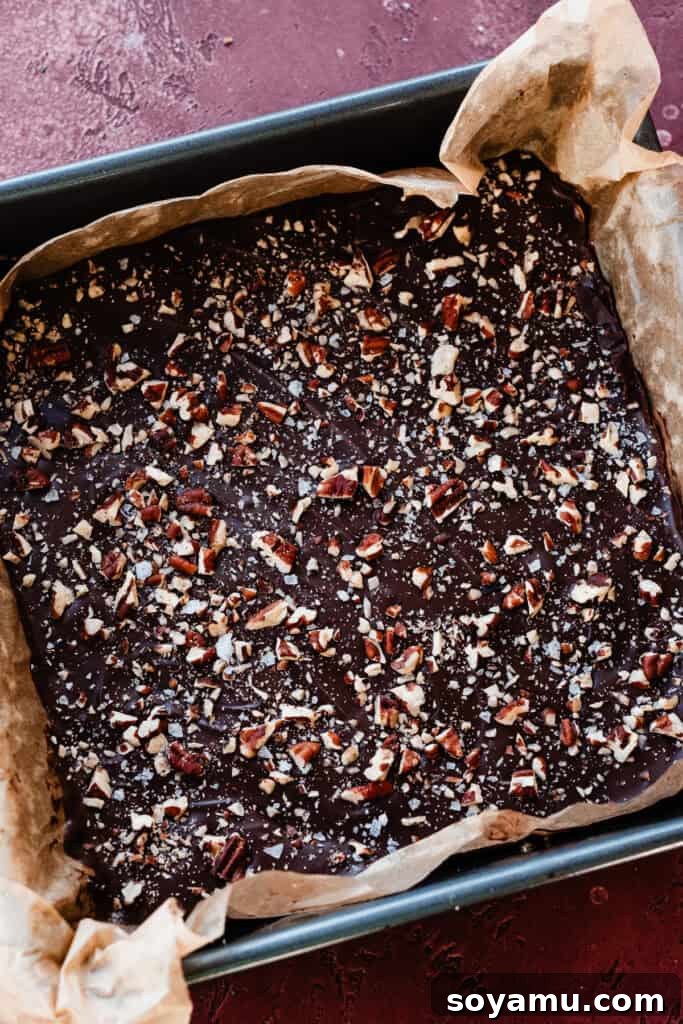
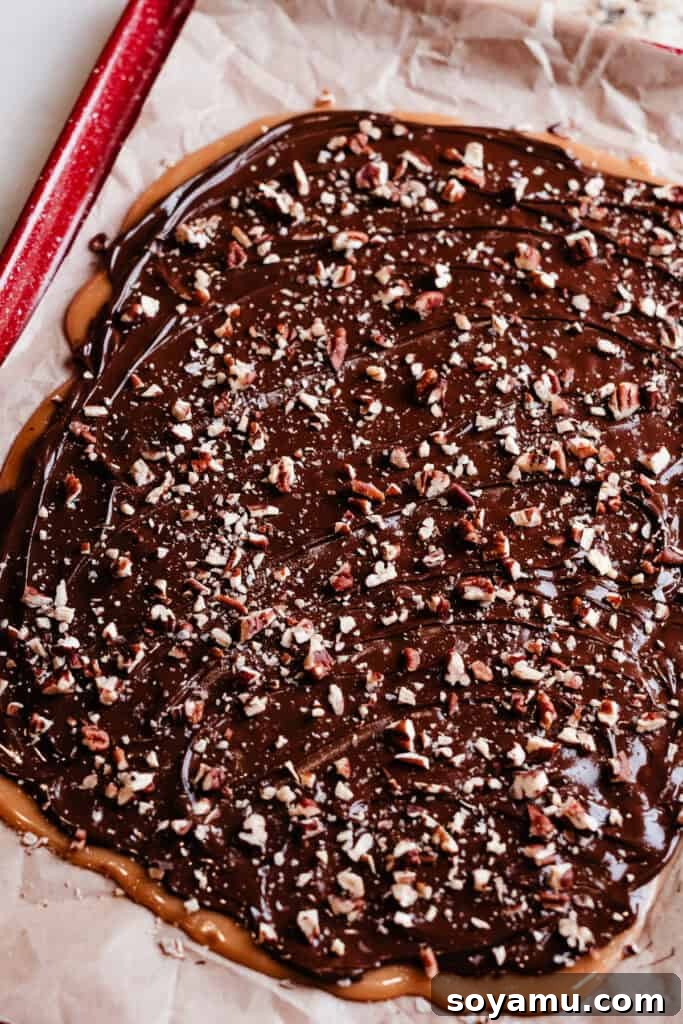
This is where the irresistible magic happens! While the toffee base is still warm and molten, generously sprinkle the semi-sweet chocolate chips evenly over its entire surface. The residual heat radiating from the toffee will gently begin to melt the chocolate. Let it sit undisturbed for a few minutes (typically 3-5 minutes) to allow the heat to work its magic. Once the chocolate chips look glossy and slightly softened, use an offset spatula or the back of a spoon to gently spread the chocolate evenly across the entire surface of the toffee, creating a smooth, inviting layer. Before the chocolate has a chance to fully set, generously sprinkle your chopped, toasted pecans (or your chosen nuts) over the melted chocolate. Gently press them down lightly with your hand or the spatula to ensure they adhere well. If you desire, now is also the perfect time to add a sprinkle of flaky sea salt for an extra touch of flavor and gourmet elegance, beautifully contrasting the sweetness.
Optional: Tempering Your Chocolate for a Perfect Finish
For a truly professional-looking finish and to prevent chocolate bloom (a harmless but aesthetically unpleasing grayish-white film that can appear on chocolate after a few days, especially if stored improperly), you can temper your chocolate before spreading it. Tempering ensures a stable crystalline structure in the cocoa butter, resulting in a beautifully shiny, snap-able chocolate that resists melting at room temperature. While not strictly necessary for taste, it significantly enhances the visual appeal and improves the shelf life of your toffee. If you’re interested in mastering this technique, many excellent resources on how to temper chocolate are available online.
Step 5: Cooling and Enjoying Your Creation
The final, and perhaps most challenging, step is patience! Allow the toffee to cool completely and undisturbed on your counter. This process is crucial and can take at least an hour, or even longer depending on your room temperature and the thickness of your toffee. It’s important not to rush this step; the toffee needs to solidify properly to achieve its characteristic crisp, brittle texture. Attempting to break or cut it too early will result in a messy, gooey disaster. Once the chocolate is fully set and firm to the touch, your homemade toffee is ready to be broken or cut and savored!
Serving & Storing Your Delicious Homemade Toffee
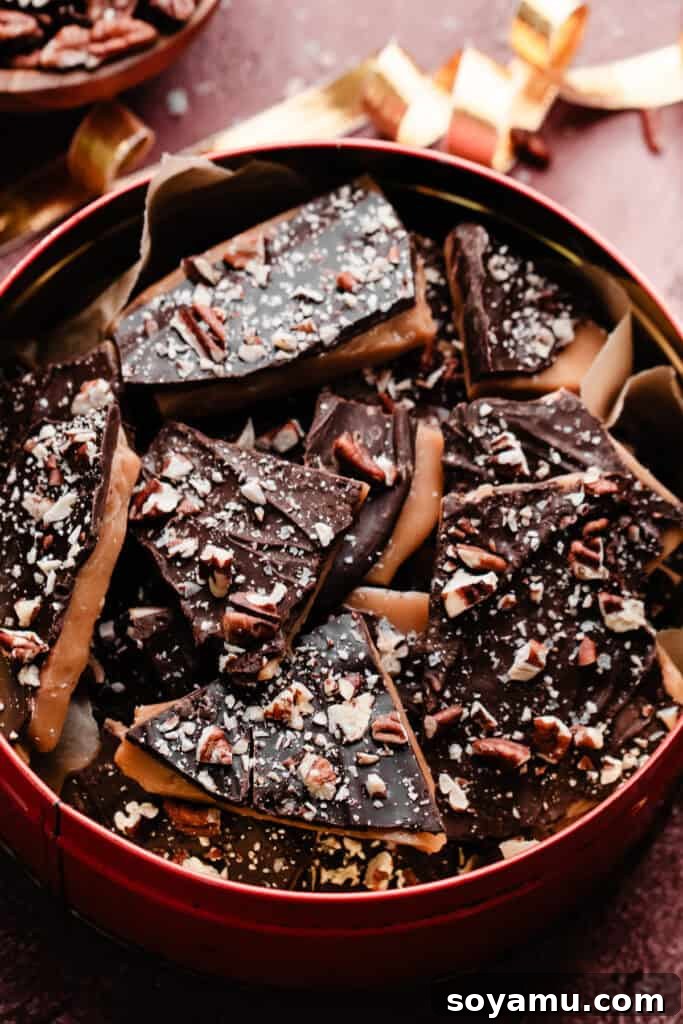
Once your toffee and chocolate have completely set and are firm, it’s time for the absolute best part: breaking or cutting it into irresistible pieces! For a rustic, charming look and a satisfying crunch, you can simply use clean hands to break the slab into irregular chunks. This method creates unique, organic shapes that are visually appealing. If you prefer more uniform pieces for presentation or portion control, a sharp, heavy knife can be used to score and then cut the toffee into neat squares or rectangles. Exercise caution when cutting, as perfectly brittle toffee can be quite firm. A quick trick is to chill the toffee in the freezer for 10-15 minutes before cutting to achieve cleaner breaks.
To enjoy your homemade toffee at its best, serve it as a delightful after-dinner treat with coffee or tea, a festive addition to holiday cookie plates, or a sweet pick-me-up any time of day. It pairs wonderfully with a scoop of vanilla bean ice cream or crumbled over desserts.
Optimal Storage for Maximum Freshness
Proper storage is paramount to maintaining the crisp texture and rich flavor of your homemade toffee. Store your delicious toffee pieces in an airtight container at room temperature. This will keep it fresh, crunchy, and absolutely delicious for about one to two weeks. For extended freshness, especially if you live in a warmer or humid climate, you can store it in the refrigerator for two to three weeks, or even up to a month. If refrigerating, allow the toffee to come to room temperature for a few minutes before serving; this ensures the best texture and allows the full flavors to develop. Avoid exposing toffee to high humidity, as it can cause the surface to become sticky and dull.
Craving more simple homemade candy recipes? Explore other delectable options like our Grandma’s Famous Peanut Butter Fudge, rich Homemade Black Forest Chocolate Truffles, or festive Double Chocolate Swirled Peppermint Bark next – each promises another delightful journey into homemade confectionery!
Expert Tips for Toffee Perfection
Even though this recipe is designed to be highly successful, a few expert tips can elevate your homemade toffee from simply great to truly exceptional. Mastering these techniques will build your confidence in candy making and ensure a perfect batch every single time:
- The Essential Tool: A Reliable Instant-Read Thermometer. This is perhaps the most critical tip for any candy-making endeavor, especially toffee. The success of toffee hinges on reaching the exact hard crack stage of 300°F (149°C). An accurate instant-read thermometer provides quick, clear, and precise temperature readings, completely eliminating guesswork. Forget cumbersome old-fashioned candy thermometers; a digital instant-read thermometer is often faster, easier to read, and more reliable, guiding you confidently to perfectly brittle toffee every time. Do not attempt to eyeball the temperature; it’s a recipe for inconsistent results.
- Use a Heavy-Bottomed Saucepan. A good quality, heavy-bottomed saucepan (preferably stainless steel or copper, at least 2-3 quart capacity) is absolutely essential. Its thick base ensures heat is distributed much more evenly across the bottom of the pan compared to a thin pan. This uniform heating prevents hot spots that can scorch the sugar in one area while the rest of the mixture hasn’t reached temperature, leading to an unevenly cooked or burnt-tasting toffee.
- Patience with Stirring (and knowing when to stop). While you’ll stir initially to dissolve the sugar and prevent scorching, once the mixture starts boiling, resist the urge to stir constantly unless specifically instructed. Excessive stirring can cause sugar crystals to form on the sides of the pan. These crystals can then fall back into the molten sugar mixture, acting as seeds that cause the entire batch to become grainy rather than smooth. If you do see crystals forming on the sides, gently brush them down with a wet pastry brush.
- Have Everything Ready (Mise en Place). As mentioned earlier, candy making is a fast-paced process once the mixture approaches its target temperature. There’s no time to chop nuts or search for your chocolate chips. Have your lined pan, precisely measured chocolate chips, and finely chopped nuts all laid out and ready to go. The moment the toffee reaches 300°F, you need to work quickly and efficiently.
- High-Quality Ingredients Make a Noticeable Difference. With a recipe containing so few ingredients, the quality of each component truly shines through in the final product. Use a good quality butter, pure vanilla extract, and a chocolate you genuinely enjoy eating on its own for the absolute best flavor and texture in your homemade toffee.
- Safety First with Hot Sugar. Melted sugar reaches extremely high temperatures and can cause severe burns if it comes into contact with skin. Always exercise extreme caution, consider wearing oven mitts or long sleeves, and keep children and pets a safe distance away from the stovetop during the entire cooking process.
Frequently Asked Questions About Homemade Toffee
Here are answers to some common questions about making perfect homemade toffee, ensuring your success and enjoyment:
When it comes to candy recipes, especially those relying on precise temperature stages like toffee, it’s generally recommended not to double or halve the recipe. Changing the volume of ingredients can significantly alter how quickly the mixture heats and cools, potentially affecting the cooking time and making it much more difficult to achieve the correct hard crack stage (300°F). For consistent and reliable results, your safest bet is to make the recipe as written, and if you need a larger quantity, simply make two or more separate batches.
This is a common issue and almost always indicates that the toffee mixture did not reach the correct temperature. For a true hard crack toffee, it absolutely must reach 300°F (149°C). If the mixture was removed from the heat too early (even by a few degrees), it will result in a softer, chewier, more caramel-like consistency. Always use a reliable instant-read thermometer and ensure it registers the correct temperature before removing the pan from the heat.
Grainy toffee is typically caused by sugar crystals forming in the mixture. This can happen if you stir too much once the mixture starts boiling, or if sugar crystals adhere to the sides of the pan and fall back into the mixture. To prevent this, ensure all sugar is completely dissolved before the mixture reaches a boil. If you observe crystals forming on the sides of the pan during cooking, gently brush them down into the liquid with a wet pastry brush.
Not at all! While candy thermometers are specifically designed for this purpose, any accurate instant-read thermometer that can measure temperatures up to at least 300-350°F (150-175°C) will work perfectly. In fact, many home cooks find modern instant-read thermometers easier to use as they provide a quick, clear digital readout, rather than having to closely watch a rising red line in a traditional candy thermometer. The key is accuracy and reliability.
Chocolate bloom, the grayish-white film that can appear on chocolate, occurs when the cocoa butter separates and recrystallizes due to temperature fluctuations. While harmless to eat, it affects appearance. The best way to prevent it is by properly tempering your chocolate before spreading it over the toffee. Tempering stabilizes the cocoa butter crystals. Alternatively, storing your finished toffee in a cool, consistent temperature (like the refrigerator or a cool pantry) can help minimize bloom, though it won’t prevent it entirely if the chocolate wasn’t tempered.
Absolutely! Homemade toffee is an excellent make-ahead treat. When stored properly in an airtight container at room temperature, it will remain fresh and delicious for 1-2 weeks. If you store it in the refrigerator, it can last for 3-4 weeks. This makes it perfect for preparing in advance for holiday gifting, special occasions, or simply to have on hand for a sweet indulgence.
Essential Tools for Successful Toffee Making
While homemade toffee is relatively simple to make, having the right tools on hand can make the process smoother, more efficient, and guarantee a perfect outcome. These aren’t necessarily “specialty” tools, but they are crucial for candy-making success. Here are the key tools you’ll need and why they’re important:
- Instant Read Thermometer: Your Candy-Making Guardian. As emphasized throughout this guide, this is by far your most crucial tool. The success of toffee hinges entirely on reaching the exact hard crack stage of 300°F (149°C). An instant-read thermometer provides quick and accurate temperature readings, eliminating all guesswork. Forget cumbersome old-fashioned candy thermometers that are hard to read; a digital instant-read thermometer is faster, much easier to read, and often more precise, guiding you confidently to perfectly brittle toffee every single time. It’s a small investment that makes a huge difference.
- Heavy-Bottomed Saucepan: The Heat Distributor. A good quality, heavy-bottomed saucepan (at least 2-3 quart capacity) is absolutely essential for toffee making. Its thick base ensures even heat distribution, preventing hot spots that can scorch the sugar in one area while the rest of the mixture hasn’t reached temperature. This uniform heating promotes consistent caramelization and is vital for smooth, delicious, and unburnt toffee. A thin-bottomed pan will likely lead to burning.
- Parchment Paper: The Non-Stick Solution. Lining your baking sheet or pan with parchment paper is a non-negotiable step. Toffee is notoriously sticky when hot, and parchment paper provides a completely non-stick surface. This makes it incredibly easy to remove the cooled toffee slab without any fuss, breakage, or sticky mess. Do not substitute with wax paper, as wax paper can melt with the high heat of the molten toffee, causing a sticky disaster.
- Offset Spatula: The Spreading Master. An offset spatula with a thin, flexible blade is the ideal tool for spreading the melted chocolate evenly over the hot toffee base. Its ergonomic design allows for smooth, controlled movements, ensuring a perfectly uniform, thin, and professional-looking layer of chocolate. A regular knife or spoon can work, but an offset spatula truly makes this step effortless.
- Wooden Spoon or Heat-Proof Spatula: For Stirring. A sturdy wooden spoon or a high-quality heat-proof silicone spatula is perfect for stirring the toffee mixture as it cooks. These materials won’t scratch your saucepan and are safe to use with extremely hot sugar. Avoid plastic spatulas that might melt.
- Pastry Brush: The Crystal Cleaner (Optional but Highly Recommended). A small pastry brush (either silicone or natural bristles) dipped in water can be used to gently brush down any sugar crystals that form on the sides of your saucepan during the cooking process. This simple action effectively prevents those rogue crystals from falling back into the mixture and causing grainy toffee.
Craving More Sweetness? Discover Other Homemade Treats!
If you’ve thoroughly enjoyed the rewarding process of making this delightful homemade toffee and are eager to explore more confectionery creations, you’re in luck! The world of simple homemade sweets is vast, varied, and incredibly rewarding. Expanding your repertoire of homemade candies and desserts is a fantastic way to impress, celebrate, or simply treat yourself. Here are some other fantastic recipes from our collection that you’re sure to love, perfect for gifting, holiday gatherings, or simply satisfying your sweet tooth:
- Double Chocolate Swirled Peppermint Bark: A truly festive and elegant treat, this peppermint bark combines rich layers of dark and creamy white chocolate, beautifully swirled together and studded with crunchy peppermint candy pieces. It’s incredibly easy to make, visually stunning, and an absolute holiday favorite!
- Bailey’s Chocolate Fudge: Indulge in a rich, velvety smooth, and utterly creamy fudge infused with the distinct and delightful flavor of Bailey’s Irish Cream. This no-bake fudge is surprisingly simple to prepare and makes for a sophisticated adult treat that’s perfect for special occasions or a cozy night in.
- White Chocolate Peppermint Pretzels: Experience the perfect blend of sweet and salty with these addictive pretzels. Crispy pretzels are dipped in creamy white chocolate and then generously sprinkled with crushed peppermint. They’re a quick, easy, and incredibly addictive snack that’s great for any occasion, from casual snacking to elegant party platters.
- Peanut Butter Blossoms: A timeless classic cookie that’s always a crowd-pleaser and brings back nostalgic memories. These soft, chewy peanut butter cookies are baked to perfection and then topped with a delightful chocolate kiss while still warm. Simple to make, fun for all ages, and utterly delicious, they’re a must-try for any cookie lover.
Did you make this recipe? We’d love to hear from you! Share your experience and leave a comment & star rating below.
Your feedback is invaluable to us and helps our small business grow by reaching more home bakers. Please consider clicking the little stars in the recipe card header to leave a rating and share how much you loved this delicious homemade toffee!

Easy Homemade Toffee
Stephanie Simmons
5
20
1
15 to 36 pieces
Print Recipe
Ingredients
- 1/2 cup pecans, chopped (plus more for topping)
- 1 cup salted butter, 226 grams
- 1/4 cup water
- 1 cup granulated sugar, 210 grams
- 1/2 tsp vanilla extract
- 1/4 tsp salt
- 1 cup semi-sweet chocolate chips or a chopped baking bar, 175 grams (see note below)
- Flaky sea salt, optional
Instructions
-
1. Prep Your Workspace: Line a 9×9 inch square pan with parchment paper (for thick toffee) or a large cookie sheet with parchment paper (for thinner pieces). Gather and measure all ingredients.
-
2. Toast Pecans (Optional): In a small saucepan, toast chopped pecans over low-medium heat for 3-5 minutes, stirring frequently until fragrant. Set aside to cool.
-
3. Make the Toffee Base: In a medium, heavy-bottomed saucepan, combine butter, water, and granulated sugar. Cook over medium-high heat, stirring constantly, until boiling and sugar dissolves. Reduce heat to medium. Cook for 11-14 minutes, stirring frequently, until the mixture reaches 300°F (149°C) on an instant-read thermometer (hard crack stage).
Immediately remove from heat and stir in vanilla extract and salt. Pour the hot mixture into or onto your prepared pan, spreading evenly.
-
4. Add Chocolate & Nuts: Immediately sprinkle chocolate chips over the warm toffee. Let sit for a few minutes to melt. Then, use an offset spatula to spread chocolate evenly. Sprinkle chopped, toasted pecans and optional flaky sea salt over the chocolate, gently pressing to adhere.
-
5. Cool & Set: Let the toffee cool completely at room temperature for at least 1 hour, or until the chocolate is fully set and firm.
-
6. Serve & Store: Once fully set, break the toffee into pieces or cut with a sharp knife. Store in an airtight container at room temperature for 1-2 weeks, or in the fridge for 3-4 weeks.
Notes
Nutrition Information (per serving)
Serving: 1 piece, Calories: 253kcal, Carbohydrates: 20g, Protein: 1g, Fat: 19g, Saturated Fat: 11g, Polyunsaturated Fat: 1g, Monounsaturated Fat: 6g, Trans Fat: 1g, Cholesterol: 33mg, Sodium: 138mg, Potassium: 86mg, Fiber: 1g, Sugar: 18g, Vitamin A: 386IU, Vitamin C: 0.04mg, Calcium: 14mg, Iron: 1mg
Nutrition information is automatically calculated, so should only be used as an approximation.
Like this recipe? We’d love to hear from you!