
Homemade Pie Crust might seem daunting, but it’s far easier to master at home than you think. Today, we’re diving deep into all the tips and tricks to help you create an impeccably flaky, wonderfully buttery pie crust. This essential recipe, relying on just a few core ingredients, comes together quickly and forms the ideal foundation for countless sweet and savory delights. We’ve packed this guide with detailed step-by-step photos and invaluable troubleshooting advice to empower you to confidently bake perfect pies.
Please don’t be intimidated by the thoroughness of this guide! Our aim is to answer all your questions comprehensively, ensuring you have every tool needed for success. While this post covers extensive details, the actual hands-on time for making pie crust is surprisingly minimal. With practice, these techniques will become second nature, transforming you into a confident pie baker.
This comprehensive guide was originally published in November 2019 and has been significantly updated in November 2022 with even more expert tips, tricks, and fresh photos to enhance your learning experience.
Why You’ll Adore This Flaky Pie Crust Recipe:
- Unrivaled Flakiness & Flavor: Our all-butter pie dough yields an exceptionally flaky, tender, and richly flavored homemade crust that elevates any filling.
- Comprehensive Troubleshooting: Benefit from years of baking experience! We’ve encountered virtually every pie problem imaginable and provide clear solutions to help you avoid common pitfalls and achieve consistent success.
- Incredibly Versatile: This pie dough is your go-to for an array of culinary creations. Use it for classic sweet and savory pies, elegant quiches, rustic galettes, charming hand pies, and even homemade pop tarts! Discover a full spectrum of pie recipes, categorized for your convenience, at the conclusion of this guide.
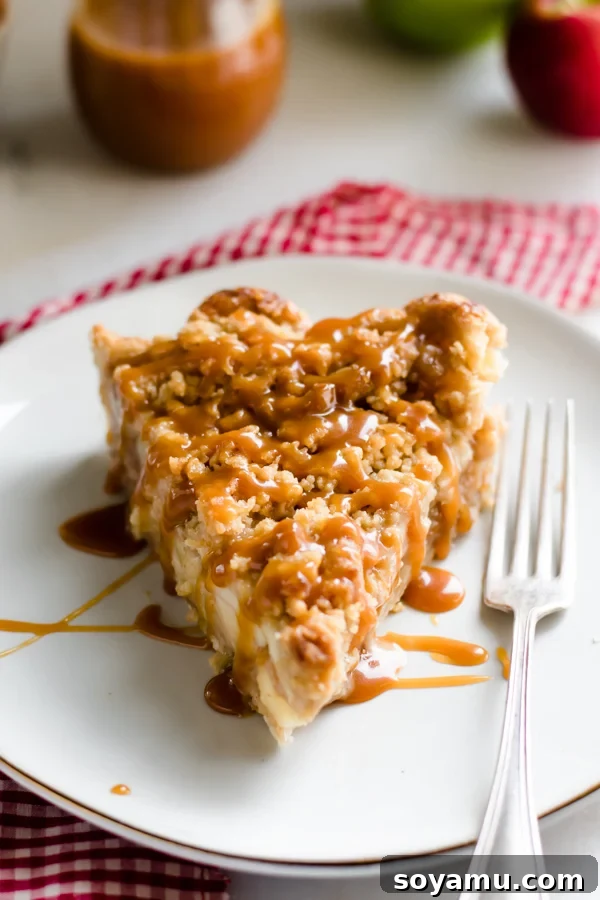
Essential Ingredients for Your Perfect Pie Crust:
While often simplified to “three basic ingredients,” a truly exceptional pie crust benefits from a few more foundational elements. Beyond pantry staples like salt and water, you’ll need all-purpose flour, sugar, and, crucially, cold butter (and often a touch of shortening for extra flakiness and easier handling).
- All-Purpose Flour: The fundamental building block, providing the essential structure for your entire crust. Ensure it’s spooned and leveled for accurate measurement.
- Salt: Absolutely vital for enhancing and balancing the overall flavor profile of your pie crust. Don’t skip it!
- Sugar: While optional in some recipes, a small amount of sugar contributes to a more tender crust and helps achieve a beautiful golden-brown color during baking. Adjust to your preference.
- Cold Butter: This is the secret to an irresistibly flaky pie dough! Keeping the butter as cold as possible throughout the process is paramount. As the butter melts in the hot oven, it releases steam, creating those coveted flaky layers. Salted butter offers fantastic flavor, but unsalted works too if you prefer to control salt levels precisely.
- Shortening: (Optional, but recommended for extra tenderness and stability) A small amount of shortening can improve the crust’s workability and contribute to a very tender crumb, complementing the butter’s flakiness.
- Ice Water: Crucial for binding the dry ingredients and fats into a cohesive dough. Ensure your water is genuinely ice-cold by chilling it in the freezer briefly before use.
Ingredient Substitutions and Dietary Considerations:
- Dairy-Free: For a dairy-free alternative, many bakers have reported success substituting dairy-free butter sticks (ensure they are solid sticks, not tubs) in their pie dough recipes. Results may vary slightly, but it’s a promising option.
- Gluten-Free: Crafting a gluten-free pie dough requires more than a simple 1:1 flour swap. Gluten-free flours behave differently and can lead to a drier, less pliable dough or crust. For reliable gluten-free results, we recommend seeking out a trusted gluten-free baking blog or cookbook that specializes in adapted pie crust recipes.
Crafting Your Flaky Homemade Pie Crust: A Step-by-Step Guide:
Before you begin, take a moment to read through all the instructions. This will familiarize you with the process and help prevent any missteps, especially if it’s your first time making pie crust from scratch. Remember, keeping ingredients cold is key!
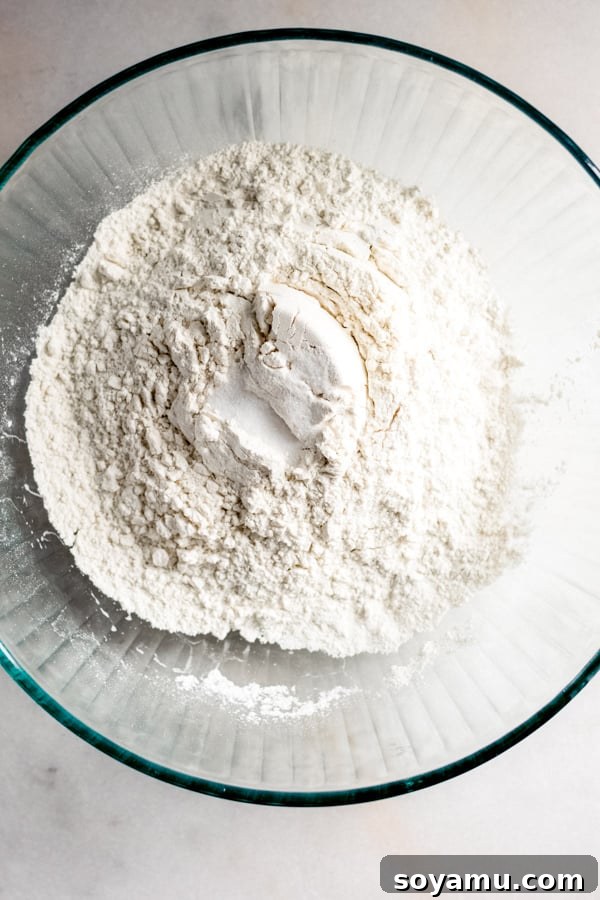
Step 1: Prepare Your Dry Ingredients
In a large mixing bowl, thoroughly whisk together your all-purpose flour, salt, and sugar. Whisking ensures an even distribution of ingredients, which is important for a consistent dough texture. Aim for a light, airy mixture.
Step 2: Incorporate the Cold Fats
Cut your very cold butter (and shortening, if using) into small, roughly ½-inch cubes. The colder the butter, the better the flakiness. Add these cold fat cubes to your dry ingredient mixture and toss gently to coat them with flour. This coating helps prevent the butter from clumping together excessively.
Now, using a pastry cutter, two forks, or even your fingertips, begin to “cut” the butter and shortening into the flour. The goal is to break down the fats until you have a mixture with pieces ranging from pea-sized to small crumbles. Some larger, flatter pieces of butter are desirable, as these will create distinct pockets of steam and contribute to maximum flakiness. Avoid overworking the dough at this stage, as warmth from your hands can melt the butter, compromising the crust’s texture.
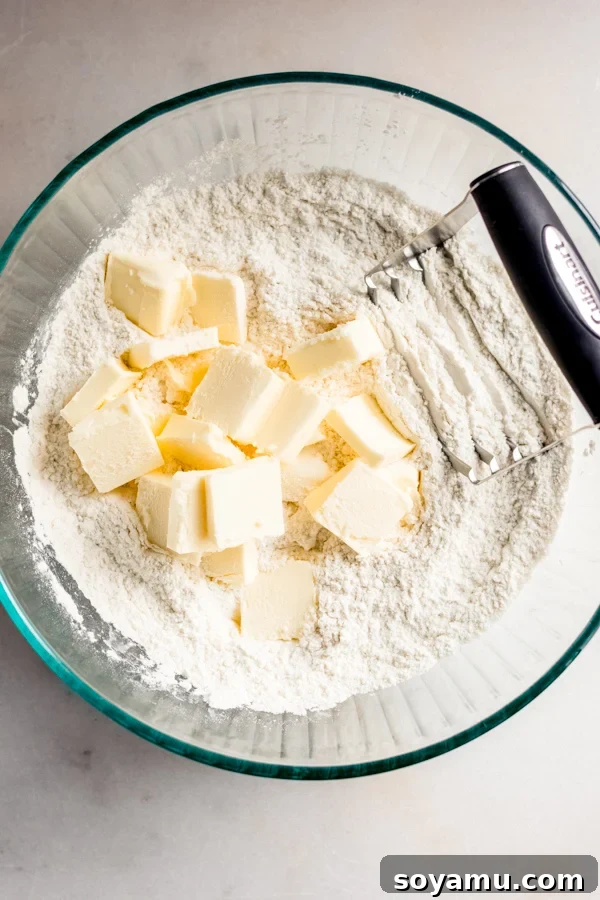
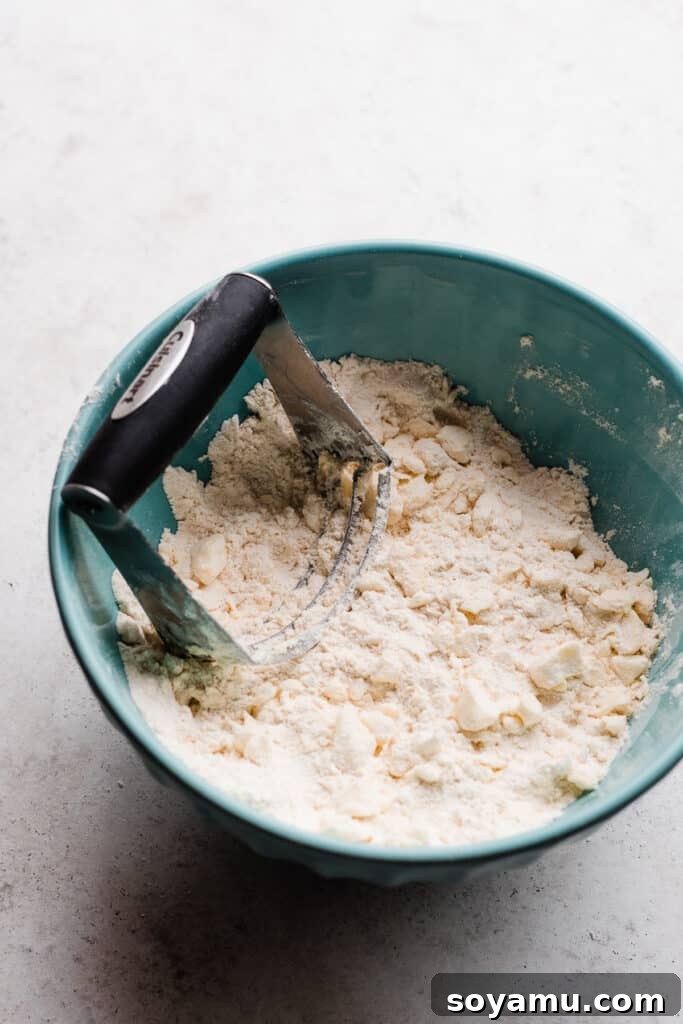
Step 3: Gradually Add Ice Water to Form the Dough
Retrieve your ice-cold water (you can even add a few ice cubes to the water before measuring to ensure it’s super chilled). Add the water gradually, starting with about half the recommended amount, then add more one tablespoon at a time. After each addition, stir the mixture with a fork to evenly moisten the dough. The key is to add just enough water for the dough to come together without becoming sticky or overly wet. You’ll know it’s ready when you can squeeze a handful of the mixture, and it holds its shape. The dough might still appear a tad dry, and a few small cracks are normal – resist the urge to add too much water. Too much hydration can lead to a tough crust.
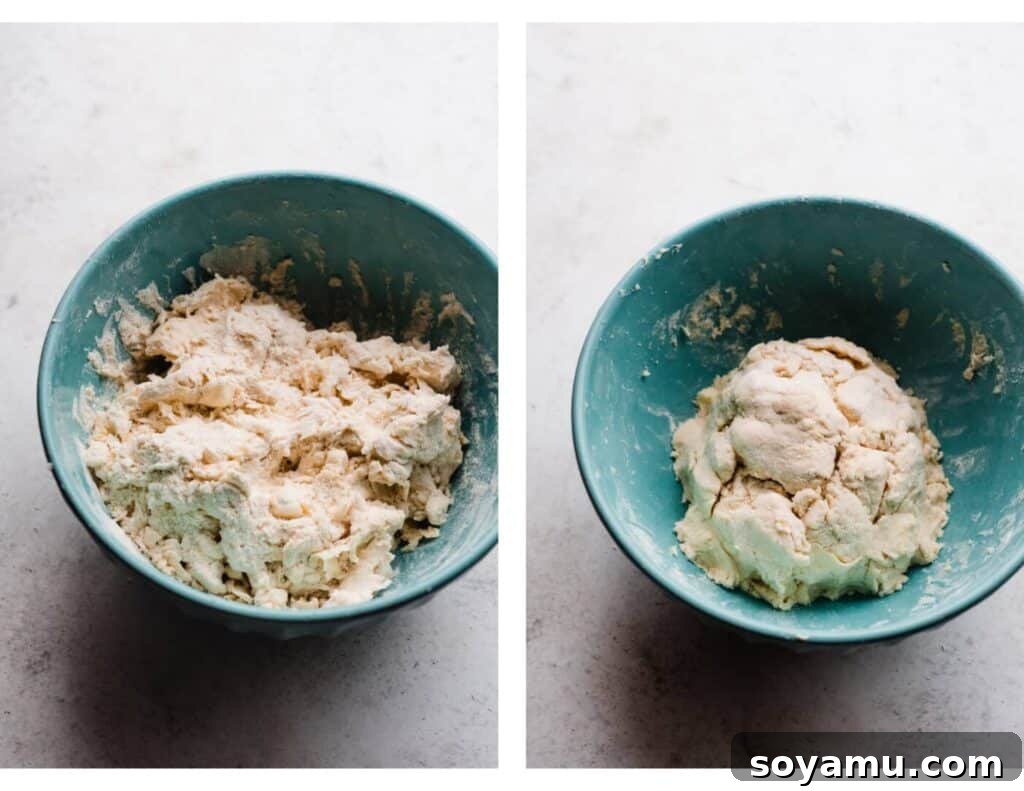
Step 4: Shape and Chill the Dough
Gently gather the dough into a ball. Avoid kneading or rolling excessively; simply bring it together, folding it onto itself a few times if necessary to incorporate any loose bits. Divide the dough into two equal halves (if making a double-crust pie or two single-crust pies). Flatten each half into a thick disc, about 1-inch thick. Tightly wrap each disc in plastic wrap. Chilling the dough is critical: it allows the gluten to relax, which prevents shrinkage during baking, and it firms up the butter, ensuring those distinct pockets of fat that create flakiness. Refrigerate for at least 2 hours, or up to 2 days. This chilling period is non-negotiable for a truly flaky crust.
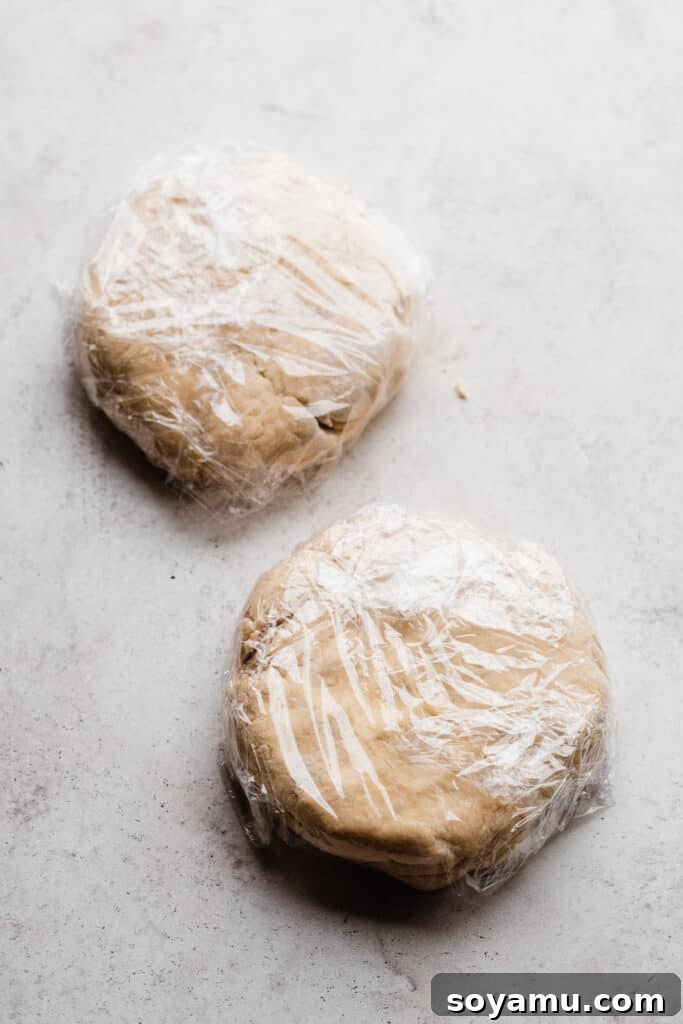
Step 5: Roll Out the Dough with Precision
On a lightly floured surface (your kitchen countertop works perfectly), unwrap one chilled dough disc. Using a rolling pin, apply even pressure and roll the dough outwards from the center in all directions. Continuously turn the dough (or gently flip it) every few rolls to prevent sticking and ensure an even thickness. Continue to lightly flour your surface and rolling pin as needed. Your pie dough should be rolled to a consistent 1/8-inch thickness. As you roll, you should still see visible specks or “marbling” of cold butter throughout the dough—these are the magical pockets that will create steam and incredible flakiness in the oven.
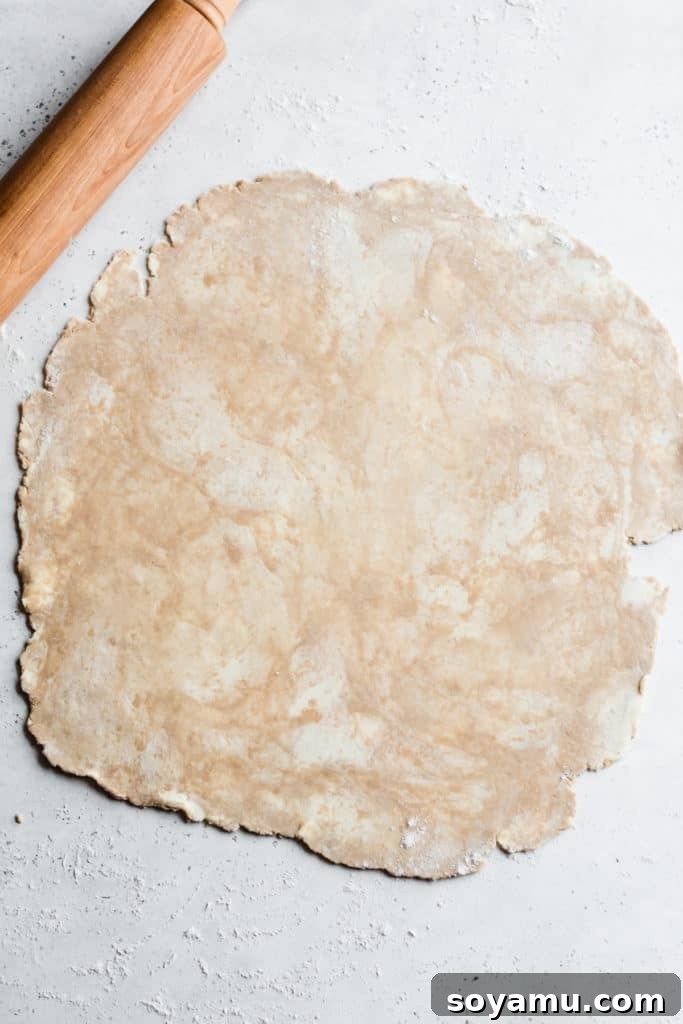
To transfer the rolled dough to your pie plate, avoid glass plates for optimal results. Ceramic and metal pie plates are universally recommended by baking experts because they conduct heat more evenly, leading to a much better-baked crust. A metal pie plate is often preferred for superior browning. You can transfer the dough by gently rolling it around your rolling pin and draping it over the plate, or by folding it in half, then in half again, placing the point in the center of your plate, and carefully unfolding it. Gently press the dough into the contours of the pie plate without stretching it. Trim any overhanging edge to approximately 2 inches around the perimeter.
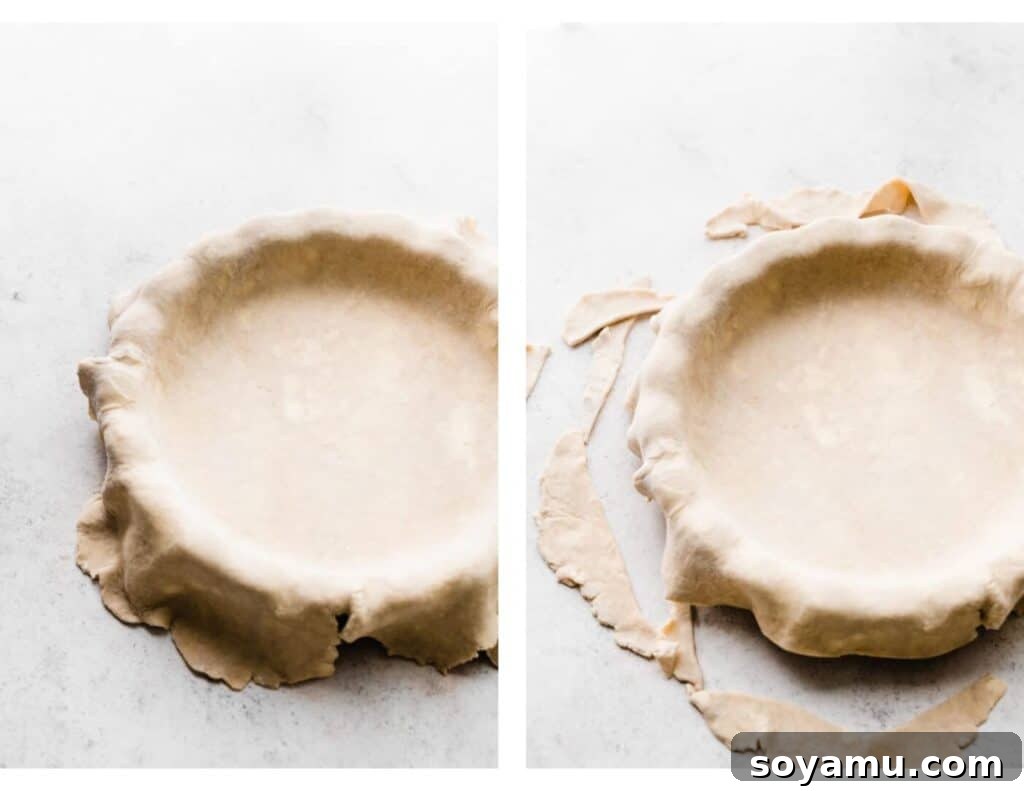
Step 6: Flute or Crimp the Edges
Fold the 2-inch overhang inward, gently tucking it under itself to create a thicker rim of dough around the edge of the pie plate. Think of it as forming a substantial “rope” of dough. The crucial rule here is: do not over-handle the crust! Excessive touching warms the butter and can lead to shrinkage in the oven. Even messy inner edges will be concealed by the filling. To crimp or flute, place your index finger on the outside of the rim and use the index finger and thumb of your other hand on the inside to guide and press the dough into a decorative pattern. Repeat this process around the entire edge of the pie.
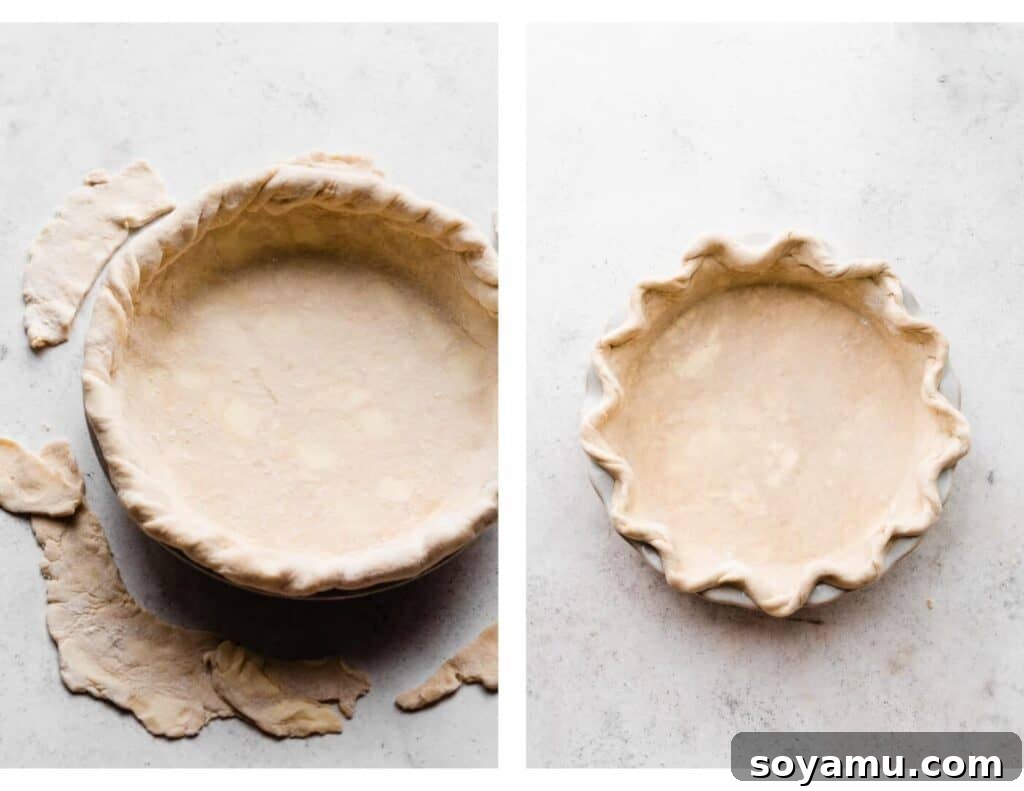
Step 7: The Essential Freeze Before Baking
Once your homemade pie crust is perfectly shaped and crimped in the pan, it’s time for another critical chilling step. Freeze the entire pie crust in the pan for at least 15 minutes before adding any filling, applying an egg wash, and baking. This step is absolutely vital, regardless of whether your recipe calls for par-baking or blind baking. This final chill ensures the butter is solid and the gluten is relaxed, which helps the crust maintain its beautiful shape and achieve maximum flakiness when it hits the hot oven.
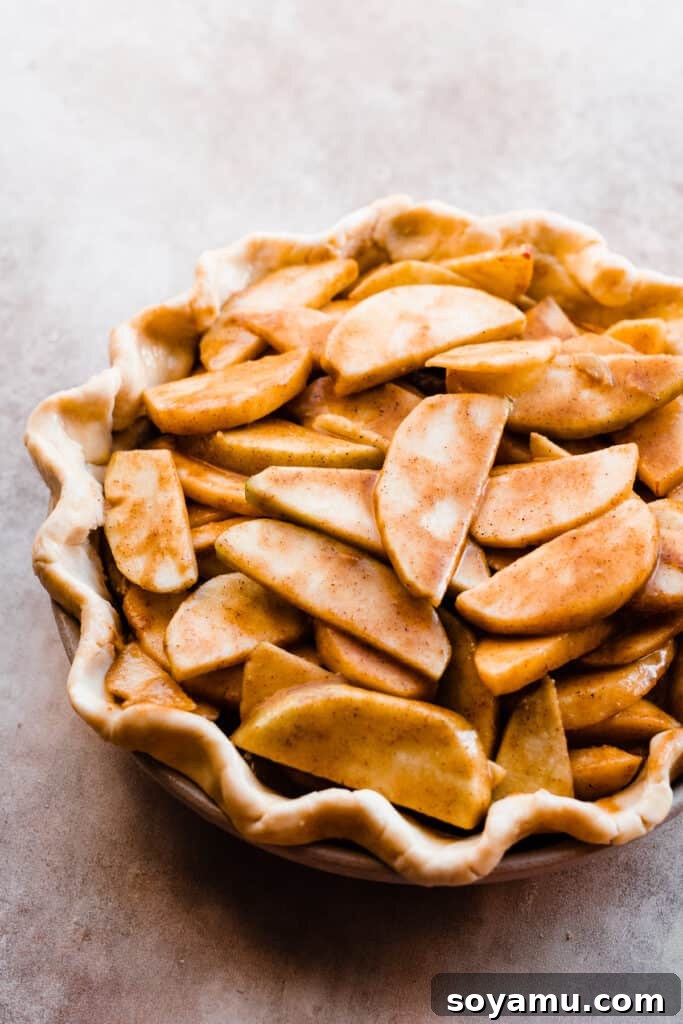
Step 8: Final Assembly and Baking
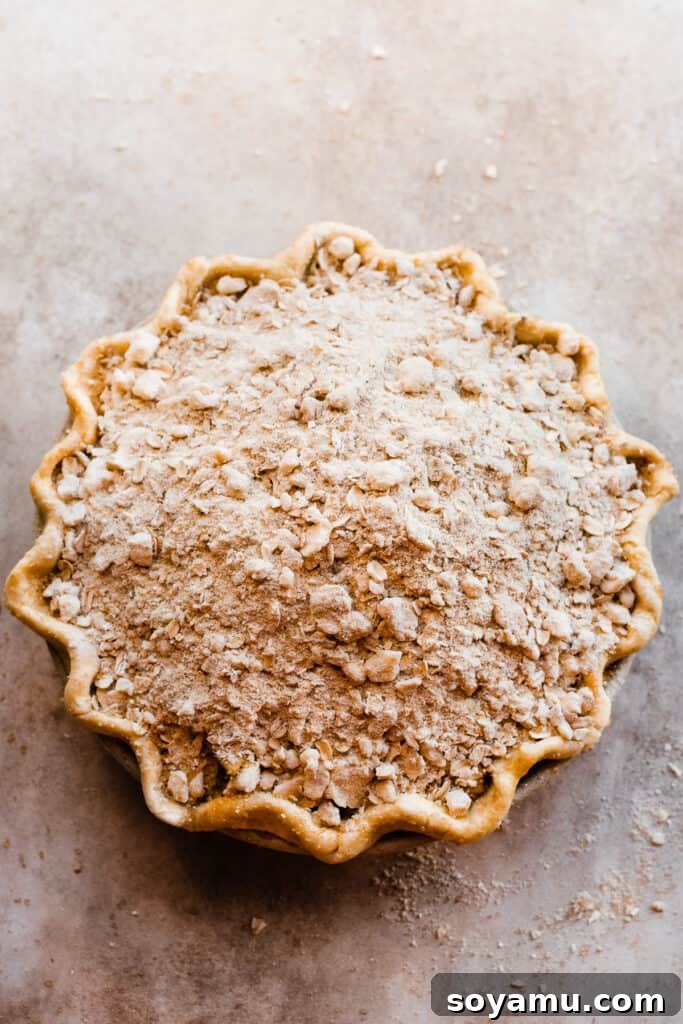
After the initial freeze, fill your pie crust with your desired filling. If your pie requires a top crust, lattice, or crumble topping, apply it now. Once assembled, return the entire pie to the fridge for an additional 10-15 minutes (or briefly to the freezer) to ensure everything is thoroughly cold before baking. This cold state is crucial for preventing shrinkage and promoting flakiness. Just before baking, brush the exposed crust with an egg wash (a beaten egg mixed with a tablespoon of water or milk) for a golden sheen, and sprinkle with coarse sugar for added sparkle and crunch. Bake according to your specific pie recipe’s instructions.
Understanding Par-Baking & Blind Baking Your Pie Crust:
These two techniques are essential for achieving perfectly cooked crusts, especially with certain types of fillings. While similar, they serve distinct purposes:
Par-Baking (Partially Baked Crust): This technique is typically used for pies with moist or liquid fillings, such as pumpkin, pecan, sweet potato, or lemon meringue pies. “Par-baked” means partially baked—we give the crust a head start in the oven before adding the filling. This prevents the bottom crust from becoming soggy (“soggy bottom syndrome”) when exposed to a wet filling, ensuring it cooks through completely and remains crisp.
Blind Baking (Fully Baked Crust): Blind baking refers to fully baking a pie crust before adding any filling. This method is employed for pies where the filling requires no baking, or only minimal heating, like French Silk Pie, fresh fruit tarts, or other no-bake fillings. A fully baked crust provides a stable base for these delicate fillings.
Guide to Par-Baking Your Pie Dough:
Follow the step-by-step instructions above until your pie dough is in the pie dish and has been frozen for 15 minutes. This ensures the butter is firm and the shape is set. Next, lightly prick (or “dock”) the bottom of the pie dough all over with a fork. This allows steam to escape during baking and prevents the crust from puffing up. Now, crumple a piece of parchment paper (only use parchment here; foil or other materials can damage your crust or stick to it!) and gently fit it inside the pie shell. Fill the parchment-lined crust with pie weights. If you don’t have specialized pie weights, dried beans, rice, or granulated sugar work perfectly. Ensure the weights fill the crust right up to the crimped edges—this is crucial to prevent the edges from slumping down into the pie as it bakes.
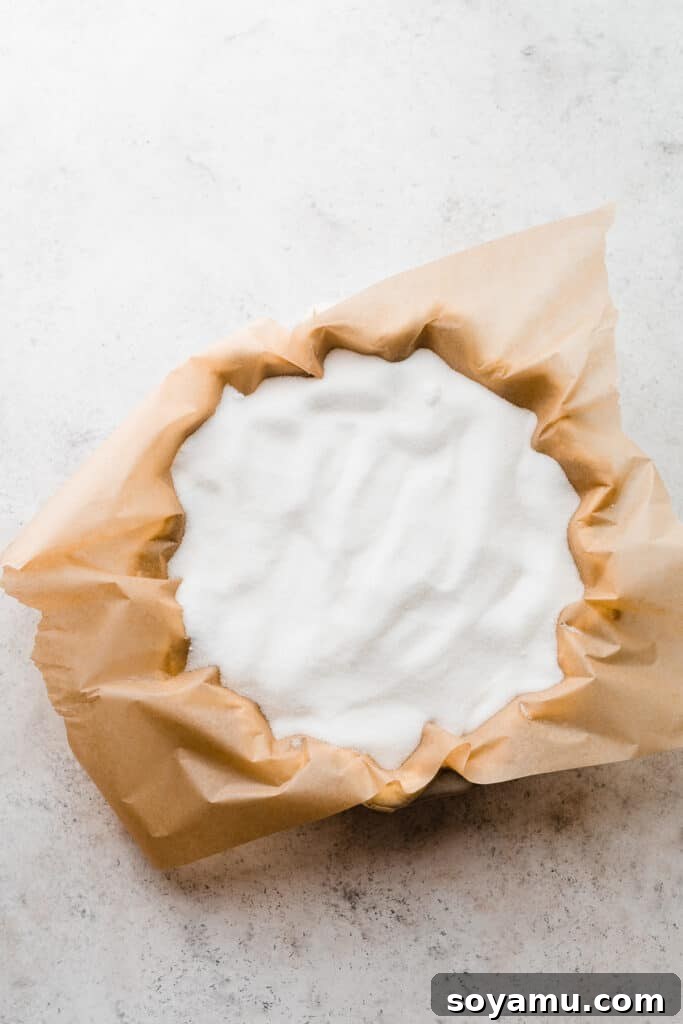
Bake the weighted crust in a preheated oven at 425°F (220°C) for 15-17 minutes, or until the crimped edges appear lightly golden brown. Carefully remove the pie weights and parchment paper. At this point, you can brush the exposed crust (especially the bottom and sides) with a light egg wash. This helps seal the crust, prevents further sogginess, and contributes to a beautiful matte finish. Return the crust to the oven for an additional 2-4 minutes, or until the bottom and sides of the crust look dry and matte, rather than shiny. It’s now ready for your liquid filling.
Guide to Blind Baking Homemade Pie Crust:
To blind bake your pie crust, follow all the initial steps for par-baking, including freezing the crust, docking it, and baking with pie weights. After removing the parchment and pie weights, instead of baking for just 2-4 minutes more, continue to bake the crust for an additional 10-12 minutes (or longer, depending on your oven and desired doneness). The goal is a fully golden-brown, crisp crust. If the edges start to brown too quickly, you can create a pie shield with foil or use a dedicated pie crust shield to protect them.
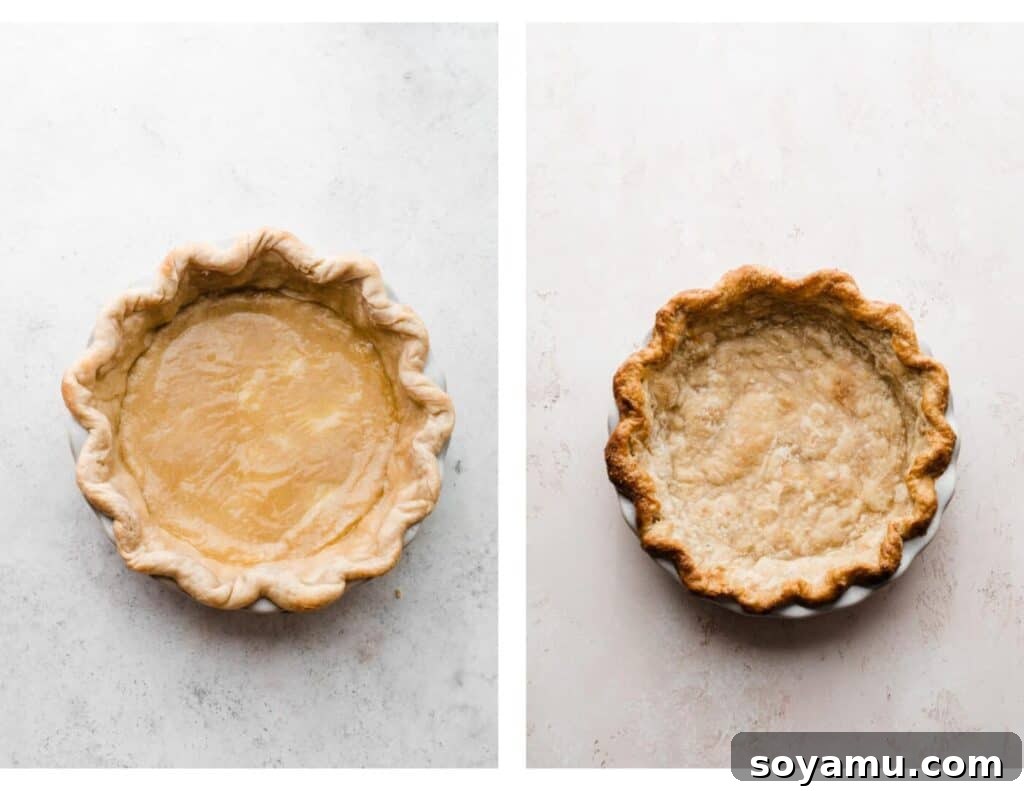
The image on the left illustrates a par-baked homemade pie crust (after the first portion of baking and removal of weights), while the image on the right shows a fully blind-baked crust, ready for a no-bake filling.
Pie Crust Troubleshooting and FAQs:
Even experienced bakers encounter challenges. Years of making pie crust, and making it “incorrectly,” have taught us a lot. Here’s what to do when facing common pie dilemmas on your quest for the perfect pie:
Problem 1: My crust isn’t flaky. Why?
A lack of flakiness is almost always due to the butter warming up too much before or during the initial stages of baking. If the butter melts at room temperature rather than in the hot oven, you won’t get those lovely pockets of steam that create flaky layers. The steam released when cold butter rapidly melts is the magic behind a tender, layered crust.
The Fix: Keep Everything COLD!
If your dough becomes too warm, soft, or melty at any point while you’re working with it (mixing, rolling, crimping), immediately wrap it tightly in plastic wrap and transfer it back to the freezer for a 10-15 minute chill (or longer if needed). This firms up the butter, ensuring it remains cold until it hits the oven. When rolling out your dough, you should still be able to discern small bits or streaks of butter within it; these visible pieces are your guarantee of flakiness.
Problem 2: My homemade pie crust melted or shrunk during baking.
This common issue manifests as crimped edges losing their shape, or the entire crust shrinking and sliding down into the pie dish.
The Fix: Avoid Over-Handling and Chill Religiously!
This is arguably the most crucial tip for perfect pie crust: Do not over-handle the dough! Excessive touching, especially when forming and crimping the edges, warms the butter and develops the gluten too much. Even if you re-chill or freeze the dough after over-handling, you can’t fully undo the damage of melted butter and over-developed gluten, which causes shrinkage. Work quickly and confidently. Don’t obsess over perfecting your crimps; a swift, firm touch is better than prolonged fussing. The 15-minute freezer chill before baking is far more effective at setting the crimps than your efforts to perfect them. Always, without exception, chill your assembled pie (or just the crust if par-baking) for an additional 15-30 minutes in the freezer or fridge before it goes into the oven. A cold pie entering a hot oven is the ultimate defense against shrinkage and ensures superb flakiness.
Problem 3: My pie dough is difficult to work with (too dry/crumbly or too wet/sticky).
Getting the dough consistency just right is critical. Too little water results in a dry, crumbly dough that’s hard to roll, while too much makes it sticky and unwieldy.
The Fix: Perfecting Moisture and Hydration.
When adding the ice water, do so in very small increments (e.g., one tablespoon at a time), stirring with a fork after each addition to distribute moisture evenly. It’s always easier to add more water than to correct an overly wet dough. The dough is perfectly hydrated when you can squeeze a handful, and it holds together firmly like a cohesive dough, yet still appears a touch dry and slightly shaggy. If your dough is too sticky, you can gently add a tiny bit more flour to the surface as you work it. If it’s too dry, you can try misting it with a very fine spray of cold water or adding a minuscule amount more water, working it in gently.
Problem 4: My pie dough tears when transferring it to the pie plate.
This issue often arises from dough that’s too sticky, too thin, or improperly handled during transfer.
The Fix: Proper Rolling Thickness and Transfer Techniques.
Firstly, ensure your dough is rolled to the correct thickness, approximately 1/8 inch—no thinner. A well-floured surface and rolling pin are also essential to prevent sticking. There are two primary methods for transferring dough to the pan:
- The Folding Method: Gently fold the rolled dough in half lengthwise, then in half again widthwise, creating a triangle or quarter-circle. Carefully lift this folded dough, center the point in your pie plate, and gently unfold it, letting it drape naturally into the pan. This is often easier for beginners.
- The Rolling Pin Method: Lightly flour your rolling pin. Gently and loosely wrap the rolled dough around the floured rolling pin, lifting it minimally off the counter. Slide your pie plate underneath the rolled dough, then gently unfurl the dough back over the plate.
After either method, carefully press the dough into the bottom and sides of the pie plate, ensuring there are no air gaps between the dough and the pan. Do this without stretching the dough.
Problem 5: My dough cracks when I’m rolling it out.
Cracking is a sign that your dough is likely under-hydrated (not enough water) or too cold and stiff directly from the fridge.
The Fix: Hydration and Rest.
If your dough is cracking, it might need a little more moisture or a brief moment to relax. First, let the dough sit at room temperature for about 10-15 minutes to allow it to soften slightly and become more pliable. Stop rolling, give it a few minutes, then try again. You can also gently push the cracked edges back together with your hands to seal them. Another trick is to flip the dough over and continue rolling on the other side; the cracked side will often start to come together underneath as you roll.
Problem 6: The pie dough tore in the pie pan after transfer.
Don’t despair! A tear in the pie dough is easily fixed and does not mean you have to start over.
The Fix: Patch It Up!
Simply grab a small piece of dough scrap leftover from trimming the edges. Choose a piece slightly larger than the tear. Dip your finger in a bowl of cold water (you’re not trying to add excessive water, just enough to make it tacky) and lightly moisten the edges of both the scrap and the hole in the pie crust. Place the scrap over the tear and gently tap the edges of the patch into the surrounding dough to seal it. If it feels too wet, dip your finger in flour and gently tap the patched spot to absorb any excess moisture. The same technique can be used if you have a short spot on the edge of the crust where there isn’t enough dough to make a crimp.
Expert Tips for Guaranteed Pie Crust Success:
- Strictly Follow the Recipe: Pie making is a delicate balance of science and art. We highly recommend adhering closely to the recipe’s measurements and instructions, especially if you’re new to making pie crust. Read through the entire guide and all tips beforehand to familiarize yourself with each step.
- COLD, COLD, COLD is Key: We cannot stress this enough: it is absolutely *imperative* that your dough, especially the butter, is kept as cold as possible throughout every stage of the process. The magic of a flaky crust happens when the intensely cold butter hits the hot oven, creating steam that separates the layers of dough. If the butter melts before baking, you lose that essential flakiness.
- Don’t Overwork the Dough: Overworking develops gluten excessively, leading to a tough, less tender crust. Handle the dough gently and only as much as necessary.
- Chill Between Steps: If your kitchen is warm or you feel the dough getting soft, don’t hesitate to pop it back into the fridge or freezer for 10-15 minutes.
- Use the Right Tools: While minimal equipment is needed, having a pastry cutter and a good rolling pin can make a significant difference in ease and results.
Creative Pie Crust Variations:
- Lattice Top Crust: Elevate your pie’s presentation with a beautiful lattice top. Mastering this technique adds an impressive touch to any fruit pie.
- Whole Wheat Inclusion: For a slightly darker, nuttier, and more robust crust, consider substituting up to one-third of the all-purpose flour with white whole wheat flour. For example, use 1 cup of white whole wheat flour and 2 cups of all-purpose flour for a total of 3 cups.
- Herb-Infused Savory Crust: For savory pies or quiches, finely chop fresh herbs like rosemary, thyme, or sage and mix them into the dry ingredients for an aromatic and flavorful crust.
Essential Tools for Perfect Pie Crust:
You don’t need a professional kitchen setup to make fantastic pie crust, but a few key tools can significantly simplify the process and improve your results:
- Rolling Pin: A simple wooden rolling pin with handles provides excellent control for rolling out dough evenly.
- Pastry Cutter (or Pastry Blender): While you can use two knives or your fingertips, a pastry cutter makes incorporating cold butter into flour much faster and more efficient, producing ideal pea-sized pieces.
- Parchment Paper: Invaluable for beginners or if you struggle with dough sticking to your counter. Rolling dough between two sheets of parchment eliminates the need for excess flour and ensures a clean lift.
- Pie Plate: A 9-inch metal or ceramic pie plate is highly recommended. Metal conducts heat superiorly, leading to a crisper, more evenly browned bottom crust, which glass plates often fail to achieve.
- Pie Crust Shield: Not strictly essential, but a pie crust shield (or a homemade foil ring) is a lifesaver for preventing the edges of your crust from over-browning or burning while the rest of the pie bakes.
- Pastry Brush: Essential for applying egg wash smoothly, ensuring a beautiful golden-brown and slightly glossy finish on your baked crust.
Delicious Pie Recipes to Inspire You:
Now that you’ve mastered the art of homemade pie crust, explore these wonderful recipes to showcase your skills:
Traditional Pies:
- Dutch Caramel Apple Pie
- Chocolate Pecan Bourbon Pie
- Maple Pie with Brûléed Topping
- French Silk Pie
- Cranberry Apple Slab Pie with Maple Glaze
- Cherry Bourbon Pie with Crumble Topping
- Strawberry Blueberry Pie
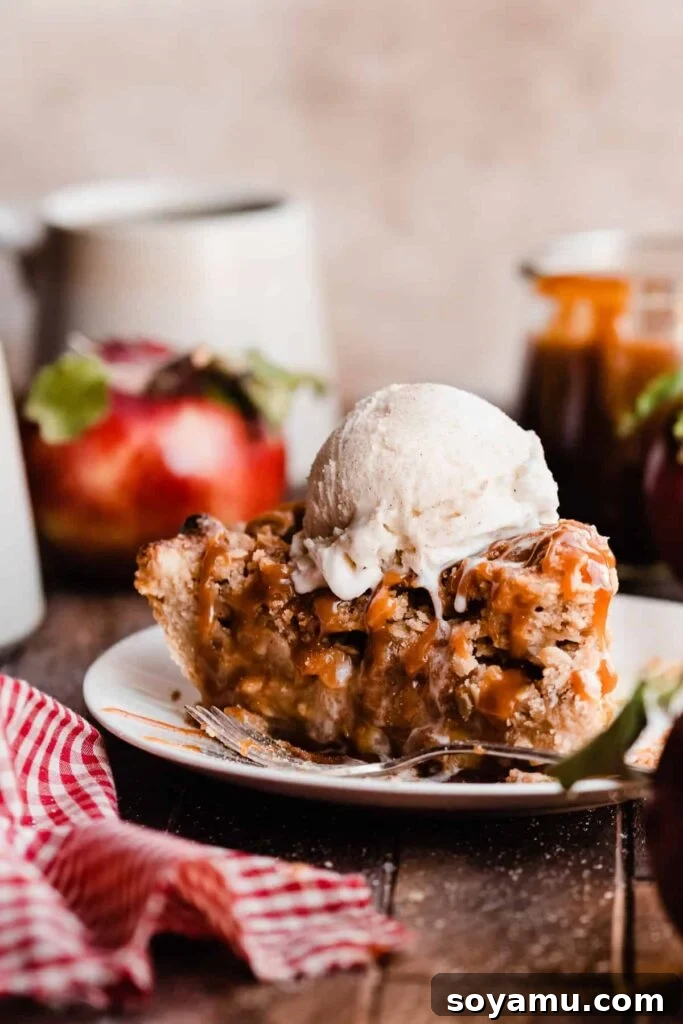
Rustic Galettes:
- Salted Caramel Pear Galette
- Strawberry Rhubarb Galette
- Blueberry Cherry Galette
- Salted Caramel Apple Galette
- Whole Wheat Mini Blackberry Galettes
- Peach Nectarine Galette
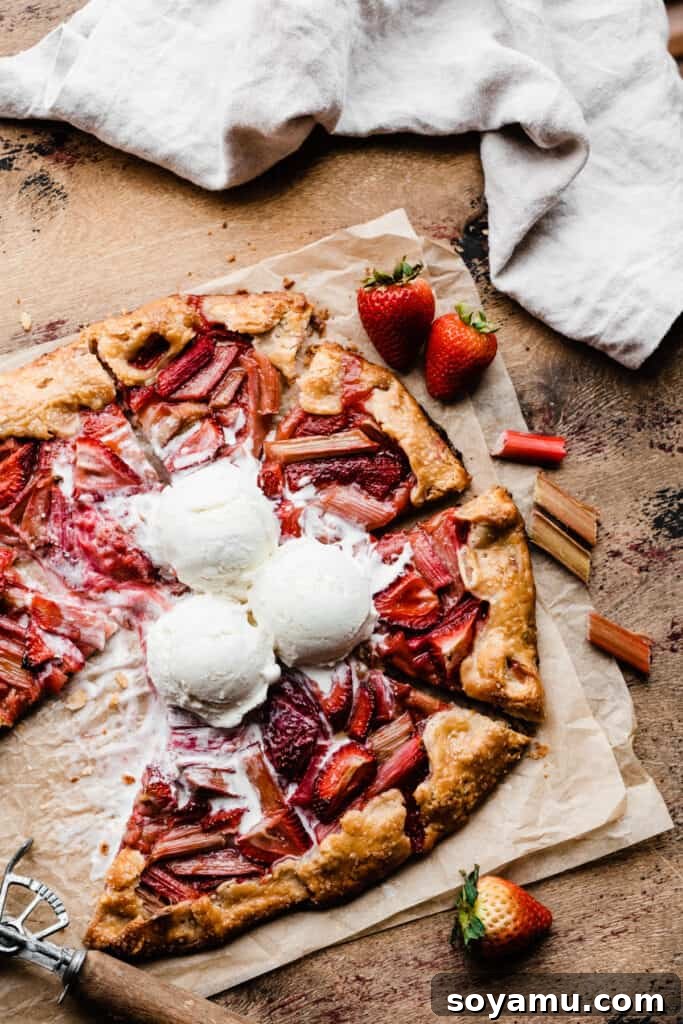
Charming Hand Pies:
- Cherry Hand Pies
- Salted Caramel Peach Hand Pies
- Cherry Cobbler for Two
- Pumpkin Pasties
- Strawberry Rhubarb Hand Pies
- Homemade Blueberry Pop Tarts
- Nutella Pop Tarts
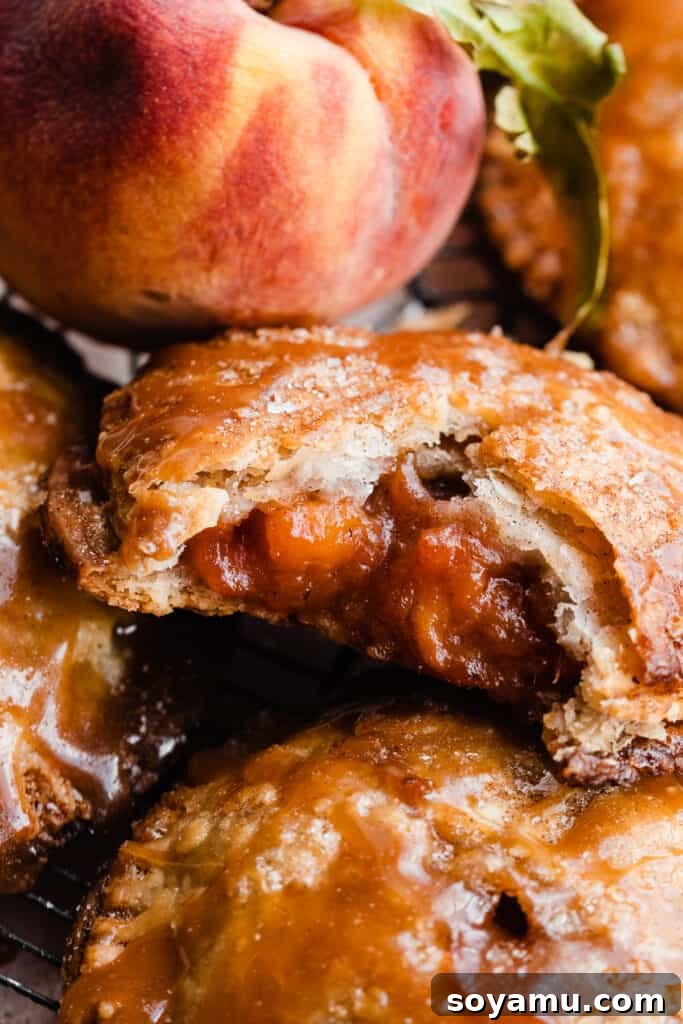
Hearty Savory Pies:
- Mixed Vegetable Galette
- Perfect Breakfast Quiche
- Butternut Squash Galette

Did you craft this recipe? Share your creation!
Follow Blue Bowl Recipes on Instagram and tag #bluebowlrecipes with your photo. We’d love to see your delicious results!
Perfect Flaky Homemade Pie Crust
Stephanie Simmons
20 mins
0 mins (for crust, varies for filled pie)
2 hrs 15 mins (minimum)
2 hrs 35 mins
2 crusts
Ingredients:
- 3 cups all-purpose flour (spooned & leveled, 390 grams)
- 3/4 tsp salt
- 1 tbsp sugar (optional, for flavor and browning)
- 1 cup (2 sticks) cold salted butter, cubed (226 grams)
- 2 tbsp shortening (optional, for extra tenderness)
- 9-10 tbsp ice-cold water
Instructions:
- Preparation Notes: Read through all directions once before starting, especially if you are new to pie crust making. Have your pie filling and any toppings (crumble, lattice, etc.) ready before you roll out your bottom crust. Letting the crust sit in the pie plate unfilled for too long can make it weak and dry. Refer to the troubleshooting section above if you encounter any issues with your dough during the process.
- Begin the Dough: Measure your water and place it in the freezer to ensure it’s truly ice-cold. In a medium mixing bowl, whisk together the flour, salt, and sugar. Add the cold butter cubes (and shortening, if using) to the flour mixture. Toss to coat the fats with flour. Use a pastry cutter or two forks to cut the butter and shortening into the dry ingredients until the mixture resembles coarse meal with some pea-sized pieces of butter still visible.
- Hydrate the Dough: Gradually drizzle the ice-cold water into the flour/fat mixture, adding 2 tablespoons at a time. Stir with a fork after each addition to moisten evenly. Stop adding water when the dough starts to come together in large clumps and forms a cohesive mass when squeezed, but still appears slightly dry. The dough should not feel sticky or overly wet.
- Form and Chill: Gently gather the dough into a ball without excessive kneading. Divide the dough in half. Lightly flatten each half into a 1-inch thick disc. Tightly wrap each disc in plastic wrap and refrigerate for a minimum of 2 hours, and up to 48 hours, before use. (See Notes below for freezing instructions).
- Roll Out Chilled Dough: Lightly flour your clean counter surface and rolling pin. Unwrap one chilled dough disc. Starting from the center, gently roll the dough outwards in all directions, turning or flipping the dough frequently to prevent sticking. Continue to flour your surface and rolling pin as needed. Smooth any minor cracks as you roll. Aim for a thickness of about 1/8 to 1/16 inch, typically rolling to a diameter of about 16 inches for a 9-inch pie plate.
- Transferring Dough to Pie Plate:
- Folding Method: Gently fold the rolled dough into quarters, then place the point in the center of your pie dish. Carefully unfold it.
- Rolling Pin Method: Loosely wrap the dough around a floured rolling pin. Slide the pie plate underneath, then gently unroll the dough over the plate.
After either method, gently press the dough onto the bottom and up the sides of the pie plate, ensuring no air gaps. Avoid stretching the dough.
- Finishing and Crimping Edges: Trim the dough edges with kitchen shears or a knife, leaving a 1 ½ to 2-inch overhang. Fold this overhang under itself, tucking it between the crust and the rim of the pie plate to create a thicker edge. Crimp the edges by placing an index finger on the outside of the rim and using the thumb and index finger of your other hand on the inside to create a decorative flute. Work quickly and avoid over-handling.
Crucial Final Chill: Once the pie dough is in the pan and crimped, place it in the freezer for an additional 15 minutes. This ensures the crust is very cold (or slightly frozen) before baking, which is vital for maintaining shape and flakiness.
For Single-Crust Pies (or with Crumble Topping): If your recipe does not require par-baking, freeze the crust for 15 minutes, brush with egg wash, pour in the filling (and add crumble topping, if applicable), then bake as directed.
For Double-Crust Pies: While the bottom crust chills, prepare your top crust (lattice or full crust) by rolling it out and chilling it on a baking sheet. Once the entire double-crust pie is assembled, freeze it for another 15 minutes before applying egg wash and baking. Regardless of pie type, always complete this final chill for best results.
- Egg Wash Application: For a beautiful golden-brown and slightly shiny crust, always apply an egg wash. Beat one egg with a tablespoon of water or milk, then use a pastry brush to coat all exposed parts of the crust. Sprinkle with coarse sugar for added sparkle, if desired, then bake according to your pie recipe.
- For Par-Baking (Partially Baked Crust): Follow the chilling steps outlined above, but skip the initial egg wash. Dock the bottom of the chilled crust thoroughly with a fork. Crumple a piece of parchment paper and line the crust, then fill with pie weights (dried beans, rice, or sugar work well), ensuring weights reach the crimped edges to prevent shrinkage. Preheat oven to 425°F (220°C). Bake for 15-20 minutes, or until edges are lightly browned. Carefully remove weights and parchment. If desired, brush the edges and bottom with egg wash for a richer color and to help seal the crust. Return to the oven for 3-7 more minutes, until the bottom and sides appear dry and matte (not shiny). This method is adapted from Erin McDowell’s “The Book on Pie.”
- For Blind Baking (Fully Baked Crust): Follow the same initial steps as par-baking. After removing the parchment and pie weights, bake for an additional 10-16 minutes (longer than par-baking) until the crust is golden brown and fully cooked. Use a pie shield or a foil ring if the edges start to brown too quickly.
- Preventing Burnt Crust Edges: For any pie with a longer bake time, check the crust after 20-30 minutes. If the edges are browning too quickly, cover them with a pie crust shield or a ring made from aluminum foil. This effectively protects the delicate edges from burning.
- Completing Par-Baked or Blind-Baked Pies: Once your crust is par-baked or blind-baked, proceed with your specific pie recipe’s instructions for filling and final baking.
- Crust Decorations: Use leftover dough scraps to create decorative elements. Roll them out (no thinner than 1/8 inch) and use a knife or small cookie cutters (like leaf shapes) for designs. Brush these decorations with egg wash and sprinkle with coarse sugar. Bake on a parchment-lined baking sheet at the same temperature as your pie for about 5-12 minutes, or until lightly golden. These are perfect for topping your finished pie or covering any minor imperfections.
Notes
Nutrition Information: The nutrition information provided is an approximation for one half of the total pie dough yielded by this recipe (equivalent to one single crust). This data is for the crust only and does not include any filling.
Nutrition (per 1 crust/half of total dough)
Carbohydrates: 149g,
Protein: 20g,
Fat: 94g,
Saturated Fat: 59g,
Polyunsaturated Fat: 4g,
Monounsaturated Fat: 24g,
Trans Fat: 4g,
Cholesterol: 244mg,
Sodium: 1606mg,
Potassium: 228mg,
Fiber: 5g,
Sugar: 7g,
Vitamin A: 2836IU,
Calcium: 56mg,
Iron: 9mg
Nutrition information is automatically calculated and should be used as an approximation only.