
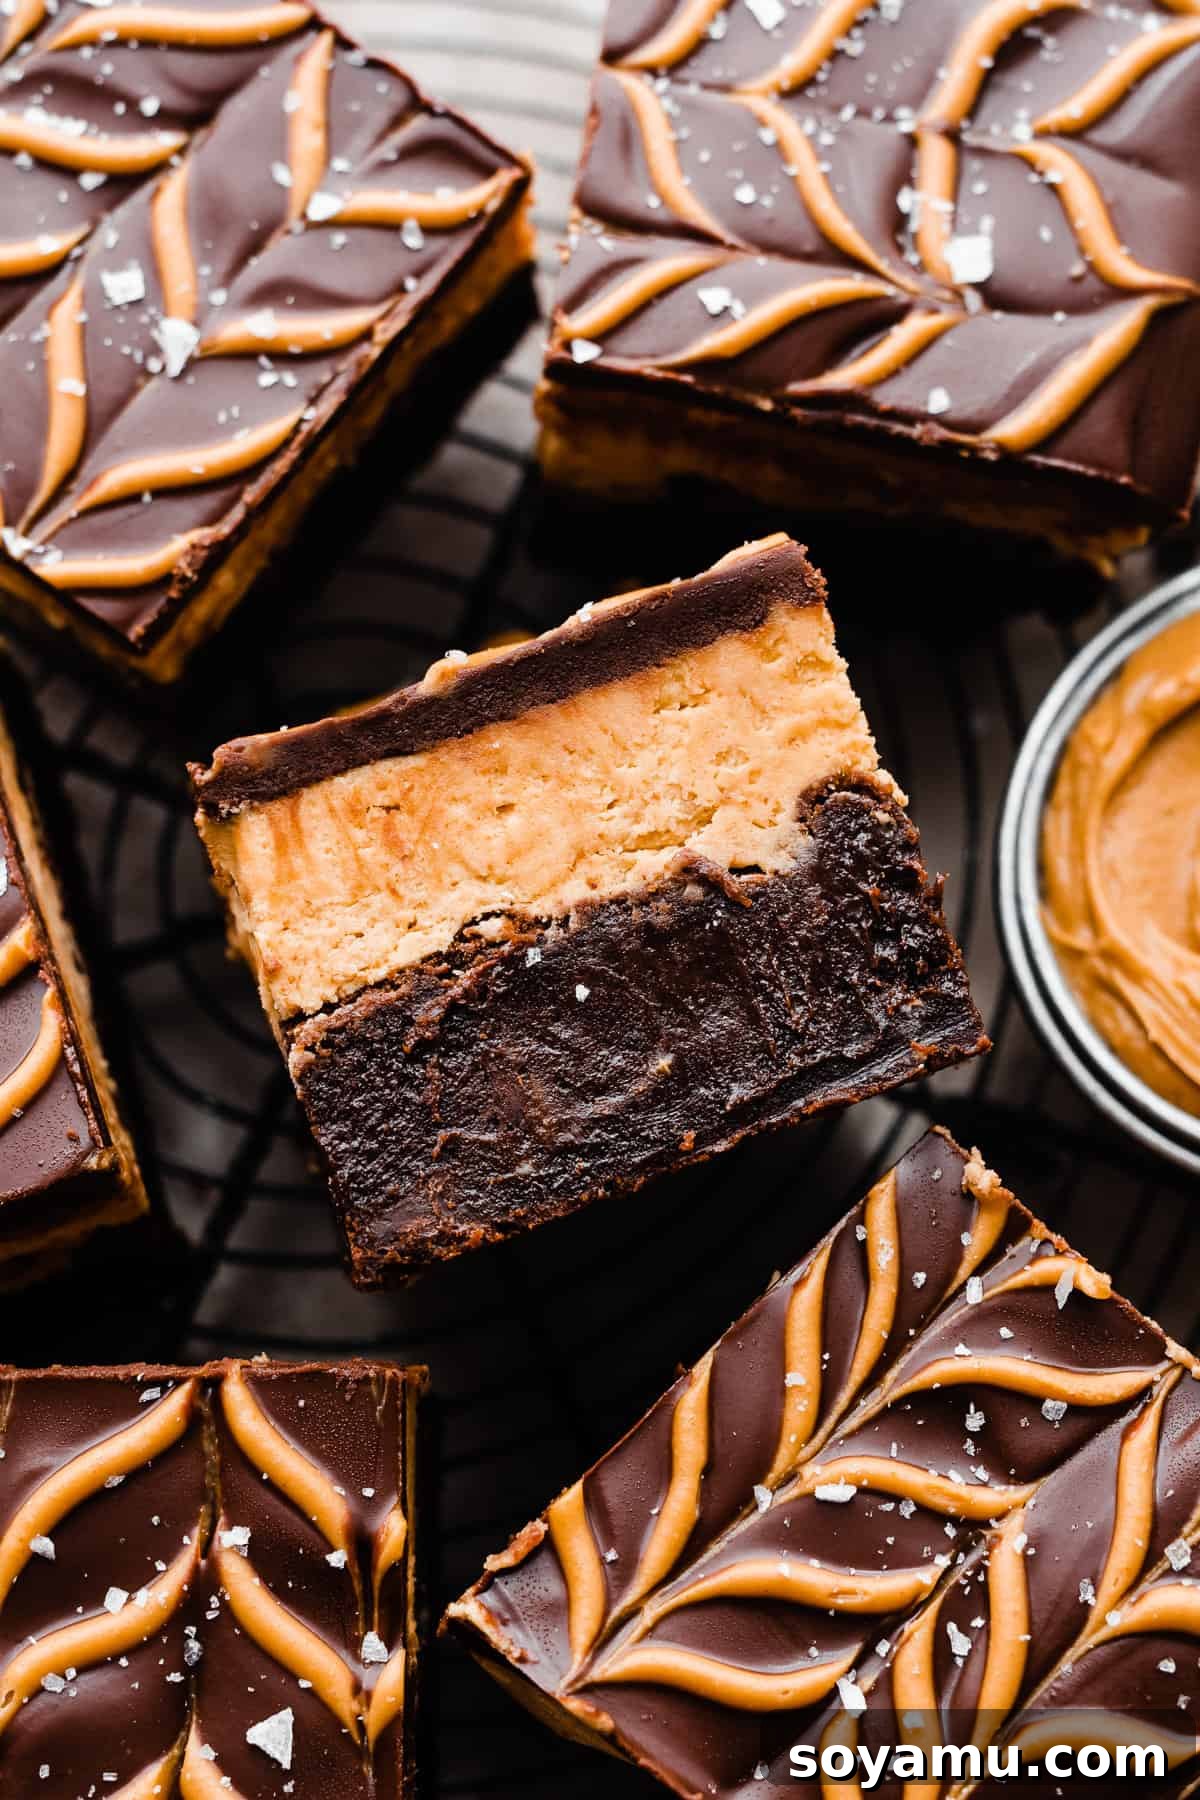
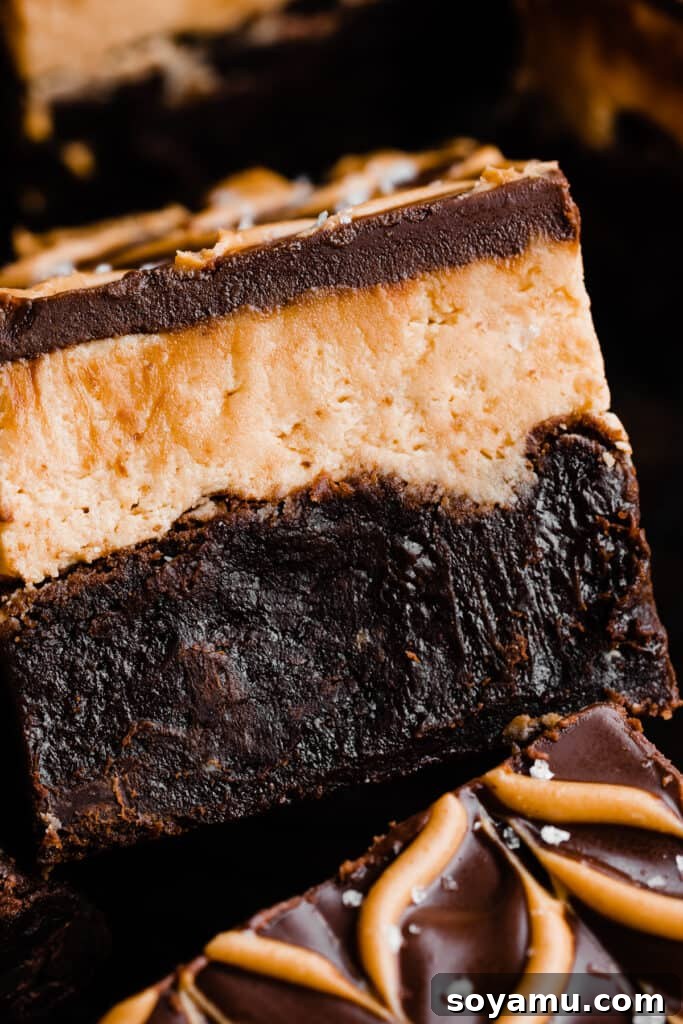
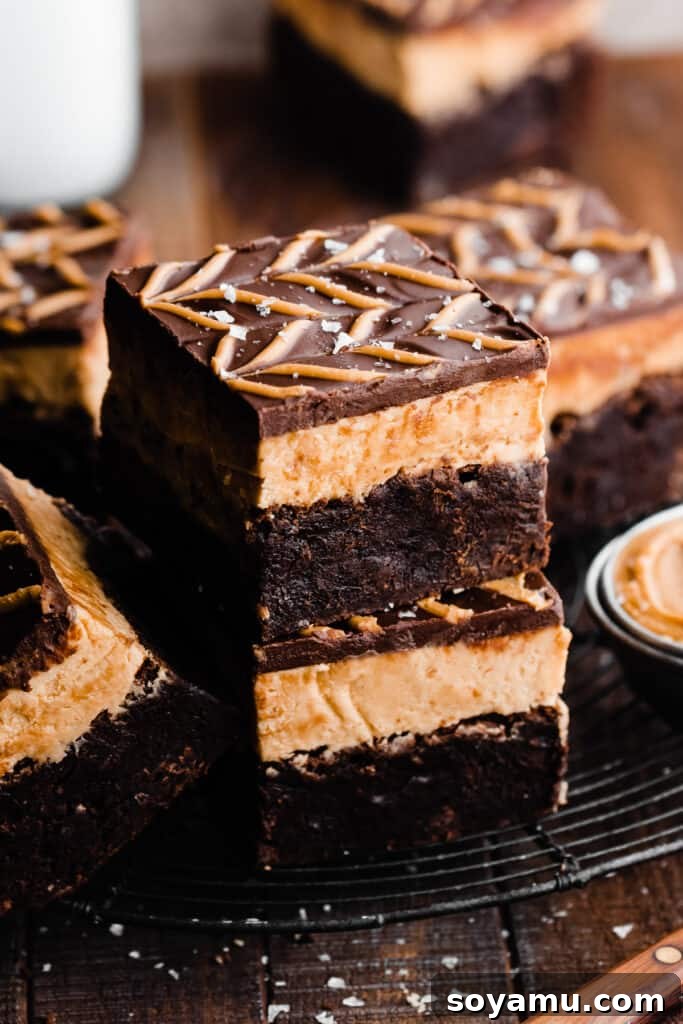
Indulge in the ultimate treat that brings together two classic American flavors: chocolate and peanut butter. These Buckeye Brownies are a symphony of taste and texture, featuring an irresistibly fudgy brownie base, a lavish layer of creamy, dreamy peanut butter filling, and a glistening, smooth chocolate topping. For that extra touch of bakery-worthy elegance, we’ll guide you through adding an easy (yes, really!) peanut butter herringbone design that will undoubtedly impress every peanut butter enthusiast and sweet tooth alike. Prepare to elevate your dessert game with this phenomenal recipe.
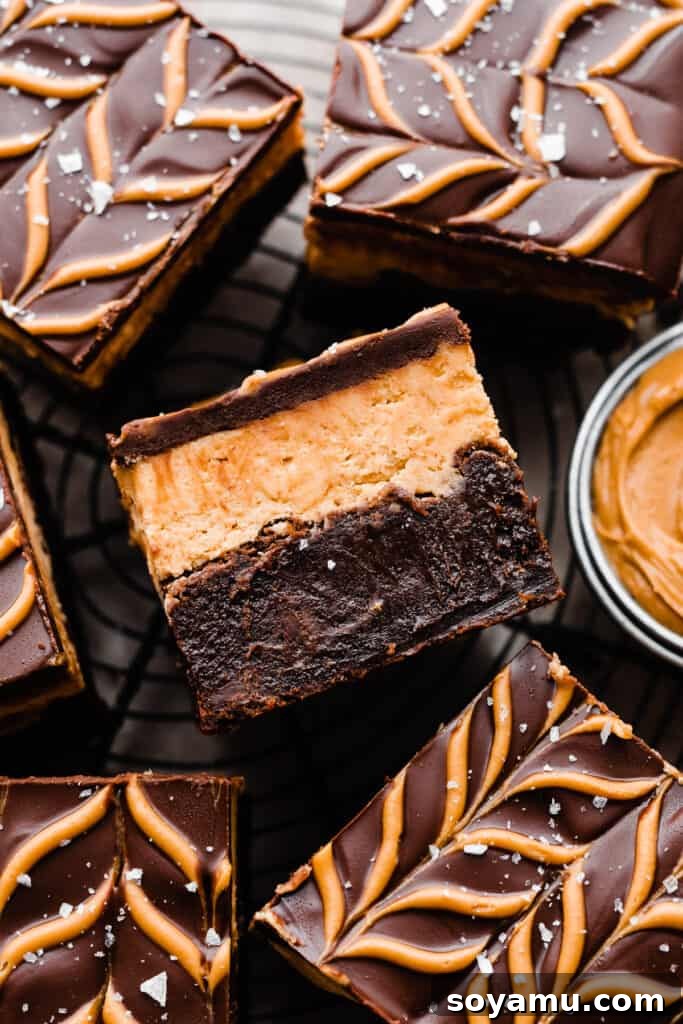
Why You’ll Fall in Love with This Ultimate Buckeye Brownies Recipe:
This isn’t just another brownie recipe; it’s an experience. We’ve perfected the balance of rich flavors and delightful textures to create a dessert that’s truly extraordinary. Here’s why these Buckeye Brownies will become your new favorite:
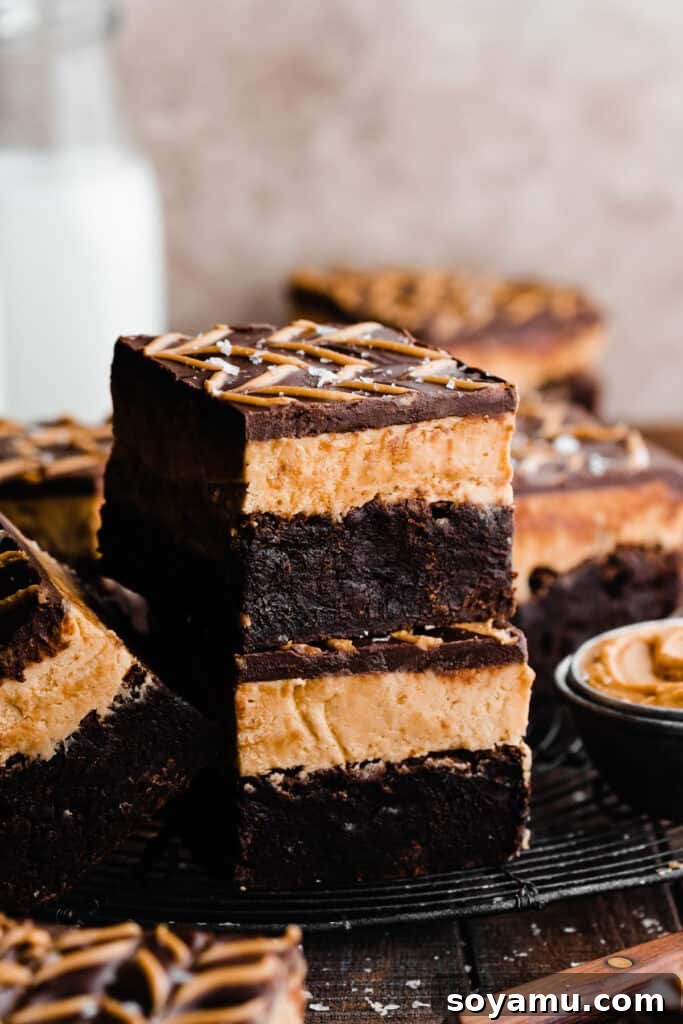
- Unbelievably Fudgy Chocolate Brownie Base: Our brownies are designed to be ultra-fudgy, boasting a deep chocolate flavor that forms the perfect foundation for this layered masterpiece. Forget dry, cakey brownies – this recipe delivers that dense, moist, and chewy texture every brownie lover craves. The secret lies in a carefully balanced ratio of melted butter and premium chocolate, ensuring a consistently decadent base that sets the stage for pure indulgence.
- Luxuriously Creamy Peanut Butter Filling: This isn’t just a basic peanut butter frosting. Our filling is wonderfully thick, yet incredibly smooth and creamy, bursting with authentic peanut butter goodness. It strikes the ideal balance, providing a sweet and savory contrast to the rich chocolate without being overly sugary. It’s like the classic Buckeye candy center, but in a spreadable, irresistible layer that perfectly complements the fudgy brownie.
- A Show-Stopping, Crowd-Pleasing Dessert: Whether you’re bringing them to a potluck, serving them at a party, or simply treating yourself, these Buckeye Brownies are guaranteed to impress. They beautifully encapsulate the beloved flavor combination of traditional Buckeye candies in an easy-to-share brownie form. The elegant herringbone design on top adds a sophisticated touch, making them look like they came straight from a gourmet bakery. Everyone will be asking for the recipe, making you the star baker of any gathering!
Essential Ingredients for Perfect Buckeye Brownies:
Crafting these delectable Buckeye Brownies requires a few key ingredients. Quality makes a difference, so opt for the best you can find. Remember, the full recipe with precise measurements and detailed instructions can always be found in the recipe card at the bottom of this page, but here’s a closer look at what you’ll need and why:
- Melted Butter: For a deeper, richer flavor in your brownies, we highly recommend using salted butter. The hint of salt perfectly complements the sweetness of the chocolate and enhances all the other flavors. However, if you prefer or only have unsalted butter, that will work too; just ensure you add the specified amount of salt to the recipe. Using melted butter in brownies helps achieve that desired dense and fudgy texture.
- Premium Chocolate: The quality of your chocolate directly impacts the richness of your brownies and topping. You can use a combination of good quality chocolate chips or finely chopped baking bars from brands like Ghirardelli or Baker’s. A mix of semi-sweet and milk chocolate in the brownie batter and topping adds complexity and ensures a balanced flavor profile that isn’t overly bitter or sweet.
- Large Eggs: Eggs are crucial for structure, moisture, and helping achieve that desirable crackly top on your brownies. They act as an emulsifier and binder, contributing to the overall fudginess. Always use large-sized eggs and ensure they are at room temperature for optimal incorporation into the batter, which results in a smoother, more uniform mixture.
- Pure Vanilla Extract: Don’t skimp on vanilla! Real vanilla extract adds a layer of warmth and depth to both the brownie and peanut butter layers, enhancing all the other flavors and preventing them from tasting flat. Imitation vanilla simply won’t deliver the same nuanced taste, so invest in a good quality pure extract.
- Creamy Peanut Butter: The star of the middle layer! We typically use creamy peanut butter for a silky-smooth filling, creating a melt-in-your-mouth texture. If you’re a fan of a little crunch, feel free to experiment with chunky peanut butter, but be aware it will alter the texture of the filling slightly. Crucially, ensure you’re using a standard, processed peanut butter (like Jif or Skippy) rather than natural peanut butter, as the latter can separate and affect the consistency and stability of the filling.
- Sugars (Granulated and Brown): A blend of granulated and light brown sugar provides the perfect sweetness and contributes significantly to the fudgy texture of the brownies. Granulated sugar promotes spread and chewiness, while brown sugar adds moisture, a subtle molasses note, and helps keep the brownies soft, enhancing the overall depth of flavor.
- All-Purpose Flour: Provides the necessary structure for the brownies. It’s important to measure it correctly (preferably by weight) and be mindful not to overmix the flour once added, as this can develop gluten and lead to tough, rather than soft and fudgy, brownies.
- Cocoa Powder: For intense chocolate flavor in the brownie base. Using a good quality unsweetened cocoa powder, such as Dutch-processed, will yield a darker, less acidic brownie with a deep, rich chocolate taste.
- Espresso Powder (Optional, but Recommended): A tiny pinch of espresso powder won’t make your brownies taste like coffee, but it will significantly deepen and intensify the chocolate flavor, making it even more decadent and complex. It’s a secret ingredient many professional bakers swear by for enhancing chocolate.
- Powdered Sugar: Essential for the smooth, creamy texture of the peanut butter filling. It dissolves easily and prevents a gritty texture. Sifting it beforehand can help prevent lumps.
- Milk or Heavy Cream: Used to achieve the perfect consistency in the peanut butter filling, ensuring it’s spreadable and luxurious. Heavy cream will yield a richer, more decadent filling, while milk offers a slightly lighter alternative.
Ingredient Adaptations and Substitutions:
While this recipe is designed for optimal flavor and texture, we understand that dietary needs or pantry availability might call for some adjustments. Here are some possible substitutions to consider without compromising too much on the integrity of this delicious dessert:
- Gluten-Free Version: We haven’t personally tested a gluten-free adaptation of this specific recipe, as the precise balance of flours is crucial for that signature fudgy brownie texture. Achieving the exact same chewiness can be tricky with gluten-free alternatives. However, many bakers have success substituting an all-purpose gluten-free flour blend (one that specifically states it contains xanthan gum) cup-for-cup for regular flour in brownie recipes. Results may vary, and a slightly different, perhaps slightly denser, texture is possible. It’s often best to find a brownie recipe specifically developed for gluten-free ingredients for guaranteed success.
- Dairy-Free Option: To make these Buckeye Brownies completely dairy-free, simply swap out the butter for your favorite high-quality dairy-free butter alternative (like Miyoko’s Kitchen or Earth Balance sticks). For the chocolate, choose dairy-free chocolate chips or baking bars, which are widely available in most grocery stores. Ensure your milk or heavy cream used for the peanut butter filling is also dairy-free (e.g., almond milk, soy milk, or full-fat coconut milk for extra richness).
- Nut Butter Alternatives: If you or someone you’re baking for has a peanut allergy, you can absolutely substitute the peanut butter with another nut butter. Almond butter or cashew butter would work beautifully, offering a slightly different but equally delicious flavor profile that pairs wonderfully with chocolate. For a completely nut-free option, sun butter (made from sunflower seeds) is an excellent choice, providing a similar creamy texture and rich taste without any nuts, making these brownies accessible to even more people.
Step-by-Step Guide to Crafting Your Dream Peanut Butter Brownies:
Making these layered delights is easier than you think. Follow these detailed steps for Buckeye Brownie perfection, ensuring each layer is as incredible as the last:
Step 1: Prepare the Irresistible Brownie Batter. Begin by preheating your oven to 350°F (175°C) and preparing a 9×9-inch baking pan. Grease it thoroughly with cooking spray and then line it with parchment paper, leaving an overhang on two sides. This parchment paper “sling” will make lifting the cooled brownies out of the pan incredibly easy and mess-free. In a large, microwave-safe mixing bowl, combine your measured melted butter with the semi-sweet and milk chocolate. Microwave in short 30-second bursts, stirring well after each interval, until the mixture is completely smooth and glossy. Next, whisk in both the granulated and light brown sugars until just combined. Incorporate the large eggs one at a time, ensuring each is fully blended before adding the next, followed by the pure vanilla extract. Continue whisking this mixture vigorously for about 2 minutes; this crucial step helps create that signature thin, crackly top on your finished brownies. Finally, gently fold in the all-purpose flour, cocoa powder, salt, and optional espresso powder using a rubber spatula. Mix only until the last streaks of flour disappear to avoid overdeveloping the gluten, which can lead to a tough, rather than fudgy, brownie. Stir in any extra chocolate chunks for added texture and richness.
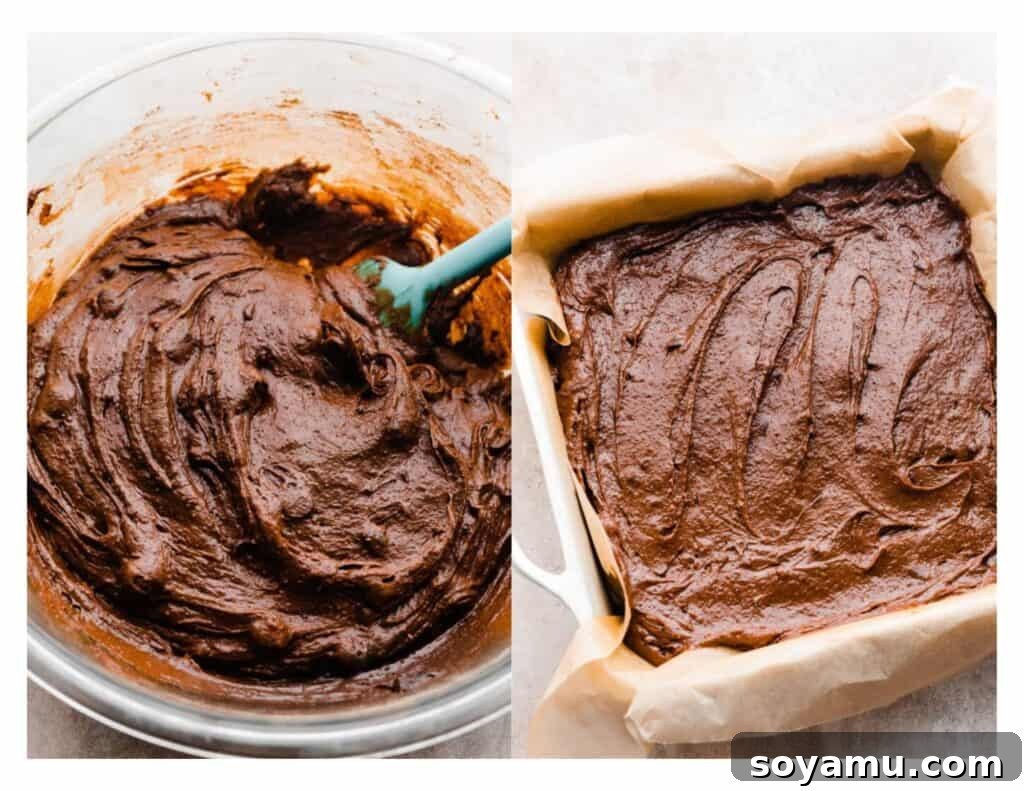
Step 2: Bake to Fudgy Perfection. Carefully spread the prepared brownie batter evenly into your 9×9-inch pan, ensuring it reaches all corners for a uniform layer. If you have any extra chocolate chunks, scatter them generously over the top for an even more indulgent bite and visual appeal. Bake for 37 to 43 minutes. Do not overbake! This is vital for achieving that desirable fudgy texture. A toothpick inserted into the center should come out with moist crumbs attached, not wet batter, and the edges should look set but not crispy. If you’re unsure, you can gently lift a small piece from the center with the tip of a knife to check for doneness. Remember, brownies continue to set as they cool, so slightly underbaked is always better than overbaked for ultimate fudginess. Allow the brownies to cool completely in the pan on a wire rack before attempting to add the peanut butter layer. Patience here is absolutely key for clean, distinct layers.
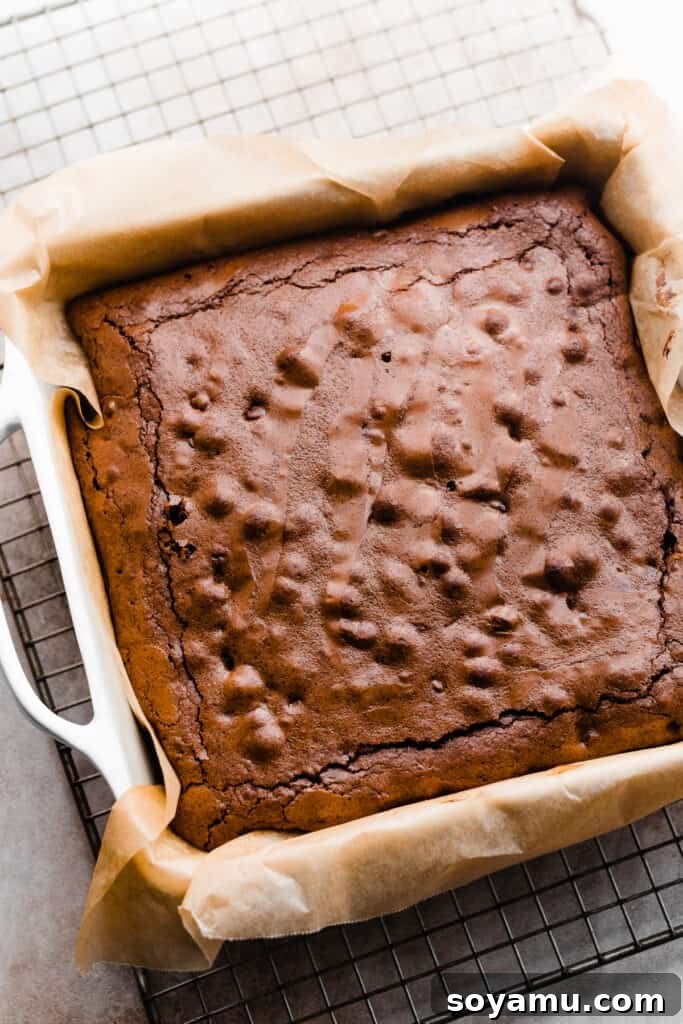
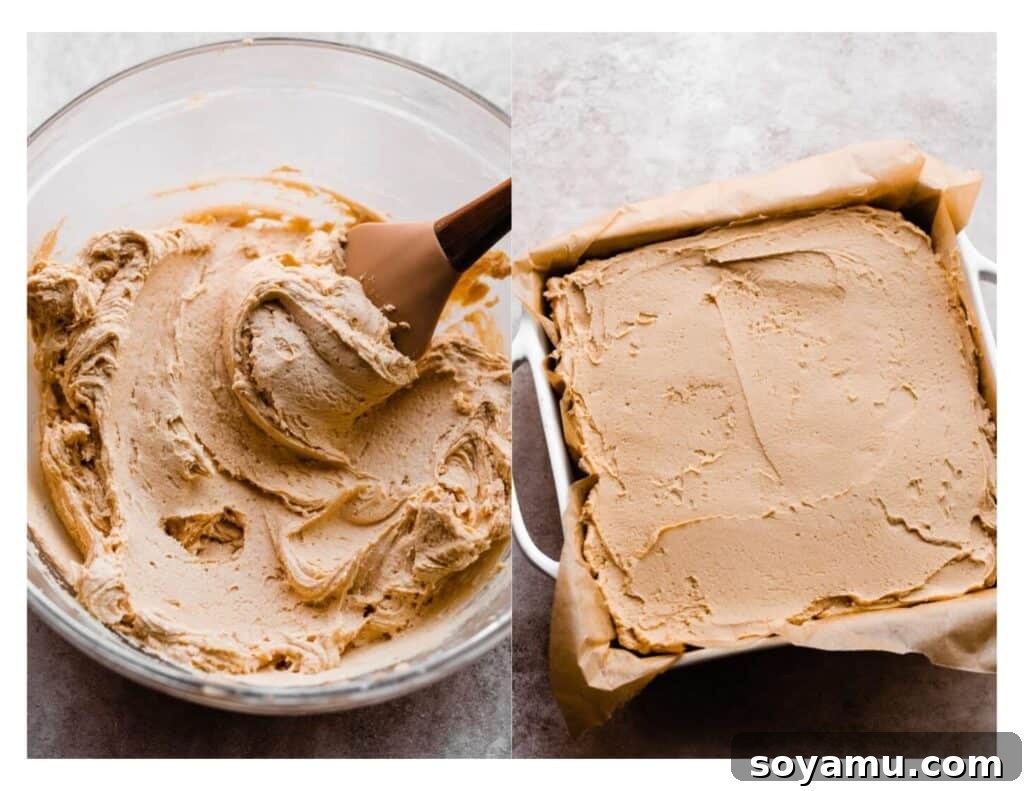
Step 3: Craft the Creamy Peanut Butter Layer. While your brownies cool, prepare the star filling. In a medium mixing bowl, use a hand mixer or stand mixer to cream together the softened salted butter and creamy peanut butter until light and fluffy, about 1-2 minutes. This step incorporates air, making the filling extra smooth. Gradually add the powdered sugar, mixing until completely smooth and lump-free. If the mixture seems too thick or crumbly, add the milk or heavy cream one tablespoon at a time until you achieve a wonderfully creamy, spreadable consistency – similar to a thick frosting. Stir in the vanilla extract and a pinch of salt to balance the sweetness and enhance the peanut butter flavor. Once your brownies are fully cooled, spread this luxurious peanut butter filling evenly over the top, making sure to create a smooth, consistent layer. Then, transfer the pan to the refrigerator and chill for 20-30 minutes. This chilling step is crucial; it allows the peanut butter layer to firm up, preventing it from mixing with the warm chocolate topping and ensuring distinct, beautiful layers when sliced.
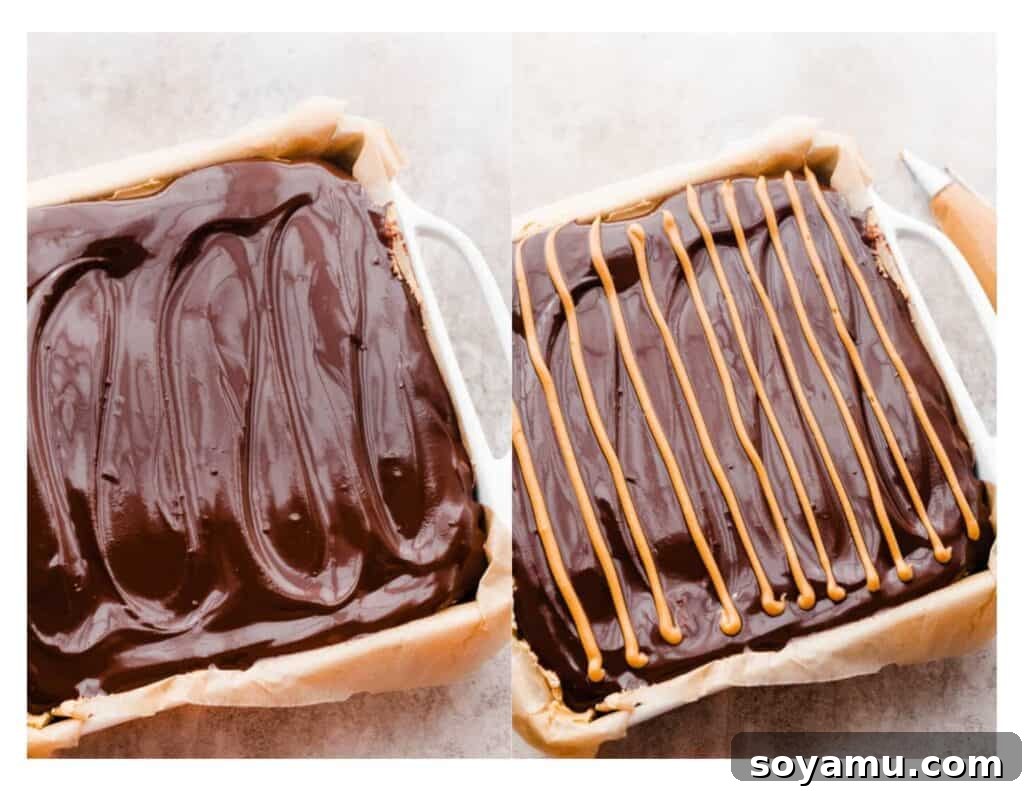
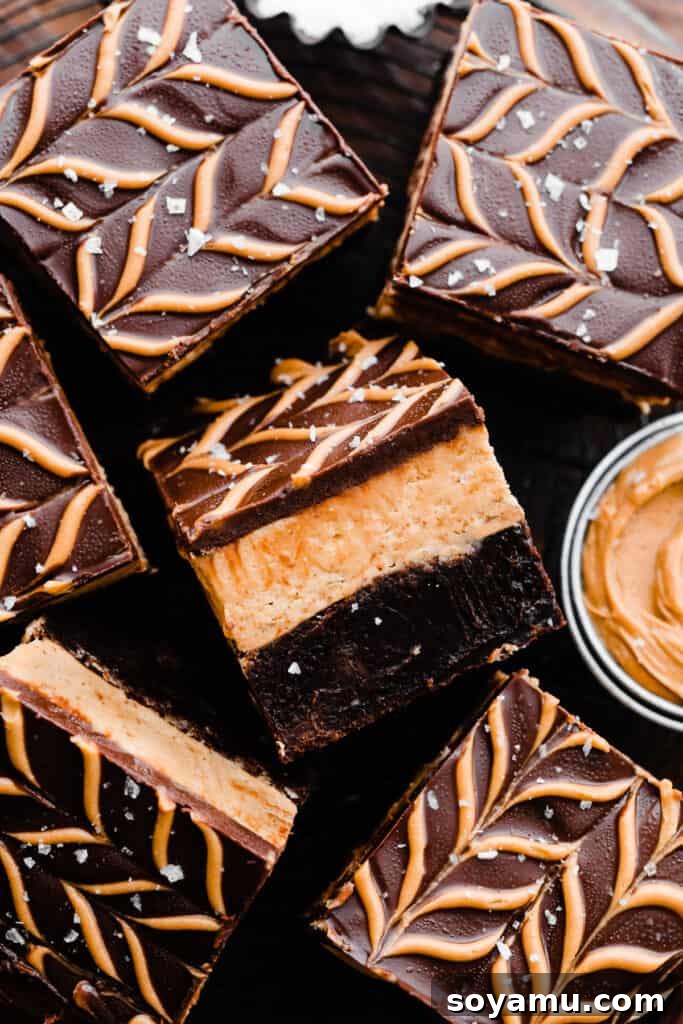
Step 4: Add the Smooth Chocolate Topping and Elegant Design. For the chocolate topping, combine the salted butter and chocolate chips (or chopped chocolate) in a medium microwave-safe bowl. Heat in 30-second intervals, stirring thoroughly after each, until the mixture is completely melted and smooth and glossy. Pour this glossy chocolate topping evenly over the chilled peanut butter layer, spreading it quickly with an offset spatula if needed to ensure full coverage. Now for the optional but impressive herringbone design: Melt the additional peanut butter in a small microwave-safe bowl in two to three 15-second intervals, stirring until smooth and fluid. Transfer the melted peanut butter to a small piping bag (or a ziploc bag with a tiny corner snipped off). Pipe thin, parallel rows of peanut butter across the entire length of the chocolate-covered bars. Work quickly while the chocolate topping is still wet and pliable. Then, take a clean toothpick and drag it perpendicularly through the piped peanut butter lines. Alternate the direction for each drag – from left to right, then right to left – to create the distinctive herringbone pattern. Wipe your toothpick clean after each drag for crisp, professional-looking lines. This simple technique transforms your brownies into a truly professional-looking dessert!
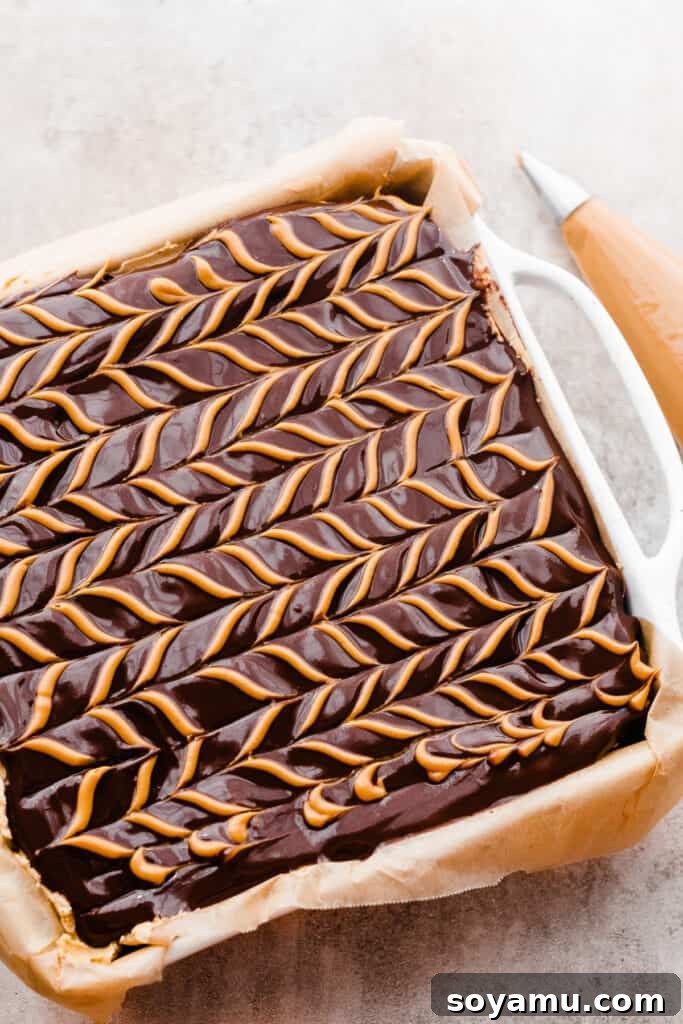
After piping your lines, take your toothpick and drag it through them from the opposite side, alternating from left to right, then right to left, to create that striking herringbone effect. This must be done while the chocolate is still wet to allow for seamless blending and a clean pattern!
Serving and Storing Your Buckeye Brownies:
Once the chocolate topping is complete and the herringbone design (if you chose to add it) is finished, place the brownies back into the refrigerator for 30 to 60 minutes, or until the chocolate is fully set and firm to the touch. This crucial step ensures clean, neat slices and a stable dessert that holds its shape beautifully. Once thoroughly chilled, use the parchment paper overhang to gently lift the entire slab of brownies out of the pan onto a cutting board. For extra clean and precise cuts, use a sharp, hot knife (wiping the blade clean with a warm, damp cloth between each slice). Enjoy them straight from the fridge for a firm, satisfying bite, or let them come to room temperature for about 15-30 minutes for a softer, slightly more yielding texture where the chocolate and peanut butter layers will be creamier. These Buckeye Brownies are incredibly rich and decadent, so consider slicing them into smaller squares (12, 16, or even 18+) to stretch the yield and allow everyone to savor each decadent bite without feeling overwhelmed. While we often photograph them in larger squares, we typically halve those before serving to friends and family to make them more manageable.
Storage: Leftover Buckeye Brownies can be stored in an airtight container at room temperature for up to 2-3 days, though if your kitchen is particularly warm or sunny, the chocolate topping might become soft. For longer freshness and to maintain the firm, distinct layers, store them in the refrigerator for up to 4-5 days. If serving from the fridge, allow them to sit at room temperature for about 30 minutes before enjoying to soften the layers slightly, enhancing their creamy texture. These brownies also freeze beautifully! To freeze, wrap individual slices tightly in plastic wrap, then place them in a freezer-safe bag or container for up to 2-3 months. Thaw frozen brownies in the refrigerator overnight or at room temperature for a few hours before serving for the best possible experience.
Expert Tips for Buckeye Brownie Success:
Achieving bakery-quality Buckeye Brownies is entirely within reach with these expert tips and tricks from seasoned bakers. Pay attention to these details for truly impressive results:
- Invest in an Oven Thermometer: Your oven’s internal thermostat might not be perfectly accurate – it’s a common issue! An inexpensive oven thermometer is a game-changer for precise baking, ensuring your oven consistently holds the correct temperature. This accuracy is paramount for fudgy brownies that are perfectly cooked, not dry or underbaked. Leave it in at all times to monitor your oven’s calibration.
- Measure Flour with a Kitchen Scale: For truly consistent and fudgy results, a food scale is your best friend. Measuring flour by volume (cups) can lead to significant discrepancies due to packing and scooping methods. Too much flour can result in cakey, dry brownies instead of the dense, fudgy texture we’re aiming for. Weighing ensures exact amounts every time, eliminating guesswork.
- Don’t Overbake the Brownies: This is perhaps the most critical tip for fudgy brownies. It’s almost always better to slightly underbake than overbake. The brownies will continue to set and firm up as they cool. When checking for doneness, a toothpick inserted into the center should have moist crumbs attached, but no wet batter. The edges should appear set. Trust the cooling process!
- Allow for Complete Cooling: Before adding any subsequent layers, the brownie base MUST be completely cool. This means room temperature, not just “not hot.” Trying to add the peanut butter layer to warm brownies will result in a messy, melted disaster. Similarly, the peanut butter layer needs to be thoroughly chilled and firm before the warm chocolate topping is added to maintain distinct layers.
- Stretch the Yield: These brownies are incredibly rich and decadent. While a 9×9-inch pan typically yields 9 large squares for photography, consider slicing them into 12, 16, or even 18+ smaller squares for serving. This allows everyone to enjoy a perfectly satisfying portion without feeling overwhelmed by the richness. We often slice our large squares in half for events and parties.
- Execute the Herringbone Design While Chocolate is Wet: If you’re opting for the beautiful herringbone decoration, timing is absolutely essential. You must pipe the peanut butter lines and create the pattern while the chocolate topping is still wet and pliable. If the chocolate has begun to set, even slightly, the design won’t spread or blend smoothly, resulting in a less defined pattern.
- Parchment Paper is Your Friend: Always line your baking pan with parchment paper, leaving an overhang on two sides. This creates a convenient “sling” that allows you to easily lift the entire slab of cooled brownies out of the pan in one piece. This makes slicing much simpler and cleaner, and significantly reduces cleanup.
- Use Room Temperature Ingredients for Filling: Ensure your butter and peanut butter for the filling are at proper room temperature. This allows them to cream together smoothly and incorporate the powdered sugar without lumps, resulting in a silky, uniform filling.
Frequently Asked Questions (FAQs):
Yes, absolutely! To double the recipe, you will need a larger 9×13-inch baking pan. Simply double all the ingredient quantities. Ensure you adjust the baking time slightly, as a larger batch might require a few extra minutes in the oven (usually an additional 5-10 minutes). Always check for moist crumbs, not wet batter, with a toothpick to determine doneness.
Yes, you can easily halve this recipe if you’re looking for a smaller batch. If you want thinner layers for everything, you can stick with a 9×9-inch pan and halve all the ingredients. However, if you still desire thick, substantial layers but a smaller yield, consider using a loaf pan (approximately 9×5 inches) or a 6-inch round pan, adjusting the baking time as needed for the smaller volume.
Certainly! If you have a peanut allergy or simply prefer another flavor, feel free to substitute the peanut butter. Nutella (hazelnut spread) or almond butter are fantastic alternatives that pair wonderfully with chocolate, offering a rich and distinct flavor. For a completely nut-free option, sun butter (made from sunflower seeds) works very well and provides a similar creamy texture and rich taste without any nuts, making these brownies accessible to even more people.
A buckeye is a traditional confection, particularly popular in Ohio, where the buckeye tree is common. It consists of a sweet peanut butter fudge ball partially dipped in chocolate, leaving a small circle of peanut butter visible at the top. The appearance is intentionally designed to resemble the shiny, dark brown nut of the Ohio Buckeye tree, giving the candy its distinctive name. Buckeye Brownies beautifully capture these iconic chocolate and peanut butter flavors in a convenient and delicious layered dessert format.
Creative Buckeye Brownie Recipe Variations:
While these Buckeye Brownies are perfect as they are, don’t hesitate to get creative and customize them to your liking. Here are a few ideas to inspire your next baking adventure:
- Simplify the Decoration: If you’re pressed for time or prefer a minimalist look, you can absolutely skip the elaborate herringbone design on top. A simple, smooth chocolate ganache topping is still incredibly delicious and elegant. For an easy yet sophisticated finish, sprinkle a pinch of flaky sea salt on top of the wet chocolate layer. This adds a beautiful textural contrast and enhances the flavors.
- Time-Saving Boxed Brownie Mix: When time is of the essence, a high-quality boxed brownie mix can be a fantastic shortcut for the base layer. Simply prepare the brownie mix according to package directions in your 9×9-inch pan, then allow it to cool completely before proceeding with our homemade peanut butter filling and chocolate topping. This significantly cuts down on prep time without sacrificing much flavor, perfect for busy schedules.
- Add a Caramel Layer: For an even more indulgent and complex treat, consider adding a thin layer of luscious salted caramel between the brownie and peanut butter layers. Ensure the caramel is firm and chilled before adding the peanut butter layer to prevent melding. This creates a delightful triple-layered surprise!
- Mini Buckeye Bites: Transform these brownies into bite-sized delights by baking the brownie base in a mini muffin tin. You’ll need to adjust the baking time significantly (likely 15-20 minutes, or until a toothpick comes out with moist crumbs). Once cooled, pipe or spread the peanut butter filling and chocolate topping, then add a tiny dot of peanut butter for the ‘buckeye’ effect. These are perfect for parties, dessert platters, or as individual treats.
- Different Chocolate Topping: Experiment with white chocolate or dark chocolate for the topping to alter the flavor profile. You could even do a swirl of melted white and dark chocolate for a stunning marbled effect instead of the herringbone pattern. A sprinkle of mini chocolate chips or chopped peanuts on top of the wet chocolate also adds texture and visual appeal.
Recommended Specialized Tools for Baking Buckeye Brownies:
Having the right tools can make your baking experience smoother and more enjoyable, leading to even better and more professional-looking results. Here are a few recommended items that will assist you in making these Buckeye Brownies:
- 9×9-inch Baking Pan: A good quality ceramic or metal 9×9-inch square pan is essential for this recipe. Its specific size is perfectly calibrated for the layered design, ensuring the ideal thickness for each component and consistent baking throughout.
- Hand Mixer or Stand Mixer: While not strictly essential for the brownie batter itself (a good whisk works just fine), a cordless electric mixer or a stand mixer is incredibly helpful. It quickly and efficiently creams together the butter and peanut butter for the filling, ensuring a smooth, lump-free consistency that would be difficult to achieve by hand.
- Offset Spatula: An offset spatula is a secret weapon for any baker, often overlooked but incredibly versatile. Its angled blade makes spreading brownie batter evenly into the pan, smoothing out the creamy peanut butter filling, and spreading the glossy chocolate topping an absolute breeze. This tool helps give your layers a perfectly flat, professional finish.
- Parchment Paper: Crucial for easy, mess-free removal of the brownies from the pan and makes cleanup a cinch. Always line your pan with it, leaving an overhang to act as handles.
- Microwave-Safe Bowls: Several microwave-safe bowls are handy for melting butter and chocolate efficiently and safely.
- Whisk and Rubber Spatula: These basic but essential tools are your go-to for mixing wet ingredients and gently folding in dry ingredients, respectively, ensuring you don’t overmix your batter.
- Piping Bag (or Ziploc Bag): For creating the optional yet impressive herringbone design. A small Ziploc bag with a tiny corner snipped off works just as well as a dedicated piping bag for this technique.
- Oven Thermometer & Kitchen Scale: As mentioned in our expert tips, these tools are invaluable for precise baking and consistent, high-quality results every time.
More Irresistible Brownie Recipes to Explore:
If you’re a true brownie connoisseur and loved making these Buckeye Brownies, you’ll be thrilled to explore these other fantastic recipes from our collection, each offering a unique twist on this beloved dessert:
- Gooey S’mores Brownies: Experience the nostalgic flavors of a campfire classic – toasted marshmallows, melty chocolate, and graham crackers – all baked into a rich brownie base.
- Fudgy Gluten-Free Brownies: A truly decadent, fudgy, and satisfying brownie recipe specifically crafted for those with gluten sensitivities, proving that dietary restrictions don’t mean sacrificing flavor or texture.
- Black Forest Brownies: Rich chocolate brownies infused with the classic flavors of Black Forest cake – tart cherries and a hint of a creamy swirl come together in a sophisticated twist.
- Layered Mint Chocolate Brownies: A refreshingly cool and intensely indulgent combination of a fudgy chocolate brownie topped with a creamy mint layer and a smooth chocolate ganache – perfect for mint chocolate lovers.
- Salted Caramel Pretzel Brownies: The ultimate sweet and salty crunch experience, these brownies feature a gooey caramel layer and crunchy pretzels, perfectly balanced with flaky sea salt.
- 5-Ingredient Brownies: When you need a quick chocolate fix, these unbelievably simple yet incredibly satisfying brownies are your go-to, proving that minimal ingredients can still yield maximum flavor.
Did you whip up this delicious recipe? We’d love to see it! Snap a photo and share your thoughts in a comment below!
Be sure to follow bluebowlrecipes on Instagram and tag #bluebowlrecipes with your photo! You can also post a photo of your masterpiece to the bluebowlrecipes Facebook page. We can’t wait to see your creations!
Buckeye Brownies
Pin Recipe
Print Recipe
Ingredients
For the Fudgy Brownies
- 3/4 cup salted butter, 170 grams, melted
- 2 ounces semi-sweet chocolate, chopped, good quality baking bar or chips
- 2 ounces milk chocolate, chopped, good quality baking bar or chips
- 1 and 1/2 cups granulated sugar
- 1/2 cup light brown sugar, packed
- 4 large eggs, room temperature
- 1 and 1/2 tsp pure vanilla extract
- 1 cup all-purpose flour , 130 grams, spooned and leveled
- 2/3 cup cocoa powder, 66 grams, unsweetened
- 1/2 tsp salt
- 1/8 tsp espresso powder, optional, enhances chocolate flavor
For the Creamy Peanut Butter Filling
- 1/2 cup salted butter, softened at room temperature
- 3/4 cup + 2 tbsp creamy peanut butter, standard, not natural
- 2 cups powdered sugar , sifted
- 2 tbsp milk, as needed to smooth things out, or heavy cream
- 1/2 tsp pure vanilla extract
- pinch of salt, to taste
For the Chocolate Topping
- 6 tbsp salted butter
- 1 heaping cup semi-sweet chocolate chips, or half semi-sweet & half milk chocolate chips
For the Peanut Butter Design (Optional)
- 1/3 cup creamy peanut butter, melted slightly
Instructions
-
Prep: Preheat your oven to 350° F (175°C). Grease a 9×9 baking dish with cooking spray and line it with parchment paper, leaving an overhang on two sides for easy removal.
-
Make the Brownie Batter: In a large microwave-safe bowl, melt the butter, 2 ounces of semi-sweet chocolate, and 2 ounces of milk chocolate together. Heat in 30-second intervals, stirring until smooth. Whisk in granulated sugar and light brown sugar until just combined. Add eggs and vanilla, then whisk vigorously for 2 minutes to create a crackly top. Gently fold in flour, salt, cocoa powder, and espresso powder until just combined.
-
Bake Brownies: Spread the batter evenly into your prepared pan. Bake for 37 to 43 minutes. A toothpick inserted into the center should come out with moist crumbs, not wet batter. The brownies will set further as they cool. Let cool completely on a wire rack.
-
Make the Peanut Butter Filling: In a medium bowl, beat softened butter until creamy (30 seconds). Add creamy peanut butter and mix for about 1 minute until well combined. Gradually add powdered sugar, mixing until smooth. Add milk (or heavy cream) as needed to achieve a creamy, spreadable consistency. Stir in vanilla and a pinch of salt. Spread this mixture evenly over the completely cooled brownies. Chill in the fridge for 20-30 minutes to firm up.
-
Prepare Chocolate Topping & Design: Melt 1/3 cup peanut butter in a microwave-safe bowl in 15-second intervals, stirring until fluid. Set aside in a piping bag (or ziploc with snipped corner). Separately, melt 6 tbsp salted butter and 1 heaping cup semi-sweet chocolate chips in a medium microwave-safe bowl in 30-second intervals, stirring until completely smooth. Pour this chocolate topping over the chilled peanut butter layer, spreading quickly. Immediately pipe parallel lines of melted peanut butter over the wet chocolate. Using a clean toothpick, drag it perpendicularly through the lines, alternating directions (left-to-right, then right-to-left) to create the herringbone pattern. Wipe toothpick clean between drags.
-
Chill, Slice & Serve: Chill the bars in the fridge for 30-60 minutes (or up to overnight) until the chocolate topping is fully set. Lift the brownies out of the pan using the parchment paper overhang. Use a sharp, warm knife to slice and serve. Store leftovers in an airtight container at room temperature or in the fridge for 4-5 days. Let chilled brownies come to room temperature for 15-30 minutes before serving for best texture.
Notes
Nutrition
Nutrition information is automatically calculated, so should only be used as an approximation.
Enjoyed this recipe? Leave a comment below!