
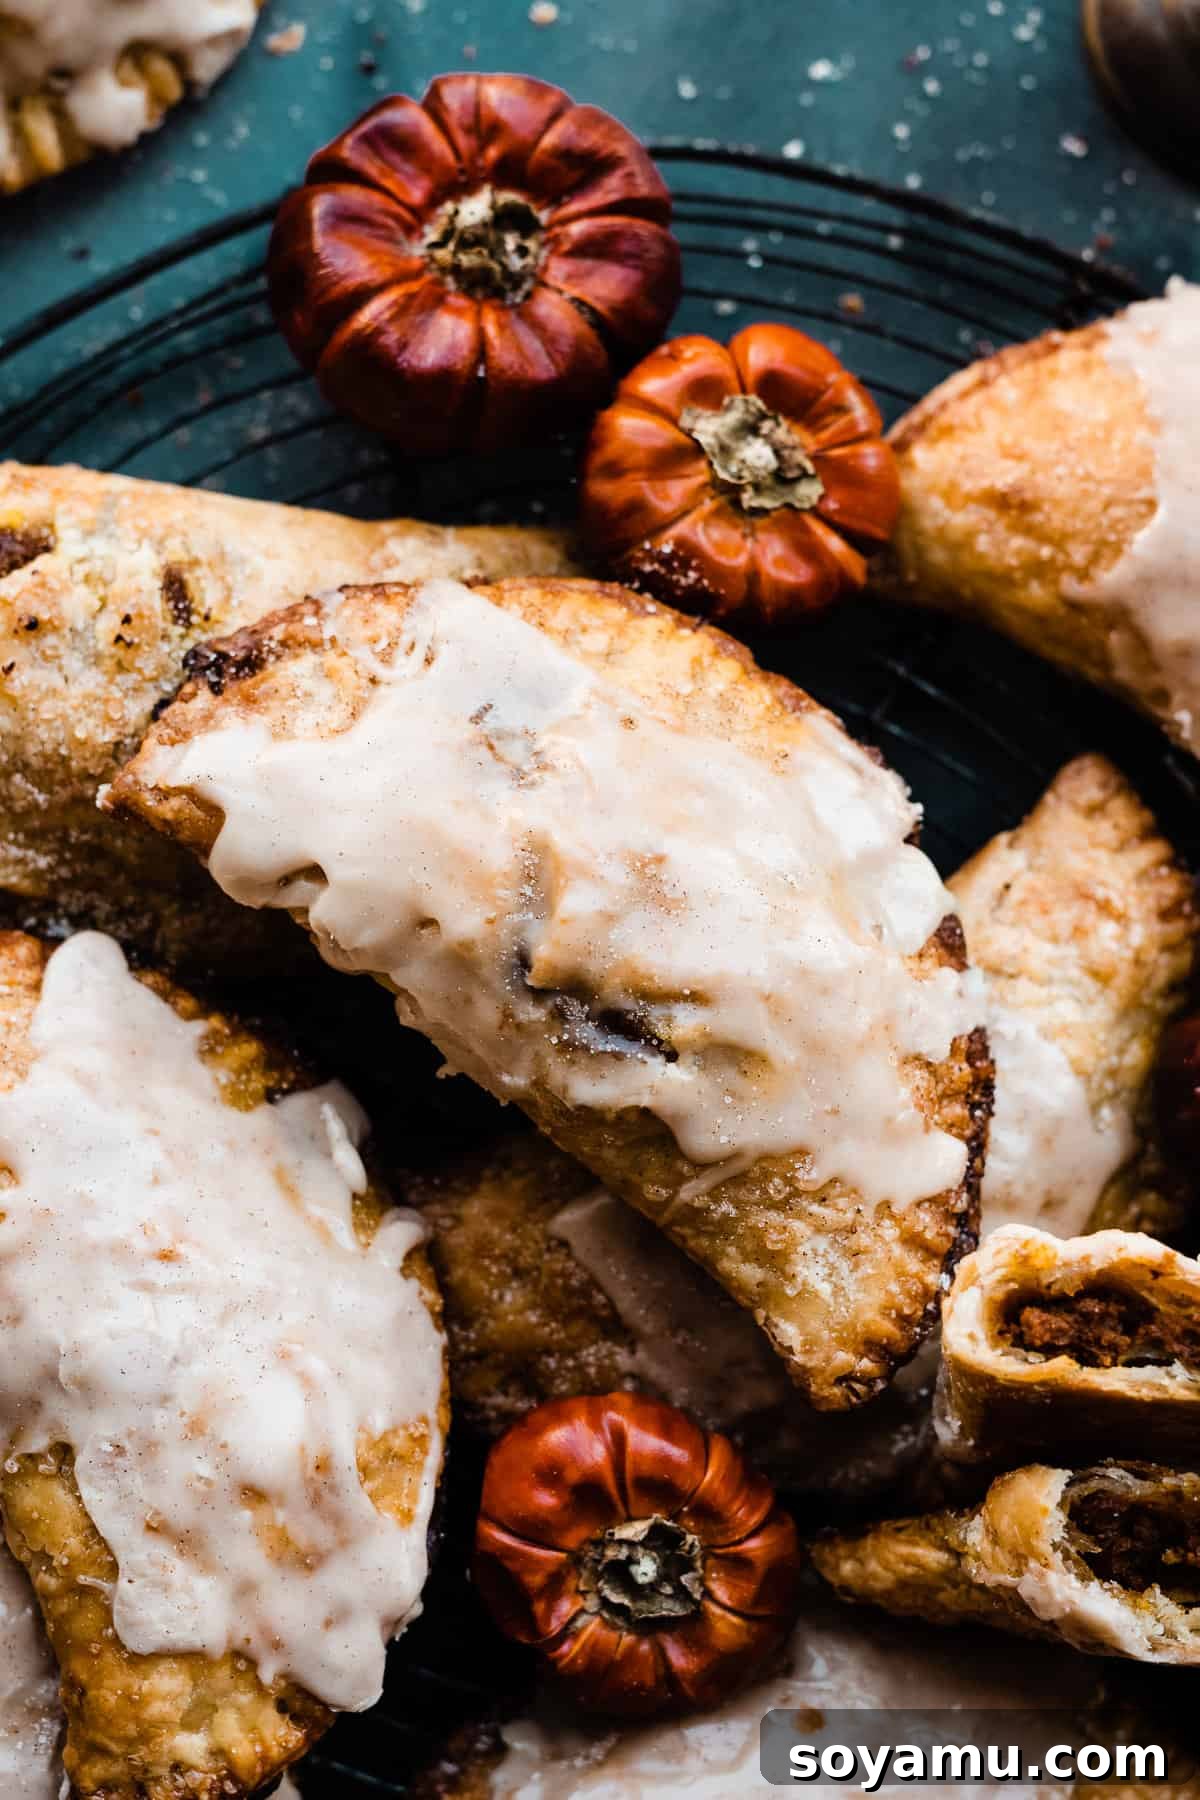
Enchanting Maple Pumpkin Pasties: A Flaky Fall Delight
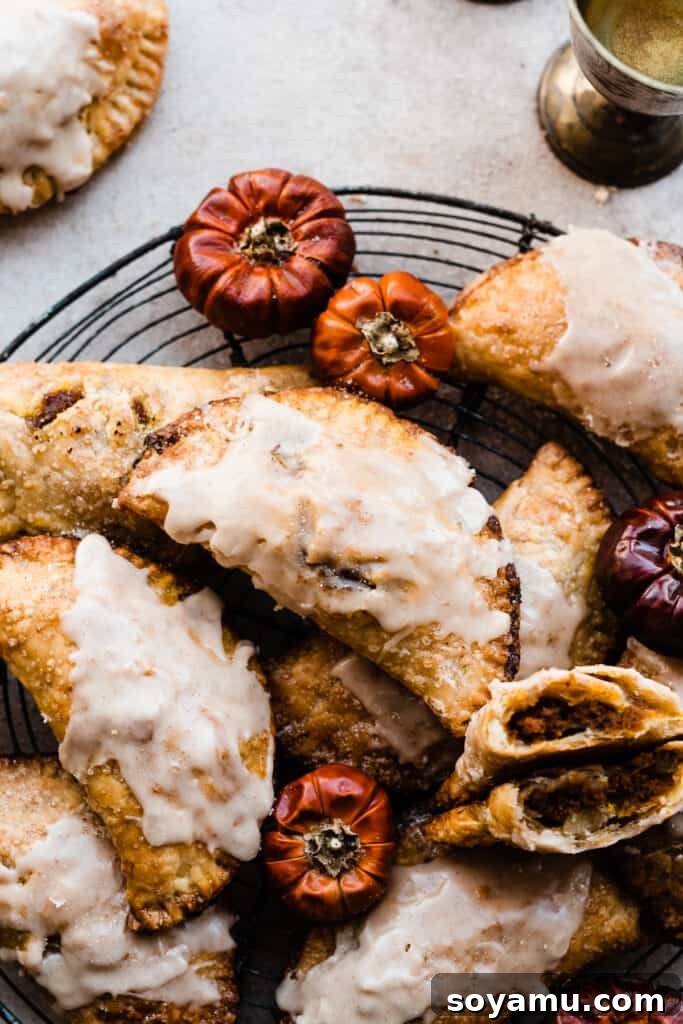
Transport yourself to a world of cozy autumn charm with these delightful **Maple Pumpkin Pasties**. Each miniature pie boasts a rich, warmly spiced maple pumpkin filling, lovingly encased in a golden, impossibly flaky all-butter pie crust. Fresh from the oven, they’re crowned with a silky, sweet maple glaze that simply melts in your mouth. Forget the fuss of a full pumpkin pie; these individual hand pies offer all the comforting flavors with a fraction of the effort, making them a perfect treat for any fall gathering or a quiet afternoon indulgence.
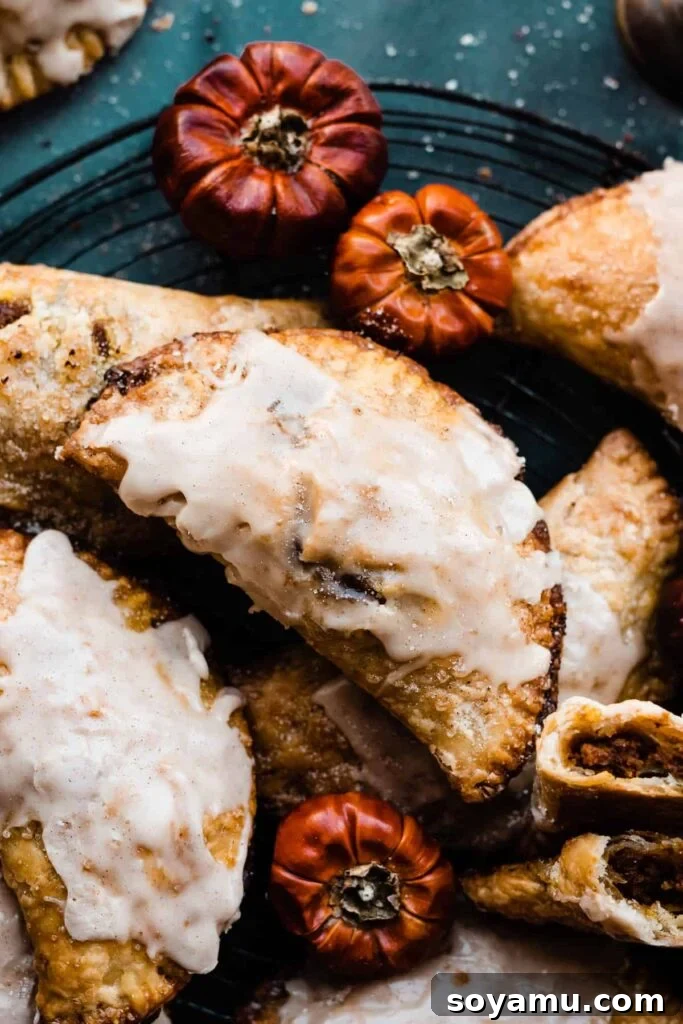
Yes, these enchanting sweet pumpkin pasties are directly inspired by the beloved treats from our favorite childhood wizarding series! Taking a bite of these golden parcels will instantly evoke the magical journey of a certain train, carrying you to a realm of comforting flavors and nostalgic memories. All that’s missing now is a frosty glass of pumpkin juice to complete the experience!
Why These Pumpkin Pasties Will Cast a Spell on You:
Prepare to fall in love with every aspect of these delectable pumpkin pasties. They’re not just a dessert; they’re an experience, designed to bring joy and warmth to your autumn season.
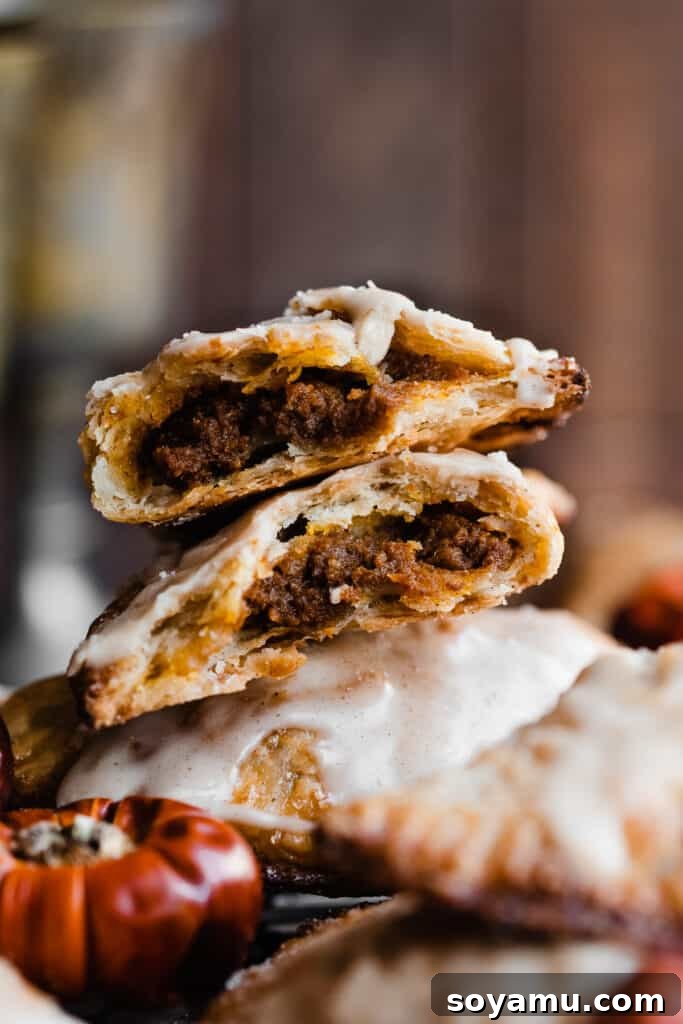
- Irresistibly Sweet & Spiced Pumpkin Filling: Our filling is a harmonious blend of creamy pumpkin puree, golden brown sugar, and a hint of pure maple syrup, all brought to life by a symphony of warm fall spices. It’s sweet but balanced, delivering that classic autumn taste without being overwhelmingly sugary. This filling truly is the heart of the pasty, offering a comforting flavor that’s both familiar and exciting.
- Remarkably Flaky All-Butter Homemade Pie Crust: The secret to truly exceptional pasties lies in the crust, and ours is simply unparalleled. Crafted with generous amounts of cold, real butter, this homemade pie crust bakes up incredibly flaky, tender, and rich. It provides the perfect contrast to the soft filling, adding a buttery depth that store-bought crusts simply cannot replicate. Each bite promises a delicate shatter, revealing the soft pumpkin interior.
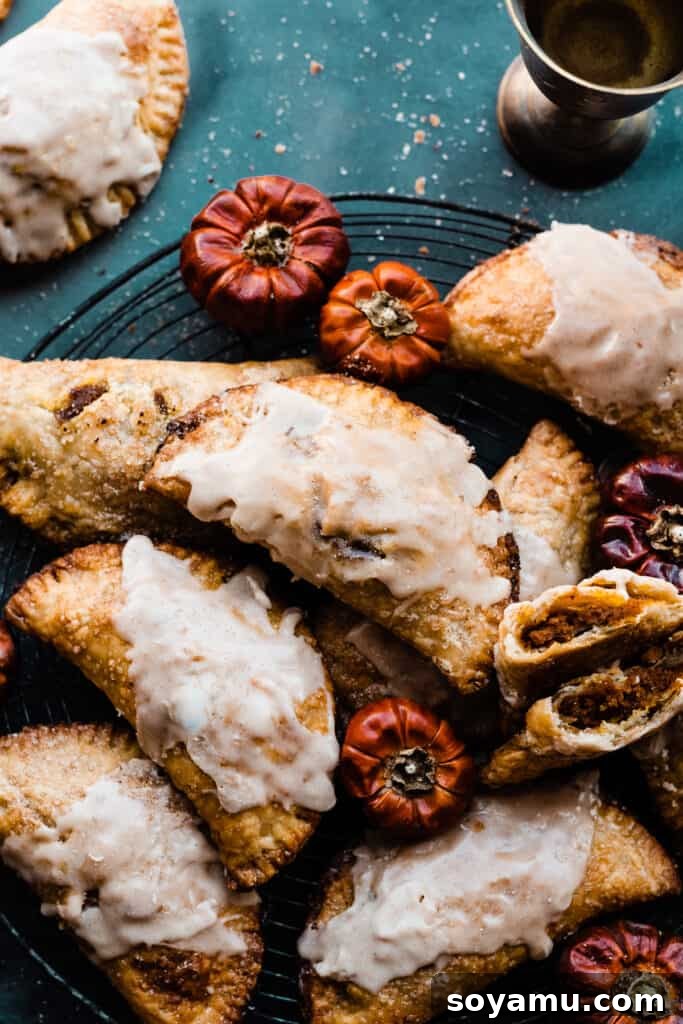
- Luscious Maple Glaze for the Perfect Finish: A simple yet sophisticated maple glaze elevates these hand pies to new heights. Drizzled generously over the warm pasties, it adds an extra layer of sweetness and a beautiful sheen. The natural flavors of maple syrup complement the pumpkin and spice notes beautifully, creating a cohesive and utterly delicious dessert that feels gourmet yet comforting.
- Effortlessly Elegant Individual Servings: Unlike a large, cumbersome pumpkin pie that requires slicing and serving, these hand pies are designed for convenience and charm. Their individual size makes them perfect for parties, lunchboxes, or a grab-and-go snack. They’re far easier to handle and serve, ensuring every guest gets their own perfectly portioned, magical treat.
- A Touch of Childhood Magic: For fans of certain wizarding tales, these pasties aren’t just food; they’re a connection to a beloved fictional world. The very idea of a “pumpkin pasty” conjures images of enchanted journeys and festive feasts, adding an extra layer of nostalgic delight to your baking and eating experience.
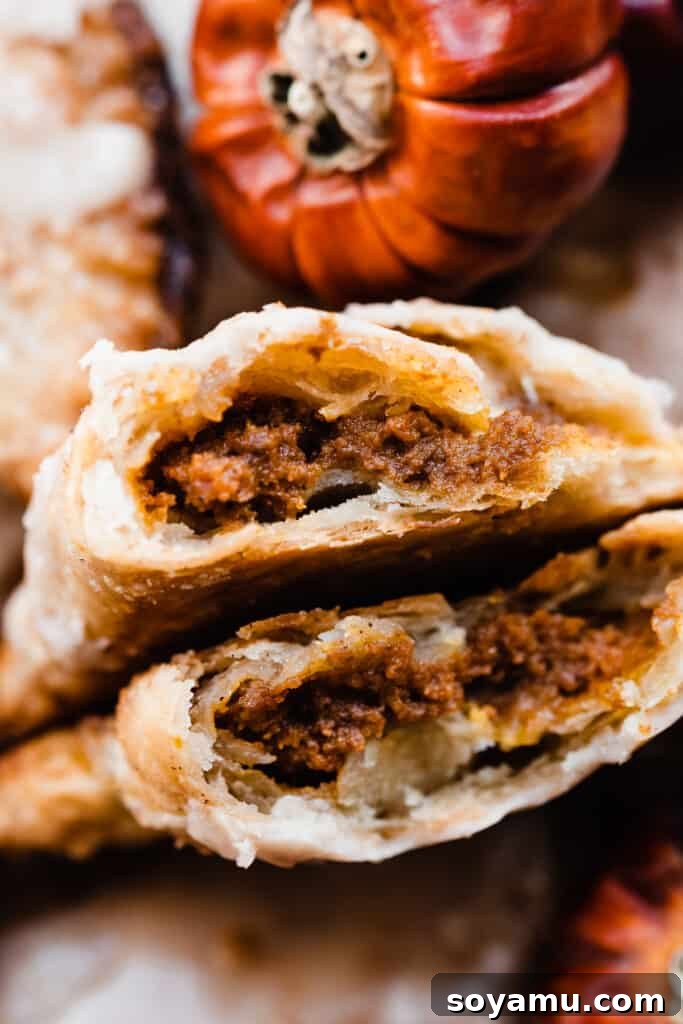
Essential Ingredients for Perfect Pumpkin Pasties:
Crafting the perfect pumpkin pasty starts with understanding the role of each ingredient. Here’s a detailed look at what you’ll need to create this autumn masterpiece:
- Butter (Cold & Melted): Butter is paramount in this recipe. For the pie crust, using ice-cold, high-quality butter is non-negotiable. Cold butter creates pockets of steam during baking, resulting in those coveted flaky layers. For the filling, a touch of melted butter adds richness and helps bind the ingredients. I personally prefer salted butter for both, as the hint of salt enhances all the other flavors, but unsalted butter can be used if you prefer to control the salt content precisely.
- Canned Pumpkin Puree (Not Pie Filling): This is a crucial distinction! Always opt for 100% pure canned pumpkin puree. This is essentially cooked and mashed pumpkin, with no added sugars or spices. Pumpkin pie filling, on the other hand, is pre-sweetened and spiced, and using it would throw off the flavor balance of this recipe. For those outside the U.S., look for plain pumpkin puree or simply ‘pumpkin’ on the label.
- Brown Sugar: Brown sugar adds a wonderful depth of sweetness and a hint of molasses flavor that perfectly complements pumpkin. Its moist texture also contributes to the filling’s tender consistency, making it richer and more satisfying than granulated sugar alone.
- Maple Syrup: The subtle yet distinct flavor of real maple syrup marries exquisitely with pumpkin and spices, enhancing the overall autumn profile of these pasties. It contributes a natural sweetness and a unique complexity that sets this recipe apart. Ensure you use pure maple syrup, not pancake syrup, for the best results.
- Vanilla Extract: Always reach for real vanilla extract. Its warm, aromatic notes elevate all the other flavors in both the filling and the glaze, adding a layer of sophistication and depth that imitation vanilla cannot match.
- Warm Fall Spices (Cinnamon, Nutmeg, Cloves, Ginger): The blend of these classic spices is what truly gives the pumpkin filling its quintessential autumn character.
- Cinnamon: The star of fall spices, offering a sweet and warm aroma.
- Nutmeg: Provides a slightly woody, sweet, and pungent note that rounds out the spice blend.
- Ground Cloves: A strong, aromatic spice that adds a deep, warm complexity. Use sparingly for impact.
- Ground Ginger: Contributes a zesty, slightly peppery warmth, balancing the sweetness and other spices.
This combination creates the signature cozy taste that everyone loves in pumpkin desserts.
- Egg (for Egg Wash): A beaten egg, mixed with a tiny bit of water or milk, creates a beautiful, glossy golden-brown finish on your pasties. It also acts as a seal for the edges, helping to keep the delicious filling inside.
- Powdered Sugar & Milk (for Glaze): Powdered sugar forms the base of our simple maple glaze, providing smooth sweetness. Milk is used to thin the glaze to the perfect drizzling consistency.
Customize Your Pasties: Delicious Variations to Explore:
While these pumpkin pasties are perfect as is, feel free to get creative with these delicious variations to suit your taste or dietary needs:
- Dairy-Free Delight: If you’re looking to make these pasties dairy-free, the main challenge lies in the butter for the pie crust. While I haven’t personally tested it for this specific recipe, many bakers have successfully used high-quality dairy-free butter sticks (like Miyoko’s Kitchen or Earth Balance sticks) in pie crusts. The key is to ensure the dairy-free butter is very cold and has a high fat content for flakiness. The filling can easily be made dairy-free by swapping the small amount of butter with a plant-based alternative or omitting it.
- Enhanced Glaze Experience: Take your maple glaze up a notch by whisking in a pinch of cinnamon and/or nutmeg. These additional spices will echo the flavors of the pumpkin filling, creating a more cohesive and intensely autumnal taste experience. A tiny splash of maple extract can also boost the maple flavor.
- Indulgent Salted Caramel Drizzle: For a truly decadent twist, forgo the maple glaze and instead drizzle your warm pasties with a generous amount of homemade salted caramel sauce. The salty-sweet notes of the caramel pair magnificently with the pumpkin, adding a rich, sophisticated touch that’s perfect for a special occasion.
- Quick & Easy Puff Pastry: Short on time or looking for an even flakier, lighter crust? Store-bought puff pastry is an excellent shortcut. Simply roll it out, cut your shapes, fill, seal, and bake as directed. The result will be a wonderfully airy and crisp pastry that’s equally delicious, though with a different texture profile than the traditional pie crust.
- Add a Nutty Crunch: Incorporate some finely chopped, toasted pecans or walnuts into your pumpkin filling for an added layer of texture and nutty flavor. Alternatively, sprinkle them on top of the glaze for a visual and textural contrast.
- Cream Cheese Swirl Surprise: For a delightful creamy element, prepare a small amount of sweetened cream cheese filling (cream cheese, a touch of sugar, and vanilla). Place a small dollop of this mixture on top of the pumpkin filling before folding and sealing your pasties. It creates a lovely swirl and tangy counterpoint to the sweet pumpkin.
Step-by-Step Guide: Crafting Your Magical Pumpkin Pasties:
Making these pumpkin pasties is a rewarding process, resulting in truly spectacular homemade treats. Follow these detailed steps for baking success:
Step 1: Prepare Your Flaky Pie Dough. The foundation of an incredible pasty is a flawless pie crust. For the absolute best results, I highly recommend making your own all-butter pie dough. Refer to my comprehensive “Perfect Pie Crust” post (linked in the expert tips section) for detailed step-by-step instructions and crucial tips on achieving maximum flakiness. Once prepared, ensure your dough is thoroughly chilled in the refrigerator for at least 2 hours (or up to 2 days), or frozen for up to 3 months (thaw overnight in the fridge before use). This chilling period is vital for the butter to firm up, which contributes to the flakiness and prevents the dough from shrinking during baking. Once chilled, roll out the dough and cut it into approximately 5-inch diameter circles. Keep these circles chilled while you prepare the filling to maintain their integrity.
Step 2: Whisk Together the Aromatic Pumpkin Filling. In a medium-sized bowl, melt the butter. To this, add your 100% pure canned pumpkin puree, brown sugar, maple syrup, real vanilla extract, cinnamon, nutmeg, ground cloves, ground ginger, and salt. Whisk all the ingredients together vigorously until they are well combined and the mixture is smooth and lump-free. The resulting filling should be thick and richly fragrant with the warm spices of autumn. Set this aside as you assemble your pasties.
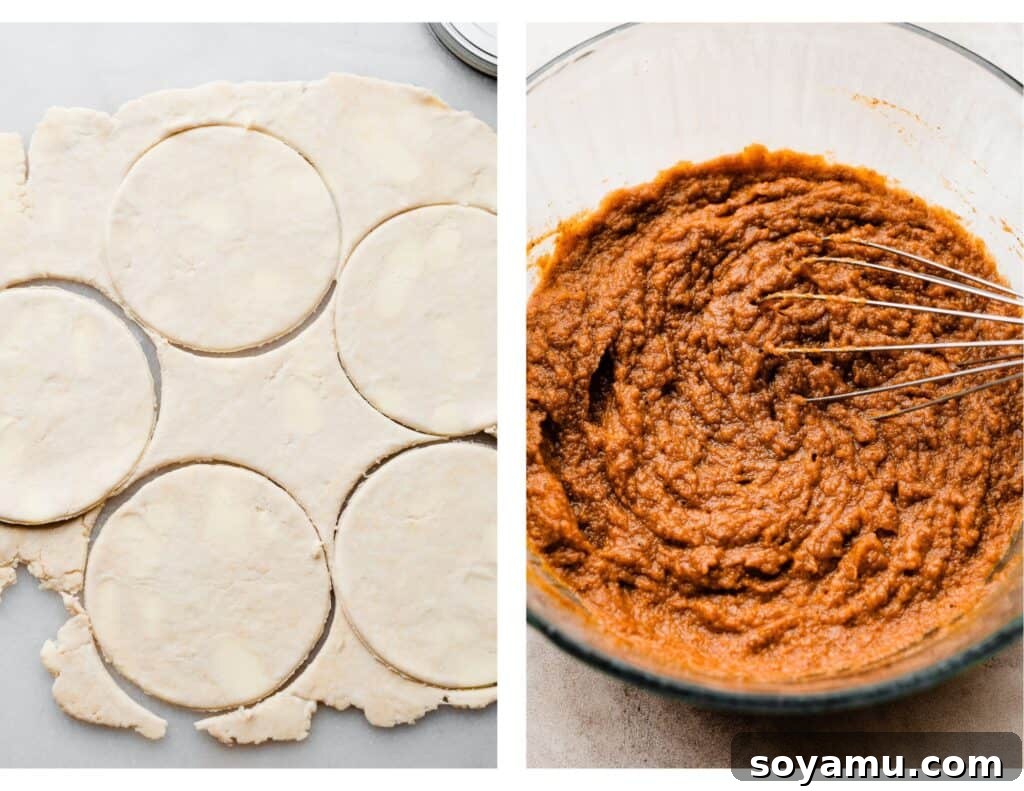
Step 3: Master the Art of Pasty Assembly. Retrieve your chilled pie dough circles. Lay them out on a lightly floured surface or directly on parchment-lined baking sheets. Spoon approximately two generous tablespoons of the prepared pumpkin filling onto one half of each dough circle, ensuring you leave a clear border around the edge—about half an inch—for proper sealing. In a small bowl, whisk one large egg with a tablespoon of water or milk to create an egg wash. Lightly brush this egg wash along the exposed edges of the dough circle. Carefully fold the unoccupied half of the dough over the filling, creating a perfect half-moon shape. Gently press the edges together with your fingertips to seal them securely. For an attractive finish and an extra-strong seal, use the tines of a fork to crimp all along the curved edge of each pasty. If your assembled pasties feel warm at this stage, return them to the refrigerator for 10-20 minutes to re-chill. Before baking, brush the tops of the pasties lightly with more egg wash for that beautiful golden sheen, then cut two or three small slits on the top of each pasty with a sharp knife to allow steam to escape during baking. Finally, sprinkle a little raw sugar or cinnamon sugar over the tops for added sparkle and sweetness.
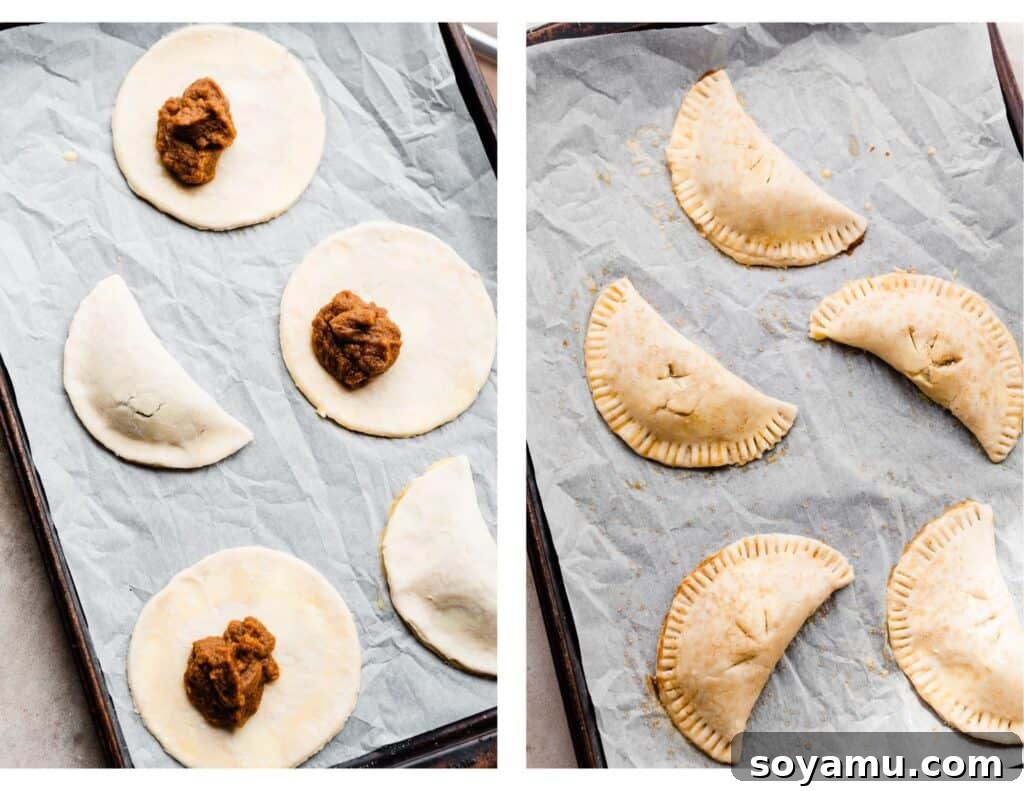
Step 4: Bake to Golden Perfection. Preheat your oven to 400°F (200°C). Arrange your assembled and chilled pumpkin pasties on baking sheets lined with parchment paper or silicone mats, ensuring they are not overcrowded. Bake for approximately 22-26 minutes, or until the crust is beautifully golden brown and the filling is bubbling slightly. To ensure the bottom crust is adequately crisp, you can carefully lift one pasty with a cookie flipper to check its underside. Once baked, transfer the pasties to a wire rack to cool slightly while you prepare the glaze.
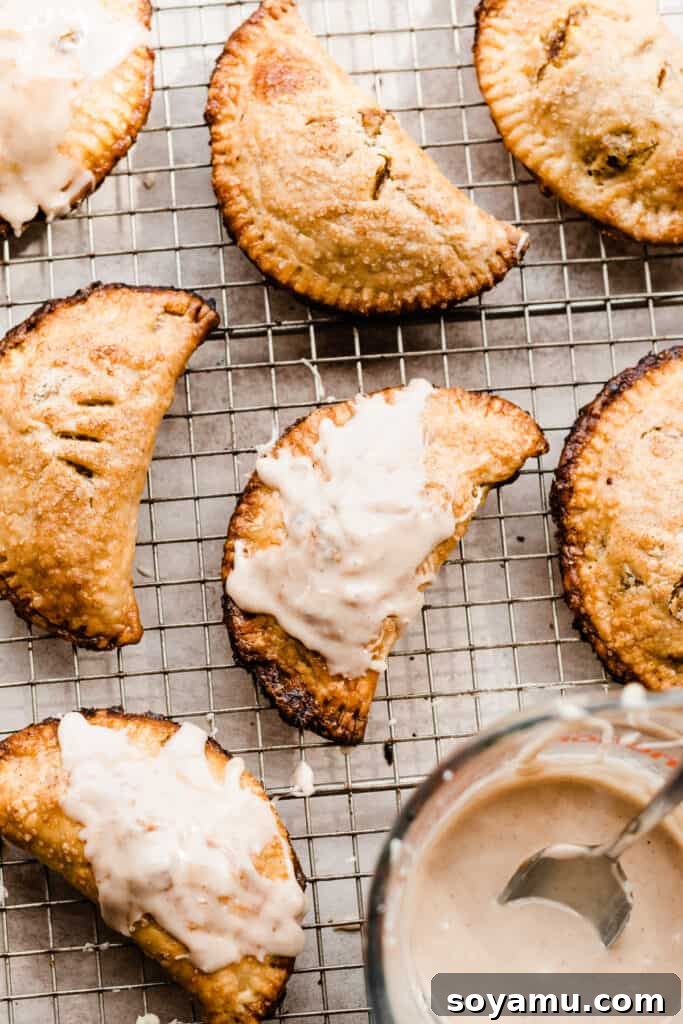
Step 5: Drizzle with the Silky Maple Glaze. While the pasties are still warm, prepare the glaze. In a small bowl, whisk together the powdered sugar, maple syrup, and vanilla extract. Add milk, one teaspoon at a time, until you achieve a smooth, pourable consistency that is neither too thick nor too runny. For an extra touch of flavor, a pinch of cinnamon can be added to the glaze. Generously drizzle this luscious maple glaze over each warm pumpkin pasty. The warmth of the pasties will allow the glaze to set beautifully, creating a perfect sweet finish.
Serving Suggestions & Storage Tips:
These glorious pumpkin pasties are truly at their peak when served fresh and warm, straight from the oven. The flaky crust is crisp, and the spiced pumpkin filling is wonderfully aromatic. Serve them with a hot cup of coffee or tea, or lean into the magical theme with a glass of apple cider or, indeed, pumpkin juice!
Should you find yourself with leftovers (a rare occurrence!), allow them to cool completely at room temperature before storing. Place them in an airtight container and refrigerate for 2-3 days. While they won’t be as crisp as when freshly baked, you can easily revive their texture. Reheat them gently in a preheated oven (around 300°F/150°C) for 10-15 minutes until warmed through and the crust regains some of its crispness. Avoid microwaving, as this tends to make the crust soggy.
For longer storage, unbaked, assembled pasties (without the egg wash and sugar on top) can be frozen for up to 3 months in an airtight container. When ready to bake, transfer them directly from the freezer to a parchment-lined baking sheet, apply the egg wash and sugar, and bake as directed, adding a few extra minutes to the baking time.
Expert Tips for Flawless Pumpkin Pasties Every Time:
Achieving bakery-quality pumpkin pasties is easier than you think with a few insider tricks. Pay attention to these expert tips for a truly stellar result:
- Embrace Homemade Pie Crust: Your Secret Weapon: I cannot stress this enough – homemade pie crust is the game-changer for these hand pies. Store-bought crusts simply don’t offer the unparalleled buttery flavor and delicate, flaky texture that an all-butter homemade version does. If you’re new to pie crusts, don’t be intimidated! Read my comprehensive guide on Perfect Pie Crust for step-by-step photos, troubleshooting common issues, and invaluable tips to help you master it. The effort is truly worth the exceptional result.
- The Power of Cold Ingredients: For your pie crust, always ensure your butter and water are ice cold. This prevents the butter from melting into the flour too quickly, creating distinct pockets of butter that expand into flaky layers during baking. Warm butter yields a tougher, less flaky crust.
- Don’t Overwork the Dough: Handle your pie dough as little as possible. Overworking develops the gluten, leading to a tough, chewy crust instead of a tender, flaky one. Mix just until the dough comes together.
- Chill, Chill, Chill!: Proper chilling of the pie dough (and even the assembled pasties) is critical. It allows the gluten to relax, prevents shrinking during baking, and ensures the butter stays cold, contributing to flakiness. Don’t skip these chilling steps!
- Avoid Overfilling: While tempting to pack in as much pumpkin as possible, overfilling can lead to pasties bursting open in the oven, causing a messy bake and dry filling. Stick to the recommended amount of filling.
- Crucial Ventilation Slits: Don’t forget to cut a few small slits on the top of each pasty before baking. These allow steam from the filling to escape, preventing the pasties from puffing up excessively or cracking unsightly. They also help the pasties bake more evenly.
- The Magic of Egg Wash: Brushing the pasties with egg wash before baking gives them a beautiful, golden-brown, glossy finish. It also helps any sprinkled sugar adhere to the crust, adding a lovely sparkle.
- Pumpkin Puree vs. Pie Filling – A Non-Negotiable Difference: As mentioned in the ingredients, always use pure canned pumpkin puree, which is simply cooked and mashed pumpkin. Pumpkin pie filling contains added spices and sweeteners that will disrupt the carefully balanced flavors of this recipe. Double-check your can before you start baking!
Frequently Asked Questions About Pumpkin Pasties:
Got questions? We’ve got answers to help you bake the most successful pumpkin pasties!
Absolutely! This recipe is fantastic for make-ahead convenience. The pie dough can be prepared up to 2 days in advance and stored tightly wrapped in plastic in the refrigerator. For longer storage, you can freeze the dough for up to 3 months; just thaw it overnight in the fridge before use. If you want to get a head start on assembly, the unbaked, assembled hand pies (without the egg wash and sugar on top) can also be frozen in an airtight container for up to 3 months. When you’re ready to bake, simply apply the egg wash and sugar to the frozen pasties and bake directly from frozen, adding an extra 5-10 minutes to the baking time.
Yes, you certainly can! While homemade all-butter pie crust offers superior flakiness and flavor, store-bought pie crust or puff pastry are excellent alternatives if you’re short on time. They will still yield delicious results, just with a slightly different texture. If using store-bought pie crust, simply roll it out and cut your circles. For puff pastry, ensure it’s thawed according to package directions before rolling and cutting. Adjust baking times as needed, as store-bought options may bake faster.
Several factors contribute to a crisp pasty. First, ensure your crust is adequately baked until golden brown on both top and bottom. Second, allow the pasties to cool on a wire rack after baking to allow air circulation, preventing condensation that can lead to sogginess. Third, if storing leftovers, refrigerate them in an airtight container, and reheat in an oven (not a microwave) to revive their crispness. Lastly, make sure your filling isn’t overly wet; the recipe calls for a thick filling, which helps prevent a soggy bottom crust.
For these individual hand pies, I recommend cutting dough circles that are approximately 5 inches (12-13 cm) in diameter. This size yields a good individual portion and allows enough space for filling and sealing without being too large or too small to handle. A standard bowl or a large biscuit cutter can be used for this.
Essential Tools for Baking These Pasties:
Having the right tools can make your baking experience smoother and more enjoyable. Here are a few recommended items:
- Pastry Cutter: This simple tool is incredibly helpful for cutting cold butter into flour when making pie dough. It allows you to incorporate the butter without using your warm hands, which is crucial for maintaining the butter’s cold temperature and achieving that desired flaky crust. They are inexpensive and a valuable addition to any baker’s kitchen.
- Pastry Brush: A good pastry brush is essential for evenly applying the egg wash to the pasties before baking, ensuring a beautiful golden-brown finish. It’s also perfect for drizzling the maple glaze once the pasties are out of the oven.
- Round Cutters (or Biscuit Cutters): A set of round cutters in various sizes will be your best friend for creating uniform pasties. You can use a 5-inch cutter for perfect individual portions. This versatile tool set can also be used for biscuits, donuts, cookies, and more.
- Rolling Pin: A sturdy rolling pin is necessary to roll out your pie dough to an even thickness (about 1/8-inch), ensuring consistent baking and a beautifully structured pasty.
- Parchment Paper or Silicone Baking Mats: While not a “tool” in the traditional sense, lining your baking sheets with parchment paper or silicone mats prevents sticking, ensures even browning, and makes cleanup a breeze.
More Irresistible Pumpkin Recipes to Explore:
If you’ve fallen in love with the flavors of pumpkin, you’re in luck! Here are more fantastic pumpkin-centric recipes from our kitchen that you’re sure to adore:
- Pumpkin Streusel Muffins with Maple Glaze
- Pumpkin Snickerdoodles with Rum Caramel
- Pumpkin Cupcakes with Brown Butter Cream Cheese Frosting
- Pumpkin Swirl Cheesecake
- Homemade Pumpkin Granola
- Pumpkin Scones with Bourbon Vanilla Glaze
- Pumpkin Whoopie Pies
- Mom’s Best Ever Pumpkin Bread
Did you make this recipe? We’d love to hear from you! Leave a comment & star rating!
Your feedback is invaluable. Please click the little stars in the header of the recipe card below to share your thoughts and a star rating, letting us know how much you enjoyed this recipe. Your ratings and comments help our small business immensely and inspire us to create more delicious recipes!
Pumpkin Pasties with Maple Glaze
These Maple Pumpkin Pasties are filled with a sweet and spiced pumpkin mixture, wrapped in an all-butter flaky pie crust, and finished with a luscious maple glaze. They offer a delightful, easy-to-make alternative to a traditional pumpkin pie.
Ingredients
For the Pie Crust (yields two 9-inch crusts, or enough for 16 pasties)
- 3 cups all-purpose flour (390 grams)
- 3/4 tsp salt
- 1 tbsp sugar
- 18 tbsp salted butter, cold (254 grams), cut into small cubes
- 9-10 tbsp ice cold water
For the Pumpkin Filling
- 2 tbsp butter, melted (28 grams)
- 1 can pumpkin (15 oz / 425g), not pumpkin pie filling (you’ll need about 2/3 of the can for the pasties)
- 1/4 cup maple syrup (60 grams)
- 3 tbsp brown sugar, packed (41 grams)
- 3/4 tsp vanilla extract
- 1 tsp cinnamon
- 1/2 tsp nutmeg
- 1/2 tsp ground cloves
- 1/8 tsp ground ginger
- 1/4 tsp salt
- 1 large egg (for egg wash – not for the filling)
For the Maple Glaze
- 1 and 1/2 cups powdered sugar (173 grams)
- 2 tbsp maple syrup (30 grams)
- Milk, as needed to thin (start with 1-2 tablespoons)
- 1/2 tsp vanilla extract
- Pinch of cinnamon (optional)
Instructions
-
1. Make the Pie Crust: Follow the directions in this pie crust post (through step 5) to prepare your all-butter pie dough. Wrap the dough tightly in plastic wrap and chill in the fridge for at least 2 hours or up to 2 days. Alternatively, you can freeze it for up to 3 months (thaw overnight in the fridge before use). Prepare the pumpkin filling while the dough chills.
-
2. Prep for Baking: Preheat your oven to 400° F (200°C). Line a few large baking sheets with parchment paper or silicone baking mats, preparing for the pasties.
-
3. Prepare the Pumpkin Filling: In a medium mixing bowl, melt the 2 tablespoons of butter. Whisk in the canned pumpkin puree, maple syrup, brown sugar, vanilla extract, cinnamon, nutmeg, ground cloves, ground ginger, and salt until well combined and smooth. The filling should be thick.
-
4. Assemble the Pumpkin Pasties: On a lightly floured surface, roll out your chilled pie dough to about 1/8″ thick. Using a 5-inch diameter bowl or round cutter, cut out circles from the dough. Place about 6 circles on each prepared baking sheet. Spoon 2 generous tablespoons of the pumpkin filling onto one side of each dough circle, leaving about a 1/2-inch border around the edge.
In a small bowl, beat the large egg with a tablespoon of water or milk to create an egg wash. Brush this egg wash around the exposed edges of each dough circle. Fold the dough over the filling to form a half-moon shape, gently pressing the edges together with your fingertips to seal. Crimp the edges securely with a fork for a decorative and tight seal.
Important: If your assembled pasties feel warm to the touch, transfer the baking sheets to the fridge and chill for 10-20 minutes before baking. This helps prevent shrinking and maintains flakiness. Lightly brush the tops of the pasties with more egg wash, cut 2-3 small slits on top for venting, and sprinkle with raw sugar or cinnamon sugar.
-
5. Bake to Perfection: Bake the pasties in your preheated oven for 22-26 minutes, or until they are beautifully golden brown. You can gently lift one with a cookie flipper to check for crispness on the bottom crust. Once baked, transfer them to a wire rack.
-
6. Make the Maple Glaze: In a small bowl, whisk together the powdered sugar, maple syrup, and vanilla extract until smooth. Add milk, a splash at a time, until you reach your desired drizzling consistency. If desired, whisk in a pinch of cinnamon for extra flavor.
-
7. Serve & Store: Drizzle the warm-from-the-oven pasties generously with the maple glaze and enjoy immediately! Harry Potter fans especially will adore this recipe!
Store any leftover pasties in an airtight container in the fridge for 3-4 days. They are best on the day they are made, but you can reheat them in a preheated oven (around 300°F/150°C) for 10-15 minutes to help retain some of the crisp texture.
Nutrition
Serving: 1 pasty, Calories: 302 kcal, Carbohydrates: 40g, Protein: 3g, Fat: 15g, Saturated Fat: 9g, Polyunsaturated Fat: 1g, Monounsaturated Fat: 4g, Trans Fat: 1g, Cholesterol: 49mg, Sodium: 266mg, Potassium: 111mg, Fiber: 2g, Sugar: 19g, Vitamin A: 4589IU, Vitamin C: 1mg, Calcium: 28mg, Iron: 2mg
Nutrition information is automatically calculated and should only be used as an approximation.
Like this recipe? We’d love your feedback!
Please leave a comment and a star rating below to share your experience. Your support helps us grow and create more delicious content!