

Get ready to embrace the flavors of autumn with this extraordinary **Homemade Pear Pizza**, a dish that perfectly captures the essence of the season. Imagine a super simple, yet incredibly satisfying homemade crust, generously topped with slices of sweet, juicy pears, tender roasted butternut squash, crisp smoky bacon, and a decadent blend of melty cheeses. Once baked to golden perfection, it’s finished with a scattering of fresh, peppery arugula and a sprinkle of Parmesan, adding a vibrant freshness that truly elevates every bite. This isn’t just a pizza; it’s a culinary experience – one of the most flavorful and surprisingly easy meals you’ll ever create!

This post is proudly sponsored by our friends at USA Pears. All opinions and love for pears are entirely my own.
Why This Pear Pizza Will Become Your Go-To Fall Favorite
I’ve been passionately crafting fall-inspired pizzas like this one since last autumn, and the excitement to finally share this recipe with you is immense! This is hands down one of my absolute favorite creations for a quick, exceptionally flavorful weeknight dinner. Every single time we make it, it disappears at an astonishing speed. Seriously, no leftovers in sight – nada, zip! The unique combination of ingredients creates a symphony of flavors and textures that is simply irresistible.
The beauty of this pizza lies in its harmonious contrast: the inherent sweetness of fresh pears beautifully complements the earthy richness of roasted butternut squash and the salty, smoky crunch of bacon. The creamy, melted cheeses bind everything together, while a simple sage and garlic infused olive oil replaces traditional tomato sauce, providing an aromatic base. Finally, the fresh arugula adds a refreshing, peppery bite, cutting through the richness and leaving you craving more. It’s a gourmet experience made accessible in your own kitchen.
Don’t Fear the Dough: Mastering Homemade Pizza Crust
For many, the idea of making pizza crust from scratch can be daunting, but I promise you, it’s an incredibly rewarding and surprisingly easy process. Once you try this simple homemade crust, you’ll wonder why you ever bought pre-made. It’s truly a breeze to put together, requiring minimal ingredients and offering a superior texture and flavor that elevates the entire pizza. I’m here to guide you through each step, ensuring a perfect, tender, and chewy crust every time.
Step-by-Step: Crafting Your Perfect Pizza Crust
Making your own pizza dough is a foundational skill that unlocks endless pizza possibilities. Here’s how we’ll create the ideal base for our fall-inspired masterpiece:
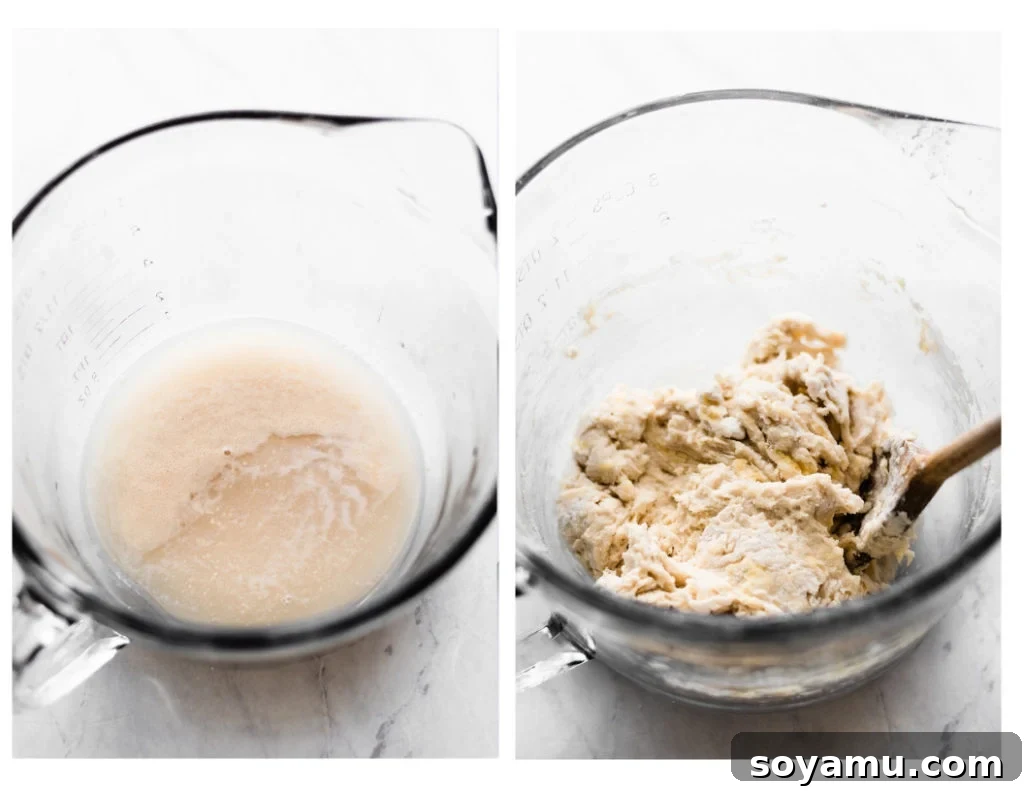
- Activate the Yeast: Begin by combining active dry yeast, a touch of sugar (which feeds the yeast), and warm water in a medium mixing bowl. The warmth of the water is crucial – too hot, and it kills the yeast; too cold, and it won’t activate. Stir it gently once and then let it rest for about 5 minutes. This “proofs” the yeast, ensuring it’s alive and ready to make your dough light and airy. You’ll know it’s working when a foamy layer appears on the surface, indicating the yeast is active and thriving. If you don’t see foam, your yeast might be old or the water temperature was off, and it’s best to start again.

- Combine Ingredients: Once your yeast is foamy, stir in the all-purpose flour, salt, and a tablespoon of olive oil. The mixture will initially look shaggy and uneven.
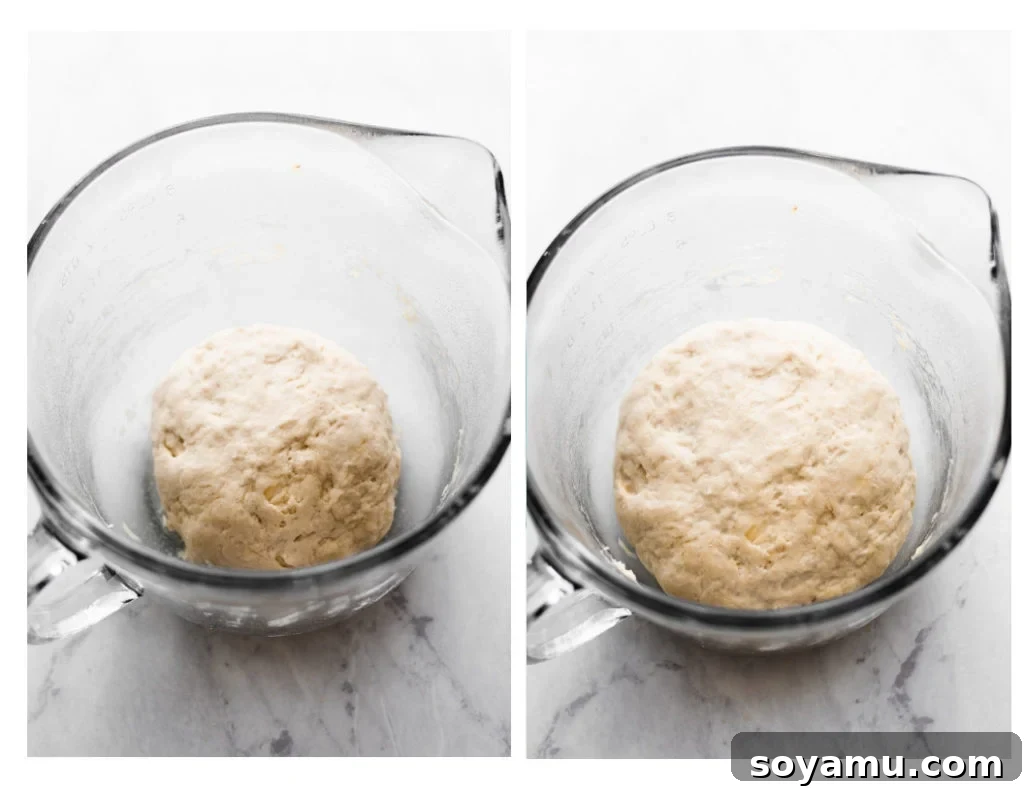
- Knead to Perfection: Transfer the shaggy dough to a lightly floured countertop. Knead the dough for just about a minute or two. The goal here isn’t extensive gluten development, but rather to bring the dough together into a smooth, cohesive ball. You’ll feel it transform from sticky to supple under your hands.
- The Rise: Lightly spray a clean bowl with cooking spray to prevent sticking. Place your dough ball into the bowl, then cover it tightly with plastic wrap or a clean kitchen towel. Allow the dough to rise in a warm spot for 40-45 minutes. During this time, the yeast will work its magic, causing the dough to roughly double in size, becoming light and puffy. This rise is essential for a tender crust.
The Aromatic Base: Sage and Garlic Infused Olive Oil
While your pizza dough is rising, you’ll prepare the simple yet incredibly flavorful “sauce” for this pizza: an aromatic olive oil infused with fresh sage and garlic. This step adds a depth of herbaceous, savory notes that beautifully complement the sweet and smoky toppings.
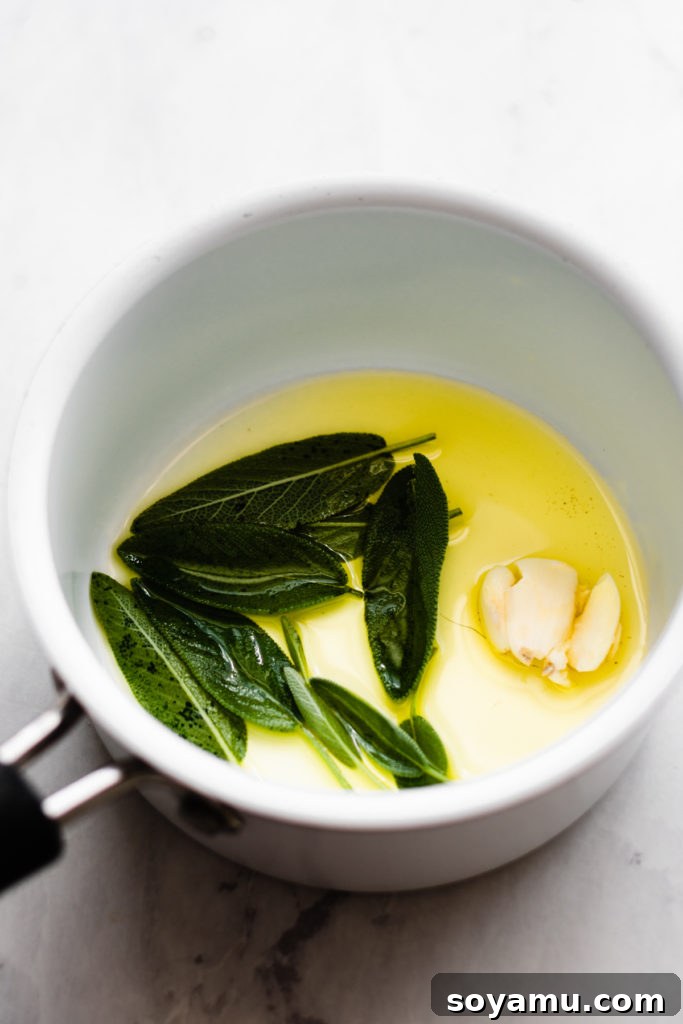
In a small saucepan, gently heat olive oil with a handful of fresh sage leaves and a crushed garlic clove over medium-low heat. The key here is low and slow; you want the flavors to gradually infuse into the oil without burning the garlic or sage. Cook for a few minutes until the oil is fragrant. Then, remove the saucepan from the heat, discard the sage leaves and garlic (their work is done!), and set the infused oil aside to cool slightly. This rich, fragrant oil will be brushed onto the crust, providing a delicious foundation that perfectly marries all the ingredients.
Assembling Your Masterpiece: Layers of Fall Flavors
With your dough perfectly risen and your infused oil ready, it’s time to bring all the elements together. This is where the magic truly happens, layering contrasting textures and flavors for an unforgettable autumn pizza.
- Prepare the Toppings:
- Roasted Butternut Squash: Ensure your butternut squash is roasted until tender and slightly caramelized. Toss cubed squash with a tablespoon of olive oil, salt, pepper, a pinch of thyme, and a hint of brown sugar. Roast at 400°F (200°C) for 18-20 minutes, flipping halfway, until beautifully soft and flavorful. This adds a sweet, earthy depth.
- Crispy Bacon: Cook your bacon slices until perfectly crisp. I find baking bacon in the oven yields the best results – evenly cooked and less messy. Once cooked, drain on paper towels and crumble into pieces. The smoky, salty crunch of bacon is essential.
- Increase Oven Temperature: Before you start assembling, increase your oven temperature to 475°F (245°C). A hot oven is crucial for a crisp crust.
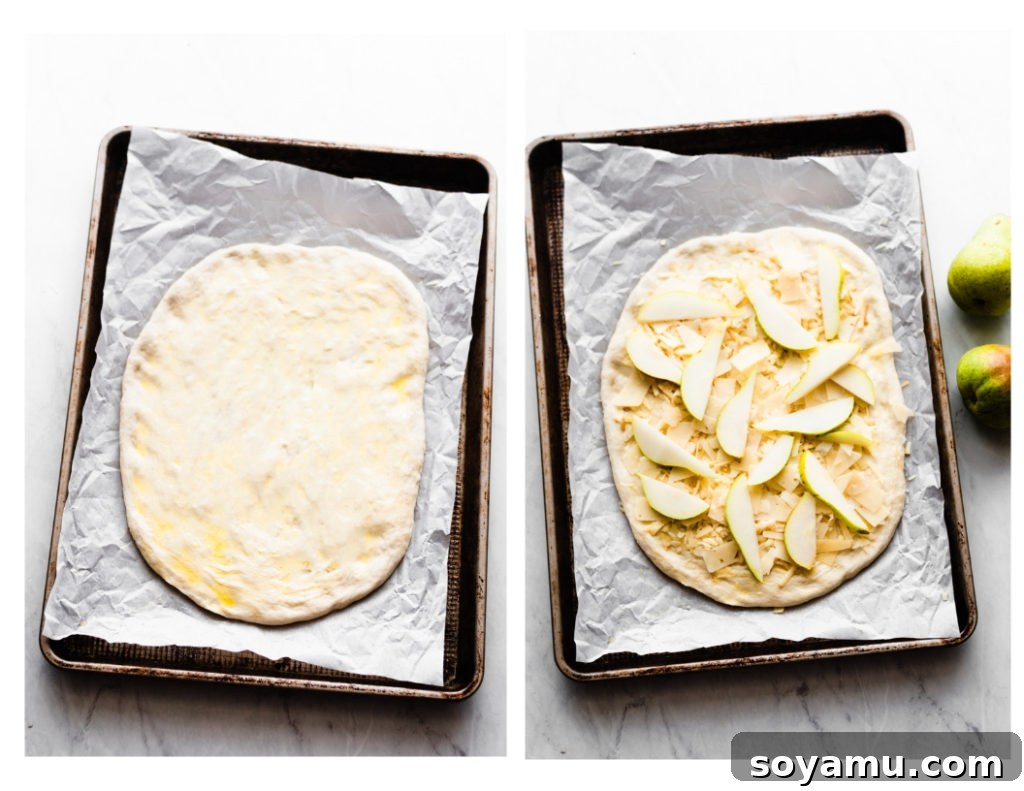
- Shape the Dough: Line a baking sheet with parchment paper. Gently transfer your risen dough to the center of the prepared baking sheet. Using floured hands or a rolling pin, press and stretch the dough until it’s about 1/4-inch thick. Don’t worry about making a perfect circle; an rustic shape adds to its homemade charm!
- Build the Flavors:
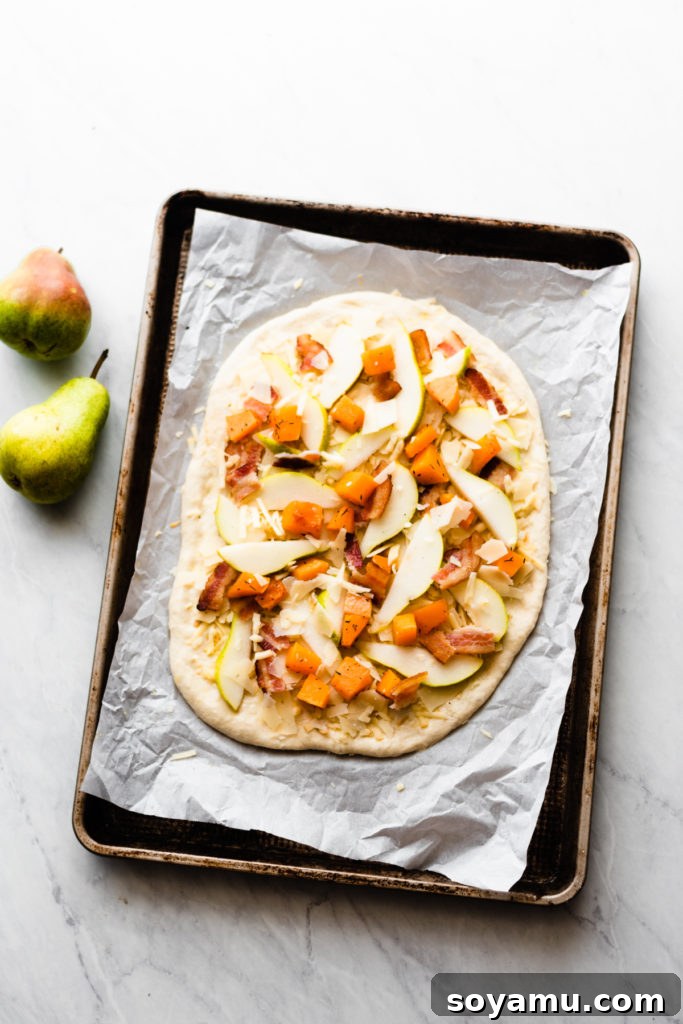
- Infused Oil Base: Generously brush the entire surface of the stretched dough with your fragrant sage and garlic-infused olive oil. This acts as our flavor-packed ‘sauce’.
- Cheesy Foundation: Sprinkle a generous mix of grated Gruyere and Parmesan cheese over the olive oil. Gruyere offers a wonderfully nutty and creamy melt, while Parmesan adds sharp, salty notes.
- Sweet Pear Slices: Now for the star – thinly sliced fresh pears! The sweetness of the pears is what makes this pizza truly unique, providing a delightful counterpoint to the savory elements.
- Savory Squash and Bacon: Distribute the tender roasted butternut squash and crispy bacon pieces evenly over the pears and cheese.
- Final Cheese Layer: Finish with an extra sprinkle of your cheese blend for maximum melty goodness.
Pro Pear Tip: To ensure your pear pizza is at its best, always check for ripeness. Gently apply pressure near the stem, at the very top of the pear. If you feel it give slightly under gentle pressure, it’s perfectly ripe and ready to contribute its juicy sweetness to your pizza!
Baking and Serving Your Fall Harvest Pizza
Once your pizza is beautifully assembled, it’s time to bake it to crispy, golden perfection. Place the baking sheet with your pizza into the preheated 475°F (245°C) oven. Bake for 12-15 minutes, or until the crust has turned a lovely light golden brown and the cheese is bubbly and melted. You can carefully lift an edge of the pizza with a large spatula to check the bottom – it should be crisp and browned, indicating a perfectly cooked crust.
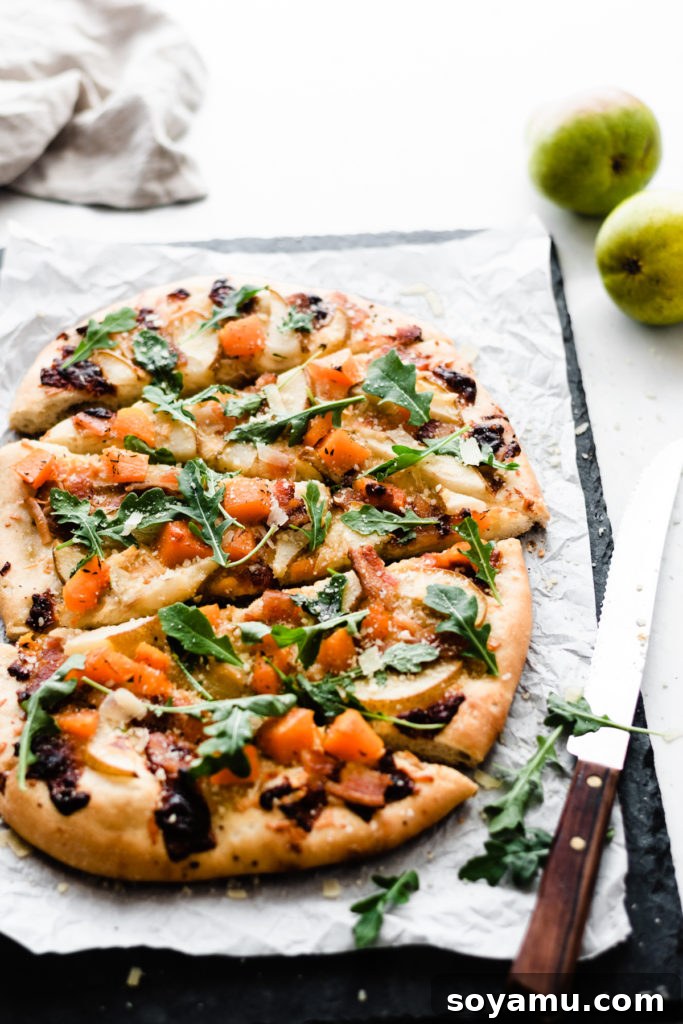
Immediately after removing it from the oven, crown your masterpiece with a generous two handfuls of fresh arugula. The heat from the pizza will slightly wilt the arugula, releasing its peppery flavor, creating a wonderful contrast to the warm, rich toppings. Finish with an extra sprinkle of fresh Parmesan cheese.
Serve your Homemade Pear Pizza immediately! This dish is a celebration of fall flavors, ideal for a cozy weeknight dinner, a romantic date night in, or a delightful meal shared with friends. If you’re feeding more than 2-3 people, I highly recommend making more than one pizza, as it tends to disappear remarkably fast!
While the photos show it sliced into 5 generous portions, I typically cut this pizza down the center and then across four times to yield 8 more manageable slices. Estimate about 2-3 slices per person, depending on appetite.
Tips for the Best Pear Pizza
- Choose the Right Pears: Firmer pear varieties like Bosc or Anjou hold up well during baking, providing a lovely texture. Bartlett pears are also great for their sweetness. Make sure they are ripe but not overly soft.
- Thinly Slice Ingredients: Uniformly thin slices of pear and squash ensure they cook through evenly and blend seamlessly into the pizza.
- Don’t Overload: While tempting, too many toppings can make the crust soggy. Distribute ingredients thoughtfully to ensure even baking and a balanced flavor.
- Hot Oven is Key: A very hot oven (475°F/245°C) ensures a quick bake, resulting in a crispy crust and perfectly melted cheese without drying out the toppings. If you have a pizza stone or steel, preheat it in the oven for at least 30 minutes before baking for an even crispier bottom crust.
- Fresh Herbs Matter: The fresh sage in the infused oil and the fresh arugula added after baking are crucial for the vibrant flavors. Don’t skip them!
Variations & Substitutions
This pear pizza recipe is fantastic as is, but it’s also wonderfully adaptable. Feel free to experiment based on your preferences or what you have on hand:
- Cheese Swaps: Not a fan of Gruyere? Try a blend of fresh mozzarella and goat cheese for a creamier, tangier profile. Feta cheese would also add a lovely salty counterpoint.
- Nutty Crunch: A sprinkle of toasted walnuts or pecans would add a delightful crunch and earthy flavor, pairing beautifully with the pears.
- Herb Alternatives: Instead of sage, consider infusing your olive oil with rosemary or a blend of Italian herbs.
- Spicy Kick: A pinch of red pepper flakes either in the infused oil or sprinkled over the pizza before baking can add a subtle heat.
- Vegetarian Option: To make this pizza vegetarian, simply omit the bacon. You could add some caramelized onions for extra depth of flavor or a sprinkle of toasted nuts.
- Different Squash: While butternut squash is wonderful, acorn squash or even sweet potato could be substituted.
Storage and Reheating
This pizza is absolutely best enjoyed fresh out of the oven, when the crust is crisp and the cheese is perfectly melted. However, leftovers can be stored in an airtight container in the refrigerator for 2-3 days.
To reheat, I recommend using a toaster oven or a regular oven set to 350°F (175°C) for about 8-10 minutes, or until heated through and the crust is crisp again. This method prevents the pizza from becoming soggy, which can happen in a microwave.
Frequently Asked Questions (FAQ)
- Can I use store-bought pizza dough?
- Absolutely! If you’re short on time or energy, many grocery stores offer excellent pre-made pizza dough. This will significantly cut down on prep time without sacrificing much flavor. Just follow the package instructions for baking.
- What if I don’t like arugula?
- No problem! The arugula adds a peppery freshness, but if it’s not to your taste, you can simply omit it. Alternatively, a sprinkle of fresh basil or finely chopped parsley would add a different, milder herbaceous note.
- Can I make this pizza ahead of time?
- You can prep certain components in advance. The butternut squash can be roasted a day or two ahead and stored in the fridge. The bacon can also be cooked and crumbled. The pizza dough is best made fresh, or use store-bought for convenience. Assembling and baking the pizza should be done just before serving for the best results.
- What kind of pears are best for this recipe?
- Firmer varieties like Bosc, Anjou, or even ripe but firm Bartlett pears work wonderfully as they hold their shape during baking and offer a pleasant sweetness. Avoid overly soft or mushy pears.
Pear Pizza with Roasted Butternut Squash, Bacon, and Arugula
Ingredients
For the Crust
- 1 and 1/2 tsp active dry yeast
- 2 tsp sugar
- 2/3 cup + 2 TBSP warm water
- 2 cups all-purpose flour
- 1 and 1/2 tsp salt
- 1 TBSP olive oil
Toppings
- 3 slices bacon, cooked
- 1 cup butternut squash, cubed
- 1 TBSP olive oil (for squash)
- 1/2 tsp salt (for squash)
- Pinch pepper (for squash)
- 1/4 tsp thyme (for squash)
- 1 TBSP brown sugar (for squash)
- 1 cup gruyere cheese, grated
- 1 cup parmesan cheese, grated
- 1 large pear, thinly sliced
- 2 handfuls fresh arugula, for topping after baking
For the Infused Olive Oil
- 2 TBSP olive oil
- 1 handful fresh sage leaves
- 1 clove garlic, peeled and smashed
Instructions
- Prep: Cook bacon according to package directions (oven baking is recommended) and place on a paper-towel lined plate to drain grease. Toss the butternut squash on a parchment-lined baking sheet with 1 TBSP olive oil, 1/2 tsp salt, pinch pepper, 1 TBSP brown sugar, and 1/4 tsp thyme. Roast at 400 degrees F (200°C) for 18-20 minutes, tossing halfway through, until tender. Set aside.
- Make the Dough: Measure warm water into a medium mixing bowl. Add the yeast and sugar. Stir once, gently, with a whisk and let sit for 5 minutes until foamy. If not foamy, discard and try again (check yeast expiration). Stir in the flour, 1 TBSP olive oil, and 1 1/2 tsp salt. A shaggy dough will form. Knead it on a lightly floured counter for about a minute until it smoothes out. Form into a ball, and place in a bowl sprayed with cooking spray. Cover with plastic wrap or a kitchen towel and let rise for 40-45 minutes.
- Make the Sage Olive Oil: When the pizza dough rise time is almost finished, add a handful of fresh sage leaves to a small saucepan with 2 TBSP olive oil and one peeled, smashed clove of garlic. Cook over medium-low heat for a few minutes to infuse the olive oil with flavor. Do not let the garlic brown. Remove from heat, discard the sage leaves and garlic, and set the oil aside.
- Assemble the Pizza: Increase oven temperature to 475 degrees F (245°C). Line a baking sheet with parchment paper. Place the risen dough on your lined pan and press it out with floured hands or a rolling pin until it’s about 1/4″ thick. Brush generously with the sage and garlic infused olive oil. Add the grated Gruyere and Parmesan cheese, thinly sliced pears, cooked bacon, roasted butternut squash, and an extra sprinkle of cheese over the top.
- Bake: Bake for 12-15 minutes, or until the crust has turned a light golden brown and the cheese is bubbly. The bottom of the pizza should be crisp – you can carefully lift it using a large spatula to check.
- Serve & Store: Top the hot pizza with fresh arugula and a final sprinkle of Parmesan cheese. Enjoy immediately. This pizza is best eaten on the first day, but leftovers can be stored in an airtight container in the fridge for 2-3 days. Reheat in a toaster oven or regular oven for best results.
Notes
Time Saver: If you’re short on time or prefer not to make dough from scratch, you can easily use store-bought pre-made pizza dough. This will simplify the process while still yielding a delicious result.
Nutrition
Nutrition information is automatically calculated and should be used as an approximation.
Did you craft this delicious recipe? We’d love to hear from you! Snap a photo and share your thoughts in the comments below.
Be sure to follow bluebowlrecipes on Instagram and tag #bluebowlrecipes with your photo! You can also post a picture of your culinary creation to the bluebowlrecipes Facebook page. I can’t wait to see what you make!