
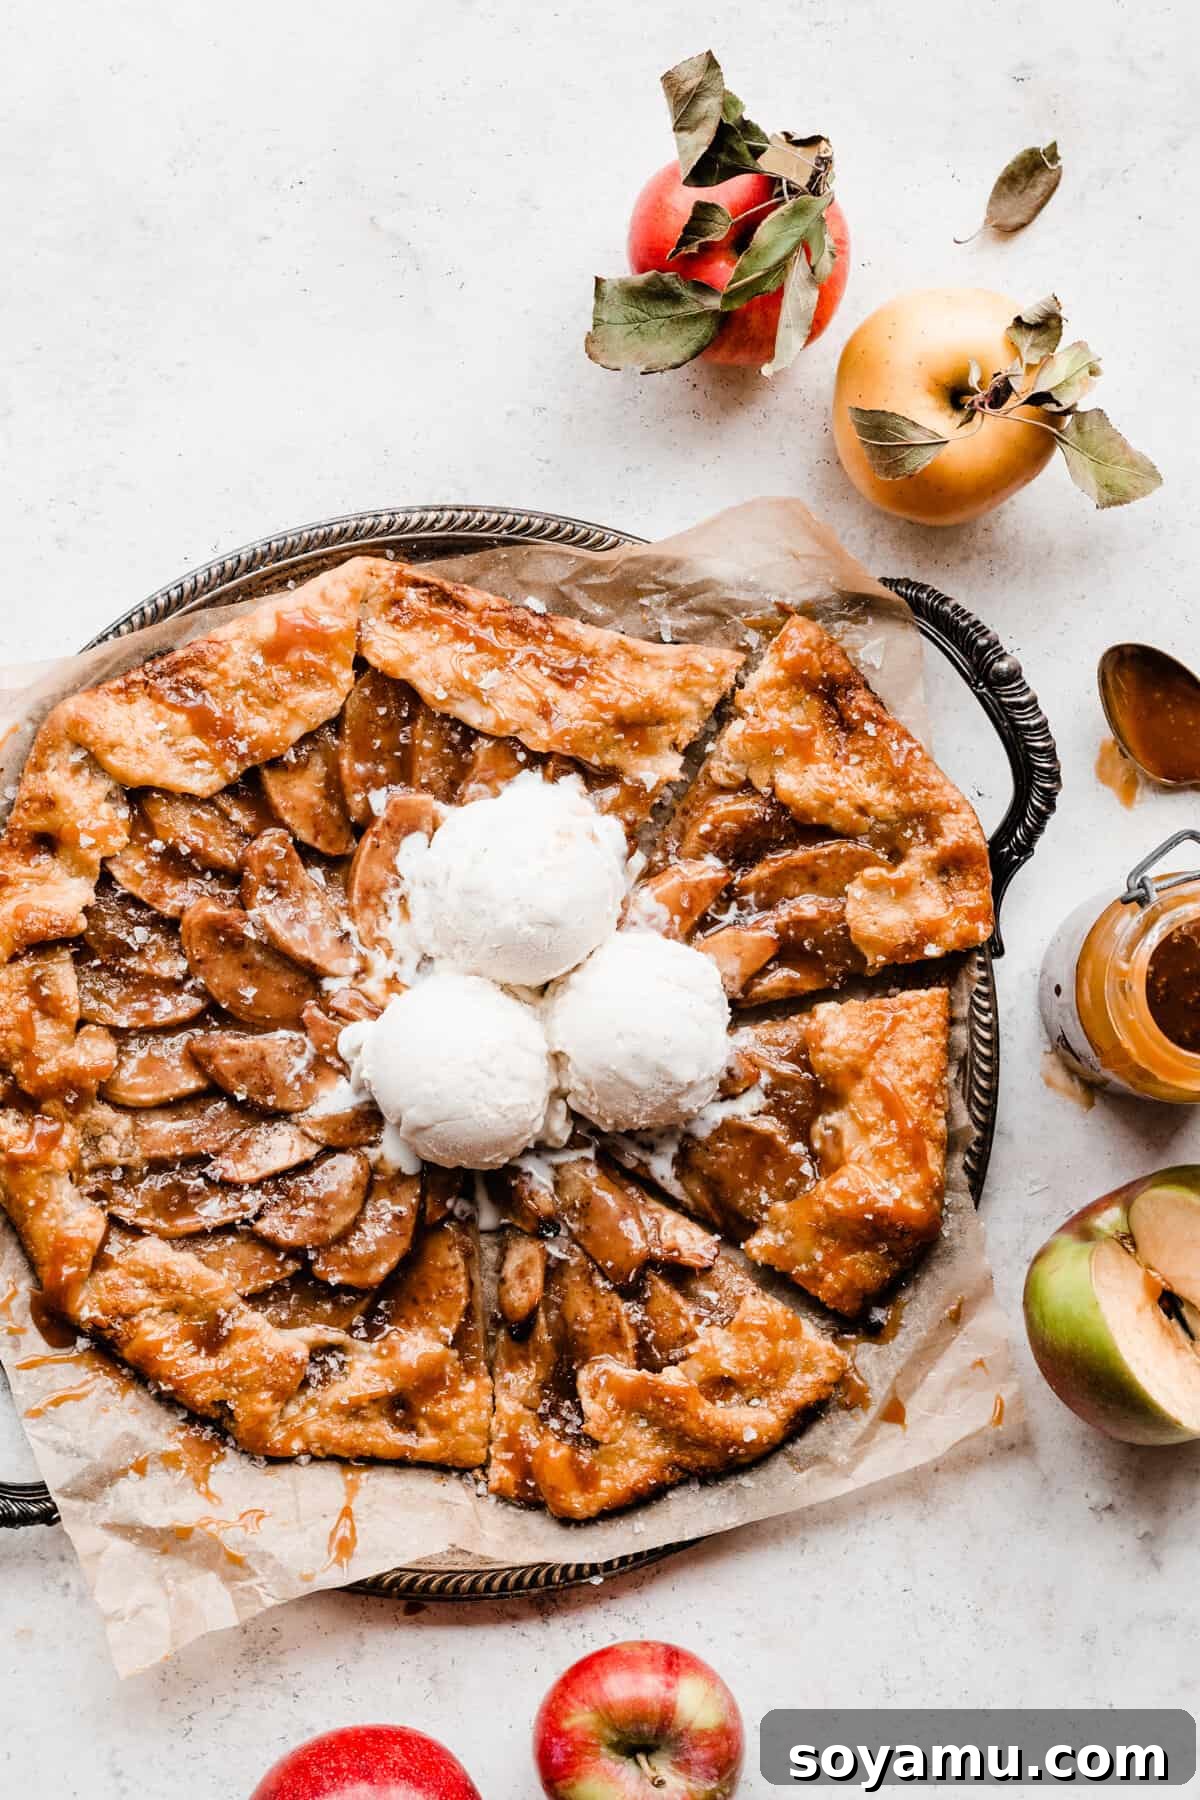
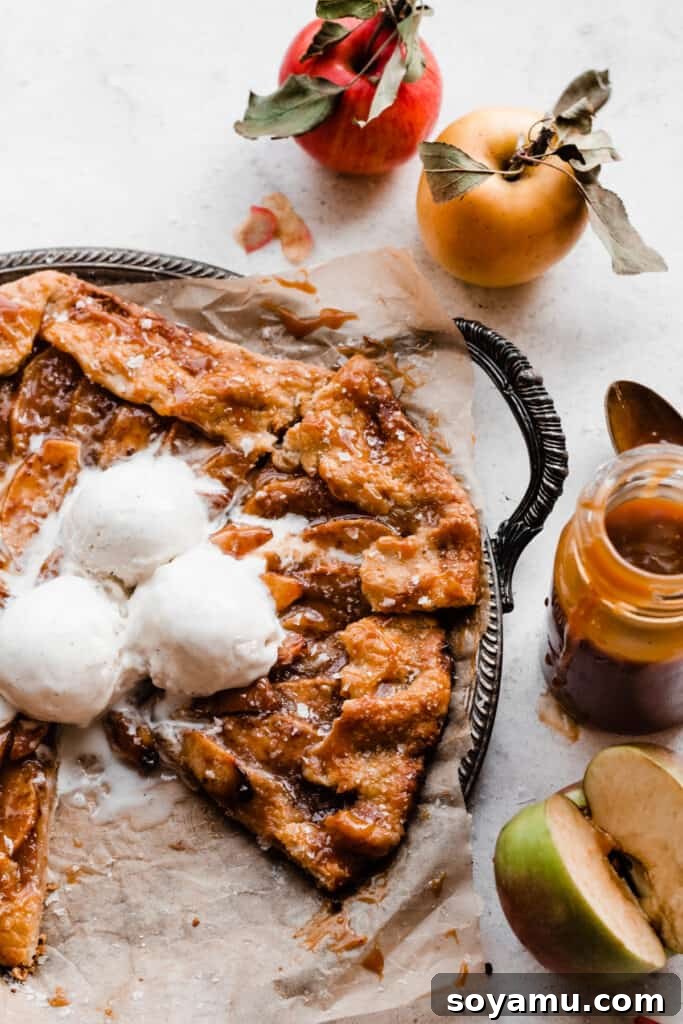
Embrace the quintessential flavors of autumn with our irresistible Salted Caramel Apple Galette. This magnificent dessert features perfectly spiced, tender apple slices lovingly wrapped in a golden, buttery, and effortlessly flaky crust, all generously drizzled with a rich, homemade salted caramel sauce. It’s more than just a dessert; it’s a cozy culinary embrace, ideal for any fall gathering, whether it’s a grand Thanksgiving feast, a casual Friendsgiving celebration, a spooky Halloween party, or simply a comforting treat after a fruitful day of apple picking. Prepare to fall in love with this beautifully rustic and utterly delicious apple tart.
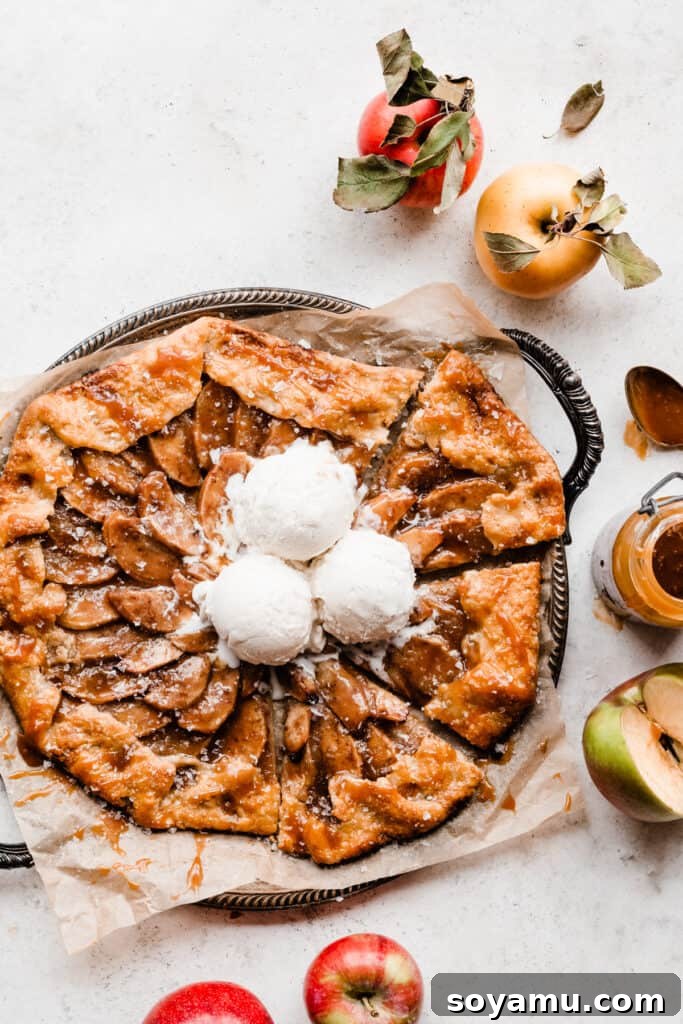
Why This Salted Caramel Apple Galette Will Become Your Fall Favorite
Discover the compelling reasons why this easy yet elegant apple galette recipe will be a staple in your autumn baking repertoire:
- Tender, Warmly Spiced Apples: Imagine biting into soft, succulent apple slices, infused with a harmonious blend of classic fall spices like cinnamon, nutmeg, and cloves. These apples are baked to absolute perfection, offering a tender texture that melts in your mouth and a flavor profile that evokes crisp autumn days and warm, cozy evenings. The slight tang from the lemon juice perfectly balances the sweetness, creating an unforgettable filling.
- Irresistible Homemade Salted Caramel Drizzle: What truly elevates this galette to another level is the luscious, homemade salted caramel sauce. Its buttery richness, combined with a delicate hint of sea salt, cascades over the warm apples and flaky crust, adding a layer of sophisticated sweetness and depth that is simply divine. This caramel transforms a delicious apple dessert into an extraordinary culinary experience.
- Buttery, Achievably Flaky Pie Crust: Don’t be intimidated by homemade pie crust! Our recipe guarantees an ultra-flaky, buttery, and tender crust that cradles the apple filling beautifully. It’s surprisingly simple to make, even for novice bakers, thanks to our expert tips for achieving that coveted delicate texture. The rustic, free-form nature of a galette means no need for perfectly crimped edges, making it a stress-free baking project with stunning results.

Essential Ingredients for Your Perfect Apple Galette
Crafting this delightful galette starts with quality ingredients. Here’s a closer look at what you’ll need and why each component is crucial for the best flavor and texture:
- Apples: The heart of your galette! For optimal flavor and texture, we highly recommend using baking apples that hold their shape well and offer a balance of sweetness and tartness. Varieties like Honeycrisp or Gala are fantastic choices, or even a mix of both for added complexity. If you prefer a tarter profile, Granny Smith apples work wonderfully. Avoid softer apples like McIntosh, as they tend to become too mushy when baked.
- Butter: The secret to a truly flaky and flavorful crust. We always opt for salted butter for an enhanced depth of flavor, but unsalted butter can be used if preferred (just be sure to adjust the added salt in the dough). The most critical rule for pie dough is to use extremely cold butter. This ensures pockets of butter steam and expand during baking, creating that desirable flaky texture.
- Water: Another key to a perfect crust is ice-cold water. To achieve this, simply add ice cubes to a bowl of water and let it sit in the fridge until you’re ready to measure it out. The cold temperature helps keep the butter solid, which is essential for flakiness.
- Lemon: A splash of fresh lemon juice in the apple filling is not just for flavor; it’s a vital balancing act. It brightens the sweet apples and spices, preventing the galette from tasting overly rich and adding a fresh, zesty note.
- Vanilla Extract: Always reach for pure vanilla extract. Its warm, aromatic notes complement the apple and spice flavors beautifully, adding a layer of sophisticated sweetness that imitation vanilla simply cannot replicate.
- Sour Cream: A game-changer for pie dough! Using full-fat sour cream (and ensuring it’s very cold) adds richness and tenderness to the crust without making it tough. It contributes to a more pliable dough that’s easier to work with and bakes up incredibly flaky.
Exciting Recipe Substitutions & Creative Variations
While our classic Salted Caramel Apple Galette is perfection, don’t hesitate to experiment with these delightful twists to suit your taste or occasion:
- Greek Yogurt: For a slight tang and similar richness in the crust, you can substitute full-fat Greek yogurt or plain full-fat yogurt for the sour cream. Ensure it’s cold, just like the sour cream, for the best dough consistency.
- Cranberries: Infuse a festive tartness into your galette by adding 1/2 cup of fresh or frozen cranberries (no need to thaw) to the apple filling. Simply replace 1/2 cup of the apple slices with cranberries for a vibrant Cranberry Apple Galette, perfect for holiday seasons.
- Caramel Sauce: While the homemade salted caramel sauce is highly recommended for its transformative effect, it is technically optional. However, we truly believe it elevates this dessert to an entirely new level of indulgence and flavor, making it a worthwhile step you won’t regret!
Step-by-Step Guide: Crafting Your Perfect Apple Galette
Creating this stunning Salted Caramel Apple Galette is a rewarding process. Follow these detailed steps for a beautifully baked, flavorful dessert:
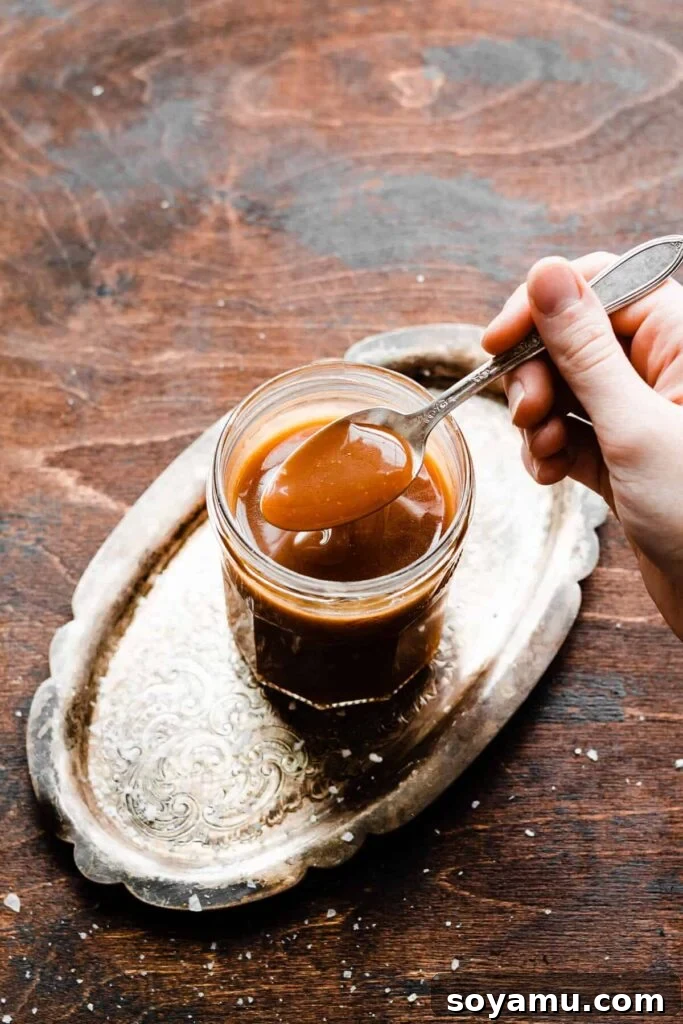
Step 1: Prepare the Homemade Salted Caramel Sauce.
Begin by making your luscious homemade Salted Caramel Sauce. This step is surprisingly quick, taking only about 10 minutes, and it’s best to prepare it first so it has ample time to cool and thicken while you work on the rest of the galette. Refer to our detailed guide (linked above) for step-by-step photos and helpful tips to ensure perfect caramel every time. Once cooled, set it aside. This caramel can even be made up to a week in advance and stored in an airtight jar in the refrigerator, ready when you are!
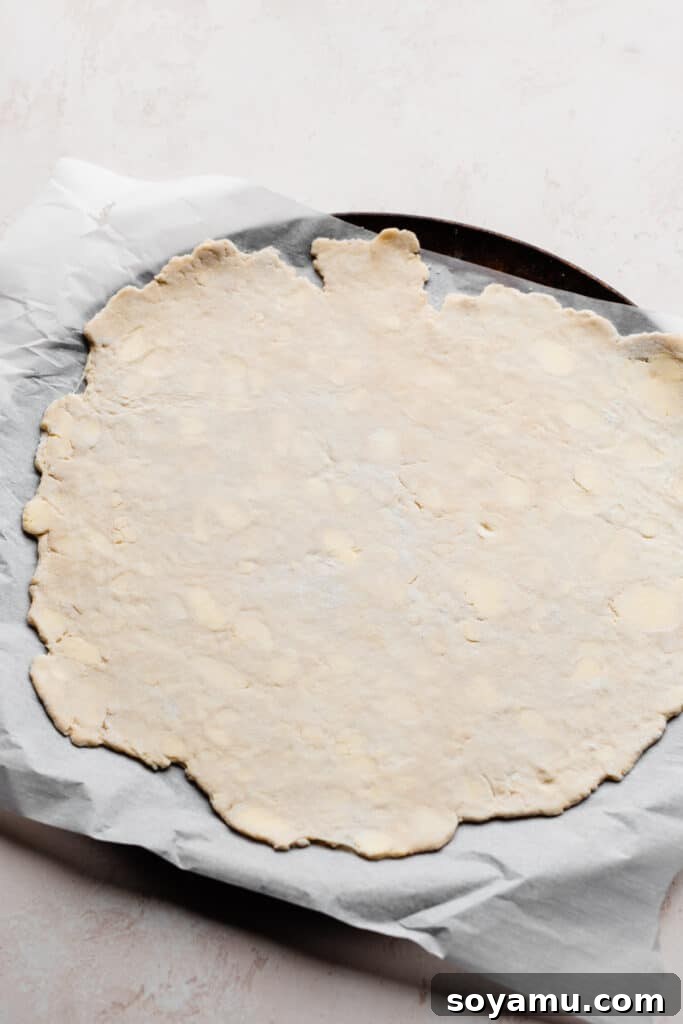
Step 2: Master the Buttery, Flaky Pie Dough.
The foundation of a great galette is a truly spectacular crust, and our recipe delivers an exceptionally buttery and flaky one that’s also remarkably easy for beginners. In a medium bowl, whisk together your all-purpose flour, salt, and granulated sugar. Next, cut your very cold, salted butter into large chunks and add them to the dry ingredients. Using a pastry cutter or your clean fingertips, work the butter into the flour mixture until it resembles coarse meal with visible pea-sized (and some slightly larger) pieces of butter. These larger butter pieces are crucial; they will create steam in the oven, yielding that desirable flakiness.
Drizzle in the ice-cold water and add the cold, full-fat sour cream. Gently toss with a fork until the dough is just moistened and the sour cream is incorporated. Be careful not to overmix! Gather the dough into a ball. If it holds together when pressed, it’s ready. If it seems too dry or crumbly, add an additional tablespoon or two of ice water, mixing just until it comes together. Gently flatten the dough into a 1-inch thick disc, wrap it tightly in plastic wrap, and chill it in the freezer for at least 1 hour or in the refrigerator for at least 2 hours. Proper chilling is paramount for a flaky crust that holds its shape. For more in-depth advice, troubleshooting, and tips, consult our comprehensive guide on How to Make Perfect Pie Crust.
Step 3: Craft the Aromatic Apple Filling.
Once your pie dough is chilling, or nearing its chill time, prepare the delightful apple filling. Peel and slice your chosen apples (we recommend a mix of Honeycrisp and Gala for balanced sweetness and texture) into even 1/4-inch thick slices, yielding approximately 4 cups. In a large bowl, combine the apple slices with a bit of all-purpose flour (to help thicken the juices), packed brown sugar, pure vanilla extract, a bright splash of lemon juice, and a generous medley of warm fall spices: cinnamon, nutmeg, and ground cloves. Toss everything together until the apples are evenly coated. If your dough still needs a few more minutes to chill, cover the bowl of apple filling with a kitchen towel and refrigerate it to keep everything fresh.
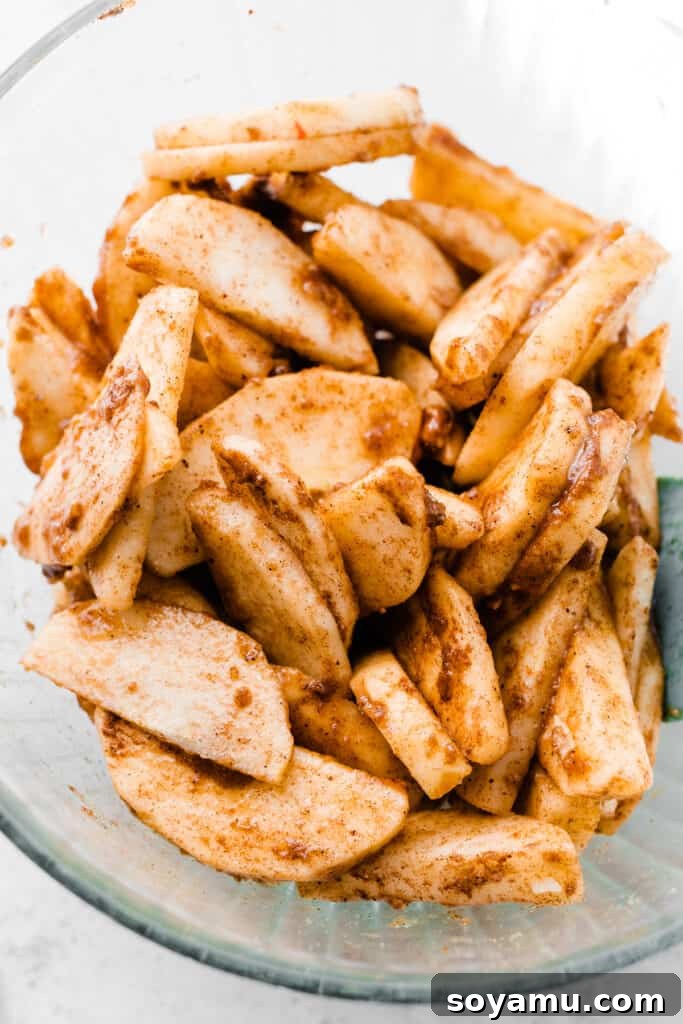
Step 4: Assemble and Bake Your Rustic Galette.
Preheat your oven to a precise 400°F (200°C) and prepare a large baking sheet by lining it with parchment paper or a silicone baking mat. Lightly flour your countertop and rolling pin. Unwrap your chilled dough and lightly sprinkle it with flour. Begin gently rolling out the dough from the center outwards, rotating it continuously to prevent sticking. Continue until the dough forms a circle approximately 12 to 14 inches in diameter and about 1/8 inch thick. Don’t rush this process; patience will yield a perfectly even crust.
Carefully transfer the rolled-out dough onto your prepared baking sheet. Evenly spread the spiced apple filling over the dough, ensuring you leave a generous 2 to 3-inch border around the edges. You can artistically arrange the apple slices in concentric circles for a beautiful presentation, or simply spread them out evenly—the rustic charm of a galette means there’s no wrong way! Drizzle any accumulated liquid from the bottom of the apple filling bowl over the slices. Then, gently fold up the exposed edges of the dough over the apples, working in small sections. Embrace the rustic imperfections; they are part of the galette’s charm.
Crucially, chill the assembled galette, uncovered, in the refrigerator for 15 minutes before baking. This re-chilling step helps firm up the butter in the crust, preventing it from spreading too much in the oven and ensuring maximum flakiness. While it chills, beat one large egg in a small bowl to create an egg wash. Once chilled, brush the egg wash generously over the folded edges of the crust and then sprinkle with a coarse sugar (like raw or turbinado sugar) for a beautiful sparkle and added crunch. Bake for 38 to 45 minutes, or until the crust is deeply golden brown and the apples are fork-tender.
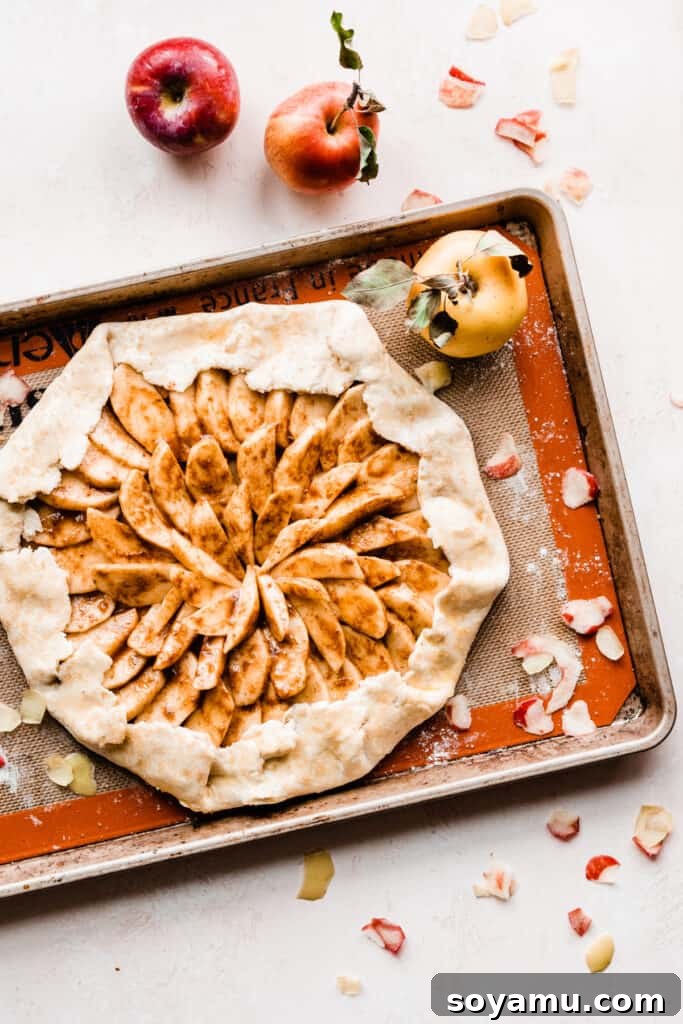
Serving Suggestions & Storage Tips for Your Apple Galette
The moment your exquisite apple galette emerges from the oven, its aroma will fill your kitchen. Here’s how to best enjoy and preserve its deliciousness:
For the ultimate indulgence, immediately after baking, generously brush or drizzle the warm apple slices with your prepared salted caramel sauce. If your caramel has thickened in the fridge, a quick 30-60 second microwave warm-up will bring it back to a pourable consistency. Allow the galette to rest for about 10 minutes before slicing to allow the filling to set slightly. Serve individual slices while still piping hot, ideally with an extra drizzle of salted caramel, a sprinkle of flaky sea salt (to enhance the caramel’s flavor), and a generous scoop of creamy vanilla bean ice cream. The contrast of warm galette and cold ice cream is pure bliss.
This Salted Caramel Apple Galette is undoubtedly best enjoyed fresh from the oven, when the crust is at its crispiest and the apples are perfectly warm and tender. However, any leftovers can be stored in an airtight container in the refrigerator for 2-3 days. To reheat and restore its delightful texture, warm individual slices in a preheated oven (around 300°F/150°C) for about 10-15 minutes, or until warmed through and the crust regains some of its crispness.
Still have an abundance of apples from your apple-picking adventure? Don’t let them go to waste! Try our equally delicious Salted Caramel Apple Pie Bars for another crowd-pleasing treat, or whip up a batch of easy, comforting Instant Pot Applesauce.
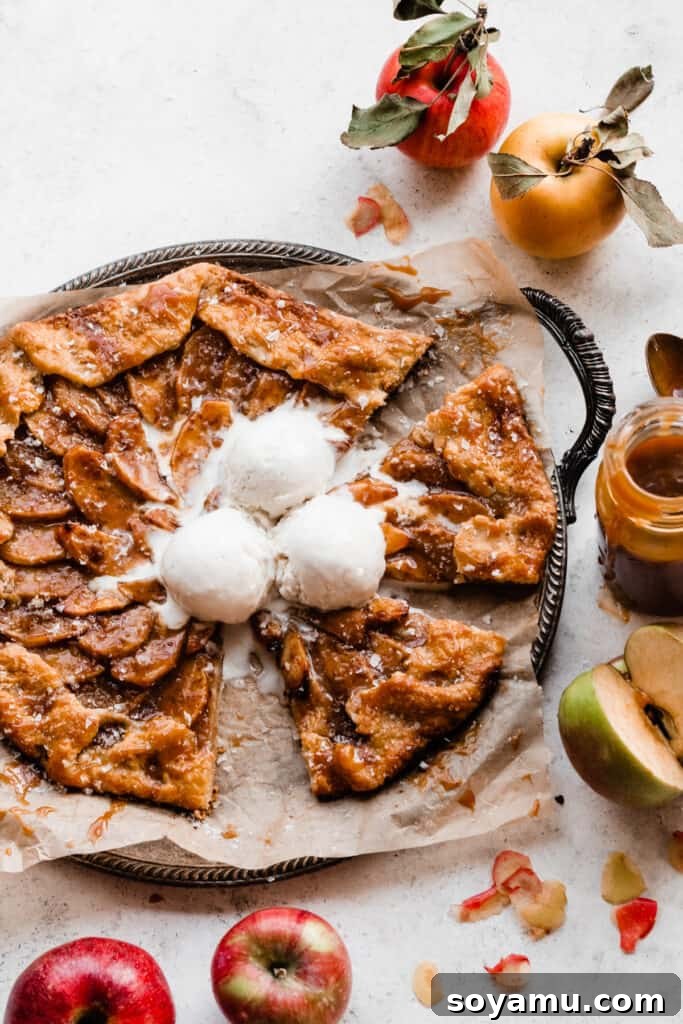
Expert Success Tips for Your Best Apple Galette
Achieve galette perfection every time with these valuable insights from seasoned bakers:
- Choose the Right Apples: The type of apple significantly impacts the final texture of your galette. Avoid soft, mealy apple varieties such as McIntosh, Red Delicious, or Fuji, as they will break down too much during baking and become mushy. Instead, opt for firm, crisp apples that can withstand baking temperatures and maintain some structure. Excellent choices include Honeycrisp, Gala, Braeburn, Jonagold, or Granny Smith (for a tarter profile). A mix often yields the best balance of flavor and texture.
- Keep Ingredients COLD: This is arguably the most crucial tip for a truly flaky pie crust. Ensure your butter, water, and sour cream are all extremely cold, straight from the refrigerator (or freezer for butter). Cold butter creates pockets in the dough that steam and puff up during baking, resulting in those glorious flaky layers. If your butter gets too warm, the dough will be tough and less flaky. Work quickly to keep ingredients chilled.
- Calibrate Your Oven with an Oven Thermometer: Many home ovens are not calibrated accurately, meaning the temperature you set might not be the actual temperature inside. An oven thermometer is an inexpensive tool that provides the true temperature of your oven. Accurate oven temperature is absolutely crucial for successful baking, impacting everything from browning to cooking time. Keep one in your oven at all times to monitor its calibration.
- Use a Kitchen Scale for Accuracy: Baking is a science, and precise measurements yield consistent results. A food scale is the most reliable way to measure flour and other dry ingredients. Volume measurements (cups) can vary widely based on how ingredients are scooped and the specific measuring cup used. Weighing your ingredients (especially flour) ensures you have the proper ratios, leading to a perfectly balanced and textured galette every time.
- Don’t Skip the Dough Chilling: Chilling the dough not only allows the gluten to relax (making it easier to roll and more tender) but also ensures the butter remains cold and solid. The second chill after assembly is equally important, helping the galette maintain its shape and flakiness during baking. Patience in chilling is rewarded with superior results.
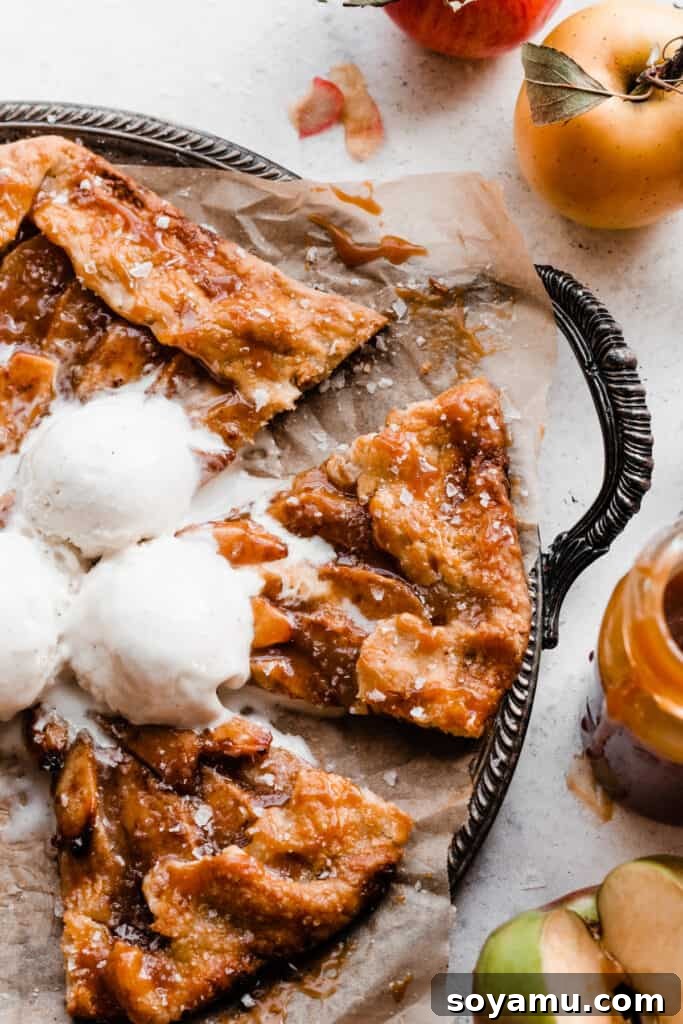
Frequently Asked Questions (FAQs) About Apple Galettes
- Can I make this apple galette ahead of time?
- While this galette is truly best enjoyed warm from the oven, you can certainly prepare components in advance to streamline your baking process. The homemade salted caramel sauce can be made and stored in an airtight container in the refrigerator for up to 2 weeks. The pie dough is also excellent for make-ahead; it can be refrigerated for up to 3 days or frozen for 2-3 months. If frozen, remember to thaw it overnight in the refrigerator before you plan to use it.
- What exactly is a galette?
- A galette is a term for a rustic, free-form tart or pie. Unlike a traditional pie baked in a pie plate, a galette is typically baked directly on a baking sheet, with the dough folded casually over the edges of the filling. Its charm lies in its “imperfect”, organic shape, making it a fantastic option for beginner pie bakers. There’s no need for fancy crimping or latticework, yet it delivers all the deliciousness of a classic fruit pie with much less fuss!
- Why do I sometimes see melting butter on the baking sheet during baking?
- It is completely normal to observe a small amount of butter escaping and melting onto your baking sheet while the galette bakes. This is usually nothing to worry about and is a natural part of the baking process, especially with a butter-rich pastry. It signifies that the butter is melting and creating steam, which is essential for developing those desired flaky layers in the crust. Rest assured, this phenomenon will not result in a soggy crust; your galette will still bake up beautifully crisp.
Handy Special Tools for Baking Perfection
While this recipe is designed to be accessible, a few tools can make your galette-baking experience even smoother and more enjoyable:
- Rolling Pin: An indispensable tool for any pie or pastry recipe. A good quality rolling pin allows you to evenly roll out your dough to the perfect thickness, ensuring consistent baking and a uniform crust.
- Pastry Brush: Essential for applying an even layer of egg wash to your galette crust. The egg wash provides that beautiful golden sheen and helps the coarse sugar adhere, adding both visual appeal and a delightful crunch. It’s also useful for brushing on melted butter or caramel.
- Pastry Blender or Cutter: While not strictly essential (cold hands can work!), a pastry blender makes quick work of cutting cold butter into flour, ensuring the butter stays cold and evenly distributed for a flaky crust.
- Baking Sheet with Parchment Paper/Silicone Mat: A sturdy baking sheet provides an even heat surface, and lining it with parchment paper or a silicone baking mat prevents sticking and makes for easy cleanup.
More Galette Recipes to Explore and Love
- Butternut Squash Galette with Asiago and Parmesan
- Strawberry Rhubarb Galette
- Mini Whole Wheat Blackberry Galettes
- Salted Caramel Pear Galette
- Blueberry Cherry Galette
Even More Apple Recipes to Savor This Season
- Caramel Apple Cider Cookies
- Cranberry Apple Crisp
- Homemade Apple Fritters with Buttery Maple Glaze
- Honeycrisp Apple & Kale Fall Salad with Maple Thyme Vinaigrette
- Caramel Apple Crumb Cake
- Apple Cider Old Fashioned Cocktails
- The Best Recipes to Make During Apple Season
Loved this recipe? Share your thoughts and leave a star rating!
Your feedback is invaluable to us and helps our small business grow. Please take a moment to leave a comment and star rating below, letting us know how much you enjoyed making and tasting this delightful dessert!
Salted Caramel Apple Galette
By Stephanie Simmons
This Salted Caramel Apple Galette features tender, spiced apples embraced by a buttery, flaky crust, all finished with a drizzle of homemade salted caramel sauce. It’s the ultimate cozy fall dessert, perfect for celebrating autumn’s bounty.

Prep Time: 45 minutes
Cook Time: 40 minutes
Dough Chilling: 4 hours
Total Time: 5 hours 25 minutes
Servings: 8 slices
Pin Recipe
Print Recipe
Ingredients
For the Salted Caramel Sauce:
- 1 cup granulated sugar (210 grams)
- 6 tbsp salted butter, cubed (85 grams)
- 1/2 cup + 1 tbsp heavy cream (135 grams)
- Pinch of flaky sea salt
For the Crust:
- 1 and 1/4 cups all-purpose flour, spooned & leveled or weighed out (163 grams)
- 3/4 tsp salt
- 1 tsp granulated sugar
- 1/2 cup cold salted butter (113 grams)
- 5 tbsp ice-cold water (75 grams)
- 1/4 cup cold, full-fat sour cream (60 grams)
For the Apple Filling:
- 3 medium apples (recommend a mix of Honeycrisp and Gala)
- 2 tsp lemon juice
- 1 and 1/2 tbsp all-purpose flour (12 grams)
- 1/4 cup brown sugar, packed (55 grams)
- 1 tsp vanilla extract
- 1 and 1/4 tsp cinnamon
- 1/4 tsp nutmeg
- 1/8 tsp ground cloves
- 1/4 tsp salt
- 1 large egg, for egg wash
- Sprinkle of raw or turbinado sugar, for garnishing crust
For Serving:
- Flaky sea salt (optional, for garnish)
- Vanilla bean ice cream (optional)
Note: Ingredient quantities are provided in US Customary and Metric for convenience.
Instructions
- Prepare the Salted Caramel Sauce: Begin by making the Salted Caramel Sauce. This takes approximately 10 minutes and needs time to cool and set. You can make this up to one week in advance and store it in an airtight jar in the refrigerator.
- Prepare the Crust: In a medium bowl, whisk together the flour, salt, and granulated sugar. Cut the very cold butter into large chunks and add to the dry ingredients. Use a pastry cutter or your clean hands to cut the butter into the dry ingredients until the mixture resembles coarse meal with visible pieces of butter (some pea-sized, some slightly larger). Drizzle in the ice-cold water and add the cold, full-fat sour cream. Toss with a fork until the dough is just moistened and comes together. If dry, add 1-2 tbsp more ice water. Gently gather the dough into a ball, flatten it into a 1-inch thick disc, wrap tightly in plastic wrap, and chill in the freezer for at least 1 hour or in the fridge for at least 2 hours.
Make-Ahead Tip: Dough can be refrigerated for 2-3 days or frozen for up to two months. Thaw overnight in the fridge if frozen.
For more detailed troubleshooting, refer to our “How to Make Perfect Pie Crust” post.
- Prepare the Apple Filling: Once the dough is chilling or nearly ready, prepare the apple filling. Peel and slice your apples into 1/4-inch thick pieces (you’ll have about 4 cups). In a large bowl, combine the apple slices with the lemon juice, flour, brown sugar, vanilla extract, cinnamon, nutmeg, ground cloves, and salt. Toss well to coat. Cover and refrigerate if the dough still needs more chilling time.
- Assemble the Galette: Preheat your oven to 400°F (200°C). Line a large baking sheet with parchment paper or a silicone baking mat. Lightly flour your countertop and rolling pin. Unwrap the chilled dough and roll it out gently into a 12 to 14-inch diameter circle, about 1/8 inch thick, turning continuously to prevent sticking. Carefully transfer the rolled dough onto the prepared baking sheet. Evenly spread the apple filling onto the dough, leaving a 2-3 inch border around the edges. Drizzle any remaining liquid from the apple bowl over the filling. Fold up the edges of the dough over the apples, working in small, rustic sections. Chill the assembled galette, uncovered, in the fridge for 15 minutes. Beat the large egg for the egg wash. Once chilled, brush the egg wash over the folded crust edges and sprinkle with raw or turbinado sugar.
- Bake: Bake the galette for 38 to 45 minutes, or until the crust is golden brown and feels crisp when tapped. The apples should be tender when pricked with a fork.
- Serve & Store: As soon as the galette comes out of the oven, brush the warm apple slices with the salted caramel sauce (warm it slightly in the microwave if it’s too thick). Let the galette rest for about 10 minutes before slicing and serving. Drizzle individual slices with more salted caramel sauce and serve with vanilla bean ice cream and a pinch of flaky sea salt. Best enjoyed warm from the oven. Store leftovers in an airtight container in the fridge for 2-3 days. Reheat slices in the oven to maintain crispness.
Notes
- Cookbook Note: This recipe is proudly featured in my cookbook, “The One-Bowl Baker”, available now!
- Nutrition Note: Nutritional information provided does not include the caramel sauce, as quantities used can vary significantly. Please refer to the dedicated caramel sauce recipe post for its specific nutritional breakdown.
Nutrition
Serving: 1 slice
- Calories: 268kcal
- Carbohydrates: 33g
- Protein: 3g
- Fat: 14g
- Saturated Fat: 8g
- Polyunsaturated Fat: 1g
- Monounsaturated Fat: 4g
- Trans Fat: 0.5g
- Cholesterol: 58mg
- Sodium: 396mg
- Potassium: 130mg
- Fiber: 2g
- Sugar: 15g
- Vitamin A: 471IU
- Vitamin C: 4mg
- Calcium: 31mg
- Iron: 1mg
Nutrition information is automatically calculated and should only be used as an approximation.