
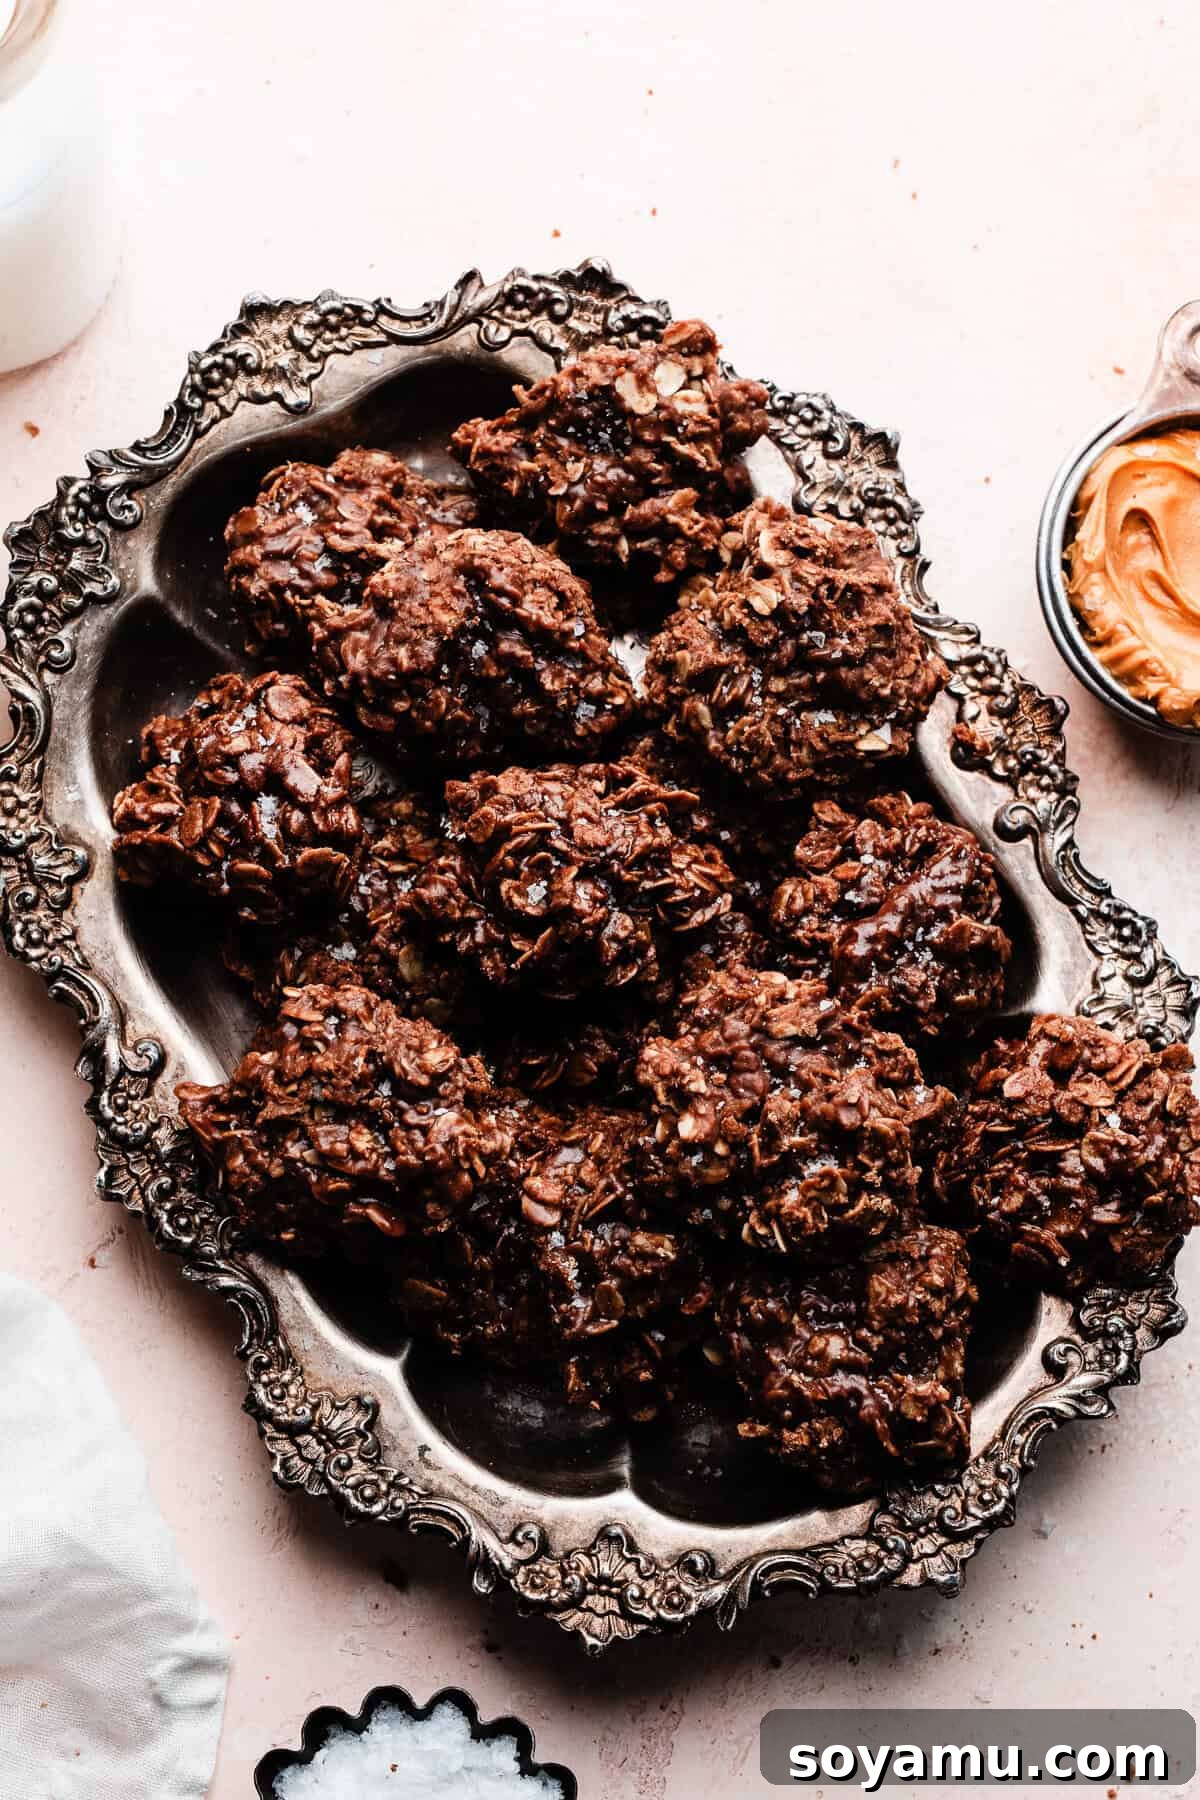
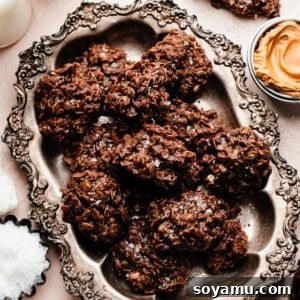
No Bake Cookies are a timeless classic, beloved for their simplicity and irresistible combination of rich chocolate and creamy peanut butter. This recipe delivers the easiest cookies you’ll ever whip up, requiring just 7 staple ingredients and coming together in a flash. Each bite offers a melt-in-your-mouth experience that brings back fond childhood memories. We’ve meticulously tweaked this cherished recipe to achieve an even more refined and pleasant texture, enhancing the classic appeal while staying true to the nostalgic flavor profile we all grew up with. Forget the oven and satisfy your sweet tooth with these delightfully simple treats!
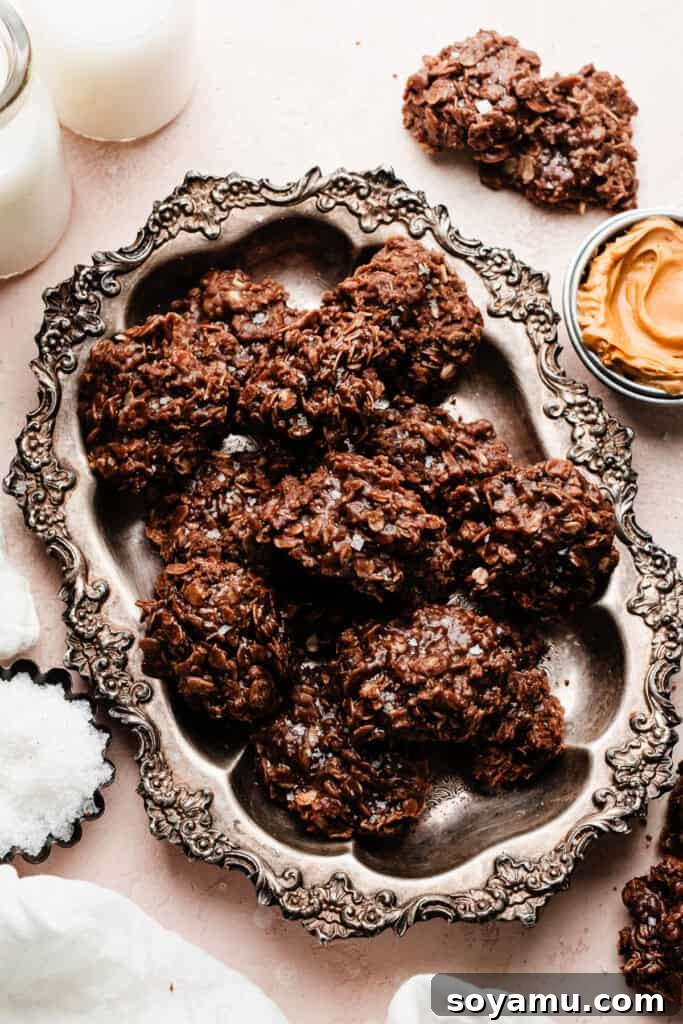
Why You’ll Fall in Love with This No Bake Cookie Recipe
These aren’t just any no bake cookies; they are an elevated version of a beloved classic. Here’s why this recipe will become your new go-to:
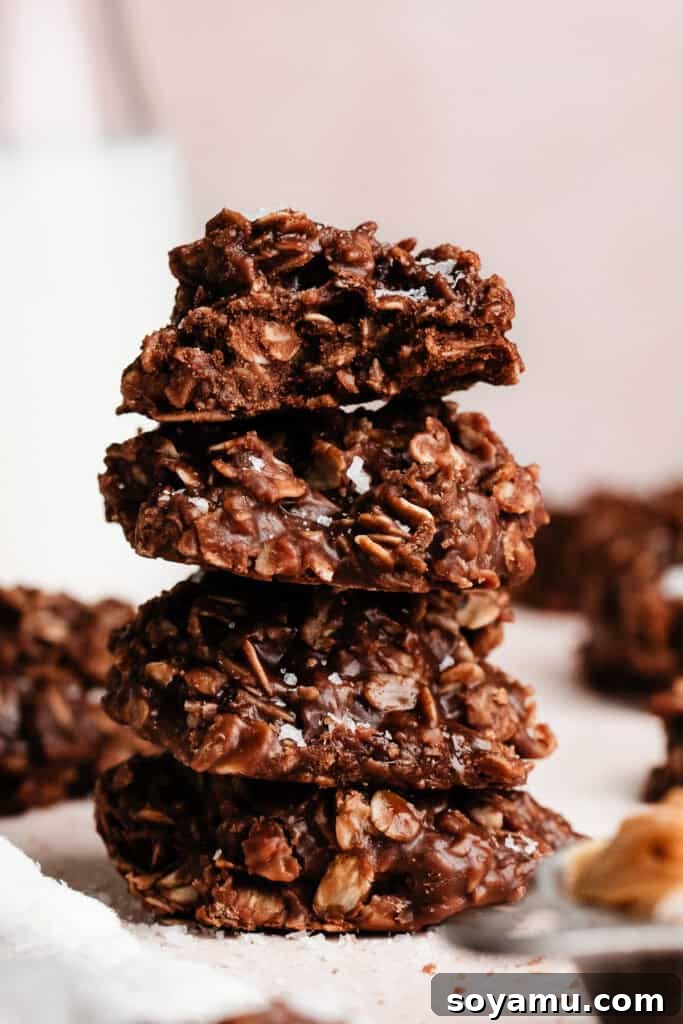
- Perfected Texture: Traditional no bake cookies can sometimes be overly chewy due to the oats. We’ve cracked the code for an ideal texture! By lightly pulsing a portion of the oats in a food processor, we create a blend of fine oat flour and small oat bits. This ingenious step ensures a wonderfully pleasant, less dense, and truly melt-in-your-mouth texture that is even better than you remember from your childhood. It’s a game-changer!
- Effortless and Quick: Time is precious, and this recipe respects that. From gathering your simple ingredients (many of which you likely already have on hand) to taking your first delicious bite, these cookies come together in approximately 25 minutes. No oven preheating, no lengthy cooling times – just pure, unadulterated cookie satisfaction in a snap.
- Generous Yield: Whether you’re planning for holiday gatherings, preparing a thoughtful homemade gift, or simply want a plentiful supply of treats for your family, this recipe has you covered. It consistently produces a large batch of around 24 cookies, making it perfect for sharing or stocking up for those inevitable cravings.
- Kid-Friendly Fun: With no baking involved, these cookies are a fantastic project for aspiring young chefs. They can help with measuring, stirring, and shaping, making it a delightful family activity that results in a tasty reward.
- Nostalgic Comfort: There’s something inherently comforting about a classic no bake cookie. This recipe captures that timeless appeal, offering a taste of nostalgia with every bite, enhanced by our texture-perfecting technique.
Essential Ingredient Breakdown for Perfect No Bake Cookies
Crafting these delectable no bake cookies requires just seven straightforward ingredients. The quality and type of each ingredient play a significant role in achieving the perfect flavor and texture. Here’s a detailed look at what you’ll need:
- Cocoa Powder: For a classic chocolate flavor, we recommend using natural unsweetened cocoa powder. This allows the sweetness from the granulated sugar to truly shine, balancing the rich cocoa notes. While Dutch-processed cocoa can be used for a darker, milder chocolate taste, natural cocoa contributes to the overall flavor balance typical of this nostalgic treat.
- Granulated Sugar: This is the primary sweetener and crucial for the cookies’ structure. When cooked with the other wet ingredients, it creates the sugary base that helps the cookies set properly. Do not reduce the sugar, as it is integral to both flavor and texture.
- Milk: We’ve found that 2% milk works beautifully, providing just the right amount of richness without being too heavy. However, feel free to use whole milk for a slightly richer cookie or skim milk if that’s what you have on hand – all will yield excellent results. The milk helps dissolve the sugar and create the base for the cookie mixture.
- Butter: For superior flavor, salted butter is our top choice. The hint of salt enhances the overall taste profile, preventing the cookies from tasting overly sweet and adding a subtle depth. If you only have unsalted butter, simply add an extra pinch (about 1/8 to 1/4 teaspoon) of salt to the recipe. Ensure it’s softened for easier incorporation after cooking the sugar mixture.
- Old-Fashioned Whole Rolled Oats: The star of the show for texture! This recipe employs a clever trick: pulsing half of the oats in a food processor until you have a mix of fine oat flour and smaller chunks. This creates a much more pleasant, less aggressively chewy cookie. The remaining whole oats provide that familiar, hearty chew. If you don’t have a food processor, you could use a blend of half quick oats and half whole oats, but pulsing is highly recommended for the best texture.
- Creamy Peanut Butter: The undeniable hero of flavor! Regular creamy peanut butter is essential here. Natural peanut butter (the kind that separates) often has a drier, oilier texture that can cause the cookies to become crumbly and not hold together as well. Opt for a classic, smooth, and creamy peanut butter for the best binding and flavor.
- Vanilla Extract: Don’t underestimate the power of good vanilla! Real vanilla extract elevates the chocolate and peanut butter flavors, adding a warm, aromatic depth that makes these cookies truly special. Skip the imitation for the best possible outcome.
- Salt: A small pinch of salt (in addition to any in salted butter) is a crucial flavor enhancer. It brilliantly balances the sweetness of the sugar and the richness of the chocolate and peanut butter, ensuring the cookies are perfectly delicious and not cloyingly sweet.
Creative Recipe Substitutions & Exciting Variations
While this classic recipe is perfect as is, it’s also wonderfully adaptable. Here are some popular substitutions and variations to help you customize your no bake cookies:
- Gluten-Free Version: For those with gluten sensitivities or celiac disease, simply ensure you use certified gluten-free old-fashioned rolled oats. The rest of the ingredients in this recipe are naturally gluten-free, making it an incredibly accessible treat!
- Dairy-Free and Vegan Option: Making these cookies dairy-free and vegan is surprisingly simple. Swap out the dairy milk for your favorite plant-based milk (almond, soy, or oat milk all work well). For the butter, use a high-quality, trusted dairy-free butter substitute. Ensure your chosen products are suitable for baking to achieve the best results.
- Nut-Free Alternative: If peanut allergies are a concern, you can absolutely make these nut-free! The best substitute for peanut butter is sunflower seed butter (often sold as SunButter). It provides a similar creamy texture and nutty flavor that holds the cookies together beautifully. Just be aware that sunflower seed butter can sometimes react with baking soda (though not used in this recipe) to create a greenish tint, but it won’t affect the taste.
- Add-ins for Extra Flavor & Texture:
- Chocolate Chips: Stir in a handful of mini chocolate chips or regular chocolate chips with the oats for an extra burst of chocolatey goodness.
- Chopped Nuts: For added crunch and a deeper nutty flavor, consider adding finely chopped pecans, walnuts, or almonds (if not making nut-free).
- Coconut Flakes: Shredded coconut (sweetened or unsweetened) can add a delightful chewiness and tropical hint.
- Spices: A dash of cinnamon or a tiny pinch of cayenne pepper (for a “mexican hot chocolate” twist) can add intriguing layers of flavor.
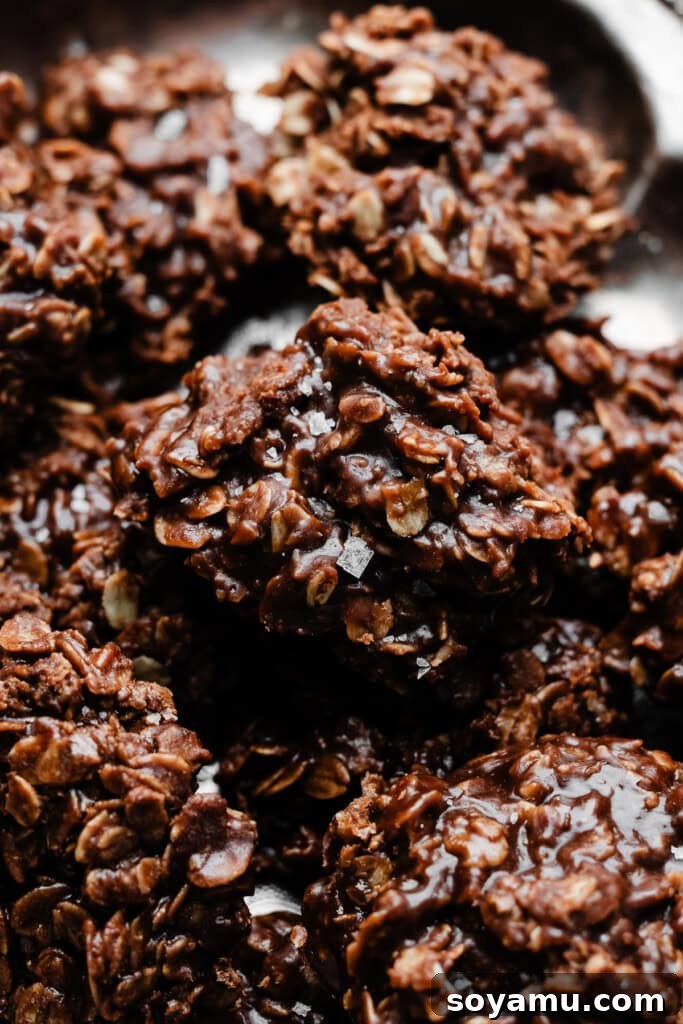
- Sea Salt Flakes: A sprinkle of flaky sea salt on top of the still-wet cookies before they set provides a beautiful contrast to the sweetness and enhances the overall flavor profile.
- Different Nut Butters: Experiment with other creamy nut butters like almond butter or cashew butter for a different flavor profile. Just ensure they are smooth and not natural/runny for optimal setting.
- Espresso Powder: A teaspoon of instant espresso powder added with the cocoa powder will deepen the chocolate flavor without making the cookies taste like coffee.
Mastering the Art of No Bake Chocolate Peanut Butter Cookies: A Step-by-Step Guide
Making these delightful no bake cookies is a straightforward process, but timing and attention to detail are key to achieving that perfect set and luscious texture. Follow these steps for flawless results:
Step 1: Prepare Your Oats for Optimal Texture.
This is where our texture-perfecting secret comes into play. Take half of your measured old-fashioned rolled oats (approximately 1 and 1/4 cups or 131 grams) and add them to a food processor. Pulse the oats a few times until you have a varied mixture – some fine, powdery oat flour and some chunkier, smaller oat pieces. This creates a more pleasant, less dense chew in the final cookie. Set these pulsed oats aside with the remaining whole oats. Also, take a moment to line two large cookie sheets with parchment paper or wax paper. Have them ready with a few spoons, as you’ll need to work quickly in a later step.
Step 2: Craft the Rich Cookie Base.
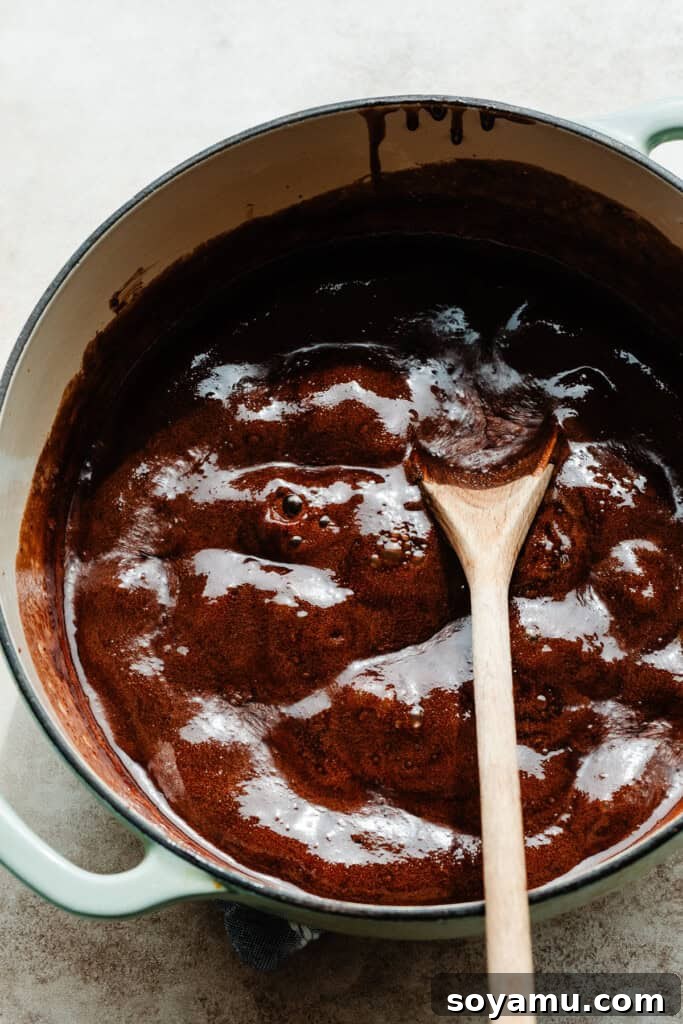
In a large, heavy-bottomed saucepan, combine the granulated sugar, cocoa powder, and milk. Place the saucepan over medium heat. It’s crucial to stir this mixture constantly to ensure the sugar dissolves evenly and to prevent scorching. Bring the mixture to a full, rolling boil. Once boiling, allow it to continue boiling, stirring frequently, until it reaches precisely 235 degrees Fahrenheit (113 degrees Celsius) on an instant-read thermometer. This is known as the “soft ball stage” in candy making. If you don’t have a thermometer, you can test it by dropping a small amount into a glass of very cold water; it should form a soft, pliable ball. This temperature is vital for the cookies to set correctly. This boiling process typically takes about 7 to 10 minutes. A reliable instant-read thermometer is highly recommended for accuracy – your meat thermometer will work perfectly as long as it’s clean!
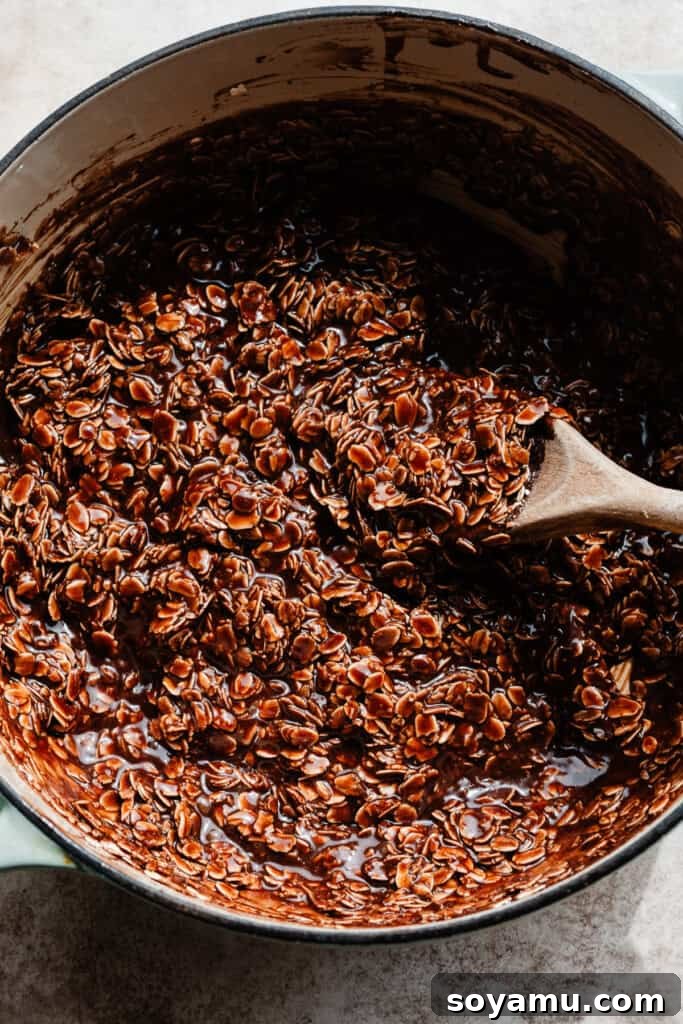
As soon as the mixture reaches the soft ball stage, immediately remove the saucepan from the heat. Without delay, stir in the softened butter, the entire portion of oats (both pulsed and whole), creamy peanut butter, vanilla extract, and salt. Stir vigorously until all ingredients are thoroughly combined and the butter and peanut butter have completely melted and integrated into the chocolate mixture. The consistency will be thick and sticky.
Step 3: Shape Your Cookies Swiftly.
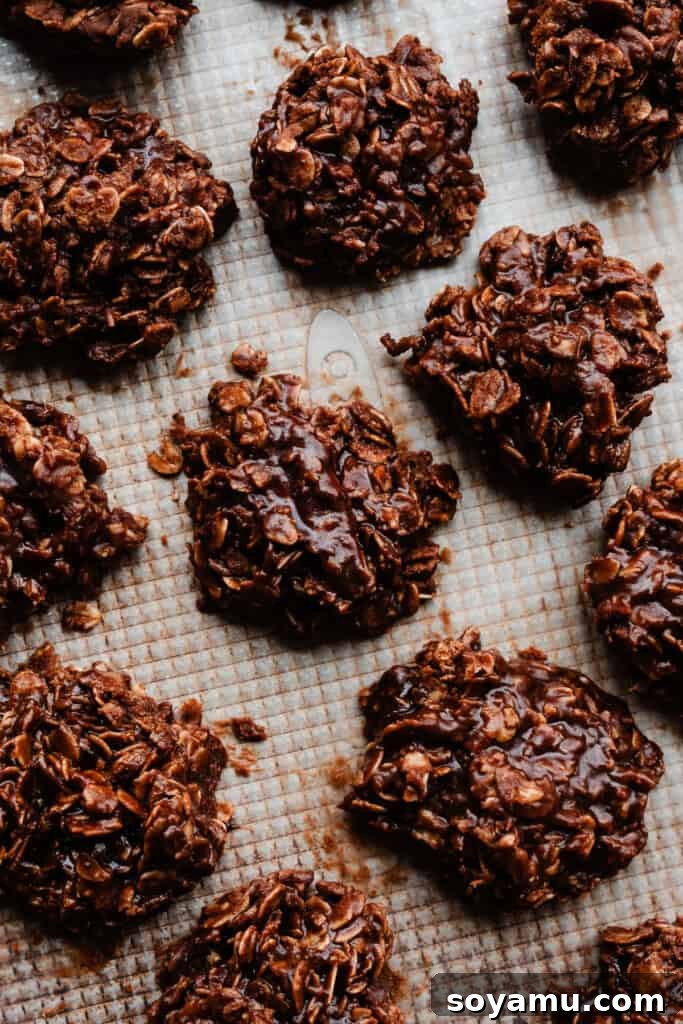
Working quickly is paramount in this step, as the mixture will begin to set rapidly once removed from the heat. Using two spoons (one to scoop, one to push off), drop spoonfuls of the warm cookie mixture onto your prepared parchment or wax paper-lined cookie sheets. You can make them as large or small as you like, but aiming for a consistent size will ensure even setting. This recipe typically yields about 24 cookies of a moderate size. Don’t worry about them being perfectly round; their rustic charm is part of their appeal!
Step 4: The Patient Wait – Allowing Cookies to Set.
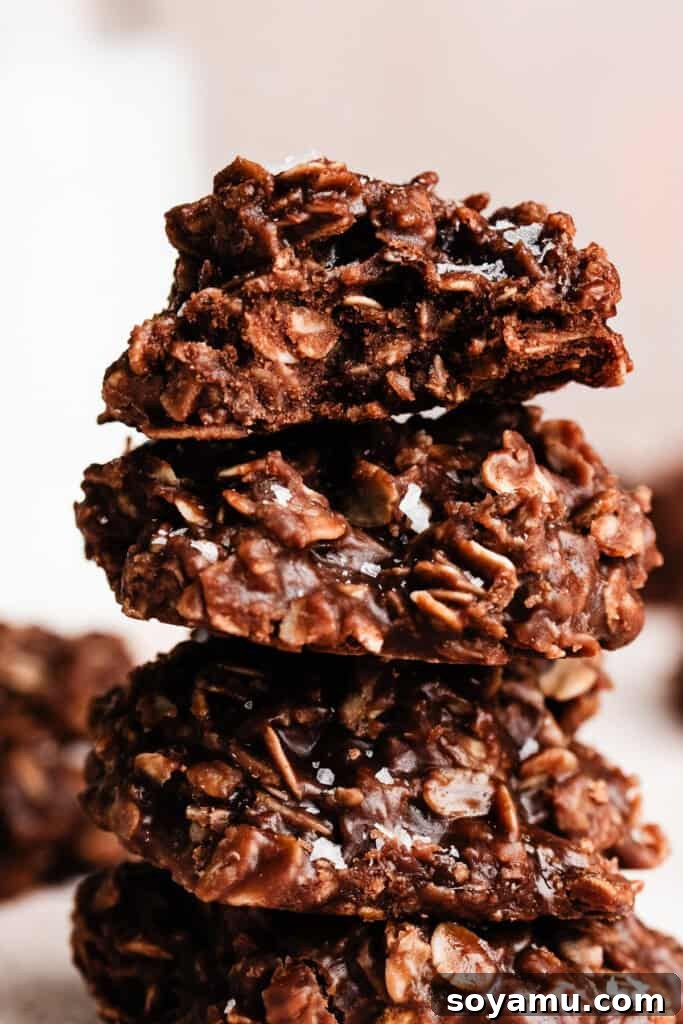
Now comes the hardest part – resisting the urge to dig in! Once all the cookies are portioned out, allow them to cool and set completely on the cookie sheets at room temperature. This process usually takes anywhere from 20 to 40 minutes, depending on the humidity and temperature of your kitchen. The cookies will harden as they cool, developing their signature chewy-yet-tender texture. Once firm to the touch, they are ready to be devoured.
Serving and Storing Your Delicious No Bake Cookies
Once your no bake cookies have fully set, they are ready to be enjoyed! These delightful treats are perfect for any occasion, from a casual snack to a party dessert.
Serving Suggestions:
- Enjoy them simply with a tall glass of cold milk, just like you did as a kid.
- Crumble them over a scoop of vanilla ice cream for an instant sundae upgrade.
- Pair them with a hot cup of coffee or tea for a comforting afternoon treat.
- They make a wonderful addition to a dessert platter or cookie exchange.
Storage:
To keep your no bake cookies fresh and delicious, store them in an airtight container at room temperature. They will maintain their optimal flavor and texture for 4-6 days. Avoid refrigerating them, as this can sometimes cause them to become too hard or dry out. For longer storage, see our FAQ section on freezing.
Pro Tips for No Bake Cookie Perfection
While no bake cookies are famously simple, a few expert tips can ensure your batch turns out perfectly every time:
- Invest in a Kitchen Scale: Precision is key, especially when it comes to ingredients like flour and sugar. A food scale is the best way to ensure your ingredients are at the proper weight. Measuring by volume can vary widely depending on how you scoop, leading to inconsistent results. Grams provide accuracy that cups simply cannot match, particularly for the oats.
- Preparation is Everything: “Mise en place” is your best friend here. Before you even turn on the stove, have all your ingredients measured out and your parchment-lined cookie sheets ready and waiting. The mixture sets quickly once it’s off the heat, so you won’t have time to measure or gather items mid-process. Work swiftly and efficiently.
- The Critical Boil: Do not skimp on the boiling time or temperature. Reaching precisely 235°F (soft ball stage) is essential. Boiling too little will result in cookies that don’t set and remain gooey; boiling too long will make them crumbly and dry. An instant-read thermometer is truly your best tool for success here.
- Stir Constantly: When the sugar, cocoa, and milk mixture is on the stove, stir it continuously. This prevents the sugar from crystallizing and burning at the bottom of the pan, ensuring a smooth, uniform base for your cookies.
- Work Quickly After Removal: Once the mixture comes off the heat, stir in the remaining ingredients immediately and begin dropping the cookies onto the parchment paper without delay. The longer the mixture sits, the harder it becomes, making it difficult to scoop and shape.
- Parchment or Wax Paper is a Must: Do not skip lining your cookie sheets. No bake cookies are sticky when warm and can adhere firmly to unlined surfaces. Parchment or wax paper ensures easy removal once they’re set.
- Perfect for Cookie Exchanges: Making a batch of these cookies is ideal for holiday cookie exchanges or bake sales. Not only does this recipe yield a generous 24 cookies, but it also leaves your oven completely free for other baking projects!
- Room Temperature Ingredients: While not as critical as in baked goods, ensuring your butter is softened will help it incorporate smoothly into the hot mixture.
Frequently Asked Questions About No Bake Cookies
You can certainly halve this recipe if you only need a smaller batch, simply divide all ingredients by two. However, we generally do not recommend doubling it. The reason is that the mixture sets very quickly once removed from the heat. Doubling the recipe means you’d have a much larger volume to work with, making it challenging to scoop all the cookies before the mixture becomes too firm. If you’re determined to make a double batch, we highly suggest enlisting a few helpers to scoop rapidly, or consider making two separate batches back-to-back to ensure the best results.
While you technically can omit the peanut butter, we strongly advise against it for this particular recipe. The peanut butter is a cornerstone of these cookies, not only providing a significant portion of their delicious flavor but also contributing to their essential texture and ability to hold together. Without it, the cookies tend to be excessively sweet and can be drier or more crumbly. If you have a nut allergy, a good substitute would be sunflower seed butter (like SunButter), which offers a similar creamy texture and flavor profile to help the cookies set and taste great.
The most common reason for no bake cookies not setting is that the sugar mixture did not reach the proper temperature (235°F / 113°C, or the “soft ball stage”). If it doesn’t get hot enough, the sugar won’t properly crystallize, and the cookies will remain gooey. Ensure you use an instant-read thermometer and boil for the full 7-10 minutes, stirring constantly. High humidity can also slightly affect setting time, so allow extra time for cooling in humid environments.
If your cookies are dry or crumbly, it’s likely that the sugar mixture was boiled for too long or reached too high a temperature. This causes too much moisture to evaporate, leading to an over-crystallized, crumbly consistency. Make sure to remove the mixture from the heat immediately once it reaches 235°F. Also, using natural, oily peanut butter instead of creamy, shelf-stable peanut butter can sometimes contribute to a drier texture, as the oils may separate.
Yes, absolutely! No bake cookies freeze beautifully. Once they are fully set, place them in a single layer on a parchment-lined baking sheet and freeze for about an hour until firm. Then, transfer the frozen cookies to an airtight freezer-safe container or a resealable freezer bag. They can be stored in the freezer for up to 2-3 months. To enjoy, simply thaw them at room temperature for about 15-30 minutes.
Recommended Tools for Perfect No Bake Cookies
While many of the tools you need for no bake cookies are kitchen staples, one in particular will significantly enhance your success:
- Instant Read Thermometer: This is arguably the most crucial tool for no bake cookies. It eliminates guesswork and ensures your sugar mixture reaches the precise “soft ball stage” (235°F / 113°C). Consistent temperature is the secret to cookies that set perfectly – not too gooey, not too crumbly. Many home cooks already have an instant-read thermometer for meats; it works just as well for candy making, as long as it’s clean.
- Heavy-Bottomed Saucepan: A sturdy saucepan with a thick bottom distributes heat more evenly, reducing the risk of scorching your sugar mixture.
- Food Processor: While optional, a food processor is highly recommended for achieving our signature improved texture by pulsing a portion of the oats. If you don’t have one, you can use a combination of whole and quick oats, but the pulsed texture is truly superior.
- Parchment Paper or Wax Paper: Essential for lining your cookie sheets. This prevents the sticky cookies from adhering to the pan and makes cleanup a breeze.
- Rubber Spatula or Wooden Spoon: For constant stirring during the boiling phase and for thoroughly mixing in the remaining ingredients.
Explore More Delicious No Bake Recipes to Love
If you’ve fallen for the ease and deliciousness of these no bake cookies, you’ll be thrilled to discover other fantastic desserts that don’t require an oven! Keep your kitchen cool and your sweet tooth satisfied with these complementary recipes:
- No Bake Oreo Cheesecake
- No Bake Lemon Bars
- Chocolate Peanut Butter Fudge
- Easy Rice Krispie Treats
- Homemade Chocolate Bark
Did you whip up this fantastic recipe? We’d love to hear from you! Please leave a comment and a star rating below!
Your feedback is incredibly valuable. Click the little stars in the header of the recipe card below to share your thoughts and help our small business grow. We take all feedback seriously, and your rating helps others discover and enjoy this recipe too!
Peanut Butter Chocolate No Bake Cookies
No Bake Cookies are the easiest cookies you’ll ever make! They’re made with just 7 ingredients and come together in a flash. The peanut butter and chocolate flavor shines in these melt-in-your-mouth cookies. We’ve tweaked this recipe to give it an even better texture, while staying true to the nostalgia of the original recipe we grew up with!
Ingredients
- 2 and 1/2 cups old fashioned whole rolled oats, divided (262 grams)
- 2 cups granulated sugar (420 grams)
- 1/3 cup cocoa powder (31 grams)
- 1/2 cup milk (I used 2%, whole or skim are fine too. 120 mL)
- 1/2 cup salted butter, softened (113 grams)
- 2/3 cup peanut butter (172 grams)
- 1 tsp vanilla extract
- 1/8 tsp salt
Instructions
- Prep: Add half of your oats (1 and 1/4 cups, 131 grams) to a food processor and pulse just until you have a mix of powdery pieces and chunky pieces. This makes a much more pleasant texture for these cookies than chewing on all whole oat pieces. Set the oats aside. Line 2 cookie sheets with parchment paper and have them ready with a few dinner spoons for dropping the cookies on with.
- Start the Cookie Mixture: Add sugar, cocoa, and milk to a large saucepan over medium heat. Stirring constantly, bring to a boil. Once boiling, let it boil, stirring regularly, until the mixture reaches 235 degrees F (113 degrees C) on an instant-read thermometer (soft ball stage). This will take about 7-10 minutes. You can also check this by dropping a bit of the mixture into cool water – it should form a sort of soft ball. I highly recommend using an instant-read thermometer here! You likely have one already for meat – you don’t need a separate candy thermometer as long as it’s clean.
- Finish the Cookie Mixture: Once the correct temp is reached, remove the pot from the heat immediately and stir in the butter, all the oats (both pulsed and whole), peanut butter, vanilla, and salt until well combined and butter is melted.
- Form the Cookies: Immediately drop the mixture by the spoonful onto your prepared pans, working quickly as the mixture will start to set.
- Serve & Store: Let cookies rest on the pans at room temperature until fully set (about 20-40 minutes). Then, dig in! Store in an airtight container at room temperature for 4-6 days.
Nutrition
Serving: 1 cookie, Calories: 179kcal, Carbohydrates: 25g, Protein: 3g, Fat: 8g, Saturated Fat: 3g, Polyunsaturated Fat: 1g, Monounsaturated Fat: 3g, Trans Fat: 0.2g, Cholesterol: 11mg, Sodium: 76mg, Potassium: 98mg, Fiber: 2g, Sugar: 18g, Vitamin A: 126IU, Calcium: 17mg, Iron: 1mg
Nutrition information is automatically calculated, so should only be used as an approximation.
Like this recipe? Leave a comment below!
Your feedback helps us create more delicious content and is greatly appreciated!