
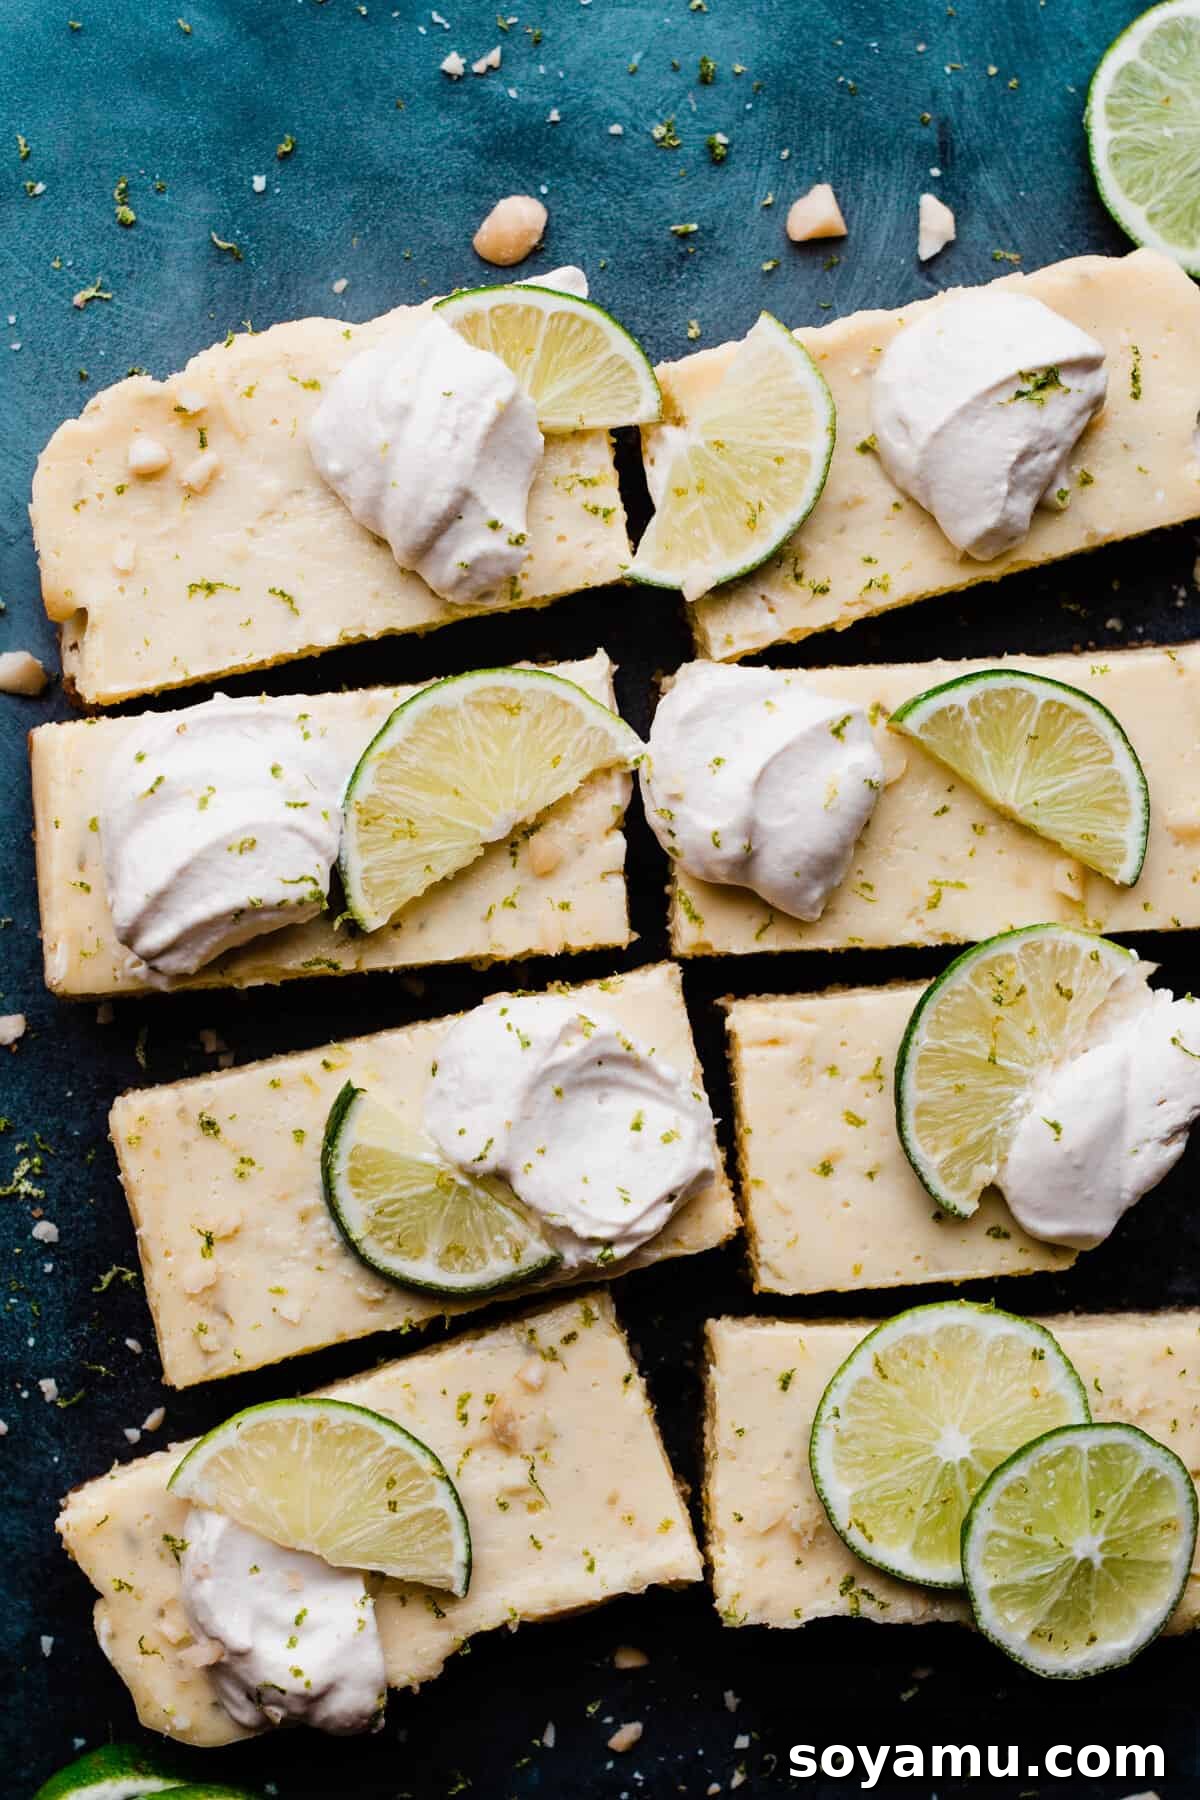
Key Lime Pie Bars offer a delightful escape to the tropics with their perfect blend of tangy lime and sweet creaminess, all resting on a crisp, buttery graham cracker crust. This easy-to-make dessert is guaranteed to refresh on a hot summer day or brighten any gathering. Topped with a cloud of fresh whipped cream, these bars are a truly irresistible treat that everyone will adore.
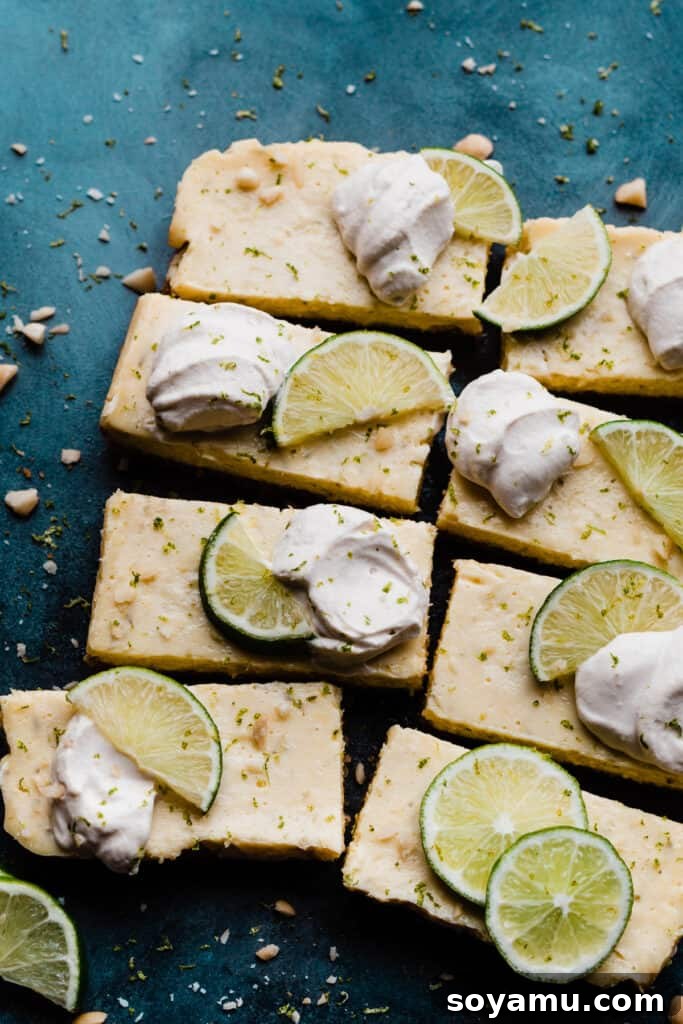
If you’ve ever craved a dessert that’s both elegant and effortlessly simple, you’re in for a treat! Our Key Lime Bars embody everything you love about classic Key Lime Pie, transformed into a convenient bar form. Each bite delivers a burst of zesty lime flavor, perfectly complemented by a rich, velvety texture that’s reminiscent of a light cheesecake. It’s the ideal balance of tart and sweet, making it a universal crowd-pleaser. Originating from the Florida Keys, traditional Key Lime Pie has captivated taste buds for generations, and now you can bring that same authentic, refreshing experience right to your kitchen with these easy-to-follow bars.
Why You’ll Fall in Love with These Easy Key Lime Bars
These aren’t just any dessert bars; they’re a culinary experience crafted for both novice bakers and seasoned pros. Here’s why these Key Lime Pie Bars will quickly become a staple in your recipe collection, earning rave reviews from everyone who tries them:
- Unforgettable Lime Flavor – Prepare your taste buds for an explosion of authentic lime. We use plenty of fresh key lime juice and zest to ensure every bite is bursting with bright, zippy citrus notes. This isn’t just a hint of lime; it’s a full-bodied, invigorating flavor that truly stands out, perfect for anyone who adores vibrant citrus desserts.
- Luxuriously Creamy Texture – The filling boasts an incredibly smooth and creamy consistency, offering a delightful melt-in-your-mouth experience. It’s rich without being heavy, providing a perfect counterpoint to the crisp crust. Many describe it as having a cheesecake-like quality, but with a unique lightness that makes it incredibly satisfying and refreshing, never cloying.
- Effortlessly Simple Dessert – Don’t let the gourmet taste fool you; this recipe is surprisingly easy to make! Requiring minimal ingredients and straightforward steps, it’s perfect for bakers of all skill levels, from those just starting out to experienced home cooks looking for a quick yet impressive treat. From busy weeknights to grand celebrations, these bars simplify your dessert menu.
- Fantastic Make-Ahead Option – Hosting a party or anticipating a busy week? These Key Lime Bars are an excellent make-ahead dessert. They require chilling, which actually enhances their flavor and texture, allowing you to prepare them a day or two in advance. This frees up your time on the day of serving, reducing stress and making entertaining a breeze.
- Versatile for Any Occasion – Whether it’s a casual backyard barbecue, a sophisticated dinner party, a refreshing summer potluck, a holiday gathering, or just a sweet craving at home, these Key Lime Pie Bars fit seamlessly into any event. Their vibrant flavor and appealing presentation make them a welcome and admired addition everywhere you take them.
Essential Ingredients for Perfect Key Lime Bars
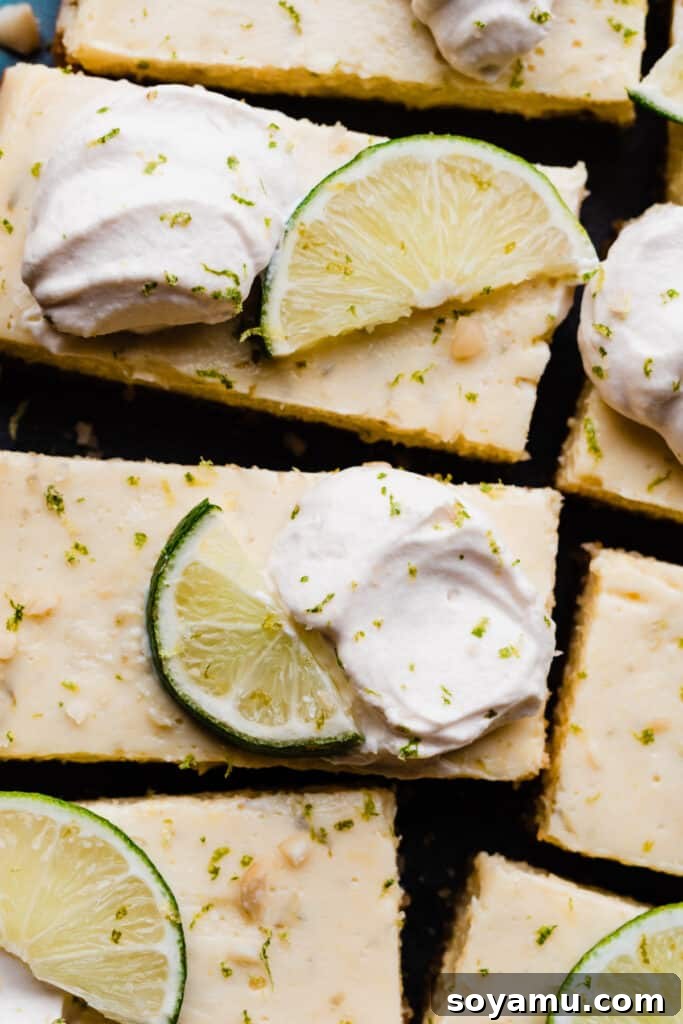
Crafting these delectable Key Lime Pie Bars starts with a selection of fresh, high-quality ingredients. Each component plays a crucial role in achieving the signature flavor, rich texture, and satisfying crunch. Below is a detailed look at what you’ll need, along with some helpful tips for sourcing and preparation.
- Graham Crackers – These golden, honey-kissed crackers form the irresistible, classic base of our crust. For ultimate convenience, you can purchase pre-crushed graham cracker crumbs. However, for a fresher taste and finer texture, we recommend making your own by pulsing whole graham crackers in a food processor until you achieve fine, consistent crumbs. The finer the crumbs, the more cohesive and uniform your crust will be, providing the perfect foundation for the creamy filling.
- Macadamia Nuts (Optional) – For an added layer of gourmet flavor and a delightful textural contrast, we highly recommend incorporating some finely crushed macadamia nuts into the crust. They provide a wonderful buttery crunch and a subtle, rich nutty note that complements the zesty lime beautifully. If nuts are not to your preference, or if you have dietary restrictions, rest assured you can omit them entirely without needing a substitute; the graham cracker crust will still be utterly delicious.
- Key Limes – The absolute star of the show! Freshly squeezed Key lime juice and vibrant zest are paramount for that authentic, sharp, and intensely aromatic lime flavor that defines this dessert. Key limes offer a unique tartness and floral undertones unmatched by regular limes. If fresh Key limes are difficult to find in your local grocery store, you can absolutely use bottled Key lime juice, which is often available in the baking aisle. For the zest, regular limes can be used as a substitute if Key limes aren’t available, ensuring you still get that bright citrus aroma.
- Butter – We always advocate for using salted butter in the crust. The hint of salt truly enhances the overall flavor profile, providing a lovely savory balance to the sweet dessert elements and preventing it from being overly sweet. However, if you prefer, unsalted butter can certainly be used; just consider adding a small pinch of fine sea salt to your crust mixture to achieve a similar depth of flavor. Ensure the butter is fully melted for easy and even incorporation with the crumbs.
- Eggs – Large eggs are essential for the creamy filling, specifically the yolks. Egg yolks act as a crucial binding agent and contribute significantly to the rich, smooth, and custard-like texture of the filling, helping it set beautifully. It’s best to use them at room temperature, as this helps them incorporate more smoothly and evenly into the other ingredients, preventing curdling and ensuring a consistently silky final product.
- Cream Cheese – Full-fat cream cheese is key to achieving that luxurious, velvety, and almost cheesecake-like creaminess in the filling. Its mild tanginess also harmonizes wonderfully with the zesty lime. Like the eggs, ensure your cream cheese is completely softened to room temperature. This makes it much easier to beat into a smooth, lump-free mixture, which is vital for a consistently silky and appealing filling.
- Sweetened Condensed Milk – This magical ingredient is vital for both sweetness and the signature creamy, thick texture of the Key lime filling. It undergoes a reaction with the acidity of the lime juice, which helps the filling set perfectly without the need for excessive baking, creating that iconic Key lime pie consistency.
- Granulated Sugar – A small but important amount of granulated sugar is added to the crust mixture. This enhances its inherent sweetness and helps it crisp up beautifully and brown lightly during the initial baking phase, adding another layer of texture and flavor.
- Vanilla Extract – A splash of high-quality vanilla extract in the filling rounds out the flavors, adding a subtle warmth, complexity, and depth that beautifully complements and enhances the vibrant lime, preventing it from being one-dimensional.
Customizing Your Key Lime Pie Bars: Creative Variations
While the classic Key Lime Pie Bar recipe is undeniably perfect, it’s also wonderfully adaptable! Don’t hesitate to experiment with these creative variations to suit your personal taste, dietary needs, or simply to use what you have readily available in your pantry. Making a recipe your own is part of the fun of baking!
- Gluten-Free Option – Making these decadent bars gluten-free is incredibly simple and requires no compromise on flavor or texture! Just swap out traditional graham crackers for their widely available gluten-free counterparts. The crust will remain wonderfully crisp, buttery, and delicious, ensuring that everyone can enjoy this refreshing treat without concern.
- Nut-Free Crust – If you or your guests have nut allergies, or if you simply prefer a straightforward graham cracker crust, feel free to omit the macadamia nuts entirely. No substitution is needed; the crust will still be perfectly delicious, hold its shape beautifully, and provide a fantastic base for the creamy lime filling.
- Key Limes vs. Regular Limes – Key limes offer a unique, more intensely tart, and distinctively aromatic flavor profile compared to regular Persian limes. If you desire a slightly less tangy bar, or if fresh Key limes are difficult to source, regular freshly squeezed lime juice can be used as a perfectly acceptable substitute. Just ensure you use the same quantities of juice and zest specified in the recipe for a balanced flavor, noting that the overall tang and aroma will be slightly different.
- Alternative Crusts – While a graham cracker crust is traditional and beloved for Key Lime Pie, don’t shy away from other delicious options. A buttery shortbread crust offers a richer, denser, and more cookie-like alternative, while a simple vanilla wafer crust can add a different dimension of sweetness and a delicate flavor. Feel free to use a trusted shortbread or vanilla wafer crust recipe you love, adjusting the quantity to fit an 8×8 or 9×9 inch pan.
- Innovative Toppings – Beyond the classic fresh whipped cream, consider other exciting toppings to elevate your Key Lime Pie Bars! A light and airy meringue (similar to a traditional Key Lime Meringue Pie), a sprinkle of toasted coconut flakes for a tropical twist, finely chopped pistachios for color and crunch, or even a delicate drizzle of melted white chocolate can add extra flair, flavor, and visual appeal.
- Spice It Up – For an unexpected yet delightful twist, try adding a pinch of ground ginger or cardamom to your graham cracker crust mixture. These spices beautifully complement the lime and can add an extra layer of warmth and complexity.
How to Master Key Lime Bars: A Step-by-Step Guide
Creating these sensational Key Lime Pie Bars is a rewarding process, and with our clear, detailed steps, you’ll achieve perfection every time. Follow along to bake your way to a refreshing, zesty dessert that will impress everyone.
Step 1: Prepare and Bake the Buttery Crust.
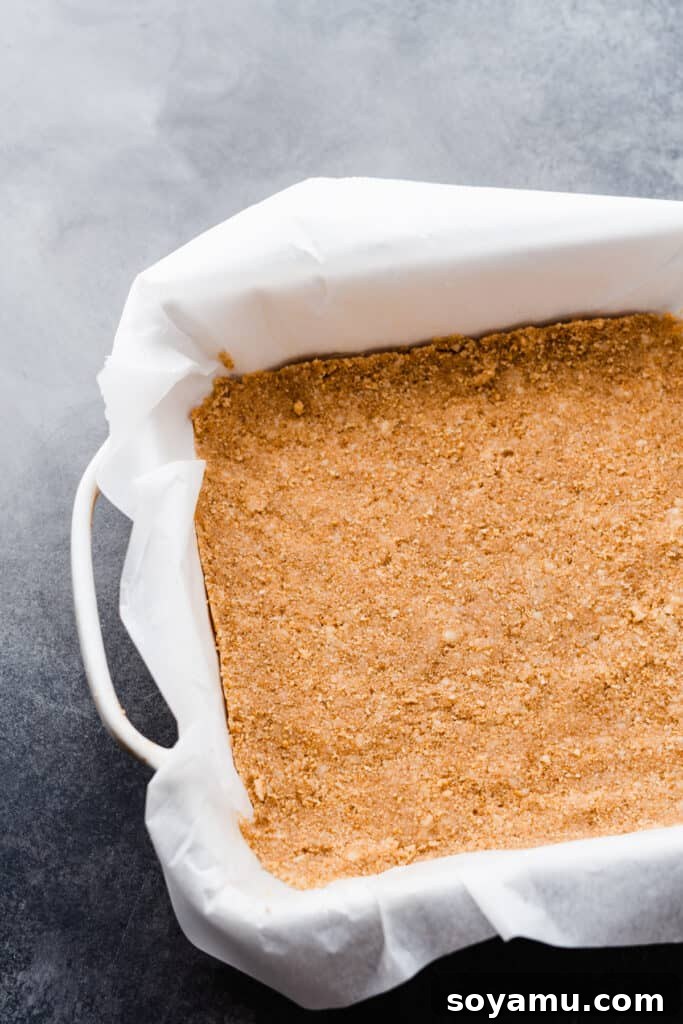
Begin by preheating your oven to 350°F (175°C). This ensures your oven is at the correct temperature for even baking. Lightly spray a 9×9-inch baking pan with nonstick spray, or line it with parchment paper, leaving a slight overhang on two opposing sides. This overhang acts as “handles” later, making it incredibly easy to lift the entire batch of bars out of the pan for clean slicing. In a medium bowl, combine your crushed graham cracker crumbs, the rich melted salted butter, a tablespoon of granulated sugar, and the optional (but highly recommended!) crushed macadamia nuts. Mix these ingredients thoroughly, using a fork or your hands, until everything is well combined and moistened, resembling wet sand. Press this mixture firmly and evenly into the bottom of your prepared baking dish. A flat-bottomed glass or the back of a spoon can help you achieve a perfectly compact and uniform crust. Bake the crust for precisely 9 minutes, just until it’s lightly golden around the edges and fragrant. Set it aside on a wire rack to cool slightly while you efficiently prepare the filling.
Step 2: Craft the Irresistibly Creamy Key Lime Filling.
In a large mixing bowl, using an electric hand mixer or a stand mixer fitted with the paddle attachment, begin by beating the softened full-fat cream cheese on high speed until it’s perfectly creamy and smooth, with no lumps, which usually takes about 1-2 minutes. This initial step is crucial for achieving a silky, lump-free filling. Next, add the room temperature egg yolks, mixing just until they are fully combined into the cream cheese mixture. Be careful not to overmix at this stage, as too much air can cause the filling to puff too much and then crack. Finally, pour in the entire can of sweetened condensed milk, the generous amount of fresh key lime juice, the vibrant and fragrant lime zest, and a splash of vanilla extract. Mix on low speed until all ingredients are just incorporated and the mixture is smooth and uniform. Remember to stop and scrape down the sides and bottom of the bowl with a rubber spatula to ensure everything is thoroughly combined and there are no unmixed pockets of ingredients.
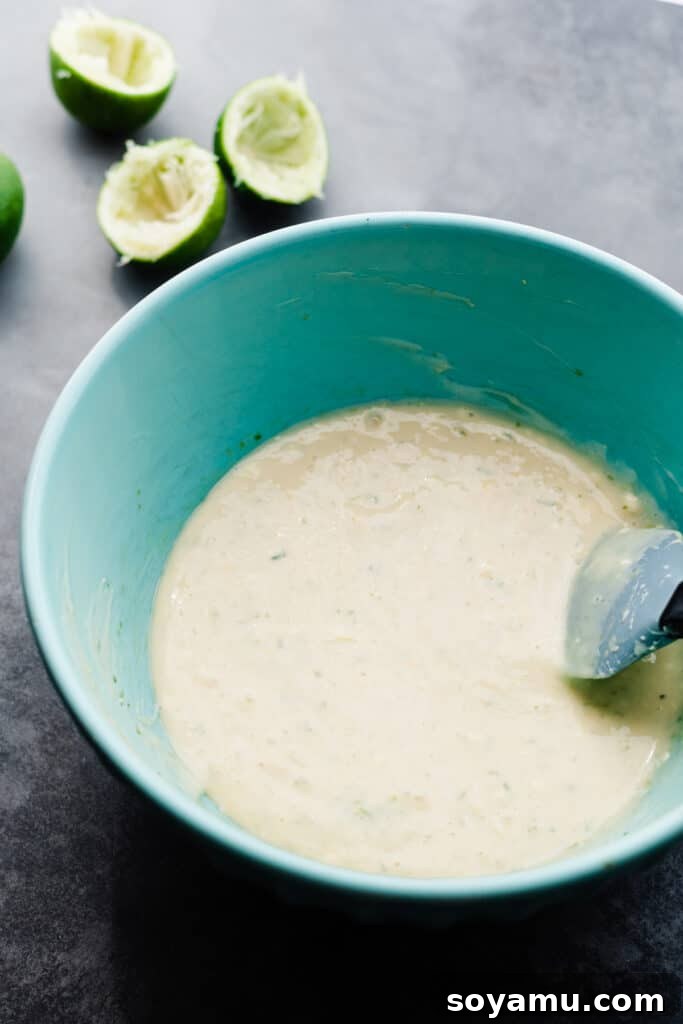
Step 3: Bake to Perfection and Chill for Optimum Flavor.
Carefully pour the lusciously creamy key lime mixture evenly over your partially baked graham cracker crust in the pan. Gently spread it with a spatula to ensure it reaches all the edges and forms an even layer. Return the pan to the preheated oven and bake for approximately 22-24 minutes. The bars are ready when the edges appear just set and very lightly golden, while the center still has a tiny bit of jiggle when the pan is gently nudged. A knife or toothpick inserted into the center should come out with a little moist, thick batter attached, not completely clean. This indicates they are perfectly baked, as they will continue to set as they cool. Once baked, remove the pan from the oven and let the bars cool completely to room temperature on a wire rack. This is a critical step for their final texture and stability. After cooling, cover the pan loosely with plastic wrap and chill the bars in the refrigerator for a minimum of 4 hours, or ideally, overnight (up to 48 hours). Proper chilling allows the filling to fully set, intensifies the vibrant lime flavors, and makes for perfectly sliceable and delicious bars.
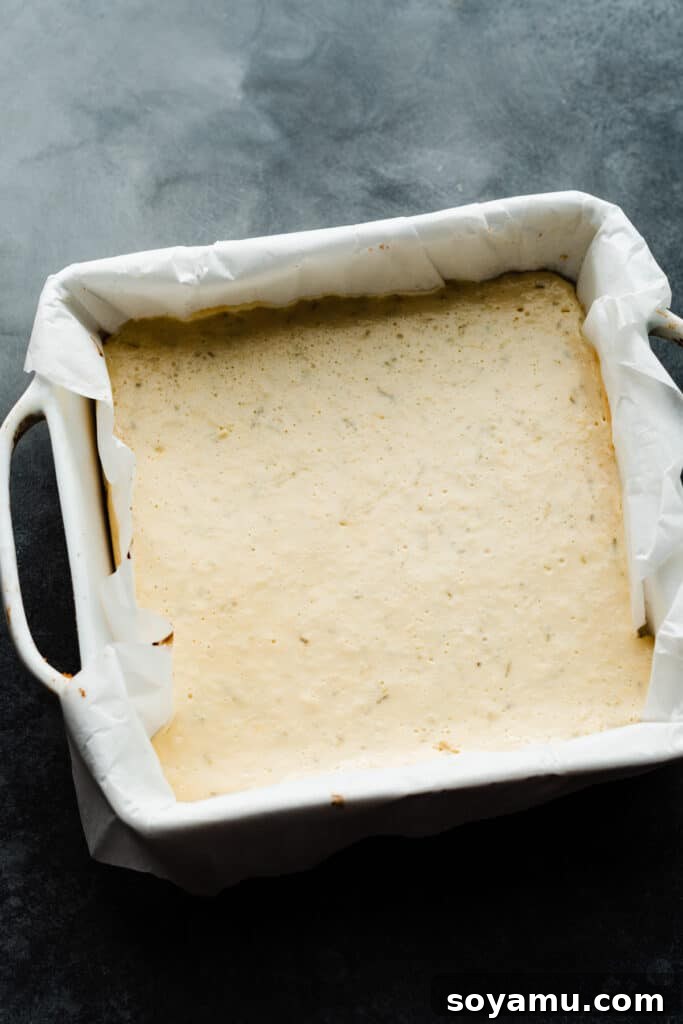
Step 4: Prepare the Fluffy Fresh Whipped Cream Topping.
Just before you’re ready to serve, prepare your fresh whipped cream. This ensures it’s at its peak freshness and fluffiness. In a large, chilled mixing bowl (a metal or glass bowl chills best), combine very cold heavy cream, powdered sugar, and vanilla extract. The cold temperature of both the cream and the bowl is absolutely essential for achieving the best volume and stability in your whipped cream. Using an electric mixer, beat on medium-high speed until stiff peaks form. Stiff peaks mean that when you lift the beaters, the cream stands up straight. Be careful not to overmix, or you’ll quickly end up with butter! A handy tip for messy bakers: drape a clean kitchen towel loosely over the bowl and mixer while it’s running on high speed to contain any splatters. This ensures your topping is light, airy, and perfectly balances the tartness of the key lime bars, adding a delightful contrast in texture and flavor.
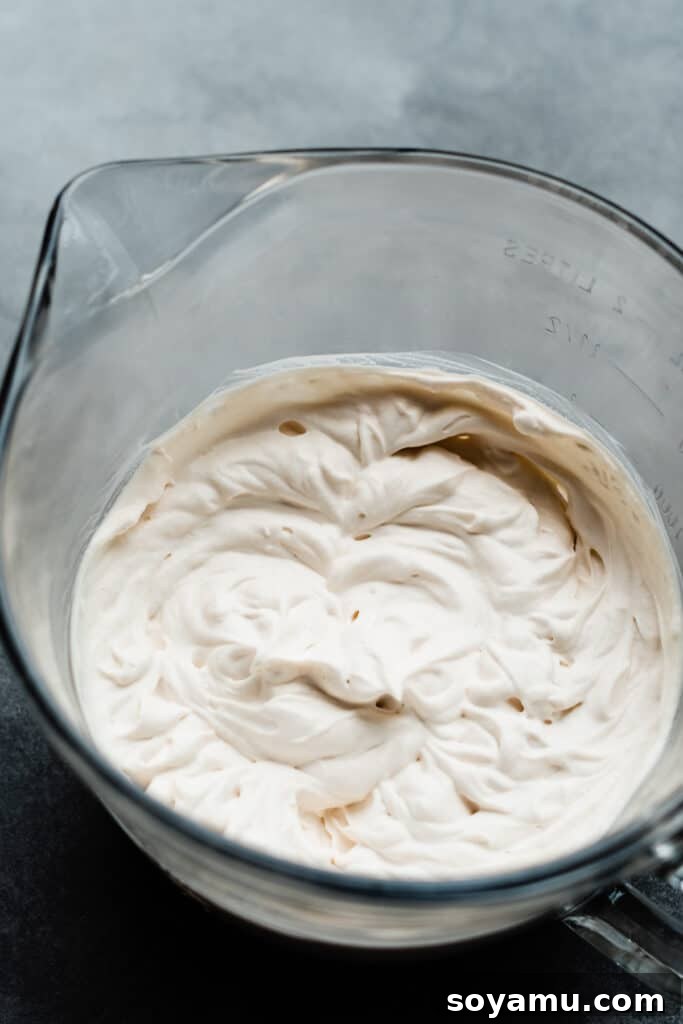
Serving & Storing Your Delicious Key Lime Bars
Once your Key Lime Pie Bars are perfectly chilled and ready, it’s time to enjoy them! This dessert is not only incredibly easy to make but also wonderfully versatile for various summer occasions and beyond. Proper serving and storage will ensure your bars remain fresh and delicious.
Serving Suggestions
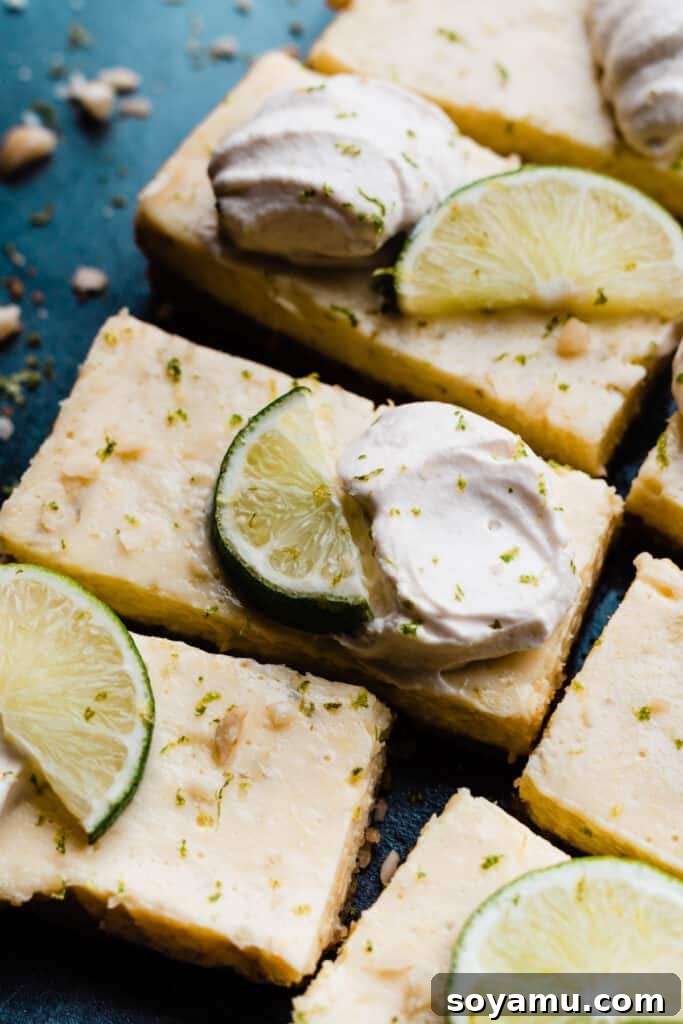
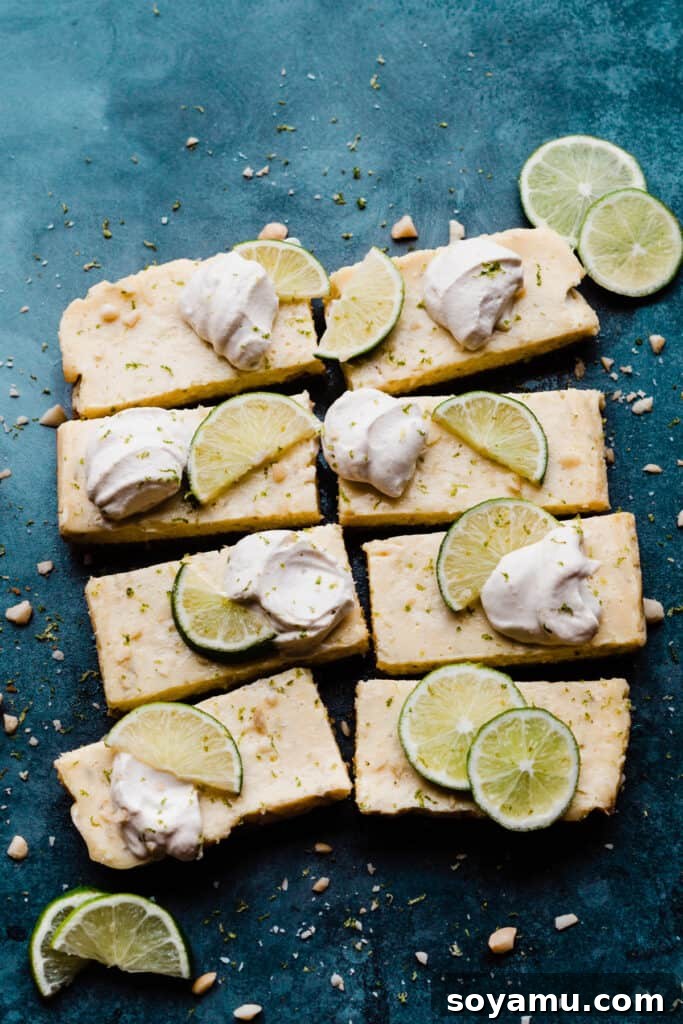
Carefully lift the bars out of the pan using the parchment paper overhang and place them onto a clean cutting board. For perfectly clean, bakery-style slices, use a very sharp, thin knife. After each cut, wipe the blade clean with a damp paper towel or warm water to prevent the creamy filling from sticking and creating messy edges. Slice into 9 equal portions for a standard 9×9 inch pan. Dollop a generous spoonful of the freshly made, fluffy whipped cream on top of each bar just before serving. For an extra touch of elegance and a burst of fresh aroma, sprinkle a little additional lime zest or adorn each bar with a thin slice or wedge of fresh lime. These bars are a standout dessert for backyard barbecues, festive picnics, bridal showers, baby showers, or simply as a refreshing after-dinner treat with your family.
Proper Storage
Leftover Key Lime Pie Bars should always be stored in an airtight container in the refrigerator to maintain their freshness, creamy texture, and vibrant flavor. When stored correctly, they will remain delicious for 4-5 days. If you’ve already added whipped cream to all bars, they will still store well, but the cream might lose some of its peak freshness and fluffiness after a day or two. For the absolute best results, we recommend storing any extra whipped cream separately in an airtight container in the fridge and adding it just before serving each individual portion. This keeps the topping at its freshest and most appealing.
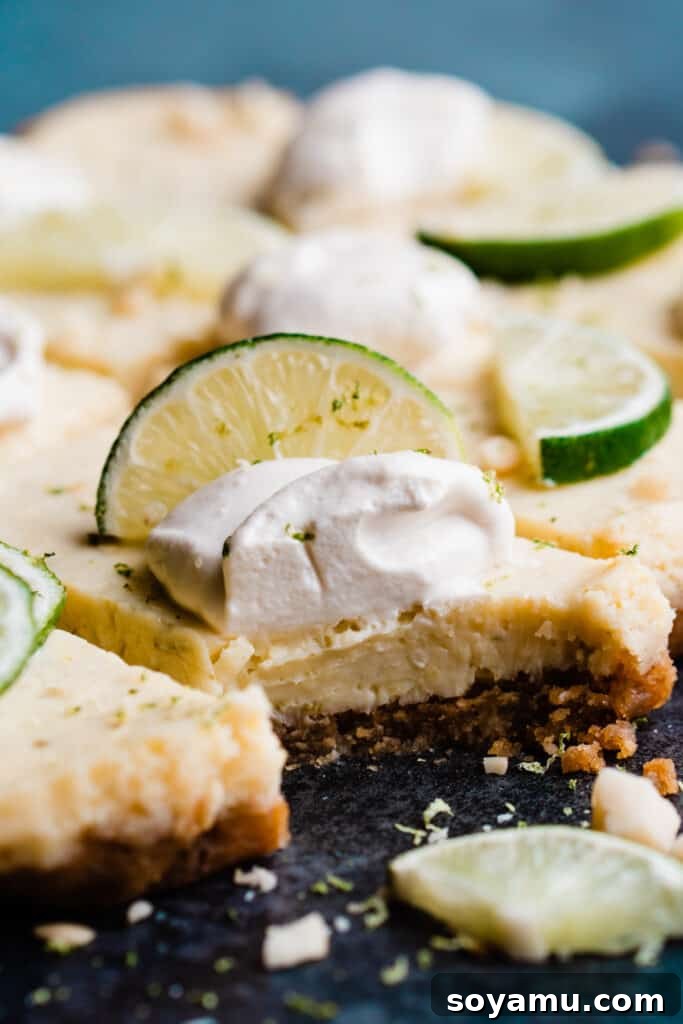
Unlock Baking Success: Expert Tips for Key Lime Bars
Achieving bakery-quality Key Lime Pie Bars is easier than you think with these professional tips and tricks. Paying attention to these small but crucial details will ensure you get the best possible outcome every single time, leading to perfectly balanced flavors and textures:
- Calibrate Your Oven with an Oven Thermometer – An oven thermometer is an invaluable tool for any serious baker. It provides an accurate reading of your oven’s true internal temperature, which can often differ significantly from the dial setting on your oven. Precise oven temperature is critical for ensuring your graham cracker crust bakes evenly to a golden crisp and your delicate lime filling sets correctly without the risk of overbaking or curdling. Keep one in your oven at all times to continually monitor its calibration.
- Measure with Precision Using a Kitchen Scale – For consistent baking results, especially with dry ingredients like graham cracker crumbs, flour (if using in other recipes), or sugar, a food scale is highly recommended. Measuring by weight (in grams or ounces) is far more accurate and reliable than volumetric measurements (using cups), as the density of ingredients can vary greatly based on how they are scooped and the specific measuring cup used. This precision ensures your recipe turns out the same way every time.
- Achieve Impeccable Slices – For picture-perfect Key Lime Bars that look as amazing as they taste, use a very sharp, thin knife. The trick for clean, neat edges is to wipe the blade clean with a damp paper towel or warm water after each and every cut. This prevents the creamy filling from sticking to the knife and creating messy, uneven edges, ensuring every bar looks professionally prepared.
- Room Temperature Ingredients Are Key – For the smoothest, most homogenous possible filling, it is absolutely essential to ensure your full-fat cream cheese and egg yolks are at true room temperature. Cold ingredients are much harder to mix smoothly and evenly, leading to a lumpy filling and potentially affecting the overall texture. Plan ahead and take them out of the refrigerator at least 30-60 minutes before you begin the mixing process.
- Avoid Overbaking for Creaminess – Key Lime Pie filling is designed to set as it cools, rather than firm up completely in the oven. The bars should still have a slight “jiggle” or gentle wobble in the very center when you gently nudge the pan, similar to a perfectly baked cheesecake. Overbaking can result in a dry, rubbery, or curdled texture rather than the desired smooth, creamy, and luscious consistency.
- Mastering Zesting and Juicing Limes – For optimal flavor and efficiency, always zest your limes before you juice them! It’s significantly easier to get the fine, fragrant zest from a firm, whole lime. Use a microplane zester to get only the vibrant green part (the zest), being careful to avoid the bitter white pith just underneath. For juicing, roll the limes firmly on your countertop for about 10-15 seconds before cutting them in half; this helps to break down the internal membranes and release much more juice.
Frequently Asked Questions About Key Lime Pie Bars
Absolutely! This Key Lime Pie Bar recipe doubles beautifully and is perfect for feeding a crowd or for meal prepping desserts. Simply double all the crust and filling ingredients precisely. When doubling, you will need to bake them in a larger 9×13-inch pan instead of the 9×9-inch. The baking time might need to be adjusted slightly, typically adding an extra 5-10 minutes. Always keep a close eye on the edges for firmness and the center for that telltale slight jiggle.
Key limes are distinctly different from regular (Persian) limes in several ways. They are notably smaller, typically about the size of a golf ball, and have a thinner, more yellowish rind when ripe. Their flavor is much more aromatic, intensely tart, and possesses a unique floral undertone that is characteristic of classic Key lime pie. Regular Persian limes are larger, have a thicker, darker green rind, and their juice is less tart and lacks the distinct floral notes. Key limes are famously associated with the Florida Keys, where they were historically cultivated on a large scale. While regular limes can be used in a pinch, Key limes offer that signature, unmistakable flavor profile that makes this dessert truly authentic.
While you technically *can* skip the whipped cream, we highly recommend against it! The sweet, light, and airy flavor of the fresh whipped cream provides a perfect and necessary balance to the intense tanginess of the Key lime filling. It truly completes the dessert, adding a delightful textural contrast (creamy whipped cream against the firm bar) and harmonizing the overall flavor experience by cutting through the tartness. It’s the yin to the lime’s yang!
Yes, absolutely! These Key Lime Pie Bars are a fantastic make-ahead dessert, making them ideal for entertaining or busy schedules. You can bake the bars, allow them to cool completely to room temperature, and then cover them and chill them in the refrigerator for at least 4 hours. For optimal flavor development and firmness, chilling them overnight (up to 48 hours) is even better! Prepare the fresh whipped cream just before serving for the best results, as it’s always best when freshly made.
Knowing when your Key Lime Bars are perfectly baked is crucial for their creamy texture. Look for the edges of the filling to be set and very lightly golden. The center should still have a slight but noticeable jiggle when the pan is gently nudged – it shouldn’t be completely liquid, but not fully firm either. A knife or toothpick inserted into the center won’t come out perfectly clean; instead, it will have some moist, thick batter clinging to it. This indicates the bars are just set and will firm up beautifully upon chilling in the refrigerator, achieving that ideal, smooth consistency.
Recommended Tools for Baking Key Lime Bars
Having the right kitchen tools can significantly enhance your baking experience, making it smoother, more efficient, and ultimately more enjoyable. Here are a couple of items we highly recommend for making these Key Lime Pie Bars:
- 9×9 Inch Baking Pan – A high-quality ceramic or metal 9×9 square baking pan is ideal for this recipe. Its size ensures the perfect thickness for your bars, allowing for even baking and easy, consistent slicing into neat portions.
- Electric Mixer (Cordless or Stand) – An electric mixer, whether a versatile cordless electric mixer for portability or a powerful stand mixer for hands-free convenience, will make beating the cream cheese to a smooth consistency and whipping the cream to fluffy peaks effortless. This tool is invaluable for achieving the desired textures in your filling and topping.
- Food Processor – While not strictly essential if you opt for pre-crushed graham cracker crumbs and finely chop nuts by hand, a food processor makes quick work of preparing the crust ingredients. It efficiently crushes graham crackers and macadamia nuts into uniform, fine crumbs, ensuring a consistent and well-formed crust.
- Microplane Zester – For achieving the finest, most fragrant lime zest without inadvertently grating any bitter white pith, a microplane zester is an excellent and highly recommended investment. It yields delicate strands of zest that infuse maximum citrus aroma and flavor into your filling.
Note: Some links provided above are affiliate links, which means we may earn a small commission at no extra cost to you if you make a purchase through them. We only recommend products we trust and use ourselves in our kitchen.
More Zesty Delights: Recipes for Every Lime Lover
If you’re as passionate about the vibrant, refreshing flavor of lime as we are, you’ll absolutely love exploring these other citrus-infused recipes from our collection. Perfect for expanding your repertoire of refreshing desserts and drinks, these recipes will keep the zesty vibes going all year long!
- Key Lime Bundt Cake with Key Lime Glaze – A truly show-stopping cake that’s moist, tender, and bursting with authentic Key lime flavor, all finished with a luscious, tangy Key lime glaze.
- Individual Key Lime Rum Cheesecakes with Boozy Whipped Cream – Elegant, small-batch cheesecakes with a subtle hint of rum, topped with a spirited whipped cream, perfect for sophisticated entertaining or a personal indulgence.
- Mojito Cake with Whipped Rum Buttercream – Experience the invigorating classic mojito cocktail in a delightful cake form, complete with refreshing mint, zesty lime, and a light rum-infused buttercream.
- Frozen Rum Punch with Strawberry, Mango, & Lime – A wonderfully tropical blended drink that’s perfect for cooling down on the warmest summer days, packed with fruity flavors and a zesty kick.
Did you whip up these delightful Key Lime Pie Bars? We’d absolutely love to hear from you!
Please share your experience, any creative variations you tried, and leave a star rating below in the comments section. Your valuable feedback not only helps us improve our recipes but also supports our small business immensely!
Key Lime Pie Bars Recipe
By Stephanie Simmons
These bars have a delicious, creamy filling flavored with zippy lime juice and zest, and a crisp crust made with graham cracker crumbs and macadamia nuts. Top these creamy delights with a dollop of fresh whipped cream and a sprinkle of lime zest, offering a refreshing and easy treat that everyone will love!
Prep Time: 20 mins
Cook Time: 32 mins
Total Time: 52 mins
Yields: 9 bars
Ingredients
For the Crust:
- 1 cup graham cracker crumbs
- 1/3 cup macadamia nuts, finely crushed (optional)
- 6 tbsp salted butter, melted
- 1 tbsp granulated sugar
For the Key Lime Filling:
- 4 ounces full-fat cream cheese, softened at room temperature
- 4 large egg yolks, at room temperature
- One 14 ounce can sweetened condensed milk
- 2 tbsp lime zest (from key limes or regular limes)
- 1/2 cup + 2 tbsp fresh lime juice (from key limes or regular limes)
- 1 tsp vanilla extract
For the Whipped Cream (prepare just before serving):
- 1/2 cup cold heavy cream
- 1 tbsp powdered sugar
- 1 tsp vanilla extract
- Extra lime zest and/or thin lime slices for garnish (optional)
Instructions
- Prep: Preheat your oven to 350℉ (175°C). Lightly spray a 9×9 inch baking pan with nonstick spray and/or line with parchment paper, leaving an overhang on two sides for easy removal of the bars later.
- Make and Par-Bake the Crust: If using whole macadamia nuts, pulse them in a food processor until finely chopped (or chop by hand). In a medium bowl, stir together the graham cracker crumbs, crushed macadamia nuts (if using), melted salted butter, and granulated sugar until well combined and moistened. Press this mixture firmly and evenly into the bottom of your prepared pan. Bake the crust for 9 minutes. While the crust bakes, begin preparing the filling.
- Make the Filling: In a large mixing bowl, using an electric mixer, beat the softened cream cheese on high speed until it is smooth and creamy (about 1-2 minutes). Add the room temperature egg yolks and mix until just combined. Pour in the sweetened condensed milk, lime zest, fresh lime juice, and vanilla extract. Mix on low speed until all ingredients are just combined and the mixture is smooth. Scrape down the sides of the bowl as needed to ensure everything is incorporated. Pour the filling evenly over the par-baked crust.
- Bake: Return the pan to the oven and bake for 22-24 minutes. The bars are done when the edges appear set and very lightly golden, but the center still has a slight jiggle when gently nudged. A toothpick inserted into the center should come out with moist crumbs, not liquid batter. Let the bars cool completely at room temperature on a wire rack. Once cooled, cover the pan with plastic wrap and chill the bars in the refrigerator for at least 4 hours, or ideally overnight (up to 48 hours), before slicing and serving.
- Make the Whipped Cream: Prepare the whipped cream just before you’re ready to serve the bars. In a large, chilled bowl, combine the very cold heavy cream, powdered sugar, and vanilla extract. Beat on medium-high speed with an electric mixer until stiff peaks form. Be careful not to overmix, which can turn it into butter. (Tip: A kitchen towel draped over the bowl can help contain splatters while mixing.)
- Serve & Store: Carefully lift the chilled bars from the pan using the parchment paper overhang. Place them on a cutting board and slice them into 9 equal portions with a sharp knife, wiping the blade clean between cuts for neat edges. Dollop a generous amount of fresh whipped cream on top of each bar. Garnish with a sprinkle of extra lime zest or a thin lime slice. Store any leftover bars in an airtight container in the refrigerator for 4-5 days.
Notes
- Nuts: You can easily omit the macadamia nuts from the crust if you prefer a nut-free version or have allergies. The crust will still be delicious!
- Gluten-Free: To make this recipe entirely gluten-free, simply use gluten-free graham crackers for the crust.
- Lime Flavor: For a slightly less tangy bar, you can use regular Persian lime juice instead of Key lime juice, using the same measurements. The flavor profile will be a bit different but still delicious.
Nutrition Information (Approximate per bar)
- Serving: 1 bar
- Calories: 384kcal
- Carbohydrates: 37g
- Protein: 8g
- Fat: 23g
- Saturated Fat: 12g
- Polyunsaturated Fat: 1g
- Monounsaturated Fat: 8g
- Trans Fat: 0.3g
- Cholesterol: 133mg
- Sodium: 274mg
- Potassium: 276mg
- Fiber: 1g
- Sugar: 30g
- Vitamin A: 668IU
- Vitamin C: 6mg
- Calcium: 204mg
- Iron: 1mg
Nutrition information is automatically calculated and should be used as an approximation only.
Enjoyed this recipe? Share your thoughts!
If you loved making these Key Lime Pie Bars, we’d be thrilled if you left a comment and rating below. Your feedback is invaluable and helps our community of bakers!