
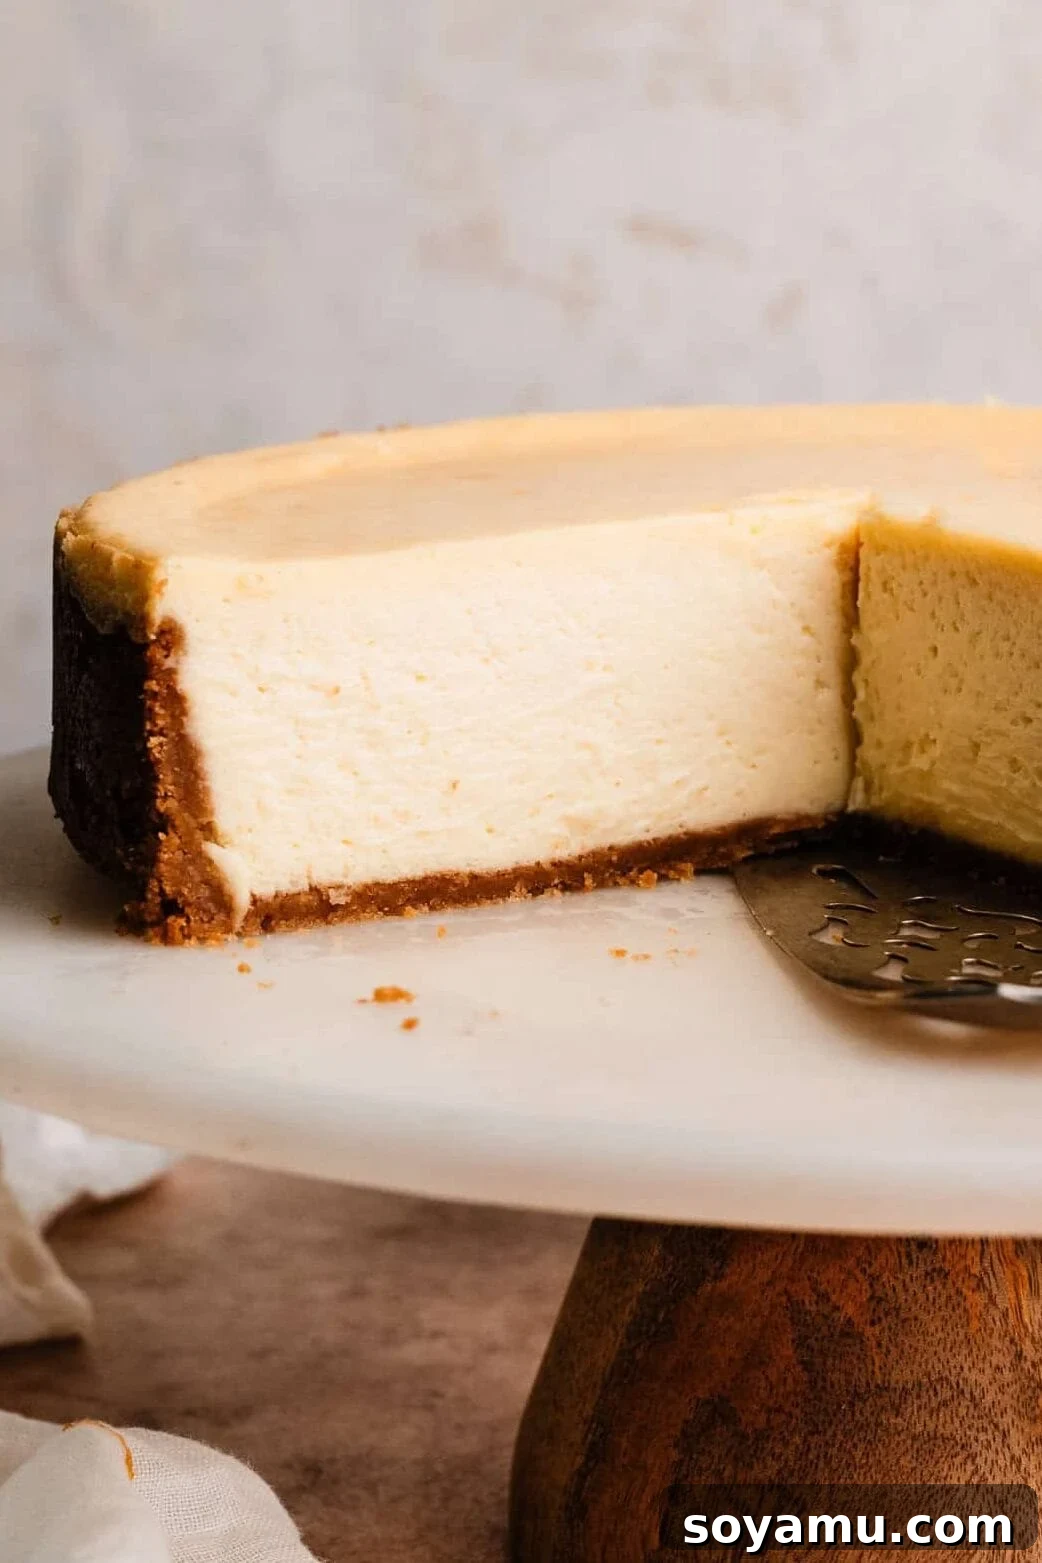
Perfect New York Style Cheesecake: Your Ultimate Guide to a Creamy Classic
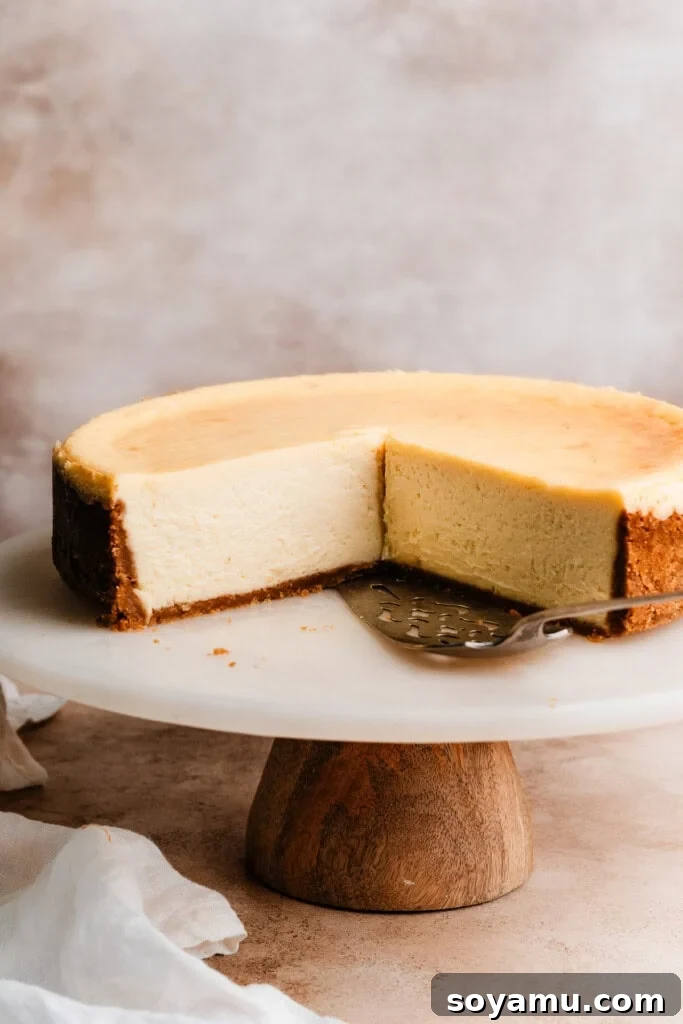
Indulge in the luxurious simplicity of a truly perfect New York Style Cheesecake, a dessert that effortlessly combines homemade charm with gourmet elegance. This recipe guides you to create an incredibly rich and velvety smooth cheesecake, boasting a light yet intensely decadent texture, all nestled upon a crisp, buttery graham cracker crust. Forget any intimidation; our comprehensive recipe provides all the essential knowledge and step-by-step instructions to ensure your cheesecake is a resounding success, every single time!
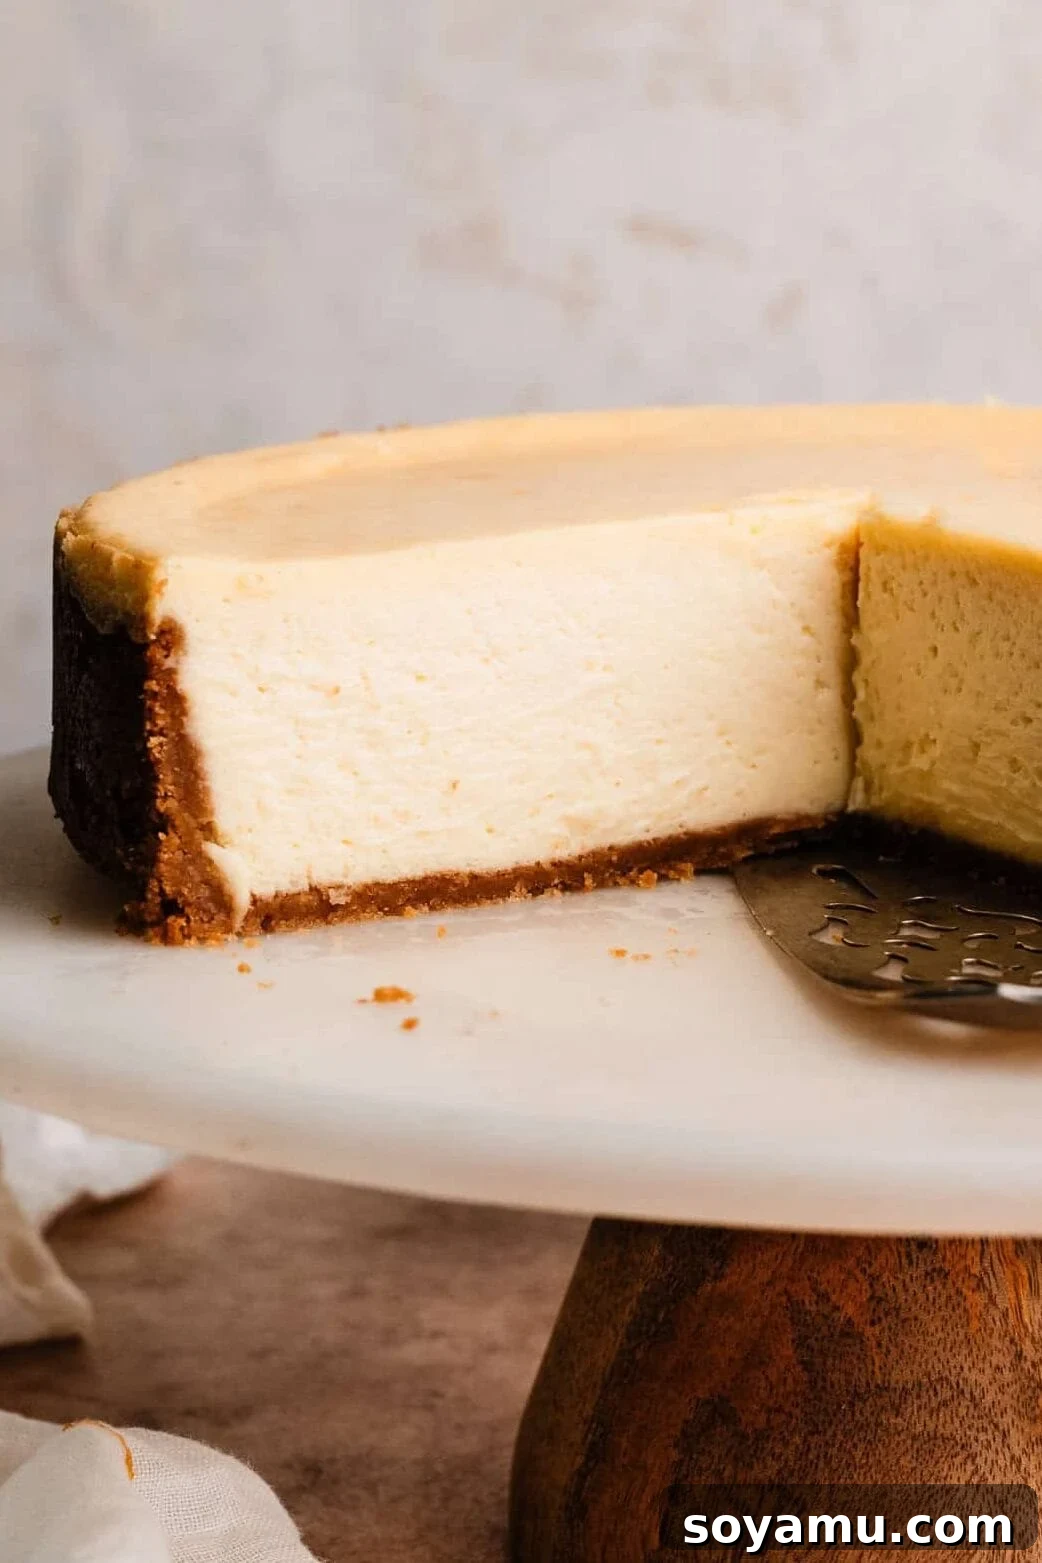
New York Style Cheesecake stands as an iconic dessert, renowned for its distinctively dense, rich, and creamy texture that sets it apart from other cheesecake varieties. Originating in New York City, this classic recipe traditionally features a higher proportion of cream cheese and often incorporates sour cream, eschewing the lighter, whipped cream-based fillings found in some “traditional” cheesecakes. This results in a truly luxurious and satisfying dessert experience that has captivated palates worldwide.
Why This Classic New York Style Cheesecake Will Be Your Go-To Recipe
There are countless reasons to fall in love with this particular cheesecake recipe. It’s more than just a dessert; it’s an experience, designed to bring joy and impress guests with minimal stress.
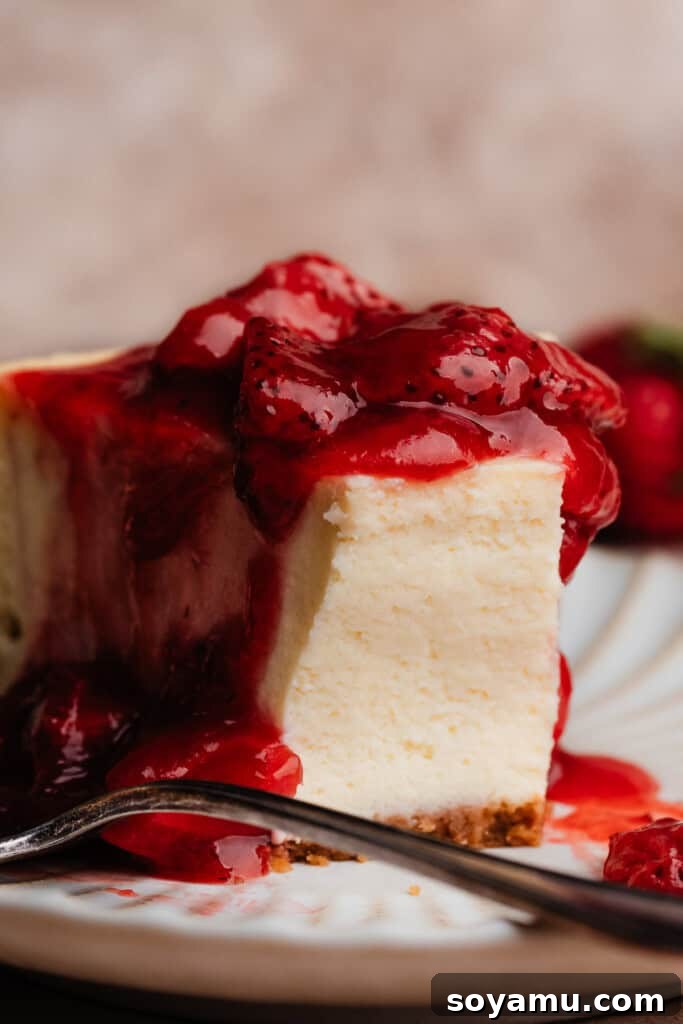
- Unrivaled Creamy Perfection: This cheesecake is crafted to achieve an ultra-creamy, incredibly rich consistency that melts in your mouth, yet remains beautifully light on the palate. The careful balance of ingredients and baking technique ensures a smooth, luscious texture that is the hallmark of a truly great New York Style Cheesecake.
- Perfect for Any Celebration: Whether it’s a birthday, holiday, or any special gathering, this cheesecake is the ultimate showstopper. Its elegant presentation and crowd-pleasing flavor make it an ideal dessert. Plus, it’s a fantastic make-ahead option, allowing the flavors to meld and deepen overnight, significantly reducing your day-of party prep stress. The versatility of toppings also means it can be customized for any season or occasion.
- Surprisingly Approachable for Home Bakers: While cheesecake might carry a reputation for being intimidating, we promise this recipe is genuinely easy to follow. We’ve broken down every step, from preparing the graham cracker crust to mastering the water bath, into clear, concise instructions. Our detailed explanations and helpful tips are designed to build your confidence, empowering you to create a flawless, restaurant-quality cheesecake right in your own kitchen.
Essential Ingredient Overview for Your Classic Cheesecake
Crafting the perfect cheesecake starts with understanding each ingredient’s role. Below is a breakdown of the key components, ensuring you choose the right ones for optimal results. The full recipe with precise measurements and detailed directions can be found in the recipe card at the bottom of this post.
- Cream Cheese: This is the star of your New York Style Cheesecake. It is absolutely crucial to use full-fat cream cheese in block form. Avoid tubs of spreadable cream cheese, as they contain added water and stabilizers that will negatively impact the texture and richness of your cheesecake. Ensure your cream cheese is at room temperature before you begin mixing; this is vital for a smooth, lump-free batter.
- Granulated Sugar: We use just the right amount of granulated sugar to sweeten the cheesecake, allowing the classic, slightly tangy flavor of the cream cheese to remain at the forefront. It balances the richness without making the dessert overly sweet.
- Eggs: Large eggs are essential for structure and richness. Like the cream cheese, eggs should be at room temperature. This helps them incorporate smoothly into the batter, preventing overmixing which can introduce too much air and lead to cracks during baking.
- Sour Cream: Full-fat sour cream is a signature ingredient in New York Style Cheesecake, contributing to its distinct tang, incredibly tender crumb, and overall luxurious moisture. Ensure it is also at room temperature to blend seamlessly with the other ingredients.
- Corn Starch: Just a hint of corn starch acts as a subtle stabilizer. It helps the cheesecake hold its magnificent shape once cooled, prevents cracking, and contributes to its super creamy texture without altering the flavor.
- Vanilla Extract: Always opt for real vanilla extract for the best flavor. It enhances the overall profile of the cheesecake, adding a warm, aromatic depth that complements the creamy filling beautifully.
- Salt: A tiny pinch of fine salt is a secret weapon in most baked goods. In this cheesecake, it effectively balances the flavors, cutting through the richness and enhancing the subtle sweetness and tanginess.
Recipe Substitutions & Creative Variations
While this recipe delivers a classic New York Style Cheesecake, there are a few ways to adapt it to specific dietary needs or flavor preferences.
- Gluten-Free Option: To make this decadent New York cheesecake suitable for those with gluten sensitivities, simply swap out traditional graham crackers for their gluten-free counterparts for the crust. The rest of the recipe naturally remains gluten-free.
- Dairy-Free Considerations: Developing a truly authentic dairy-free New York Style Cheesecake is a complex endeavor that requires specialized ingredients and techniques. As I haven’t personally perfected a dairy-free version, I recommend exploring dedicated vegan baking blogs known for their expertise in this area. Fantastic resources like The Banana Diaries or Little Blog of Vegan often provide excellent, reliable dairy-free adaptations.
- Graham Cracker Alternatives: If you’re outside the U.S. and graham crackers are hard to come by, don’t despair! Digestive biscuits are an excellent and widely available substitute. Their texture and mild sweetness mimic graham crackers wonderfully, ensuring your crust is just as perfect. Other plain, crumbly cookies can also work in a pinch.
How to Master the Classic New York Style Cheesecake: Step-by-Step
Follow these detailed steps carefully to achieve a flawlessly creamy and crack-free New York Style Cheesecake.
Step 1: Prepare and Bake the Crust.
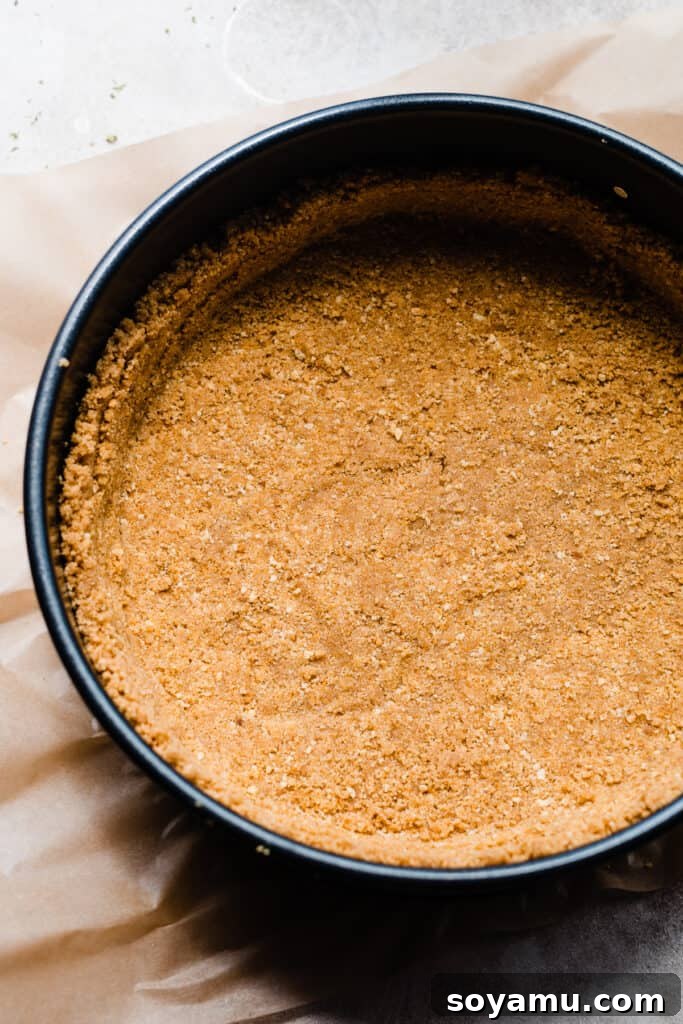
Begin by preheating your oven to 350°F (175°C). In a bowl, combine the finely crushed graham cracker crumbs with melted butter. Mix until the crumbs are evenly moistened. Press this mixture firmly and evenly into the bottom and slightly up the sides of a 9-inch springform pan. For best results and easier release later, consider lining the bottom of the pan with parchment paper before assembling. Bake the crust for 10 minutes to set it, then remove from the oven and set aside to cool slightly. It’s important to keep your oven on at 350°F and begin preparing your water bath by filling a large pot with water and placing it on your stovetop to boil, and also getting out a large roasting pan.
Step 2: Combine Cream Cheese & Sugar for a Smooth Base.
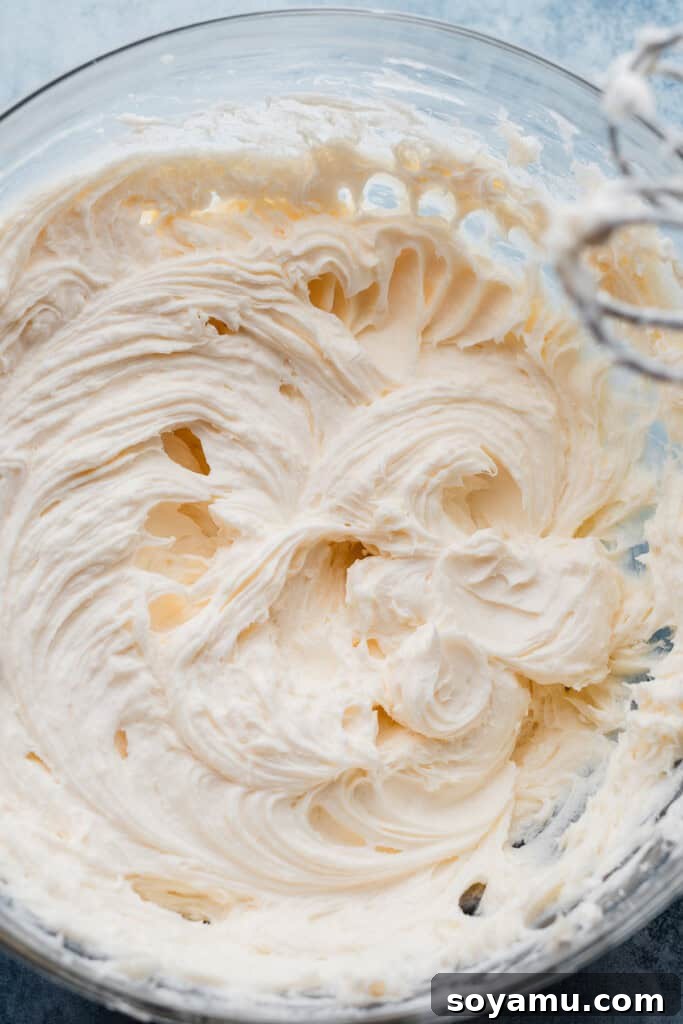
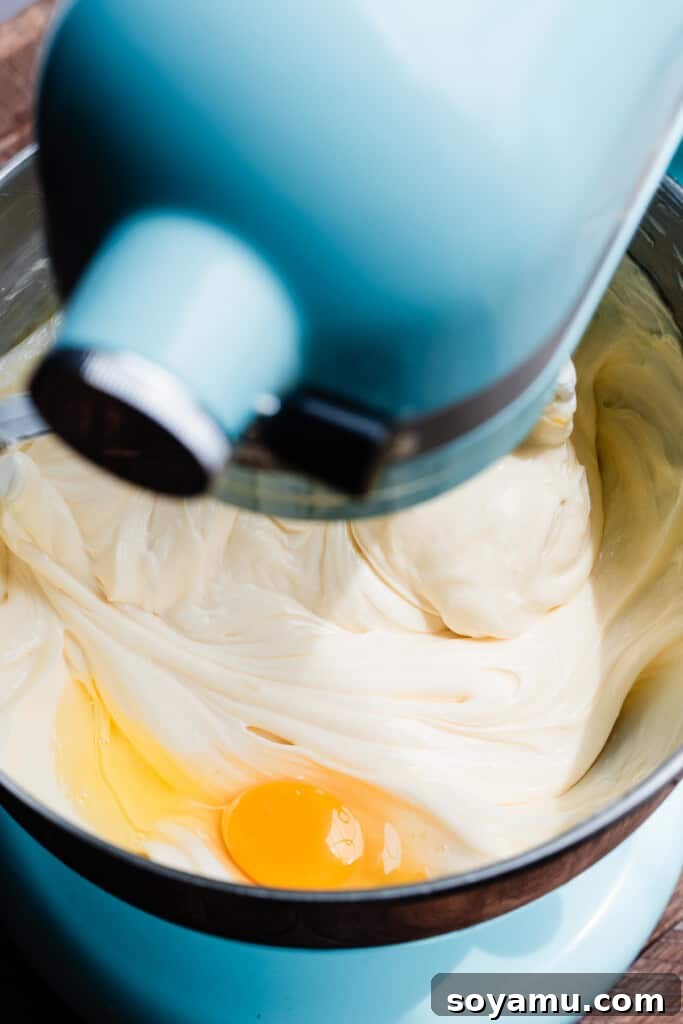
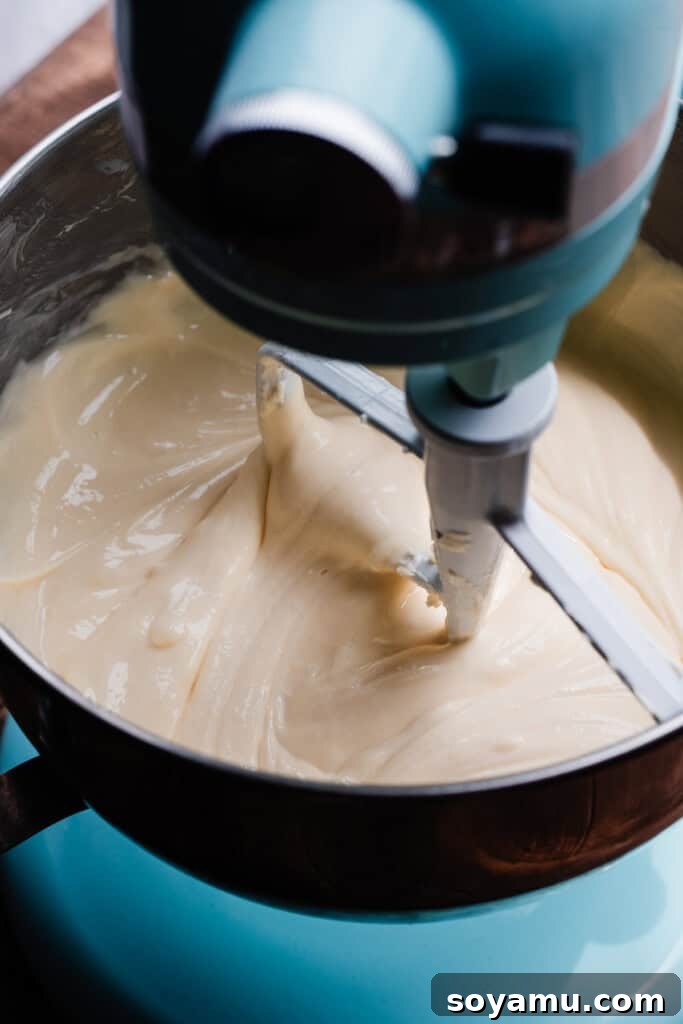
In a large mixing bowl, beat the softened cream cheese alone with an electric mixer for 30-60 seconds until it’s wonderfully smooth and creamy. This initial step is crucial for breaking down any lumps. Stop and thoroughly scrape down the sides and bottom of the bowl with a rubber spatula to ensure no unmixed cream cheese remains. Next, add the granulated sugar and continue beating for 1-2 minutes, or until the mixture is light and fluffy, and the sugar is fully incorporated. Remember to scrape the bowl again to guarantee a consistently smooth batter.
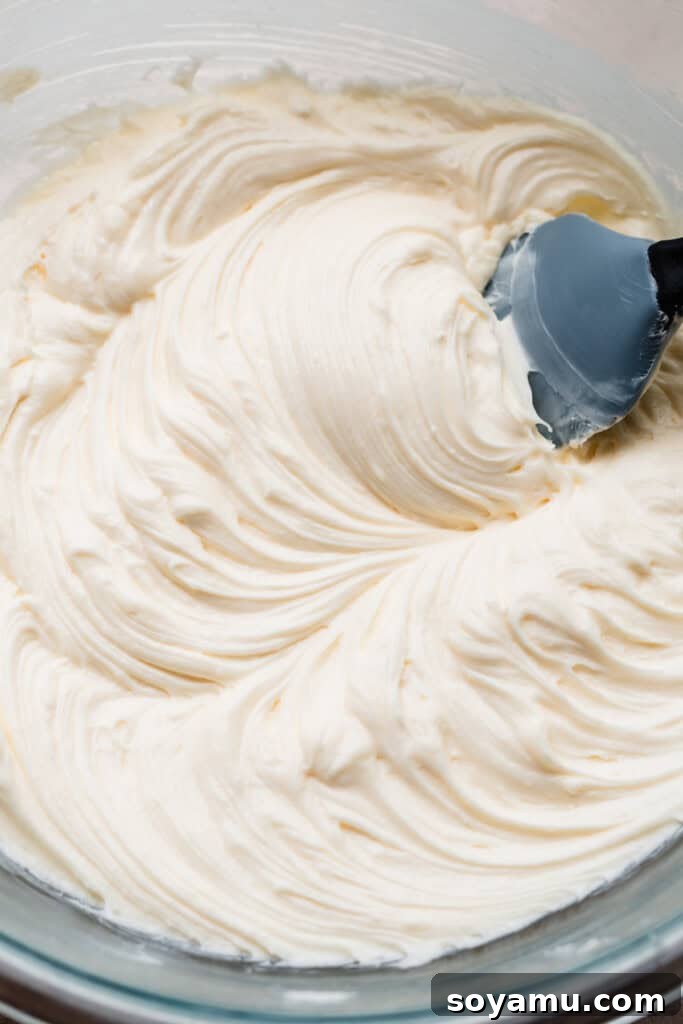
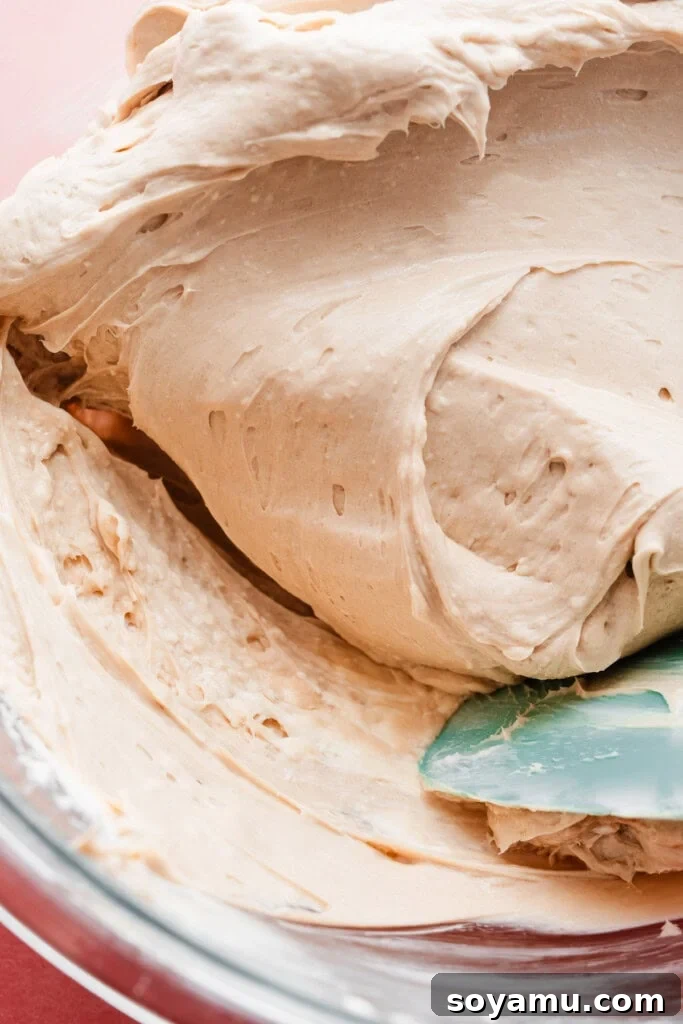
You can clearly see how small lumps of cream cheese might hide at the bottom of the bowl, even after initial mixing, as illustrated in the image below. This highlights precisely why thorough scraping of the bowl’s sides and bottom is so incredibly important for achieving a truly smooth cheesecake batter. (Note: The cheesecake batter shown below has a slightly different color due to the use of brown sugar in my Pineapple Upside Down Cheesecake recipe, which differs from the white granulated sugar used in this classic version.)
Step 3: Incorporate Eggs, Sour Cream, and Vanilla.
Add the large eggs one at a time, mixing each on medium speed only until it is just barely combined. Overmixing at this stage can incorporate too much air into the batter, which can cause the cheesecake to puff up excessively during baking and then collapse or crack upon cooling. After the eggs, gently mix in the room temperature sour cream, corn starch, salt, and vanilla extract until the mixture is cohesive and smooth. Be careful not to overmix; stop as soon as all ingredients are just incorporated.
Step 4: Bake in a Water Bath for Ultimate Creaminess.
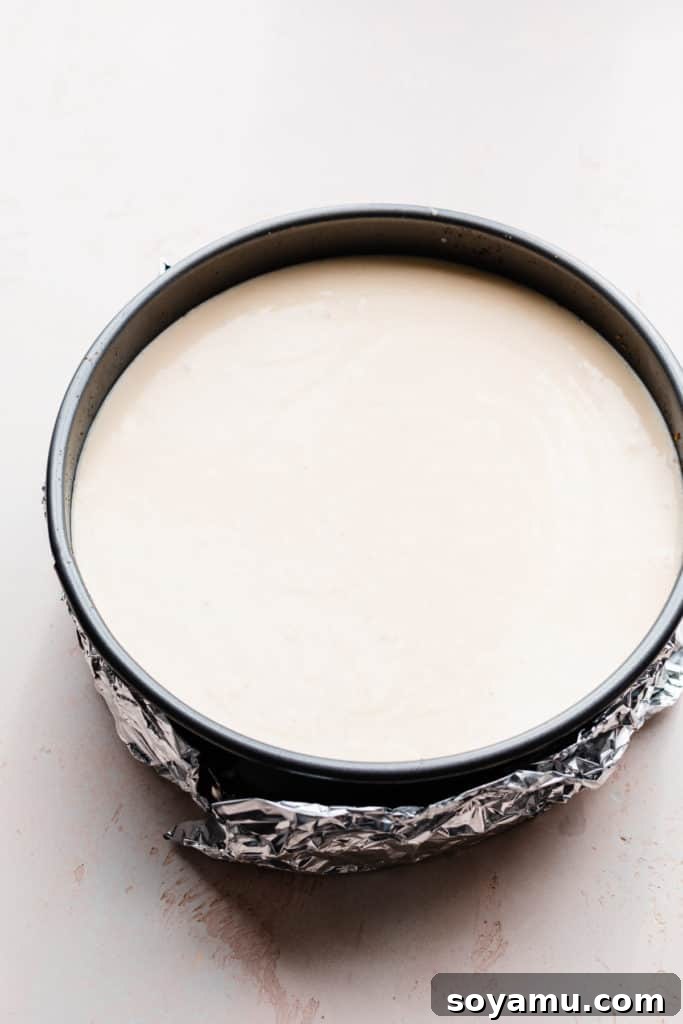
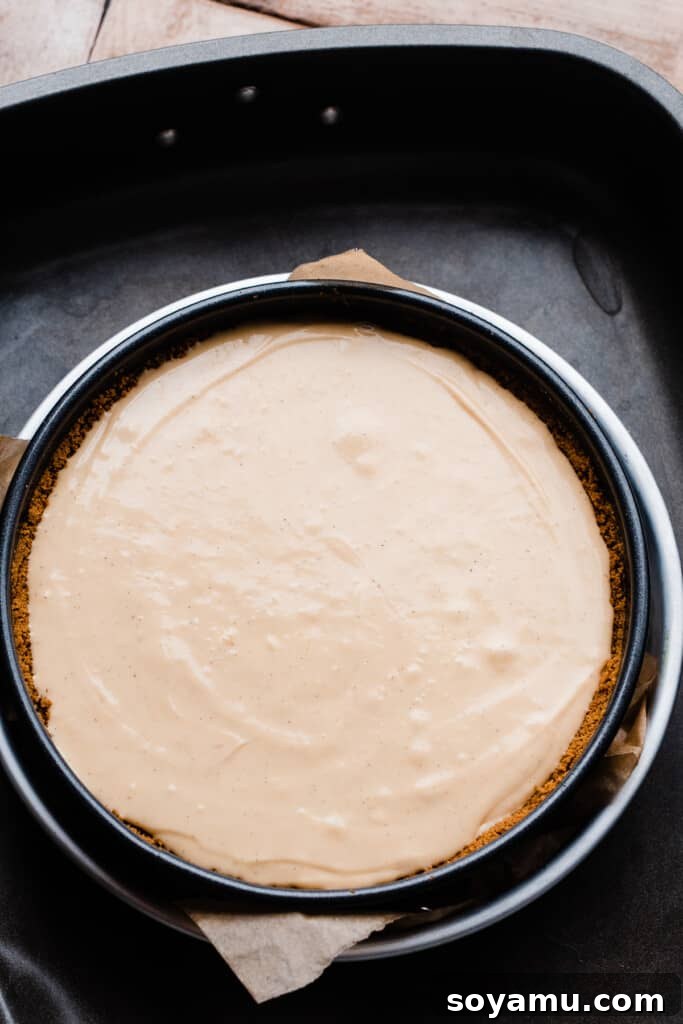
Carefully pour the silky-smooth cheesecake batter into your pre-baked graham cracker crust. To implement the crucial water bath, there are two highly effective methods:
Method A (Direct Placement): Place your springform pan (securely wrapped in multiple layers of heavy-duty aluminum foil to prevent water seepage) inside a larger roasting pan. Then, carefully place this roasting pan on the oven rack.
Method B (Barrier Method, Recommended): Position your springform pan inside a slightly larger 10-inch cake pan. This cake pan then sits inside your roasting pan. This creates an impenetrable barrier, virtually eliminating any risk of water leaking into your cheesecake.
Once your setup is in place on the oven rack, pour boiling water into the roasting pan only, ensuring the water level comes about halfway up the sides of the cheesecake pan. The steam created by the water bath ensures even, gentle cooking, prevents cracking, and contributes to the cheesecake’s signature creamy texture.
Step 5: Master the Cooling & Chilling Process.
The cooling phase is as critical as the baking itself for a crack-free cheesecake. Once the baking time is complete (typically 74 to 85 minutes, or until the center has a slight wobble and an instant-read thermometer reads 156°F to 160°F), turn the oven off. Crack the oven door open slightly and allow the cheesecake to cool gradually inside the oven for 1 hour. This slow cooling prevents drastic temperature changes that can cause cracks. After an hour, remove the cheesecake from the oven and place it on a wire rack to continue cooling to room temperature, which will take approximately another hour. Only once it has reached room temperature, cover the cheesecake with plastic wrap or foil and transfer it to the refrigerator. Chill for a minimum of 6 hours, but ideally overnight (12-24 hours) for the best texture, flavor development, and firm set. This extended chilling time is essential for optimal enjoyment.
Serving Your Cheesecake & Storing Leftovers
After your cheesecake has lovingly chilled overnight, it’s ready for its grand unveiling! Before serving, you can add any desired toppings to elevate its flavor and presentation. For those coveted, restaurant-quality slices with clean, sharp edges, employ this simple but effective trick: run your large, sharp knife under hot water, then immediately dry it completely before making each cut. Repeat this process – rinsing the knife in hot water and drying it – for every single slice. While it may seem a little fiddly, the result is consistently perfect, pristine slices that will impress your guests.
To preserve any delicious leftovers, store the cheesecake in an airtight container in the refrigerator. It will maintain its exquisite taste and texture for 3-4 days. For longer storage, see our expert tips on freezing below.
Irresistible New York Cheesecake Topping Ideas
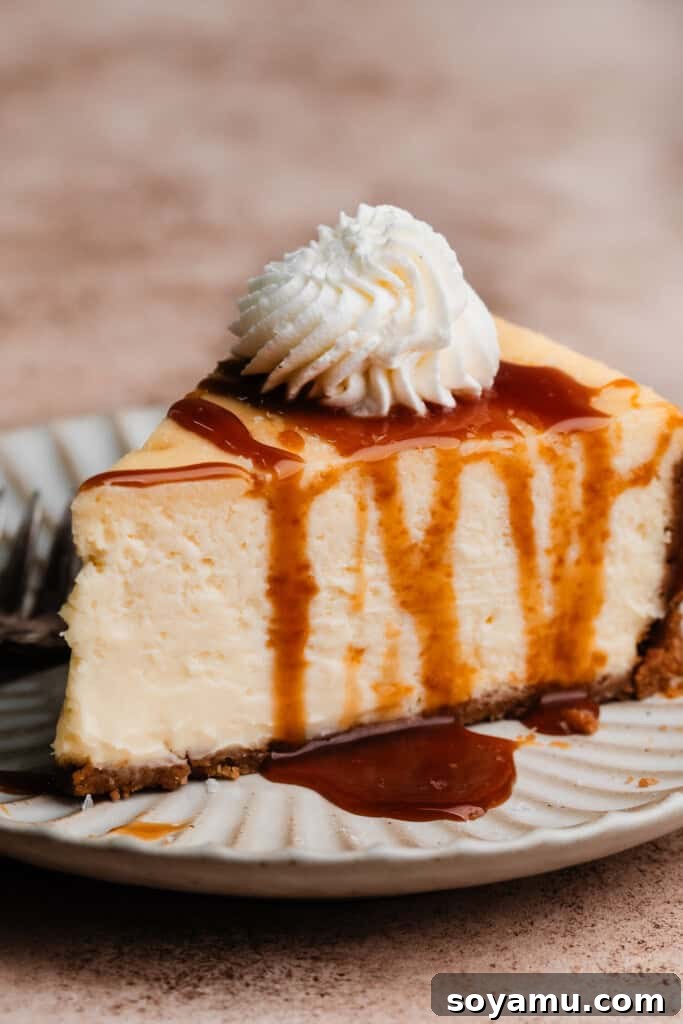
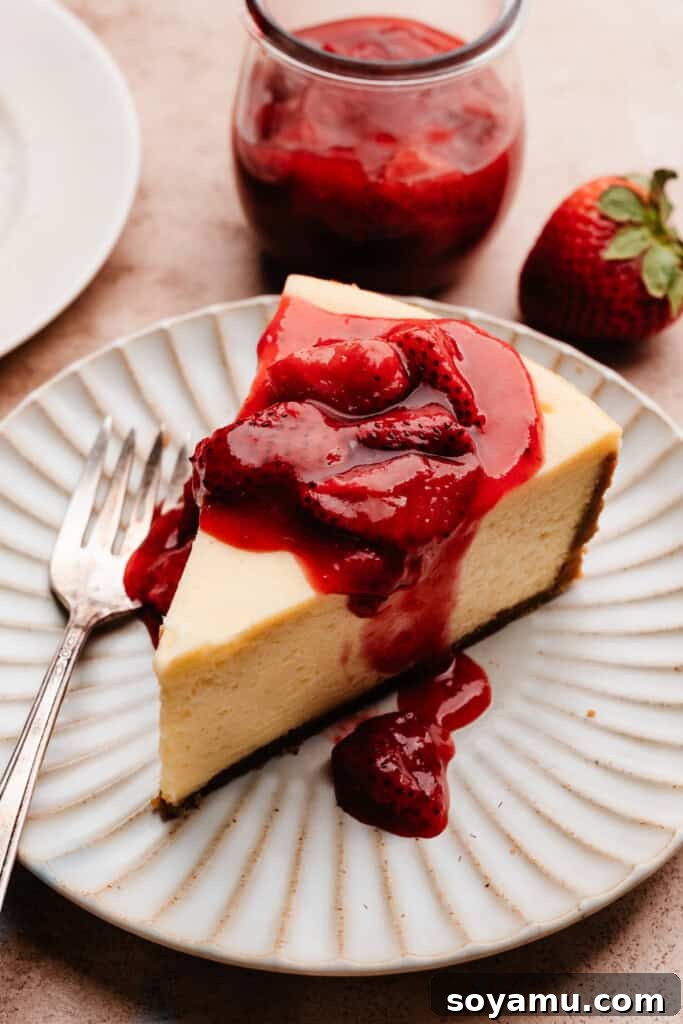
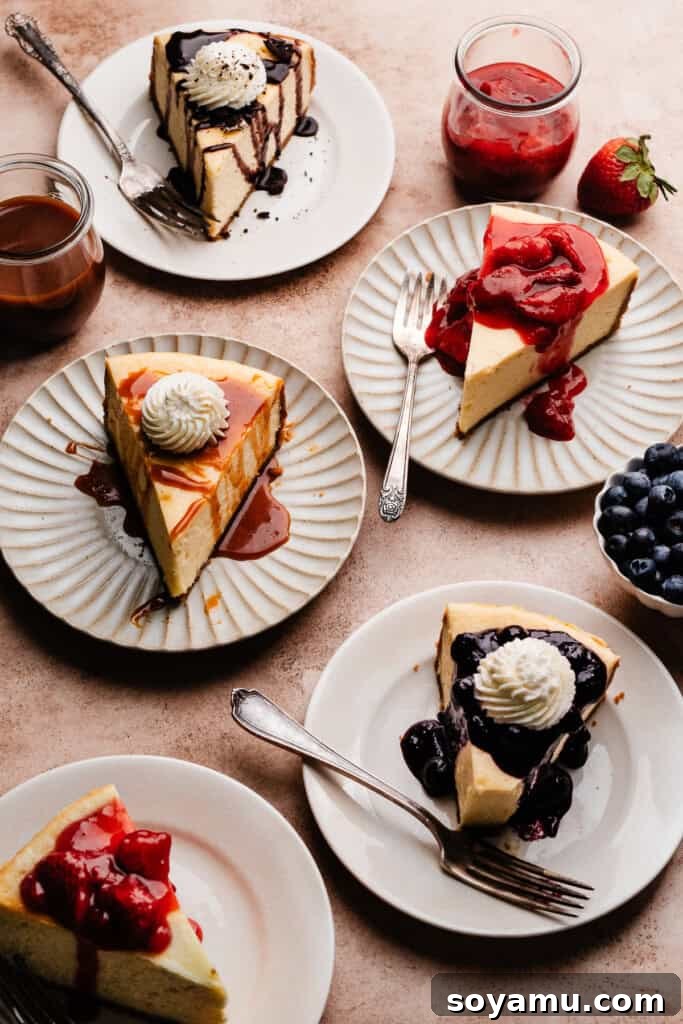
While a classic New York Style Cheesecake is phenomenal on its own, it also serves as the perfect canvas for a variety of delightful toppings. Elevate your dessert by adding fruity compotes, rich chocolate, decadent caramel, or a dollop of fresh whipped cream just before serving. Here are some of our favorite topping recipes to inspire you:
- Homemade Salted Caramel Sauce: A sweet and salty drizzle that adds a sophisticated touch.
- Quick Strawberry Compote: Bursting with fresh berry flavor, a classic pairing.
- Luscious Blueberry Topping: Sweet and slightly tart, a vibrant addition.
- Elegant Raspberry Coulis: A bright, tangy sauce that contrasts beautifully with the rich cheesecake.
- Velvety Lemon Curd: For a zesty, bright, and refreshing twist.
- Tangy Lime Curd: Similar to lemon, but with a unique citrus punch.
- **Chocolate Ganache:** A rich, glossy chocolate topping for the ultimate indulgence.
- **Fresh Berries:** A simple yet elegant choice, providing natural sweetness and a pop of color.
Expert Baking Tips for Achieving the Best New York Style Cheesecake
Making a show-stopping New York Style Cheesecake is within your reach with these crucial expert tips that address common pitfalls and ensure flawless results.
- Verify Oven Temperature with a Thermometer: An oven thermometer is an invaluable tool that reveals your oven’s true temperature, which often deviates from the set dial. Accurate oven temperature is paramount for consistent baking, especially for delicate desserts like cheesecake. Leave a thermometer in your oven at all times to monitor its calibration.
- Room Temperature Ingredients are Non-Negotiable: It is **imperative** that all cold ingredients, especially cream cheese, eggs, and sour cream, are brought to true room temperature. Cold ingredients will not emulsify properly, resulting in a lumpy, inconsistent batter. This directly impacts the cheesecake’s smooth texture and can even contribute to cracking. Plan ahead and take them out of the fridge at least 1-2 hours before you start baking.
- Avoid Overmixing the Batter: When combining the cream cheese and sugar, mix until just smooth. When adding eggs, mix them in one at a time on medium speed, only until they are *just* incorporated. Overmixing introduces too much air into the batter, which can cause the cheesecake to puff up like a soufflé in the oven and then buckle, sink, or crack severely as it cools.
- Do Not Overbake the Cheesecake: Overbaking is a leading cause of dry, cracked cheesecakes. Follow the doneness cues provided in the recipe card meticulously. The center of the cheesecake should still have a slight wobble when gently shaken; it will continue to set as it cools. A perfectly baked cheesecake will have set edges and a creamy, slightly jiggly center. Don’t panic if the very top develops a slight golden hue; this can happen without the cheesecake being overbaked.
- Utilize a Stand Mixer for Ease: While a hand mixer can certainly get the job done, this recipe truly shines when prepared with a stand mixer fitted with the paddle attachment. It ensures a consistent, thorough mix without overworking the batter, making the process much easier and more efficient.
- Gradual Cooling is Key: The transition from hot oven to cool room temperature can shock a delicate cheesecake, leading to cracks. Allowing the cheesecake to cool slowly within the turned-off, slightly ajar oven, followed by room temperature cooling, is vital for preventing this thermal shock.
- Chill Thoroughly: The lengthy chilling period (at least 6 hours, preferably overnight) is not just for firming up the cheesecake; it allows the flavors to meld and mature, resulting in a richer, more developed taste and the quintessential dense, creamy texture of a New York Style Cheesecake.
- Freezing for Future Enjoyment: Cheesecake freezes beautifully! For longer storage, ensure it’s completely chilled, then wrap individual slices or the whole cheesecake tightly in plastic wrap, followed by a layer of aluminum foil. Freeze for up to 1-2 months. Thaw in the refrigerator overnight before serving.
Frequently Asked Questions About New York Style Cheesecake
While planning ahead is best, you can “cheat” this process with a few gentle tricks. For cream cheese and sour cream, gently warm them separately in the microwave for very short bursts—think 4-6 seconds at a time. Do two blocks of cream cheese on a plate for 5 seconds per side, repeating if necessary, until slightly softened but not melted. Place eggs in a bowl of warm (not hot!) water for about 10-15 minutes.
Yes, you can absolutely halve this recipe! It bakes beautifully as a half batch. I recommend baking it in an 8×8 or 9×9 inch square pan lined with parchment paper for ease. Half the batter might still be a bit much for a standard 6-inch springform pan, so a square pan is usually the better option for scaled-down recipes.
Yes, the extensive chilling period is an essential part of the cheesecake-making process. It allows the internal structure to fully set, the flavors to deepen and meld, and the texture to transform into that signature dense, creamy consistency. Allow the cheesecake to cool completely to room temperature after baking, then transfer it to the fridge to chill for at least 6 hours, or ideally overnight (up to 24 hours) before attempting to slice and serve. Patience here truly rewards you with perfection!
I highly recommend it! The water bath (or “bain-marie”) is a game-changer for cheesecake. The hot water creates a moist, steamy environment in the oven, which helps the cheesecake cook evenly and gently. This gradual cooking prevents the edges from setting too quickly while the center remains raw, drastically reducing the risk of cracks and ensuring an incredibly smooth, creamy, and custard-like texture throughout. Without it, your cheesecake is more prone to drying out and cracking.
Preventing leaks is a common concern, but there are reliable methods.
**Option 1 (Elevated):** Place the roasting pan (filled with water) on the rack *below* your cheesecake, which is directly on an oven rack. The steam will still rise and create the desired humid environment.
**Option 2 (Barrier Method, Most Recommended):** Wrap the base of your springform pan very well in several layers (at least 3-4, often 8-10 for absolute security) of heavy-duty aluminum foil. Then, place this foil-wrapped springform pan inside a 10-inch cake pan. Place *this entire setup* inside your roasting pan. Pour boiling water only into the *roasting pan*. This double-layer barrier is highly effective. Simply wrapping the springform pan and placing it directly into a water-filled roasting pan will almost always result in some leakage, even with many layers of foil, as the seams can be compromised by the water pressure.
A New York Style Cheesecake is distinctively richer and denser than many “traditional” cheesecakes. The key difference lies in its ingredients: it typically uses more full-fat cream cheese and incorporates sour cream instead of (or in addition to) heavy cream. The inclusion of more eggs also contributes to its luxurious, decadent, and intensely creamy consistency, making it a truly indulgent dessert experience.
Special Tools for Achieving New York Style Cheesecake Excellence
While some baking can be improvised, certain tools are highly recommended for achieving the best results with a New York Style Cheesecake. These tools ensure proper baking, prevent common issues, and make the process smoother.
- 9-inch Springform Pan: This is an essential item for any cheesecake baker. Its removable sides allow for easy release of the delicate cheesecake without damaging its beautiful structure, ensuring a perfect presentation every time.
- Large Roasting Pan: Crucial for the water bath method. You’ll need a roasting pan large enough to comfortably hold your springform pan (or your 10-inch cake pan, if using the barrier method), with enough room around the sides to pour boiling water. Remove any racks that may come with the roasting pan.
- 10-inch Cake Pan (or similar): This creates a foolproof barrier against water leakage during the water bath. By placing your 9-inch springform pan inside this slightly larger cake pan, then placing both into the roasting pan filled with water, you virtually eliminate the risk of water seeping into your cheesecake. If you prefer not to purchase an extra pan, you can wrap your springform pan very, very well in 8 to 10 layers of heavy-duty aluminum foil, though the cake pan method offers superior security. Any pan you already own that fits around the 9-inch springform and inside your roasting pan will work.
- **Electric Mixer (Handheld or Stand Mixer):** While not strictly “special,” an electric mixer (either a hand mixer or a stand mixer with a paddle attachment) is highly recommended for achieving the incredibly smooth and lump-free batter essential for a New York Style Cheesecake. It ensures proper incorporation of ingredients without overworking them manually.
Now that You’ve Mastered the Classic Cheesecake, Try These Delicious Variations!
Once you’ve confidently baked your perfect New York Style Cheesecake, you’ll have the skills to tackle a range of exciting cheesecake flavors. Expand your dessert repertoire with these incredible recipes:
- Zesty Key Lime Cheesecake: A refreshing, tangy twist perfect for citrus lovers.
- Sweet Strawberry Cheesecake: A timeless classic featuring vibrant homemade strawberry sauce.
- Decadent Pecan Pie Cheesecake: A rich fusion of two beloved dessert traditions.
- Indulgent Bailey’s Chocolate Cheesecake: A sophisticated, boozy treat with rich chocolate ganache.
- Dreamy Biscoff Cheesecake: Featuring the caramelized spice cookie flavor throughout.
- Irresistible Triple Nutella Cheesecake: For the ultimate hazelnut chocolate indulgence.
- Bright Lemon Blueberry Cheesecake: A harmonious blend of tart lemon and sweet blueberries.
Did you make this recipe? We’d love to hear from you!
Please leave a comment and a star rating below to let us know how you enjoyed the recipe. Your feedback is invaluable and greatly helps our small business!
Classic New York Cheesecake Recipe
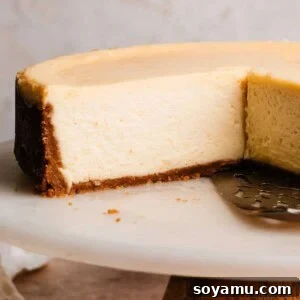
Summary: My Classic New York Style Cheesecake is an incredibly easy dessert to make at home, but feels like it came from a fancy restaurant! It’s rich and creamy, with a light yet decadent texture, and a crisp graham cracker crust. Don’t be intimidated – our recipe walks you through everything you need to know for cheesecake success every time!
Author: Stephanie Simmons
Prep Time: 30 mins
Cook Time: 1 hr 15 mins
Chilling Time: 6 hrs
Total Time: 7 hrs 45 mins
Servings: 8 to 16 slices
Share this recipe: Pin It! Print Recipe
Ingredients
For the Crust:
- 3 cups graham cracker crumbs (276 grams)
- 1/2 cup salted butter, melted (113 grams)
For the Cheesecake:
- 32 ounces full fat cream cheese, at room temperature (use the block style – 904 grams)
- 1 and 1/2 cups granulated sugar (308 grams)
- 4 large eggs, at room temperature
- 3/4 cup full fat sour cream, at room temperature (180 grams)
- 1 and 1/2 tsp corn starch
- 2 tsp vanilla extract
- Pinch of salt
Instructions
- Make the Crust: Preheat oven to 350°F (175°C). Spray a 9-inch springform pan with nonstick spray and ensure the bottom is securely fastened. Stir together crust ingredients and press firmly into the prepared pan and slightly up the sides (refer to photos above for guidance). Bake for 10 minutes. Set aside to cool. Keep the oven on at 350°F. Fill a large pot with water and set it on your stove to boil, and get out a large roasting pan – you will need this for your water bath later.
- Make the Cheesecake Filling: Remember that all cold ingredients must be at room temperature before you start, or the filling will not turn out smooth. In a large mixing bowl, beat the softened cream cheese with an electric mixer until creamy, about 1-2 minutes. Add the granulated sugar and mix until well incorporated, about 1 minute, scraping the sides and bottom of the bowl with a rubber spatula frequently to ensure no lumps. Add the eggs one at a time, mixing on medium speed after each until just incorporated – if you over-mix, the cheesecake can inflate and overflow in the oven, or crack. Be sure to scrape the bottom of the bowl between each egg addition, as small lumps of cream cheese often hide there. Finally, add the vanilla extract, sour cream, corn starch, and salt, mixing until just combined.
- Prepare the Water Bath: Bring the large pot of water to a boil on the stovetop. For a leak-proof water bath, set your springform pan (wrapped well in foil if not using a barrier pan) inside a 10-inch cake pan, and place this assembly into your large roasting pan. Carefully position the roasting pan on the center oven rack. Pour the boiling water into the roasting pan only, ensuring the water comes up about halfway around the cheesecake pan.
- Assemble & Bake Cheesecake: Pour the smooth cheesecake batter evenly over your prepared and baked crust. Bake the cheesecake for 74 to 85 minutes. The cheesecake is done when it has only a slight wobble in the center, and a knife inserted into the center (and removed) has just a small bit of thick batter clinging to it. An instant-read thermometer inserted into the center should read approximately 156°F to 160°F (avoid touching the bottom of the pan as this will give a false reading).
Once baked, turn off the oven and crack the oven door open. Leave the cheesecake inside for 1 hour to gradually begin cooling. This slow transition is crucial for preventing cracks. - Cheesecake Cooling: After the hour in the cooling oven is complete, carefully remove the pan from the oven. It should be cool enough to handle. Remove any foil or the barrier cake pan, and set the springform pan on a wire rack. Allow the cheesecake to cool completely to room temperature, which will take approximately 1 hour more. Once at room temperature, cover the cheesecake securely with plastic wrap or foil and refrigerate for at least 6 hours, or preferably overnight (up to 1 day) before attempting to remove it from the pan and serve.
- Serve + Store: Once thoroughly chilled, unlatch and remove the sides of the springform pan. If desired, carefully transfer the cheesecake to a cake stand or serving plate. Add any desired toppings (refer to the topping ideas in the blog post above). Then, slice with a hot, dry knife (wiping after each slice) and serve! Store any leftover cheesecake in an airtight container in the fridge for 3-4 days. For longer storage, see freezing tips in the blog post.
- Optional: For an extra special touch, serve individual slices with a dollop of fresh whipped cream. You can easily make a homemade whipped cream using the method from my Key Lime Cheesecake recipe. There’s no need to pipe it elaborately; simply let your guests dollop it onto their slices themselves.
Notes
Crust Note: If you pulsed your own graham crackers into crumbs from whole crackers, you might find the mixture slightly drier and may need 1-2 tablespoons of additional melted butter to help it come together properly. This is often the case because homemade crumbs tend to be less uniform and absorb butter differently compared to finely milled store-bought graham cracker crumbs, which usually won’t require this extra butter.
Nutrition (Approximate per slice, based on 8 servings)
Serving: 1 slice, Calories: 859kcal, Carbohydrates: 69g, Protein: 13g, Fat: 60g, Saturated Fat: 34g, Polyunsaturated Fat: 3g, Monounsaturated Fat: 16g, Trans Fat: 0.5g, Cholesterol: 251mg, Sodium: 698mg, Potassium: 273mg, Fiber: 1g, Sugar: 50g, Vitamin A: 2147IU, Vitamin C: 0.2mg, Calcium: 175mg, Iron: 2mg
Nutrition information is automatically calculated and should only be used as an approximation. Actual values may vary based on specific ingredients and preparation methods.