
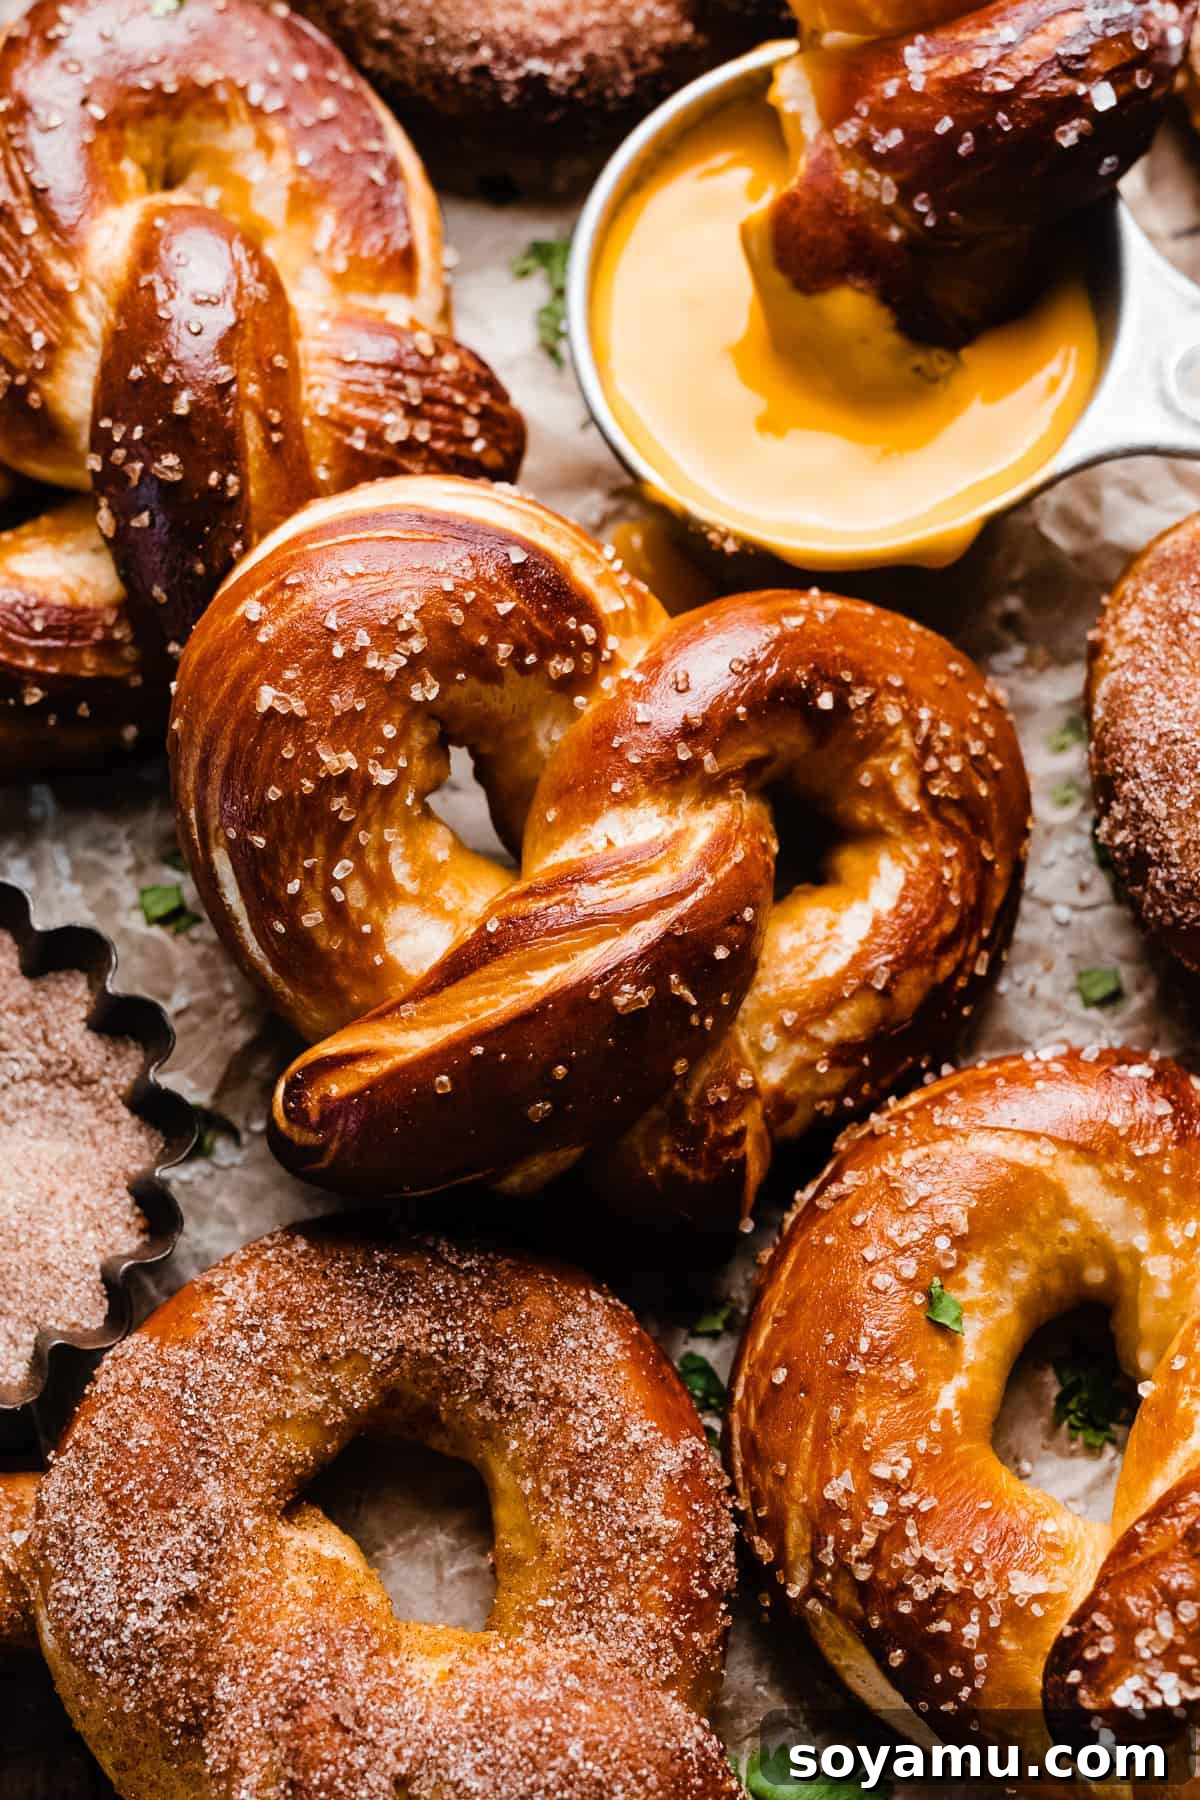
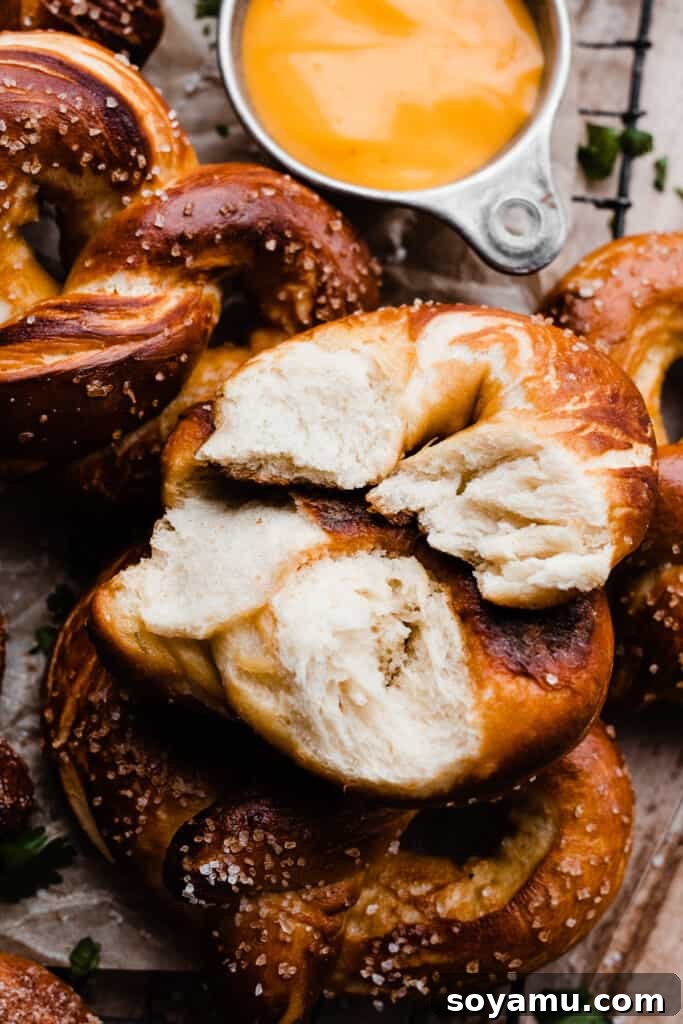
There’s something undeniably magical about a warm, fluffy, and chewy soft pretzel. That distinctive golden-brown crust, the satisfying chew, and the unique flavor profile – it’s a snack that instantly evokes feelings of nostalgia, often associated with bustling shopping malls or lively street fairs. While these delightful treats might seem like something best left to professional bakeries, we’re here to tell you a secret: **Soft Pretzels** are surprisingly easy to make right in your own kitchen! Forget the long lines and elevated prices; with this comprehensive guide, you’ll be whipping up batches that taste even better than your favorite mall pretzel, with a fraction of the effort you might imagine. This simple, hands-on dough comes together effortlessly, transforming into fluffy, chewy perfection after a quick bake. The secret to their signature taste and texture? A simple but crucial baking soda bath, which we’ll walk you through. Plus, we’ve included a variety of recipe variations, from classic salty to delightful sweet options, complete with fun dip ideas for every craving. Get ready to impress your family and friends with these irresistible homemade soft pretzels!
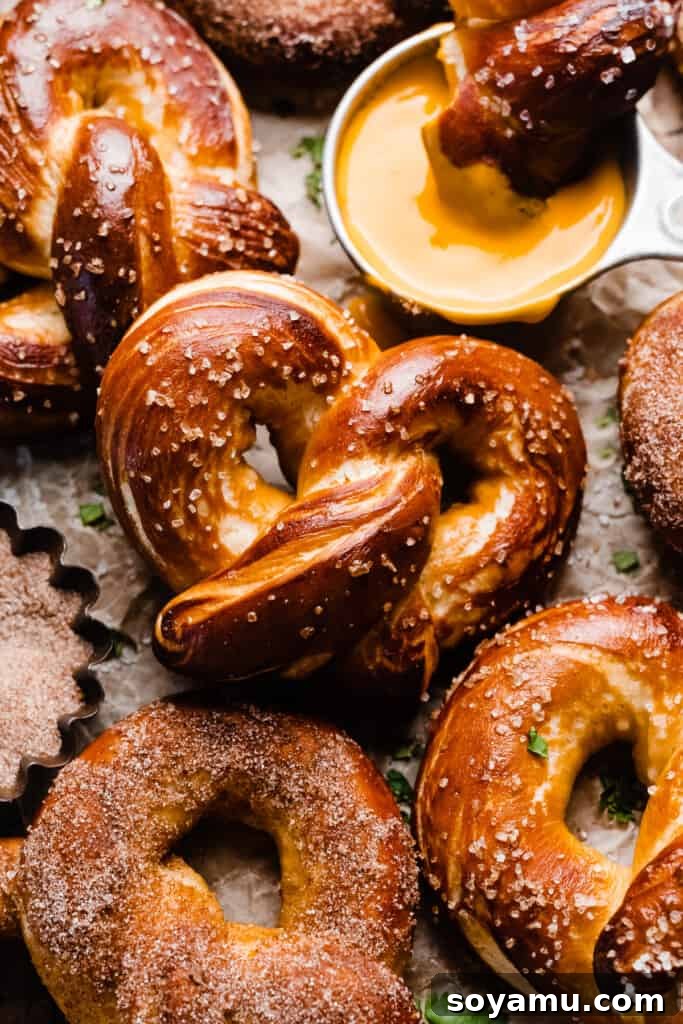
Why You’ll Fall in Love with Homemade Soft Pretzels
Once you try making soft pretzels at home, you’ll wonder why you ever bought them. Here’s why this recipe is destined to become a household favorite:
- Remarkably Easy Recipe: Don’t be intimidated by working with yeast! This recipe is designed with beginners in mind, simplifying the bread-making process into straightforward steps. We’ll guide you through each stage, ensuring a successful and rewarding baking experience, even if you’re a complete bread baking newbie. The dough is forgiving and incredibly fun to work with, making it a perfect project for bakers of all skill levels.
- Authentic Mall Pretzel Flavor: Our homemade version captures that iconic soft, chewy texture and slightly tangy, savory flavor you crave from the pretzels found at the mall. The critical baking soda bath is the key to achieving that distinctive crust and taste, replicating the authentic pretzel experience right from your oven. You’ll be amazed at how closely they resemble your beloved store-bought favorites, often surpassing them in freshness and quality.
- Endless Customizable Flavors: The beauty of homemade pretzels lies in their versatility. Whether you prefer the timeless appeal of a classic salty pretzel or something a little more adventurous, this recipe serves as a perfect canvas. Brush them with melted butter and a generous sprinkle of coarse salt straight out of the oven for a savory delight, or transform them into a sweet treat by coating them in cinnamon sugar. The possibilities are truly endless, allowing you to cater to any preference or occasion.
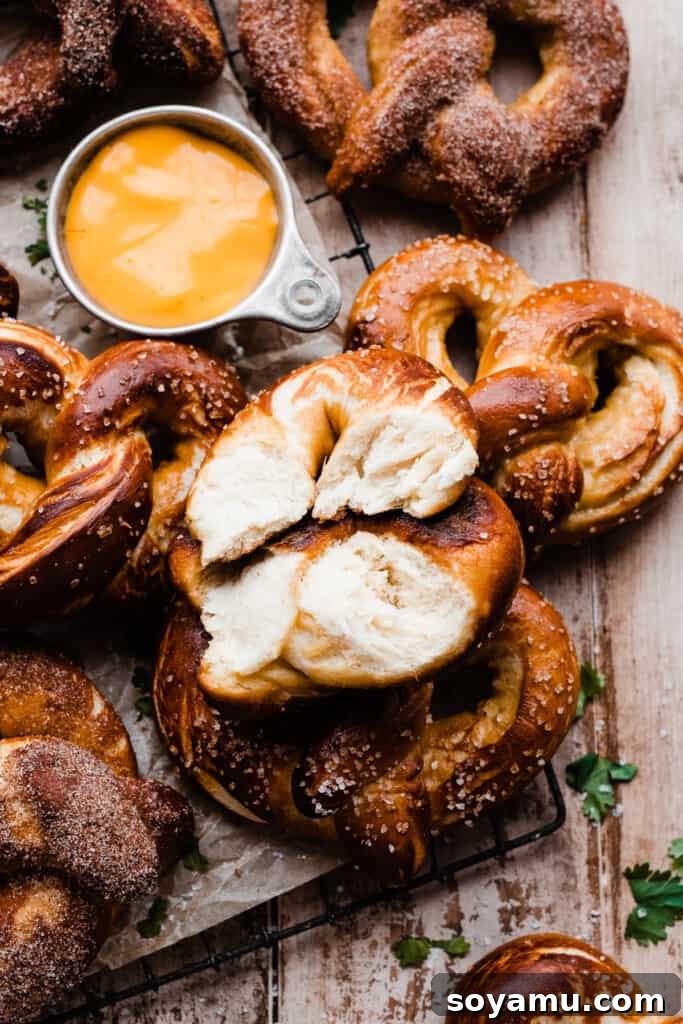
Essential Ingredients for Perfect Pretzels
Crafting the perfect soft pretzel starts with understanding the role of each ingredient. Below is a detailed overview of what you’ll need and why each component is crucial. Remember, precise measurements and detailed instructions are provided in the full recipe card at the bottom of this post.
- Butter: For the richest flavor, we recommend using salted butter. The salt enhances the overall taste of the pretzel dough, creating a more balanced and delicious result. If you only have unsalted butter on hand, that’s perfectly fine; just ensure you don’t skimp on the salt measurement later in the recipe. Butter also contributes to the dough’s tenderness and rich mouthfeel.
- Milk: We typically use 2% milk, as it’s a common pantry staple. However, whole milk will yield a slightly richer dough, while skim milk can also be used without significant issues, though it might result in a slightly less tender crumb. The milk provides liquid for the yeast, adds moisture, and contributes to the soft texture. Ensure it’s warmed to the correct temperature for activating the yeast.
- Yeast: This recipe calls for instant yeast, also known as rapid rise yeast. This type of yeast can be added directly to the dry ingredients without needing to proof it separately, making the process faster and more convenient. Do NOT use active dry yeast unless you adjust the method to proof it in warm milk first, as it requires activation before mixing. Yeast is essential for the dough’s rise, creating that light and airy yet chewy texture.
- Brown Sugar: Light brown sugar plays a dual role in our pretzel dough. It provides a subtle sweetness that contributes to the classic pretzel flavor profile, balancing the savory notes. More importantly, it acts as food for the yeast, helping it activate and produce carbon dioxide, which makes the dough rise. Do not omit brown sugar, as it is crucial for both flavor and fermentation.
- Salt: Beyond just flavor, salt is vital in bread making. It controls the yeast’s activity, preventing it from over-fermenting and ensuring a steady, even rise. It also strengthens the gluten structure, contributing to the pretzel’s characteristic chewiness. A good quality salt makes a noticeable difference in the final taste.
- All-Purpose Flour: This is the structural backbone of our pretzels. For the best and most consistent results, it’s imperative to measure your flour correctly. Instead of scooping the measuring cup directly into your flour bag (which compacts the flour and leads to too much being used), spoon the flour into the measuring cup and then level it off with a flat utensil. Alternatively, using a kitchen scale for precise measurement is always the most accurate method and highly recommended to avoid a dry, dense dough.
- Egg (for Egg Wash): A beaten egg creates a glossy egg wash that is brushed onto the pretzels just before baking. This step is critical for several reasons: it helps the pretzels bake to a beautiful deep golden-brown color, gives them a lovely shine, and acts as an adhesive for any toppings, like coarse salt or cinnamon sugar.
Ingredient Substitutions and Dietary Considerations
While this recipe is designed for optimal results with the listed ingredients, here are some notes on potential adjustments for dietary needs:
- Dairy-Free Option: If you need to make these pretzels dairy-free, simply substitute your favorite trusted dairy-free milk (such as almond or soy milk) and dairy-free butter alternative. Ensure they are suitable for baking to achieve the best texture and flavor. The process remains the same.
- Gluten-Free Note: Unfortunately, this specific recipe has not been tested with gluten-free flour. The unique texture of soft pretzels relies heavily on the gluten development in all-purpose flour. Substituting gluten-free flour may drastically alter the texture and require significant adjustments to liquid and other ingredients. We recommend seeking out a recipe specifically designed for gluten-free pretzels for reliable results.
Mastering the Art: How to Make Soft Pretzels Step-by-Step
Embark on your journey to homemade pretzel perfection with these detailed steps, designed to guide you from basic ingredients to mouth-watering results.
Step 1: Preparing the Dough – The Foundation of Flavor and Texture
Begin by melting your butter in a large mixing bowl. In a separate 2-cup glass measuring cup, gently warm the milk in your microwave in short 15-20 second bursts, stirring between each, until it reaches an ideal temperature of 100°F to 110°F (38°C to 43°C). This warmth is crucial for activating the yeast without killing it. If you’re unsure, an instant-read thermometer is your best friend here. Pour the warm milk into the bowl with the melted butter, then add the instant yeast, brown sugar, and salt. Whisk these wet ingredients thoroughly until well combined. Finally, gradually stir in the all-purpose flour until a shaggy, somewhat sticky dough forms. This initial mixing is important for distributing ingredients evenly before kneading.
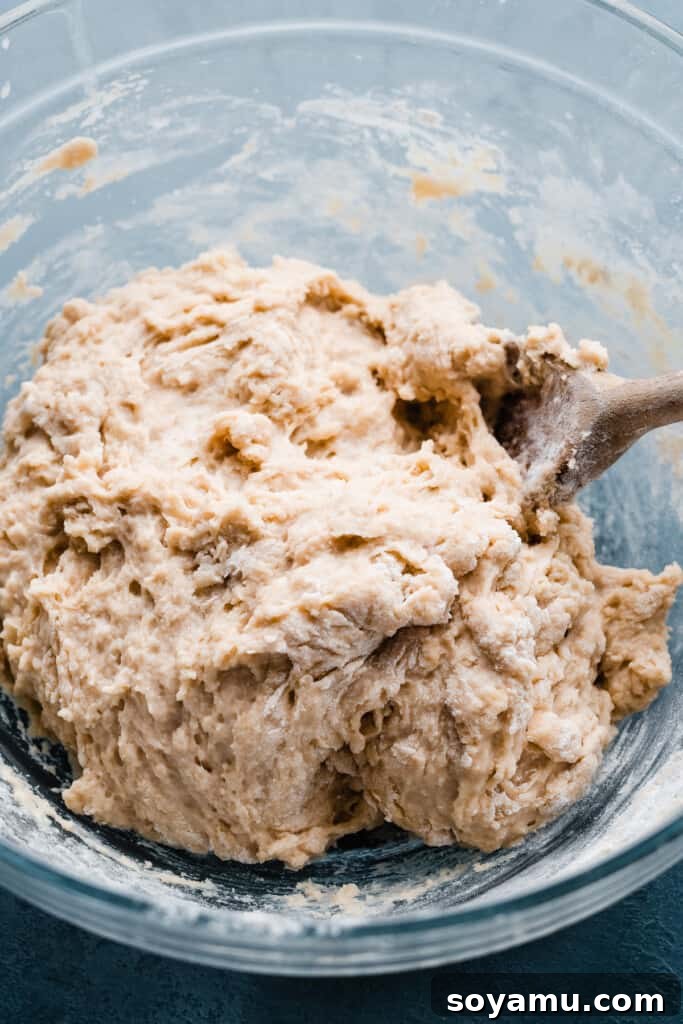
Step 2: Kneading and the All-Important Rise – Developing the Perfect Chew
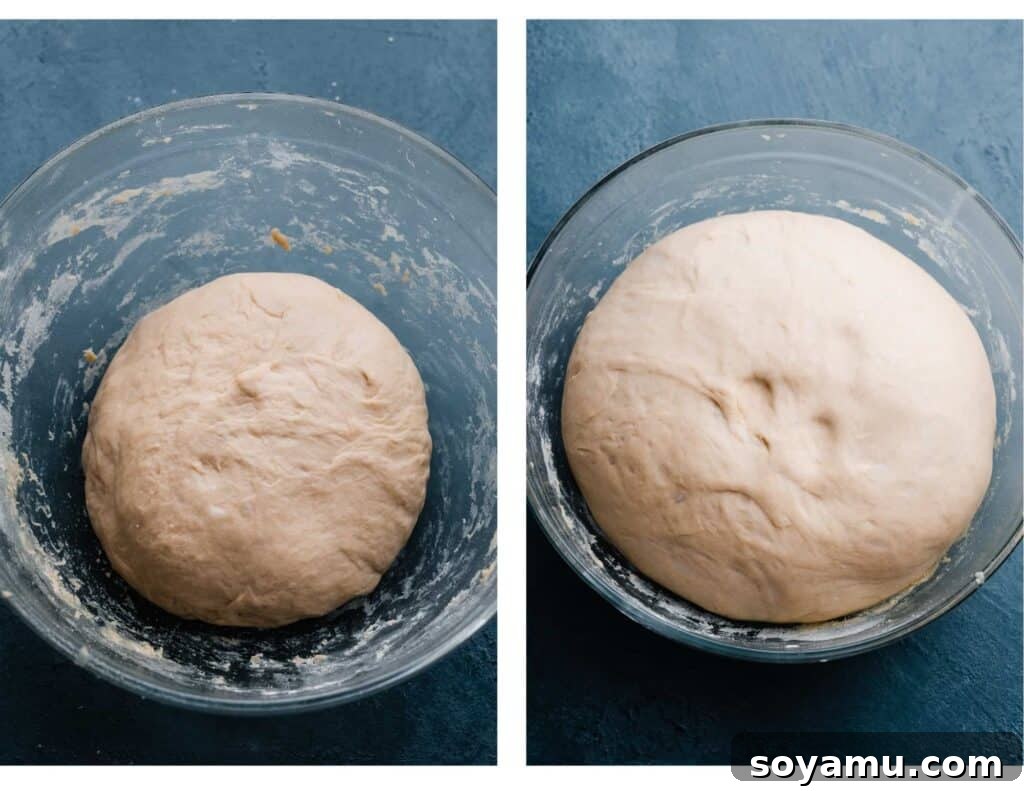
Lightly flour a clean countertop and turn the shaggy dough out onto it. Begin to knead the dough vigorously for about 4-5 minutes. As you knead, the dough will transform from rough and sticky into a smooth, elastic ball. This process is vital for developing gluten, which is what gives pretzels their characteristic chewiness. You’ll know it’s sufficiently kneaded when it feels supple and springs back when lightly indented with a fingertip. Once kneaded, lightly grease the mixing bowl (you don’t need to wash it out) with a nonstick spray or a little oil, and place the dough ball back inside. Cover the bowl with a clean kitchen towel and allow the dough to rise in a warm place for approximately 1 hour, or until it has visibly doubled in size. The exact rising time can vary depending on your kitchen’s temperature; a warmer environment will shorten the rise, while a cooler one will extend it. The key is to watch for the doubling in size, not just the clock.
Step 3: Dividing and Expertly Shaping Your Pretzels – Crafting the Iconic Twist
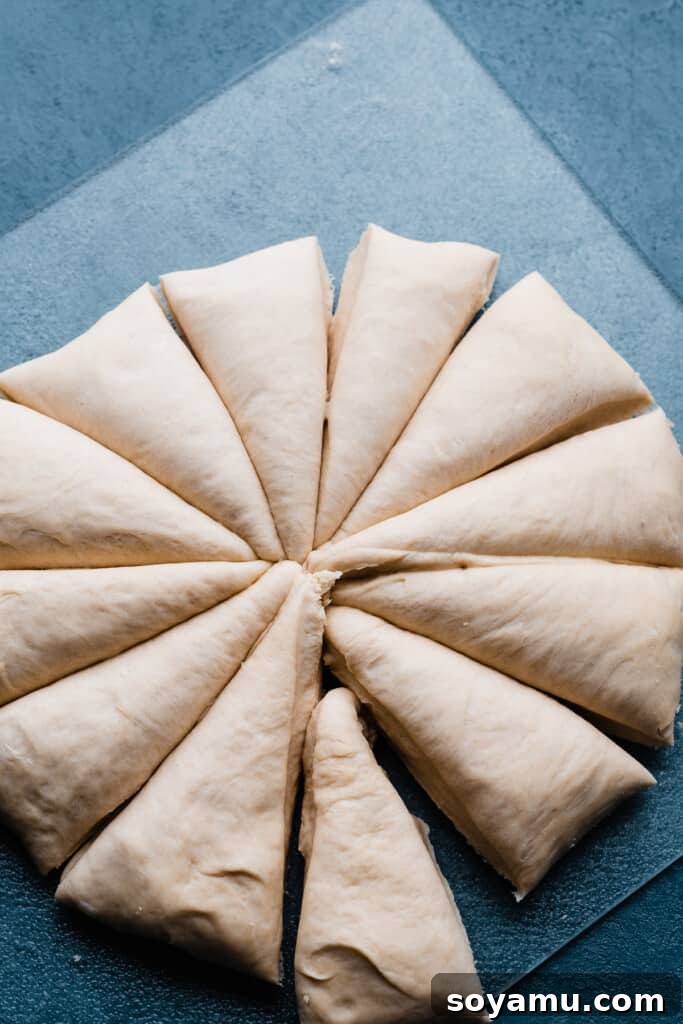
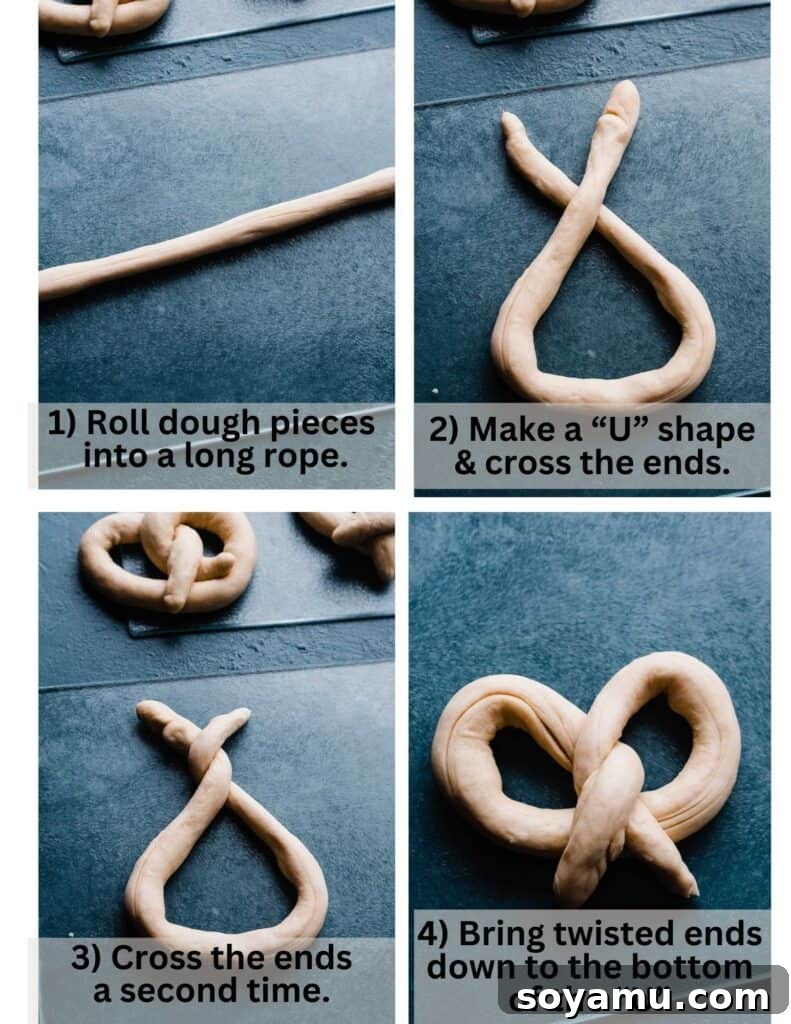
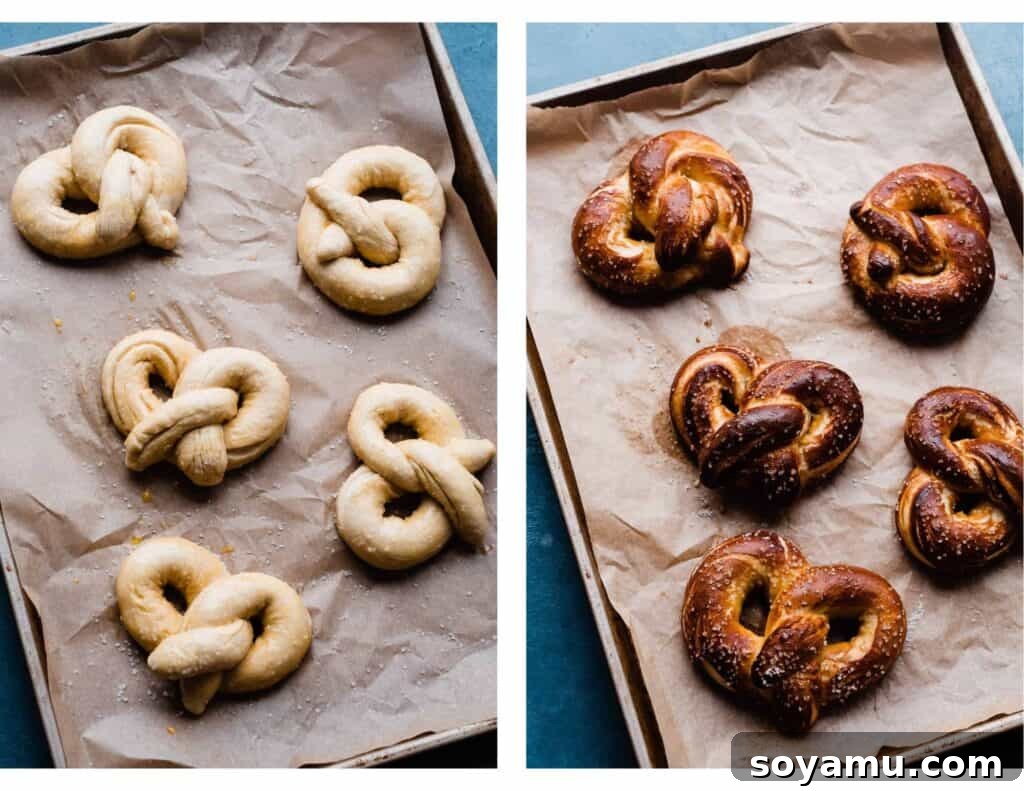
Once your dough has majestically doubled in size, gently punch it down to release the air. Transfer it to an unfloured countertop and carefully press it into an oval shape, roughly 9 inches across. Using a sharp knife (a quick spritz of nonstick spray on the knife helps prevent sticking), slice the dough into quarters, then slice each quarter into three equal pieces, resulting in 12 slender triangles of dough in total. For precision, each piece should weigh between 80-90 grams. Keep the remaining dough pieces covered with the kitchen towel to prevent them from drying out while you work. Take one piece of dough and, with both hands, roll it out on the counter into a long rope, about 18-22 inches in length. Start from the middle and gradually work your hands outwards, applying even pressure. Once you have a long rope, form it into a large “U” shape. Pick up the ends of the “U” and cross them over each other twice, creating a twist. Then, bring these twisted ends back down over the curved bottom of the “U” to form the classic pretzel shape. Repeat this process with the next three pieces of dough, forming a batch of four pretzels. We will work in batches to manage the boiling process efficiently. (For a visual guide, refer to the step-by-step images located below the next image.)
Step 4: The Essential Baking Soda Bath – Unlocking That Classic Pretzel Flavor
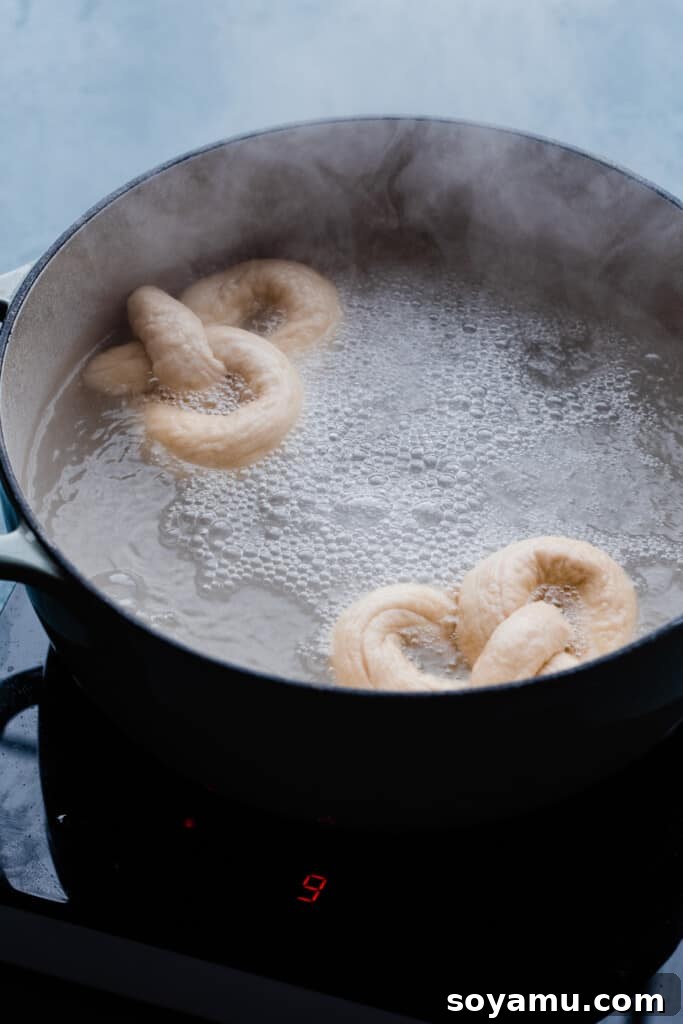
This step is the true secret to authentic soft pretzels. In a large pot or Dutch oven, combine 9 cups of water with 1/2 cup of baking soda and bring it to a rolling boil. It’s crucial that the water is boiling, not just warm, to achieve the desired chemical reaction. Carefully drop 2-3 shaped pretzels into the boiling baking soda solution at a time. Allow them to simmer for a brief 20-30 seconds. This alkaline bath causes the Maillard reaction to occur more readily during baking, resulting in that beautiful deep golden-brown crust and the distinctive, slightly tangy pretzel flavor. Do not leave them in for longer than 30 seconds, as this can impart an undesirable metallic taste. Promptly remove the pretzels with a slotted spoon or fish spatula, allowing any excess liquid to drain back into the pot, and place them onto a prepared baking sheet lined with parchment paper. Aim for about 4 pretzels per sheet to ensure even baking.
Step 5: Egg Wash, Topping, and Baking to Golden Perfection
Preheat your oven to a blazing 450°F (232°C). As soon as the pretzels come out of the baking soda bath and are on the parchment-lined baking sheet, brush them generously with the beaten egg wash. This egg wash ensures a deep golden color and a beautiful sheen. If you’re making classic savory pretzels, sprinkle them with coarse pretzel salt immediately after the egg wash. Bake this batch of four pretzels for 10-12 minutes, or until they achieve a rich, deep golden-brown color and are puffed up beautifully. For ultimate assurance, an instant-read thermometer inserted into the thickest part of a pretzel should register between 200°F and 210°F (93°C-99°C). While one batch bakes, continue shaping, boiling, and preparing the next batch of pretzels, repeating the process until all 12 are baked to perfection.
Serving and Storing Your Homemade Pretzels
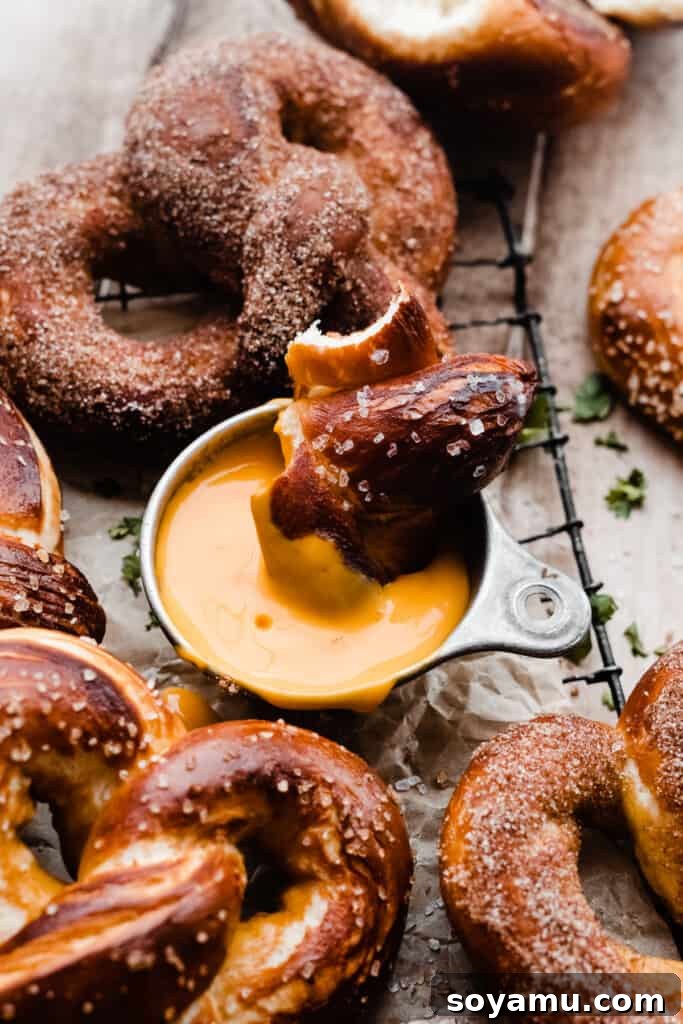
The best way to enjoy these soft pretzels is undoubtedly fresh and piping hot from the oven! Their texture and flavor are at their absolute peak immediately after baking. For an extra touch of indulgence, brush them with a little melted butter as soon as they emerge from the oven. Then, finish them with your chosen toppings or dips. We’ve got plenty of exciting flavor variations and dip ideas just a few sections down.
While homemade pretzels are glorious fresh, you might have leftovers or want to prepare them slightly ahead. They can be gently reheated in a warm oven (around 300°F/150°C for 5-7 minutes) to revive some of their warmth and softness on the same day. However, it’s important to manage expectations: pretzels are truly a “first-day” food. Their delightful chewiness and fluffy interior are best experienced within hours of baking. By the second day, while still edible, their texture will have changed, becoming denser and less fresh. We highly recommend making only what you plan to consume immediately for the optimal experience, or freezing unbaked, shaped dough for later use (see FAQs).
Expert Success Tips for Flawless Homemade Pretzels
Even though this recipe is beginner-friendly, a few insider tips can elevate your pretzel game from good to absolutely phenomenal. Pay close attention to these details for consistently perfect results:
- The Importance of an Oven Thermometer: Many ovens, especially older models, can run significantly hotter or colder than the temperature you set them to. An oven thermometer is an inexpensive tool that provides an accurate reading of your oven’s actual temperature. For most baked goods, especially yeasted breads like pretzels, precise temperature is critical for proper rise and browning. Keep one in your oven at all times to monitor its calibration and ensure consistent baking.
- Invest in a Kitchen Scale for Flour Accuracy: Measuring flour by volume (cups) can lead to wildly inconsistent results. Depending on how packed or loose your flour is, a “cup” can vary by ounces, which can significantly impact the dough’s hydration and the final texture of your pretzels. A food scale is the most accurate way to measure flour by weight, ensuring you use the precise amount specified in the recipe. This small investment will dramatically improve the consistency and quality of all your baking endeavors.
- Understanding Dough Rising: When working with yeast doughs, like this pretzel recipe, the most important indicator of a successful rise is not the clock, but the dough itself. Your dough needs to double in size during the rise time. While the recipe provides an approximate time (around 1 hour), actual rise time can be influenced by many factors. On a warm summer day or in a particularly warm kitchen, the dough might double in as little as 45 minutes. Conversely, on a cold day or in a cooler home, it could take 90 minutes or even longer. Trust your eyes; once the dough has clearly doubled in volume, it’s ready for the next step, regardless of how much time has passed. For reference, my dough took 60-65 minutes on a cloudy winter day when my house temperature was between 67-69 degrees Fahrenheit.
- Don’t Overcrowd the Pot or Baking Sheet: When boiling the pretzels in the baking soda bath, resist the urge to cram too many into the pot at once. This will lower the water temperature, hindering the crucial chemical reaction, and make it difficult to evenly coat and retrieve the pretzels. Similarly, when baking, give your pretzels enough space on the baking sheet for even air circulation and browning. Overcrowding can lead to unevenly baked or pale pretzels.
Frequently Asked Questions About Homemade Soft Pretzels
Yes, you can absolutely adjust the recipe quantity! If you choose to double the recipe, we recommend working with only 4-5 pieces of dough at a time while shaping the pretzels. Keep the remaining sliced dough pieces on a parchment-paper lined pan, covered with a kitchen towel, in the refrigerator. This will slow down their rising process, preventing them from over-proofing while you take more time to shape the larger quantity of dough. For halving the recipe, simply divide all ingredient measurements by two.
You can certainly prepare the dough and shape the pretzels in advance. After shaping the pretzels, arrange them on a parchment-paper lined baking sheet and cover them thoroughly with plastic wrap. You can then refrigerate the shaped pretzels for up to 24 hours. This slow, cold proofing can even enhance their flavor! Important: do NOT perform the baking soda bath or apply the egg wash until you are ready to bake them. Allow the pretzels to come to room temperature for about 15-20 minutes before proceeding with the bath and baking.
Properly baked pretzels will have a beautiful deep golden-brown color and will appear visibly puffed. If you’re ever in doubt, the most reliable way to check for doneness is to use an instant-read thermometer. Insert it into the center of the thickest part of a large pretzel; when fully baked, the internal temperature should register between 200°F and 210°F (93°C-99°C). For instance, my pretzels typically reach perfection when they hit 205°F.
While truly best fresh, you can gently reheat soft pretzels to revive some of their warmth and chewiness. Place them on a baking sheet and warm them in a preheated oven at 300°F (150°C) for about 5-7 minutes. You can also lightly toast them in a toaster oven for a few minutes. Avoid microwaving, as this tends to make them tough and rubbery.
Exciting Soft Pretzel Flavor Variations
Once you’ve mastered the basic pretzel, the fun truly begins with endless flavor possibilities. Here are some delicious ideas to inspire your creativity:
- Classic Salty: The timeless favorite! After the baking soda bath, brush generously with egg wash and sprinkle with coarse pretzel salt for that iconic savory crunch. Serve these irresistible pretzels warm with a rich, creamy cheese sauce, or as a perfect accompaniment to our Beer Cheese Soup for an elevated snack experience.
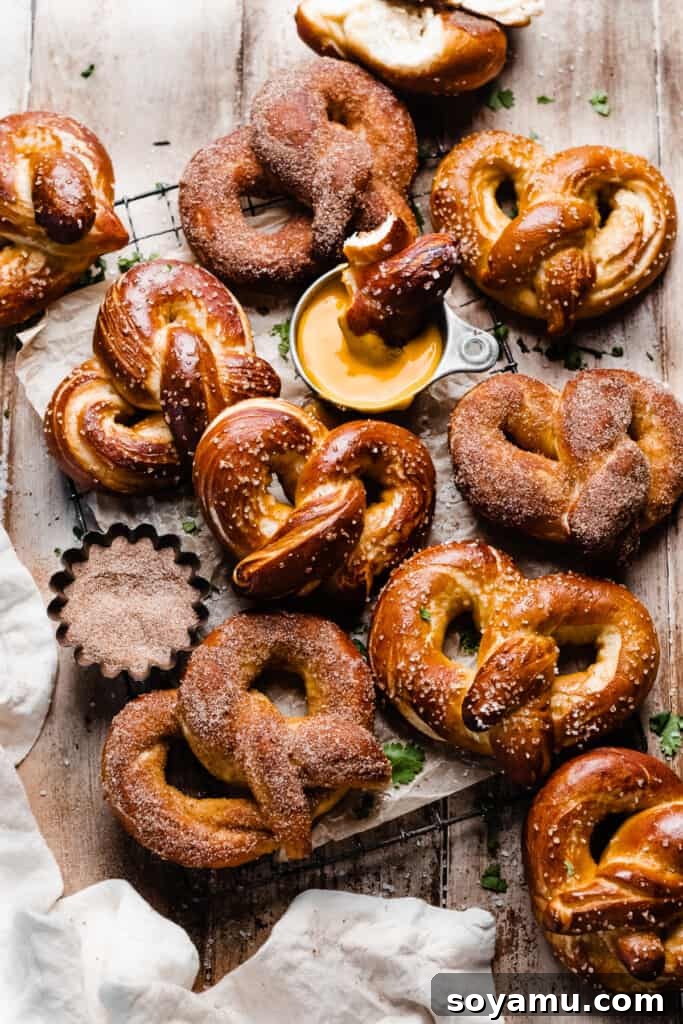
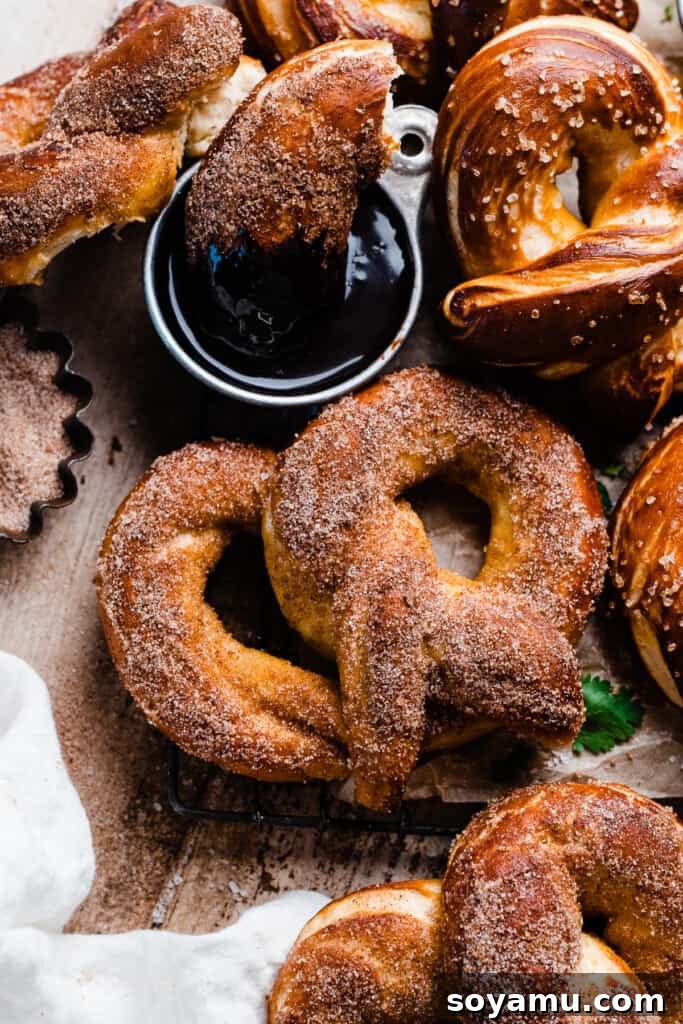
- Sweet Cinnamon Sugar: For those with a sweet tooth, this variation is a dream. Immediately after baking, brush the hot pretzels with melted butter, then generously coat them in a mixture of cinnamon and sugar. The warm butter helps the sweet coating adhere perfectly. These are fantastic served with a warm chocolate dipping sauce or a tangy cream cheese dip (cream cheese, powdered sugar, milk, and vanilla to taste).
- Garlic Parmesan: A savory twist that’s bursting with flavor. Bake your pretzels with the egg wash but without salt. As soon as they come out of the oven, brush them with melted butter. Then, dip them into a flavorful mixture of grated parmesan cheese (the powdery kind works best for coating), Italian seasoning, garlic powder, and a pinch of salt. Serve these aromatic pretzels with a warm marinara sauce for dipping.
- Spicy Cheddar Jalapeño: For a kick of heat and cheesy goodness. After brushing with the egg wash, gently press a few thin slices of fresh or pickled jalapeño onto the top of each pretzel. Sprinkle with a little pretzel salt, then generously top with shredded cheddar cheese. Bake as directed, allowing the cheese to melt and crisp slightly.
- Mini Pizza Pretzels: A fun and kid-friendly option that brings pizza night to your snack time. After applying the egg wash, press a few mini pepperoni slices (or small pieces of regular pepperoni) onto the top of each pretzel. Add a dash of pretzel salt, then sprinkle with shredded cheddar or mozzarella cheese. Bake as instructed, and watch the cheese and pepperoni melt into a savory delight.
- Simply Plain: Sometimes, simplicity is perfection. If you prefer your soft pretzels unadorned, simply brush them with the egg wash before baking and skip any additional salt or sweet coatings. The natural flavor and chewy texture of the pretzel dough will shine through beautifully, perfect for pairing with your favorite dip on the side.
Special Tools for Pretzel Perfection
While not strictly mandatory, certain kitchen tools can significantly streamline the pretzel-making process and help you achieve the best possible results:
- Slotted Flipper or Fish Spatula: This tool is incredibly useful for safely lowering your raw pretzels into the boiling baking soda bath and then carefully removing them. The slots allow excess liquid to drain away quickly, preventing the pretzels from becoming waterlogged before baking. A fish spatula is particularly versatile due to its thin, flexible blade.
- Pretzel Salt: While coarse sea salt can work in a pinch, pretzel salt is specifically designed for this purpose. Its crystals are the ideal size – large enough to provide a satisfying crunch without being overwhelmingly salty, and they adhere well to the egg-washed surface. Regular coarse salt from the grocery store might have crystals that are too large; you can try crushing them slightly in a plastic bag with a rolling pin if pretzel salt isn’t available.
- Instant Read Thermometer: As mentioned in our expert tips, an instant-read thermometer is invaluable. It ensures your milk is at the perfect temperature for yeast activation, and it can also confirm your pretzels are fully baked by checking their internal temperature. This tool eliminates guesswork, leading to more consistent and successful bakes.
More Fun Snack Recipes to Love:
- Classic Puppy Chow
- Edible Cookie Dough Bites
- Homemade Chocolate Bark (Customizable!)
- Cheddar Cheese Stuffed Soft Pretzels
- Chocolate Chip Cookie Cups
Did you make this recipe? Snap a photo and leave a comment!
Be sure to follow bluebowlrecipes on instagram and tag #bluebowlrecipes with your photo! You can also post a photo of your recipe to the bluebowlrecipes Facebook page. I’d love to see what you make!

Easiest Soft Pretzels, Two Ways
Soft Pretzels are easier to make at home than you’d think, and taste even better than the ones you find in the mall! The simple dough is made by hand, and the pretzels bake to fluffy, chewy perfection. A baking soda bath gives them the classic pretzel flavor, and I’ve included recipe variations for sweet or savory pretzels with fun dip ideas for each.
Pin
Rate
Ingredients
For the Pretzel Dough
- 3 tbsp salted butter, melted
- 1 and 1/2 cups warm milk (100℉ to 110℉)
- 3 and 1/4 tsp instant yeast (Also called “rapid rise yeast”)
- 1/4 cup light brown sugar, packed
- 1 and 1/2 tsp salt
- 3 and 3/4 cups all-purpose flour, plus more for dusting
For the Baking Soda Bath
- 1/2 cup baking soda
- 9 cups water
For Topping & Baking
- 1 large egg, for egg wash
- pretzel salt (Or coarse sea salt)
For Finishing
- melted butter
- cinnamon sugar
- garlic parmesan seasoning
Instructions
-
Make the Dough: Melt the butter in a large mixing bowl. Add the milk to a 2-cup glass measuring cup and warm in the microwave in 15-20 second intervals, stirring between each. It should be warm but not super hot – when in doubt, check for 100 to 110℉ with an instant thermometer. Add the warm milk to the bowl of butter, along with the yeast, brown sugar, and salt. Whisk well, then stir in the flour last. You’ll have a shaggy dough. Flour your counter, and dump the dough out. Knead the dough for 4-5 minutes. It will smooth out during this time, and the dough should spring back when gently poked with your fingertip. Shape it into a ball (doesn’t need to be perfect!). Give the mixing bowl a light spray with nonstick spray (no need to clean it out first) and place the dough back into the mixing bowl, covered with a clean kitchen towel, to rise for 1 hour.
(Note: The main thing to look for is that the dough has doubled in size – even if it takes less or more than 1 hour. Rise time will vary with the temperature of your home.)
-
Prep for baking: Preheat your oven to 450° F. Line 3 baking sheets with parchment paper or silicone baking mats. Lightly spray parchment paper with nonstick spray. Beat the egg in a small bowl (this will be your egg wash). Add your baking soda and water to a large pot or dutch oven and whisk together. Bring this to a boil while you shape the pretzels.
-
Fill and Shape the Pretzels: Once the dough has doubled in size, dump it onto the counter (don’t use flour this time) and gently press down into an oval that’s about 9 inches across. Slice this into quarters with a sharp knife (give it a quick spritz of nonstick spray to prevent any sticking) and then slice each quarter into thirds, giving you 12 thin triangles of dough total. (Each should be between 80-90 grams, if you want to check your work). Keep the other dough pieces covered with the kitchen towel while you work, and begin with one – rolling it out on the counter with both hands, like a rope, starting in the middle and working your hands outwards, repeating as needed until the rope is 18-22 inches long. Then, shape it into a “U.” Pick up the ends and cross them over each other twice, then bring them down to meet the bottom of the “U” – you just shaped a pretzel! Repeat with 3 more pieces of dough, so you have a batch of four pretzels. We’ll get those baking, then repeat the process with the remaining sections of dough.
-
Baking Soda Bath: Drop the filled and shaped pretzels, 2-3 at a time, into the boiling baking soda bath. Leave them in for 20-30 seconds, then remove promptly with a slotted spoon, leaving behind excess liquid, and place them on a prepared baking sheet (you should be able to fit 4 per sheet).
Note: Too long in the baking soda bath can leave an odd taste.
-
Bake: Brush this batch of four pretzels with egg wash and sprinkle with coarse salt (if using). Bake for 10-12 minutes. They will be a deep golden brown when done. An instant thermometer inserted into the center of the pretzel should read 200-210℉. While this batch bakes, repeat with the next batch of four pretzels, and then repeat one final time with the last 4 pretzels.
-
Serve + Store:
For Salted Pretzels: Brush the baked pretzels with melted butter when they’re fresh out of the oven, and enjoy immediately! Serve savory pretzels with cheese dip.
For Cinnamon Sugar or Garlic Parmesan Pretzels: For these flavors, brush hot pretzels with melted butter then coat in cinnamon sugar or a mixture of grated parmesan (the powdery kind), garlic powder, and Italian seasoning (pour it onto a plate, and dunk the pretzels in). Serve cinnamon sugar pretzels with a cream cheese dip (cream cheese + powdered sugar + milk + vanilla to taste), and serve garlic parm ones with a marinara dipping sauce.
These are absolutely best while they’re fresh from the oven, although they can be gently reheated as the day goes on. However, once the first day passes they will not be as good. This is a food that was truly intended to be eaten on the first day. Reheating them in the oven on the 2nd day does help, but seriously – just eat them on the first day!
Tip: The best way to coat the cinnamon sugar and garlic parm pretzels is to put the coating in a shallow bowl and swirl the buttery pretzel around in it.
Notes
Soft Pretzels with Store Bought Dough: Use a ball of your favorite store-bought pizza dough. Slice it into 12 sections, and follow the directions given above to shape your pretzels, and prep them for baking. Bake at the temperature indicated on the packaging, for 7-12 minutes, checking for doneness in the same way as the recipe above specifies. I’ve also made these in the past with Rhodes Thaw, Rise, & Bake Bread dough. A bag of that dough comes with 3 loaves, and each loaf is enough to make 6 pretzels.
Recipe Reviews: This recipe was originally published in December of 2018 and was sponsored by Rhodes. At that time, the recipe only included directions for the pre-made dough option. So, any recipe reviews from prior to January of 2024 are referencing that. The new recipe is absolutely delicious and makes the perfect homemade pretzel!
Nutrition
Serving: 1 pretzel, Calories: 329kcal, Carbohydrates: 56g, Protein: 10g, Fat: 7g, Saturated Fat: 4g, Polyunsaturated Fat: 1g, Monounsaturated Fat: 2g, Trans Fat: 0.2g, Cholesterol: 40mg, Sodium: 2567mg, Potassium: 197mg, Fiber: 3g, Sugar: 9g, Vitamin A: 239IU, Vitamin C: 0.01mg, Calcium: 85mg, Iron: 3mg
Nutrition information is automatically calculated, so should only be used as an approximation.