
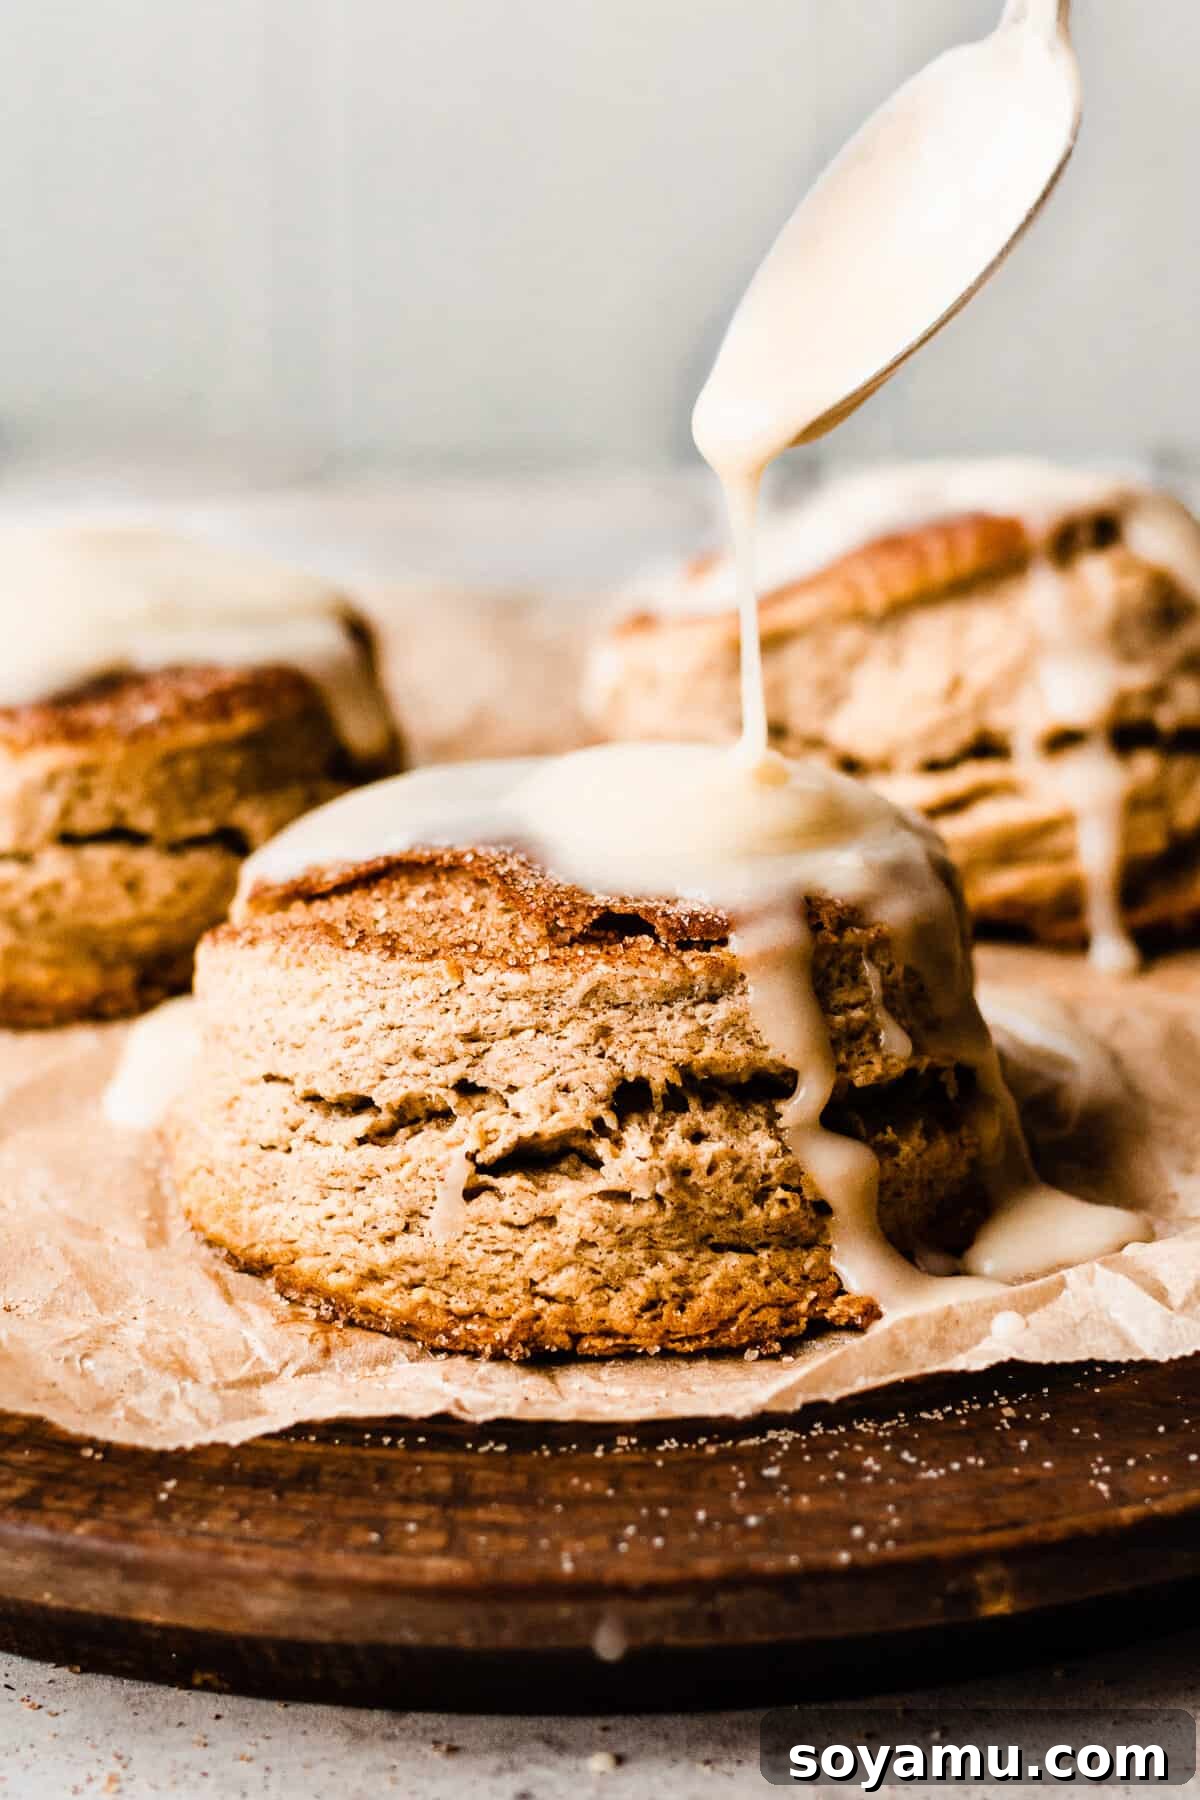
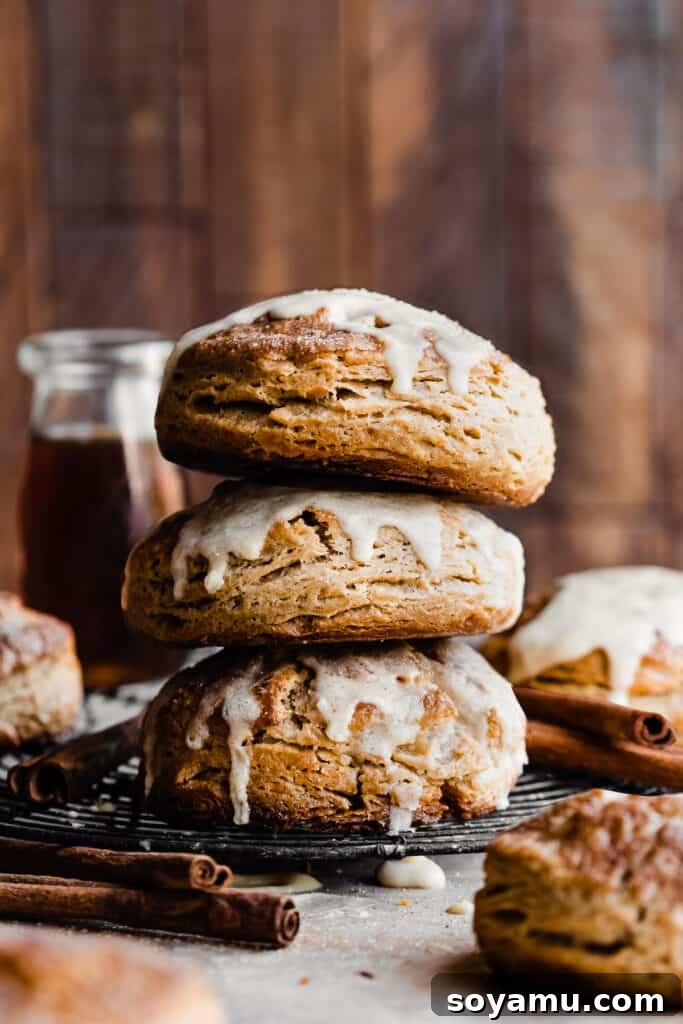
Welcome to the ultimate guide for creating the most irresistibly cozy Maple Biscuits! These aren’t just any biscuits; they are a culinary celebration, baked to perfection with an impressive height, beautifully crisp edges, and insides so pillowy soft they practically melt in your mouth. Each bite bursts with the rich, authentic flavor of real maple syrup, making them an unparalleled delight for any fall brunch, holiday gathering, or simply a comforting treat on a crisp morning. To crown this masterpiece, we’ll smother them in a luxurious buttery maple glaze, elevating every nuance of fall bliss to new heights.
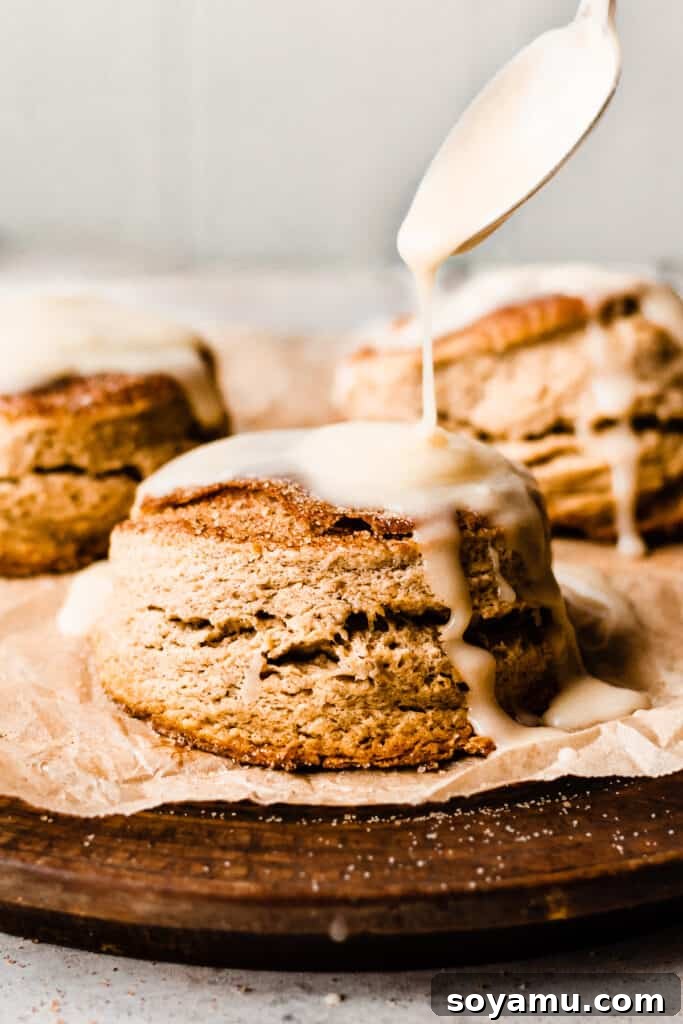
While the art of biscuit making might seem daunting at first glance, this recipe for flaky maple biscuits is designed for success. It may not fall into the “quick and easy” category, primarily due to the essential dough folding technique, but with a bit of patience and by carefully following each step, you’ll achieve bakery-quality results right in your own kitchen. We’ve broken down every detail to ensure that even novice bakers can master these towering, tender treats. Prepare to impress your family and friends with a truly exceptional homemade bake!
Why You’ll Fall in Love with These Flaky Maple Biscuits
These aren’t just ordinary biscuits; they are an experience. Here’s why these delightful maple-infused treats will quickly become your new favorite recipe:
- Unforgettable Real Maple Flavor: Forget artificial maple extracts! Our recipe insists on using only pure, real maple syrup, infusing every layer of these homemade biscuits with a deep, earthy, and naturally sweet flavor that truly embodies the essence of fall. This is the cornerstone of their exquisite taste.
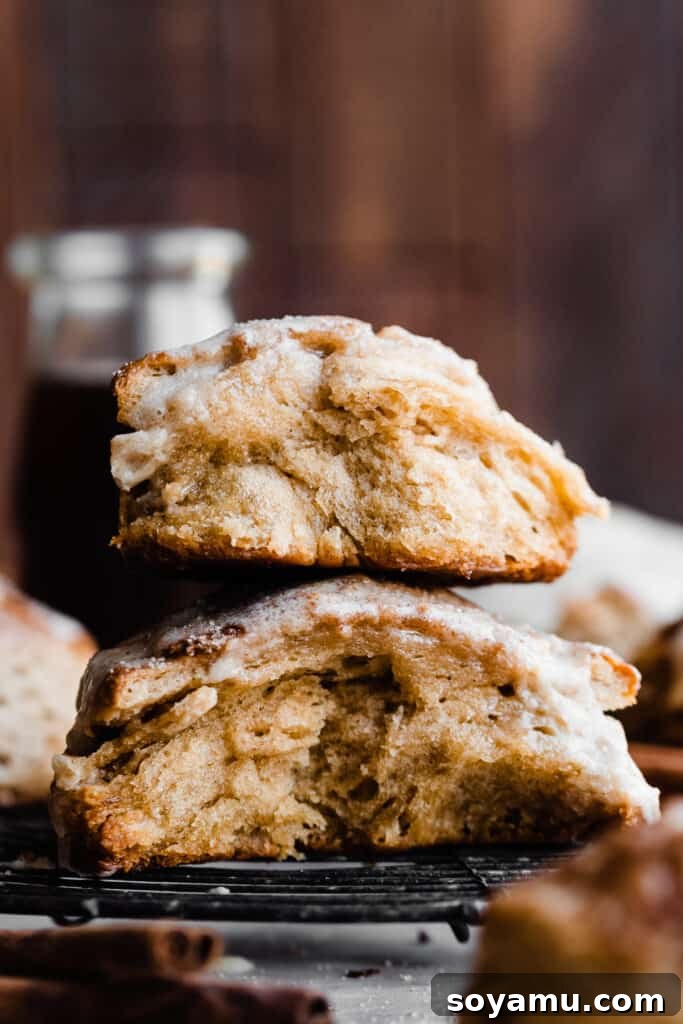
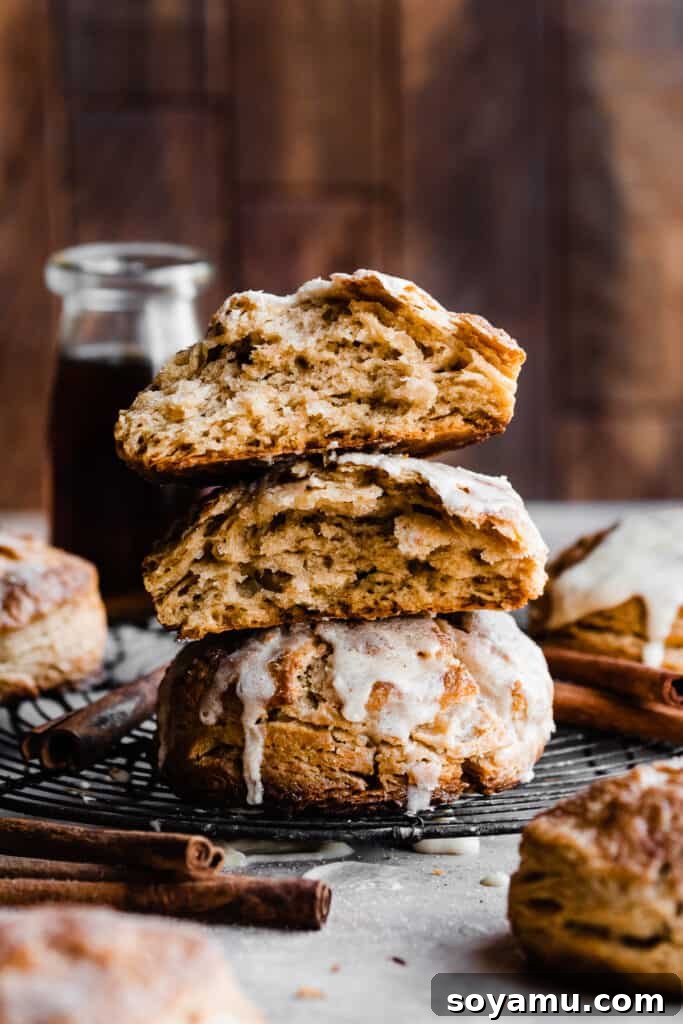
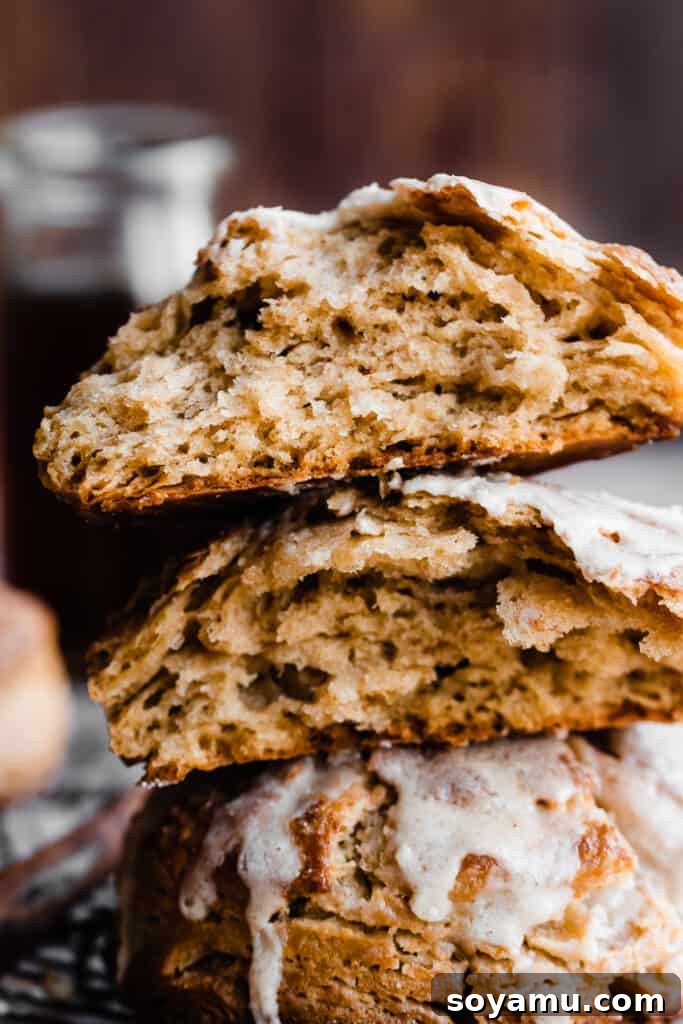
- Perfectly Flaky & Tall Texture: Achieving the perfect biscuit texture is an art, and these biscuits deliver! Thanks to a specific folding technique and the right leavening agents, they bake up incredibly tall with numerous distinct, buttery layers. Each biscuit boasts crisp, golden edges and a wonderfully soft, airy interior.
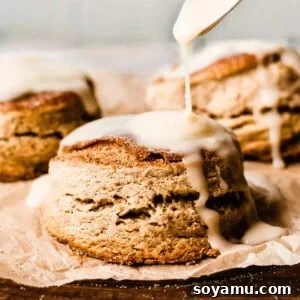
- Decadent Buttery Maple Glaze: What’s better than a warm maple biscuit? A warm maple biscuit drenched in a luscious, buttery maple glaze! This simple yet utterly delicious topping melts into the nooks and crannies of the warm biscuits, adding an extra layer of sweetness and moisture that makes them absolutely irresistible.
- Ideal for Cozy Brunch & Beyond: Whether it’s a festive holiday brunch, a leisurely weekend breakfast, or a comforting afternoon snack, these maple biscuits fit every occasion. Their rich flavor and comforting aroma make them a perfect centerpiece for any cozy gathering.
- A Rewarding Baking Project: While requiring a bit more attention than a basic biscuit, the process of creating these towering, flaky wonders is incredibly rewarding. The joy of seeing them rise in the oven and the compliments you’ll receive make every moment spent worth it.
Key Ingredients for Superior Maple Biscuits
Crafting exceptional maple biscuits begins with understanding the role of each ingredient. Here’s a closer look at what you’ll need and why it’s important:
- Butter (and why it must be cold!): We strongly recommend using high-quality salted butter for the best flavor, though unsalted butter works if you prefer to control the salt content. The absolute key here is for the butter to be *ice cold*. Cold butter creates pockets of steam during baking, which are crucial for achieving those signature tall, flaky layers that define a perfect biscuit. Do not use softened or melted butter in the dough itself!
- Pure Maple Syrup: This is non-negotiable for authentic maple flavor. Real maple syrup (Grade A or B, depending on your preference for intensity) provides a complex sweetness and depth that artificial syrups simply cannot replicate. Read your labels – pure maple syrup should have only one ingredient listed: maple syrup.
- Baking Powder & Baking Soda: These leavening agents work in harmony to give your biscuits their impressive rise. In combination with the strategic dough folds and the steam from the cold butter, they create a light, airy, and fluffy texture. Ensure your leavening agents are fresh for optimal results.
- Milk: We typically use 2% milk, but whole milk will yield an even richer biscuit. The liquid binds the dough together and contributes to its tenderness. For a classic Southern biscuit twist, consider buttermilk, as explained in our variations section.
- All-Purpose Flour: The foundation of our biscuit dough. Measuring flour by weight (grams) is always recommended for precision, as volume measurements can vary widely. This ensures your dough has the correct consistency.
- Granulated Sugar & Cinnamon: A touch of sugar enhances the overall sweetness and provides a lovely golden crust. Cinnamon adds a warm, inviting spice that complements the maple beautifully, especially in the dough and as part of the irresistible cinnamon-sugar topping.
- Egg: A single large egg adds richness and helps bind the dough, contributing to its structure and tender crumb.
- Vanilla Extract: A splash of good quality vanilla extract always elevates baked goods, adding a layer of aromatic complexity that ties all the flavors together.
Exciting Recipe Variations to Explore
While these maple biscuits are perfect as is, feel free to get creative and customize them to your liking. Here are a few ideas to inspire you:
- Dairy-Free Adaptation: For those with dietary restrictions, this recipe can likely be adapted. Substitute regular milk with your favorite dairy-free milk (almond, oat, or soy milk work well) and use a high-quality dairy-free butter stick. Ensure your dairy-free butter is cold and firm for the best flaky results. (Note: This variation has not been personally tested, so results may vary).
- Infuse with Cozy Spices: Elevate the aromatic profile by adding a pinch of other warm spices. Cardamom offers a modern, fragrant twist, while a dash of nutmeg or allspice can deepen the fall flavor. You could also experiment with maple sugar in place of regular cinnamon-sugar for the topping for an even more intense maple experience.
- Classic Buttermilk Biscuits: For a tangier, more traditional biscuit, substitute the regular milk with buttermilk. Buttermilk reacts with the baking soda to create an incredibly tender crumb and a distinct, delicious flavor.
- Alternative Toppings & Fillings:
- Maple Cream: Instead of the glaze, try topping your warm biscuits with a dollop of homemade maple cream for a lighter, yet equally delightful, finish.
- Maple Butter: Soften some butter and whip in a generous amount of maple syrup for a spreadable maple butter. It’s fantastic slathered inside a warm biscuit, allowing the flavors to meld beautifully.
- Chopped Nuts or Dried Fruit: Fold in some finely chopped pecans or walnuts, or even dried cranberries or chopped dates, into the dough for added texture and flavor.
- Savory Maple: A surprising twist could involve adding a hint of cooked, crumbled bacon to the dough, creating a sweet and savory sensation.
How to Master These Flaky Maple Biscuits: Step-by-Step Guide
Follow these detailed steps closely to achieve the most spectacular, flaky, and flavorful maple biscuits. Precision in each stage, especially with the dough handling, is key.
Step 1: Prepare Your Dough – The Foundation of Flakiness.
In a spacious large bowl, thoroughly whisk together your dry ingredients: the all-purpose flour, granulated sugar, baking powder, baking soda, salt, and cinnamon. It’s crucial that these are evenly distributed. Next, cut your very cold salted butter into large cubes and add them to the dry mixture. Using a pastry cutter (or two knives, or even your fingertips if you’re quick and keep the butter cold), cut the butter into the flour until the mixture resembles coarse meal with some pea-sized and even walnut-half-sized chunks of butter remaining. These larger pieces are vital for flakiness!
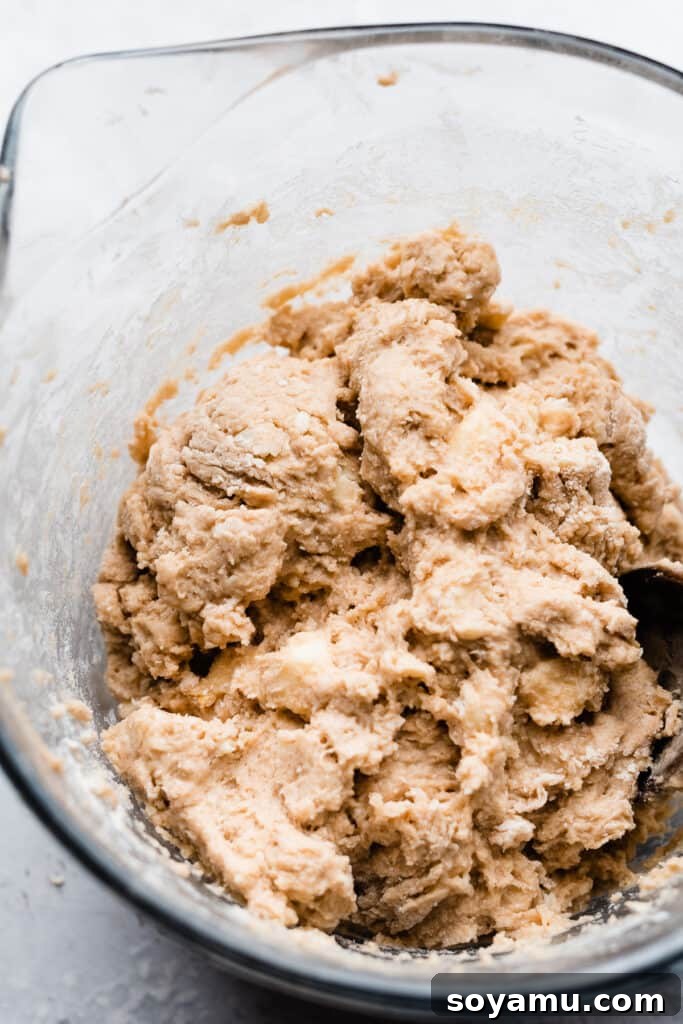
In a separate measuring cup (you can use the same one you’ll use for milk), lightly beat the large egg. Pour the beaten egg into the flour-butter mixture. Then, add the milk, the real maple syrup, and vanilla extract. Stir everything together with a spoon or spatula until just combined. The dough will look somewhat wet and shaggy – this is exactly what you want! Avoid overmixing at this stage, as it can develop the gluten too much, leading to tough biscuits. Cover the bowl and let this shaggy dough chill in the refrigerator for a minimum of 30 minutes. This chilling period is important for relaxing the gluten and firming up the butter.
Step 2: The Magic of Rolling and Folding – Creating Layers.
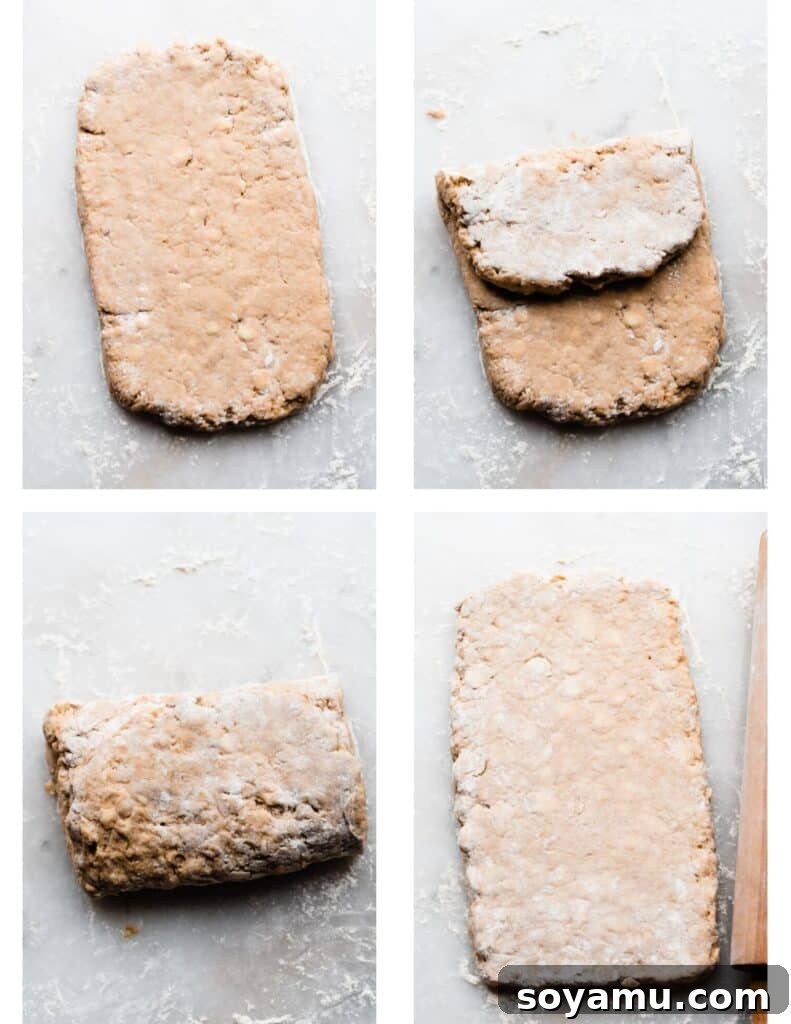
Lightly flour a clean work surface. Gently turn out the chilled dough onto this surface. It will still be somewhat moist, so sprinkle a little extra flour over it. Before you begin, a helpful tip: grab a piece of scrap paper and write down “1, 2, 3, 4” to keep track of your dough folds. Cross off each number as you complete a fold. This prevents losing count!
With lightly floured hands, carefully pat the dough into a thick rectangle, aiming for about ¾ inch (19mm) in thickness. Make sure it’s roughly twice as long as it is wide. Don’t worry about perfect symmetry; just try to keep it relatively even. If any small pieces break off, gently press them back into the dough. Now, imagine you’re folding a letter: fold one-third of the dough over the middle, then fold the other third over that. You’ll now have a shorter, thicker rectangle.
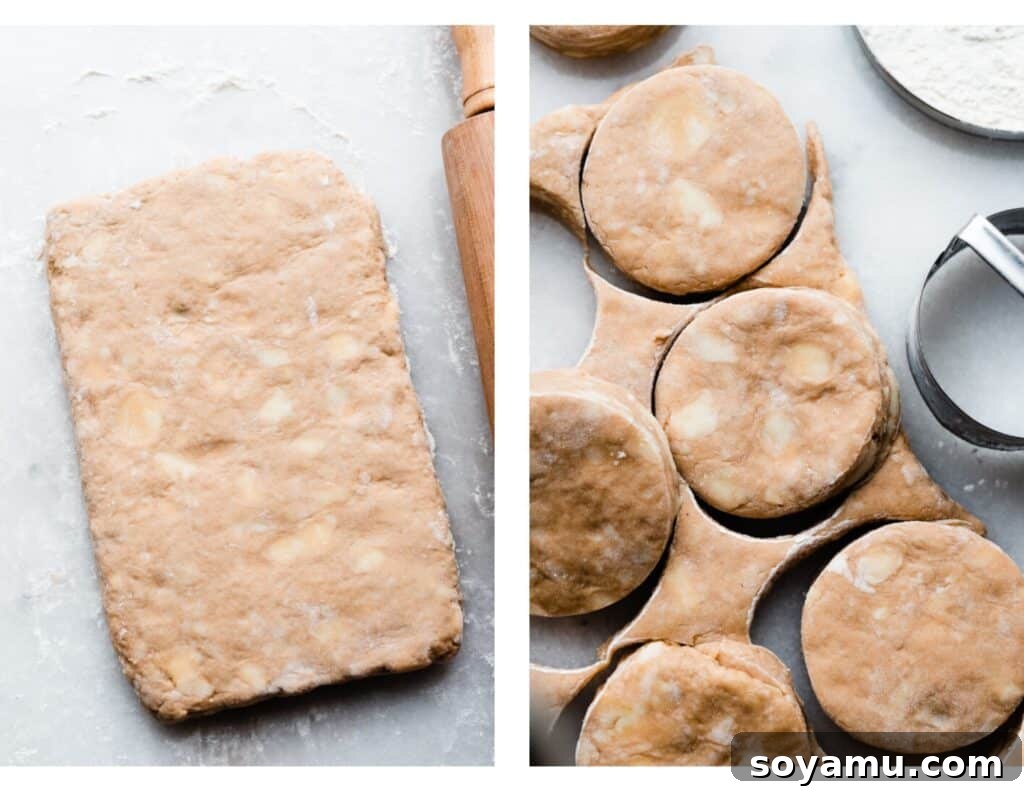
Rotate the folded dough 90 degrees (a quarter turn). Lightly flour your rolling pin and the work surface again. Gently roll the dough back out into a rectangle about ½ inch (13mm) thick, again roughly twice as long as it is wide. Repeat the “fold in thirds, rotate 90 degrees, roll out” process three more times, for a total of four folds. With each fold and roll, you are creating dozens of thin, buttery layers that will separate beautifully during baking. For the fourth and final roll-out, aim for a thickness of ¾ inch (19mm). After the final fold and roll, place the dough rectangle onto a baking sheet, cover it loosely with plastic wrap, and chill it in the refrigerator for another 30 minutes. This second chill is crucial for making the dough easier to cut and ensuring the butter remains cold.
Step 3: Precisely Cut Your Biscuits.
Once the dough is adequately chilled from its final rest, you’ll have a beautifully layered rectangle. Lightly flour your 3-inch (8cm) biscuit cutter. This step is critical: press the cutter straight down into the dough without twisting. Twisting the cutter can seal off the edges of the biscuit layers, preventing them from rising to their full potential.
Cut out as many biscuits as possible from the first pass. You should yield about 5-6 biscuits. Carefully gather the dough scraps, gently press them together (avoid excessive kneading or handling), and re-roll to cut out 1-2 additional biscuits. You may need to do this a second time for all scraps. The biscuits made from re-rolled scraps might not rise quite as tall or have as distinct layers, but they will still be delicious!
Step 4: Bake to Golden Perfection.
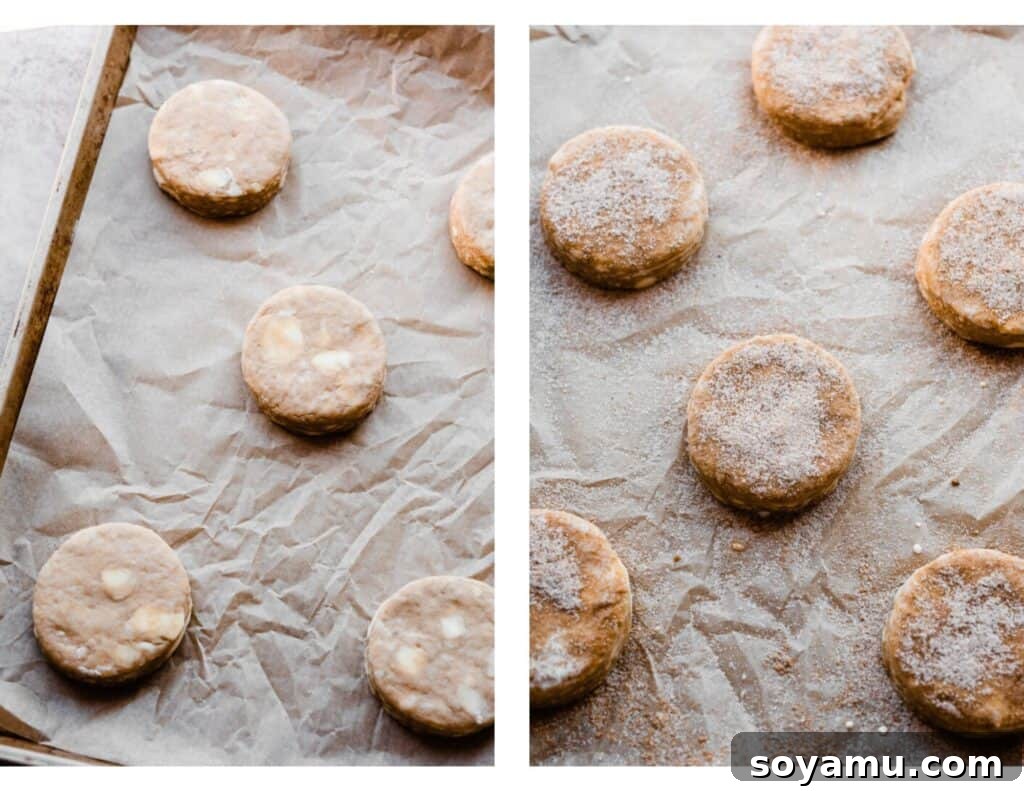
Preheat your oven to 400°F (204°C). Line a baking sheet with parchment paper or a silicone baking mat. Arrange the cut biscuits on the prepared baking sheet, ensuring they are not touching, which allows for even baking and browning. In a small bowl, combine the extra cinnamon and granulated sugar for the topping.
Lightly brush the tops of each biscuit with heavy cream. This helps them achieve a beautiful golden-brown color and allows the cinnamon-sugar mixture to adhere. Generously sprinkle the cinnamon-sugar over each biscuit – don’t be shy, use it all!
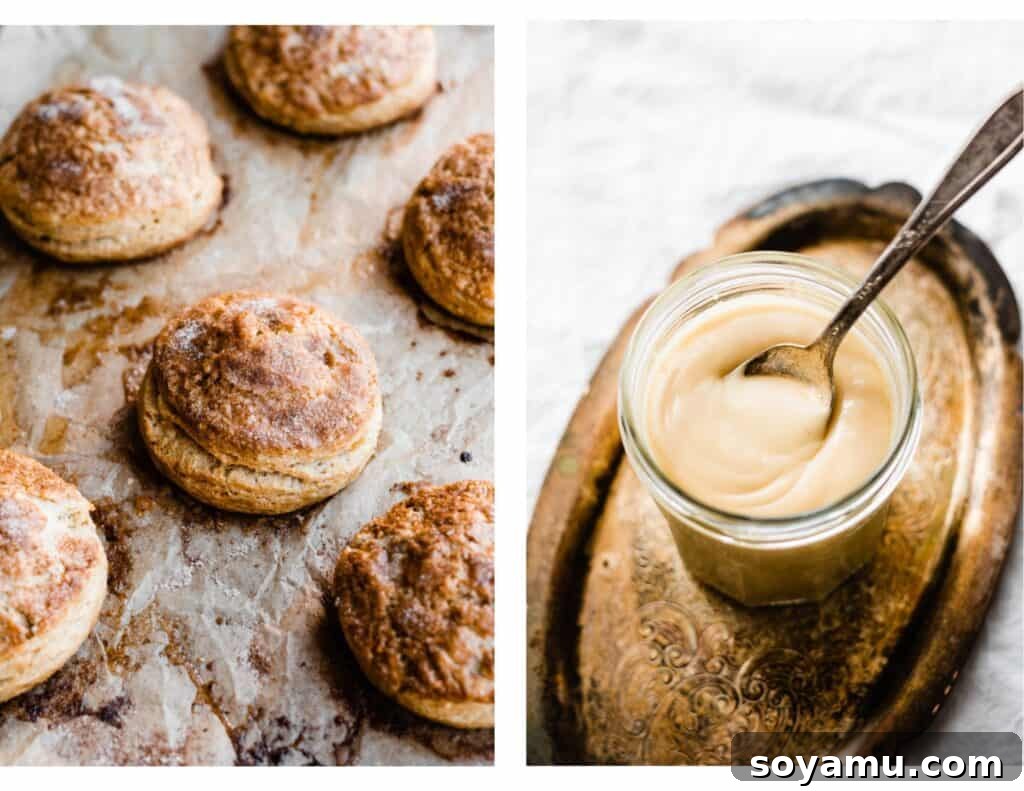
Bake for 14-17 minutes, or until the biscuits are golden brown on top and cooked through. The exact baking time can vary depending on your oven and the thickness of your biscuits. If you’ve made any larger biscuits from scraps, they might need an extra 1-3 minutes. You can check for doneness by gently separating a biscuit in half with a knife; there should be no wet dough visible inside.
(Note: The initial photograph in this post accurately depicts the intended height of these biscuits. Minor variations in dough thickness during the rolling process can affect the final rise, as was the case with one batch where the dough was slightly thinner.)
Step 5: Drizzle with Buttery Maple Glaze.
While your delicious biscuits are baking and filling your kitchen with an irresistible aroma, prepare the luscious buttery maple glaze. In a small bowl, melt the salted butter. Whisk in the real maple syrup, powdered sugar, vanilla extract, a tiny pinch of salt (to balance the sweetness), and a pinch of cinnamon. Continue whisking until the glaze is smooth and pourable. If it’s too thick, add a tiny bit more milk (half a teaspoon at a time) until it reaches your desired consistency.
As soon as the biscuits come out of the oven and have cooled for just a few minutes (so the glaze doesn’t completely disappear into them), generously drizzle the warm glaze over each one. The warmth of the biscuits will allow the glaze to melt slightly, creating a beautiful, glossy finish. These biscuits are truly best enjoyed warm, fresh from the oven, with that melty, buttery maple glaze. So, dig in and savor every single bite!
Serving Suggestions & Storage Tips
These Maple Biscuits are undeniably at their peak when served warm, straight from the oven, with the buttery maple glaze still slightly gooey and melty. The crisp tops and tender insides are simply divine when fresh.
- Best Enjoyed Fresh: We highly recommend enjoying these biscuits on the very first day of baking. The unique crispness of the edges and the top, a hallmark of a well-made biscuit, will naturally soften by the second day.
- Storing Leftovers: If you happen to have any leftovers (a rare occurrence!), store them in an airtight container at room temperature for an additional day or two.
- Reheating: To revive their wonderful texture, reheat leftover biscuits in a preheated oven at 300°F (150°C) for about 5-7 minutes, or until warmed through. This helps restore some of their tenderness. Avoid microwaving, as it can make them chewy.
- Freezing Dough (Make Ahead): For ultimate convenience, you can prepare the dough through the cutting stage. Place the cut, unbaked biscuits in a single layer on a parchment-lined baking sheet and freeze until solid (about 1-2 hours). Transfer the frozen biscuits to an airtight freezer-safe bag or container and freeze for up to 1 month. When ready to bake, place frozen biscuits directly onto a prepared baking sheet, brush with cream, sprinkle with cinnamon sugar, and bake for a few extra minutes (approximately 18-22 minutes) at the same temperature.
- Serving Pairings: These biscuits are wonderful on their own, but they also pair beautifully with a hot cup of coffee, a warm mug of chai, or alongside a hearty brunch spread featuring eggs, bacon, or fresh fruit.
Craving more delightful maple-infused treats? Don’t miss my Maple Bacon Cupcakes for a unique sweet and savory twist, or my elegant Brûléed Maple Pie for a show-stopping dessert!
Expert Tips for Biscuit Baking Success
Achieving perfect, sky-high, flaky maple biscuits is absolutely within your reach with these expert tips:
- Master the Dough Folds: This is arguably the most critical step for achieving those desirable layers. Don’t rush it! As mentioned in the instructions, writing down “1, 2, 3, 4” on a piece of scrap paper and crossing off each fold as you complete it is an excellent way to keep track and ensure you perform all four crucial folds. The layers created by this technique are what give biscuits their incredible texture.
- Ensure Tall Biscuits – Avoid the Twist! When cutting out your biscuits with a biscuit cutter, always press straight down and lift straight up. Never twist the cutter! Twisting can seal the edges of the dough layers, effectively preventing the biscuits from rising as tall and flaky as they should. Also, handle the cut biscuits gently; avoid overworking or pressing on their edges.
- The Power of Cold Butter: We cannot emphasize this enough: your butter must be ice cold. Cold butter melts slowly in the oven, creating steam that pushes the dough layers apart, resulting in an incredibly flaky texture. If your kitchen is warm, you can even pop the butter back into the freezer for 10-15 minutes before cutting it into the dry ingredients.
- Use Real Maple Syrup: As a Wisconsin native, I take my maple syrup seriously! For the true, deep maple flavor that defines this recipe, always use pure, real maple syrup. Artificial maple syrup is typically corn syrup with added flavors and will not yield the same delicious results. Check the ingredient label – it should simply say “pure maple syrup.”
- Precision with an Oven Thermometer: Oven temperatures can be notoriously inaccurate. An oven thermometer is an inexpensive tool that will accurately tell you if your oven is running at the temperature you set it to. Accurate temperature is vital for consistent baking results, especially for items that rely on a strong, quick rise like biscuits. Leave one in your oven at all times to monitor its calibration.
- Weigh Your Flour with a Kitchen Scale: For baking, precision is paramount, and measuring flour by volume (cups) can lead to significant variations. A food scale ensures you use the exact amount of flour needed. This consistency is key to achieving the correct dough hydration and ultimately, the perfect biscuit texture.
- Don’t Overmix the Dough: After adding the wet ingredients to the dry, stir just until everything is combined and a shaggy dough forms. Overmixing develops gluten, which can lead to tough, chewy biscuits rather than tender, flaky ones.
- Give Your Biscuits Room: When placing biscuits on the baking sheet, ensure there’s a little space between them. This allows hot air to circulate evenly, promoting a better rise and even browning on all sides.
Frequently Asked Questions About Maple Biscuits
Yes, absolutely! You can prepare the biscuit dough through the step where you cut out the individual biscuits. Once cut, arrange them in a single layer on a baking sheet lined with parchment paper. Flash freeze them until solid (about 1-2 hours), then transfer them to an airtight, freezer-safe container or bag. They can be stored in the freezer for up to 1 month. When you’re ready to bake, place the frozen biscuits directly onto a prepared baking sheet, brush with heavy cream, and sprinkle with cinnamon sugar. Bake as directed in the recipe card, adding an extra 3-5 minutes to the baking time to account for them being frozen.
Several factors can affect biscuit rise and flakiness. The most common reasons include not using sufficiently cold butter, not executing the dough folding process correctly or enough times, overmixing the dough (which develops gluten and makes them tough), or twisting the biscuit cutter when cutting (which seals the edges). Additionally, ensure your baking powder and baking soda are fresh and active. Even if they don’t reach optimal height, they will still taste incredibly delicious!
For the best results and flavor, we recommend sticking to the listed ingredients for the buttery maple glaze. However, if you’re out of vanilla extract, you could omit it in a pinch, but it does add depth. While you could try a different sweetener, powdered sugar provides the smooth, consistent texture needed for a glaze. Always use real maple syrup for that signature flavor.
Your maple biscuits are done when they are beautifully golden brown on top and around the edges. If you’re unsure, you can gently lift one and check the bottom—it should also be golden. For an internal check, carefully break one open; there should be no visible wet dough inside, and the layers should appear cooked and flaky. Remember that oven temperatures can vary, so visual cues are often the most reliable.
Essential Tools for Perfect Biscuits
Having the right tools can make all the difference in ensuring your biscuit-making process is smooth and successful:
- Pastry Cutter: A pastry cutter (also known as a pastry blender) is incredibly helpful for efficiently cutting cold butter into dry ingredients. It ensures the butter stays cold and is evenly distributed, which is paramount for flaky biscuits, pie crusts, and scones.
- Biscuit Cutter: To achieve uniformly shaped biscuits with clean edges that rise beautifully, a good quality biscuit cutter (we recommend a 3-inch/8cm round cutter) is essential. Avoid twisting it when cutting! A similar size round cookie cutter can also work.
- Kitchen Scale: As discussed in our expert tips, a digital food scale is invaluable for precise measurement of dry ingredients like flour, leading to consistent and reliable results every time.
- Parchment Paper or Silicone Baking Mat: These make cleanup a breeze and prevent your biscuits from sticking to the baking sheet, ensuring a perfectly golden bottom.
More Cozy Fall Baking Recipes to Love:
If you’ve enjoyed these maple biscuits, you’ll surely love exploring more of our favorite fall and cozy baking recipes:
- Homemade Apple Cider Donuts – A classic fall treat bursting with apple flavor.
- Pumpkin Streusel Muffins – Soft, spiced muffins with a delightful crumb topping.
- Salted Caramel Apple Galette – An elegant yet simple rustic apple pie.
- Maple Bacon Cupcakes with Brown Butter Frosting – A unique combination of sweet and savory.
- Banana Cake with Maple Cream Cheese Frosting – A moist and flavorful cake perfect for any season.
- Pumpkin Cupcakes with Brown Butter Frosting – The quintessential fall cupcake with a rich, nutty frosting.
Did you make this recipe? We’d love to hear from you!
Please consider leaving a comment and a star rating in the recipe card below. Your feedback helps our small business immensely and guides other bakers in their culinary adventures. Thank you for your support!
Maple Biscuits with Buttery Maple Glaze
Stephanie Simmons
40
mins
16
mins
1
hr
1
hr
56
mins
8
biscuits
Ingredients
For the Biscuits:
- 2 and 3/4 cups all-purpose flour, 357 grams
- 3 tbsp granulated sugar, 40 grams
- 1 tbsp + 1 tsp baking powder
- 1/2 tsp baking soda
- 1 and 1/2 tsp salt
- 1 tbsp cinnamon
- 3/4 cup salted butter, cold, 1 and 1/2 sticks or 170 g
- 1 large egg
- 2/3 cup milk, 160 grams
- 1/4 cup real maple syrup, 60 grams
- 1 and 1/2 tsp vanilla extract
For Topping the Biscuits:
- 1 tsp cinnamon
- 2 tbsp granulated sugar, 26 grams
- heavy cream
For the Buttery Maple Glaze:
- 4 tbsp salted butter, melted, 57 grams
- 2 tbsp real maple syrup, 30 grams
- 1 cup powdered sugar, 115 grams
- 2 tsp vanilla extract
- pinch of salt
- pinch of cinnamon
Instructions
-
Make the Dough: Whisk together the dry ingredients (flour, sugar, baking powder, baking soda, salt, cinnamon) in a large mixing bowl. Add the cold, cubed salted butter and cut it in with a pastry cutter until the mixture has chunks ranging from pea-sized to walnut-half-sized. Beat one large egg in a separate measuring cup. Add the beaten egg, milk, 1/4 cup maple syrup, and vanilla extract to the flour mixture. Stir gently until just combined, forming a shaggy, slightly wet dough. Cover the bowl and chill in the fridge for 30 minutes.
Dump the chilled dough onto a lightly floured surface. Lightly sprinkle the dough with flour. Pat the dough into a thick rectangle (about ¾ inch/19 mm thick and twice as long as wide). Fold the dough into thirds like a letter. Rotate the dough 90 degrees, lightly flour, and roll back out to about 1/2 inch (13 mm) thick. Repeat this folding and rolling process 3 more times (for a total of 4 times). On the final roll-out, roll the dough back to ¾ inch (19 mm) thickness. Place the dough on a cookie sheet, cover, and chill for another 30 minutes.
-
Prep for Baking: Preheat your oven to 400° F (204° C). Line a baking sheet with parchment paper or a silicone baking mat. In a small measuring cup, stir together 1 tsp cinnamon and 2 tbsp granulated sugar for the biscuit topping.
-
Cut & Bake Biscuits: Using a 3-inch (8 cm) biscuit cutter, cut out biscuits by pressing straight down without twisting (flour the cutter between each use to prevent sticking). Gather dough scraps gently, press them together, and re-roll to cut out any remaining biscuits. Place the cut biscuits on your prepared baking sheet. Brush the tops with a light layer of heavy cream, then generously sprinkle with the cinnamon sugar mixture.
Bake for 14-17 minutes, or until golden brown and cooked through. Larger biscuits may require an extra 1-3 minutes. Check for doneness by ensuring no wet dough spots are visible.
-
Prepare the Maple Glaze: While the biscuits are baking, melt 4 tbsp salted butter in a small bowl. Whisk in 2 tbsp real maple syrup, 1 cup powdered sugar, 2 tsp vanilla extract, a pinch of salt, and a pinch of cinnamon until smooth.
-
Serve & Store: Let the baked biscuits cool for a few minutes before drizzling generously with the warm maple glaze. Enjoy them warm for the best taste and texture. Leftovers can be stored in an airtight container at room temperature for 1-2 days and reheated in the oven to restore crispness.
Notes
Nutrition
Calories: 517kcal,
Carbohydrates: 68g,
Protein: 6g,
Fat: 25g,
Saturated Fat: 15g,
Polyunsaturated Fat: 1g,
Monounsaturated Fat: 6g,
Trans Fat: 1g,
Cholesterol: 86mg,
Sodium: 865mg,
Potassium: 135mg,
Fiber: 2g,
Sugar: 33g,
Vitamin A: 777IU,
Vitamin C: 0.05mg,
Calcium: 160mg,
Iron: 2mg
Nutrition information is automatically calculated, so should only be used as an approximation.
Love this recipe? Share your thoughts!