
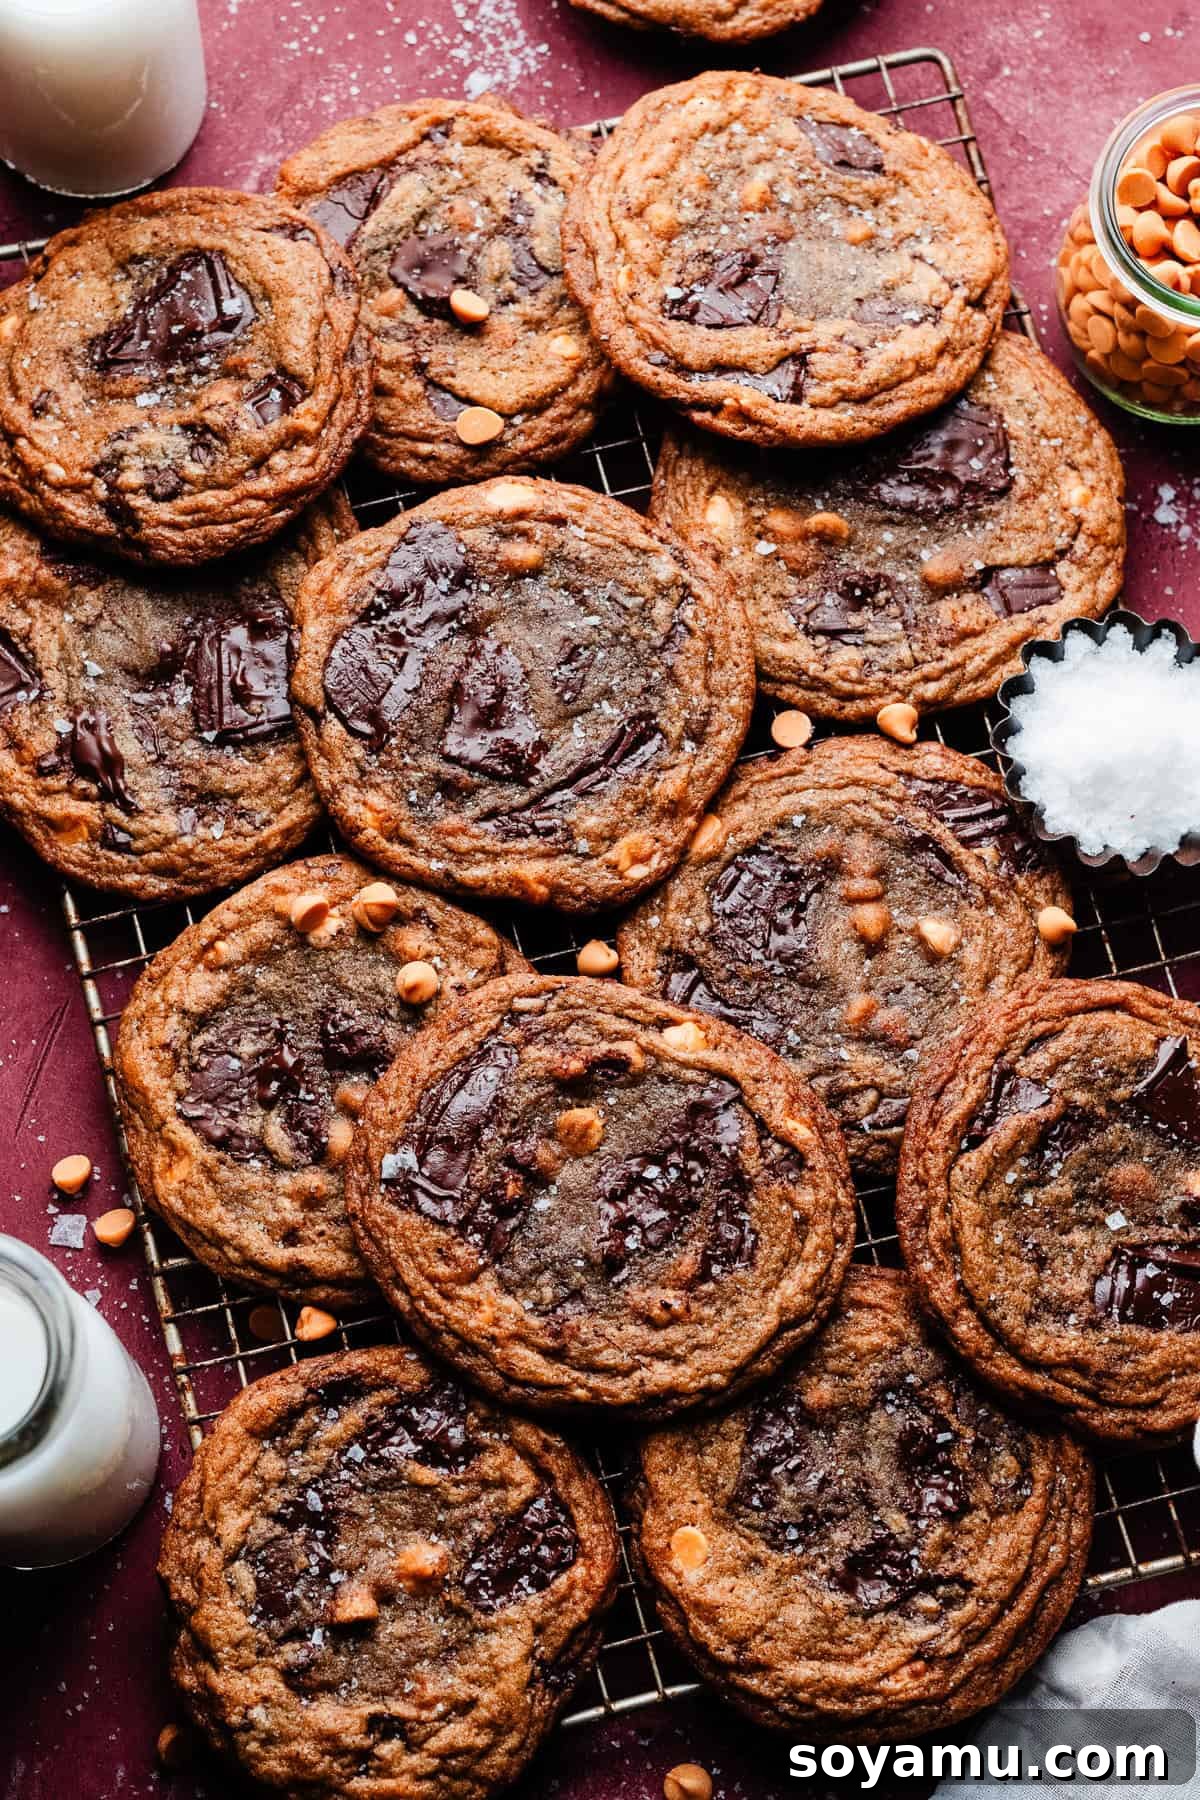
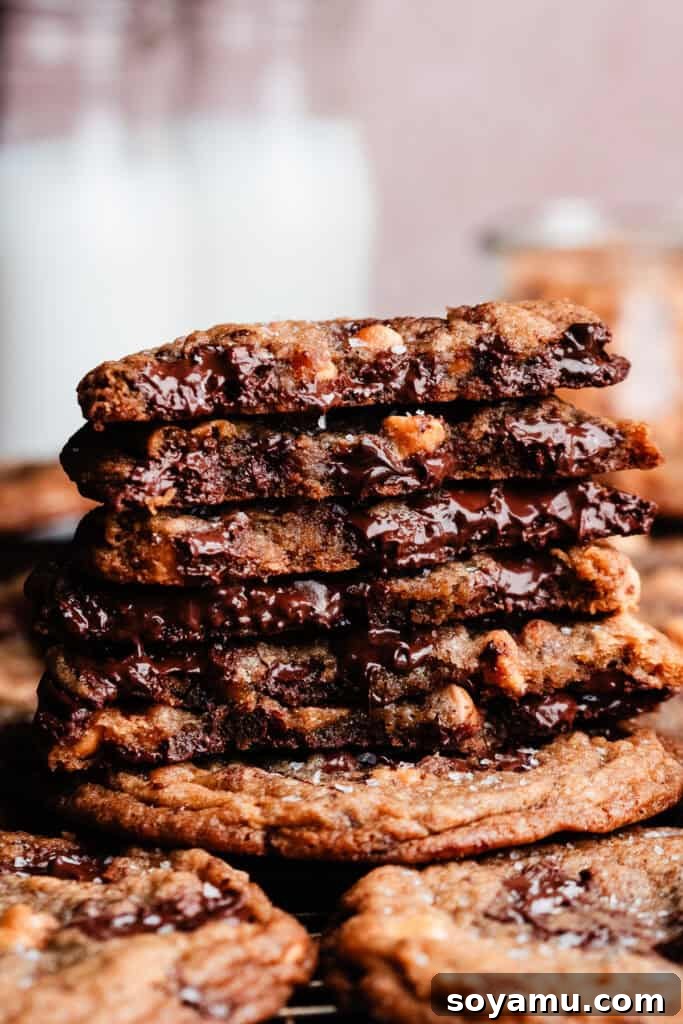
Prepare to be completely captivated by the **Ultimate Butterscotch Chocolate Chip Cookies** – a cookie experience that truly has it all! Imagine perfectly crisp, rippled edges giving way to a luxuriously chewy center, studded with decadent pools of melted chocolate and generous amounts of rich butterscotch chips. We believe butterscotch is the secret ingredient that classic chocolate chip cookies have always been missing, transforming a beloved treat into something truly extraordinary. This isn’t just a bold claim; it’s the result of extensive testing and a passionate pursuit of cookie perfection. Once you taste these, you might find yourself, like us, forever changed and unable to go back to ordinary chocolate chip cookies.
Why These Butterscotch Chocolate Chip Cookies Are a Must-Try
Our journey to create the perfect butterscotch chocolate chip cookie was filled with dedication and countless batches. After extensive experimentation, we’ve fine-tuned this recipe to deliver consistent, mouth-watering results every time. Here’s why these cookies will become your new favorite:
- Perfected Through 18 Rounds of Testing: Our initial batch of these cookies was unexpectedly perfect, but replicating that magic proved to be a delightful challenge. What followed were months of tireless experimentation, 18 different iterations, to crack the code. We meticulously tested every variable – from butter temperature to chilling times – to ensure that you get the ultimate cookie experience without any guesswork. The breakthrough? A specific butter consistency, between melted and softened, that guarantees an incredibly chewy texture and significantly reduces the traditional long chill time. No need for five-week fridge stays here!
- Flexible Baking Schedule: Life gets busy, and sometimes you need a recipe that fits your schedule. While these cookies are truly delicious after just a two-hour chill, their flavor and texture deepen and improve with each passing day in the fridge. You can prepare the dough up to three days in advance, making them ideal for meal prep, spontaneous cravings, or entertaining. Bake a few now and save the rest for later – the convenience is unmatched.
- Unrivaled Depth of Flavor: What truly sets these cookies apart is their complex and harmonious flavor profile. We combine the rich, molasses notes of dark brown sugar with the balanced savoriness of salted butter. A hint of milk adds to the tenderness, while generous amounts of premium butterscotch chips infuse every bite with their distinct, caramelized sweetness. This thoughtful blend of ingredients creates an extraordinary depth that elevates these beyond a simple chocolate chip cookie.
Essential Ingredients for Perfect Butterscotch Chocolate Chip Cookies
Every great cookie starts with quality ingredients. Below is a detailed look at the components that make these butterscotch chocolate chip cookies truly special. Remember, for the precise measurements and complete instructions, refer to the full recipe card at the end of this post.
- Butter: We highly recommend using **salted butter** for its superior flavor balance, which beautifully complements the sweetness of the sugars and chips. If you only have unsalted butter, you can certainly use it, but consider adding an extra pinch of salt to your dry ingredients to achieve a similar depth. Crucially, pay attention to the butter’s temperature: for the best results, ensure it’s at that specific “between melted and softened” consistency as described in our instructions.
- Brown Sugar: The choice of sugar significantly impacts the cookie’s texture and flavor. We lean towards **dark brown sugar** for its higher molasses content, which contributes to a deeper, more caramelized flavor and a wonderfully chewy texture. While light brown sugar can be used, dark brown sugar truly enhances the richness of the butterscotch.
- Granulated Sugar: Working in harmony with brown sugar, **granulated sugar** helps to create those desirable crisp edges and contributes to the overall sweetness, balancing the complex notes of the dark brown sugar and butterscotch.
- All-Purpose Flour: Proper measurement of flour is paramount in baking. To avoid a dry, dense cookie, always **spoon your flour** into the measuring cup and then level it off with a straight edge. Better yet, use a digital kitchen scale for ultimate accuracy; scooping directly from the bag can compact the flour, leading to an excess amount.
- Eggs: This recipe calls for one **large egg** and an additional **large egg yolk**. The whole egg provides structure and moisture, while the extra yolk adds richness, tenderness, and contributes to that desirable chewy texture without making the cookie too cakey. Ensure eggs are at room temperature for better emulsification with the butter and sugar.
- Vanilla Extract: Don’t skimp on quality here! **Pure vanilla extract** makes a noticeable difference in the overall aroma and flavor of your cookies. Avoid imitation vanilla for the best results.
- Milk: Just a touch of **milk** (whole milk is preferred) adds a subtle richness and helps achieve the perfect dough consistency, contributing to the cookie’s tender crumb.
- Baking Soda: This leavening agent reacts with the acidic brown sugar to help the cookies spread and achieve their characteristic ripples, contributing to both texture and appearance.
- Salt: A crucial flavor enhancer, **salt** balances the sweetness and brings out the nuances of the butterscotch and chocolate. We use a half teaspoon in the dough, plus an optional sprinkle of flaky sea salt on top for a gourmet touch.
- Chocolate Chips: The beauty of these cookies lies in the contrast between butterscotch and chocolate. Feel free to use your favorite **semi-sweet chocolate** – whether it’s classic chocolate chips, finely chopped chocolate bars, or gourmet chocolate chunks. High-quality chocolate will create those irresistible melty puddles.
- Butterscotch Chips: The star of the show! Generous amounts of **butterscotch chips** provide that iconic, buttery, caramelized flavor that defines these cookies. Ensure they are fresh for the best taste.
Customizing Your Butterscotch Chocolate Chip Cookies: Creative Variations
While the classic recipe is divine, these cookies are also incredibly versatile! Feel free to experiment with these delicious substitutions and variations to tailor them to your taste or dietary needs:
- Dairy-Free Delight: For those with dietary restrictions, these cookies can easily be made dairy-free. Simply substitute your favorite high-quality **dairy-free butter** alternative and dairy-free chocolate. Finding dairy-free butterscotch chips might be a bit more challenging, but some brands offer them. If unavailable, consider using toffee bits or another dairy-free caramel alternative for a similar flavor profile.
- Nutty Additions: Elevate the texture and flavor by adding **3/4 cup of chopped walnuts or pecans**. For an extra layer of flavor, lightly toast the nuts before adding them to the dough – this brings out their inherent sweetness and crunch.
- Chocolate Combinations: Don’t limit yourself to just semi-sweet! Play with different chocolate varieties. Try a mix of **half semi-sweet and half dark chocolate** for a richer, more intense flavor, or **half milk chocolate and half semi-sweet** for a sweeter, creamier profile. White chocolate chips can also add a lovely contrast.
- Other Mix-ins: Get creative! Consider adding **caramel bits**, a sprinkle of **toffee bits**, or even **shredded coconut** for an extra layer of flavor and texture. Just be mindful not to overcrowd the dough.
- Quick Bake Option: Short on time but still craving homemade goodness? While the chilling time is essential for optimal flavor and texture in this specific recipe, you can adapt the flavor profile to a quicker format. Consider transforming this concept into **cookie bars**, which often require less chilling (or none at all) and bake in a single pan for convenience.
Step-by-Step Guide: Crafting Your Perfect Butterscotch Chocolate Chip Cookies
Making these irresistible cookies is a rewarding process. Follow these detailed steps to achieve buttery, chewy, and perfectly rippled results.
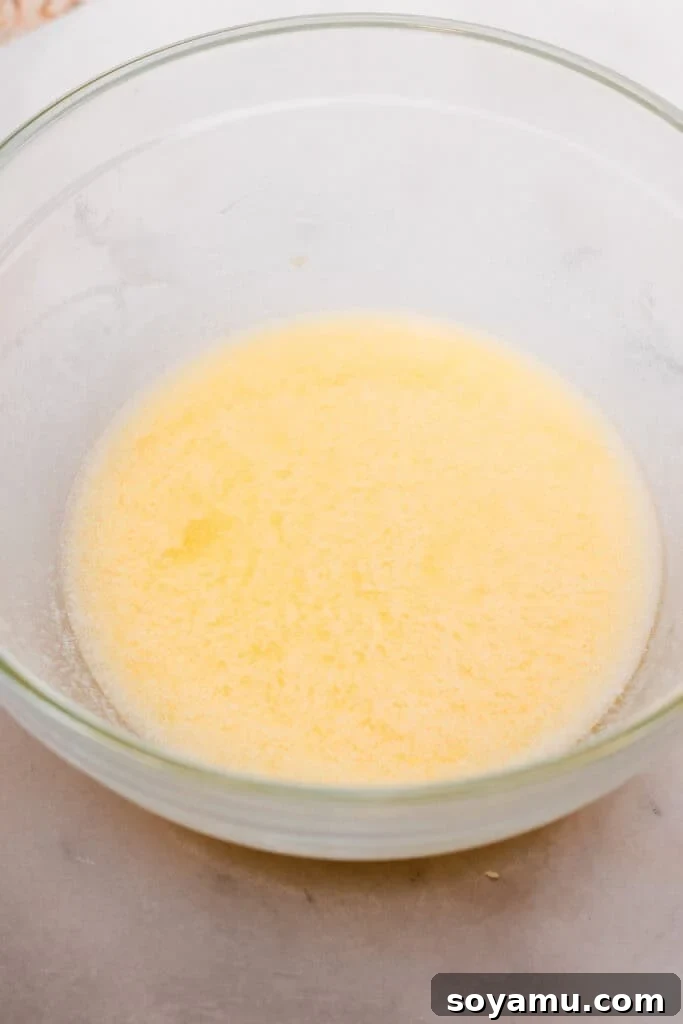
Step 1: Achieve the Ideal Butter Consistency. This is a critical step for the ultimate chewy texture. Begin by melting your butter in a medium mixing bowl. You can do this gently in the microwave in short bursts (30-60 seconds) or on the stovetop over low heat. Once melted, stir it gently to ensure all solids are dissolved. Then, place the bowl of melted butter into the fridge for about 10-15 minutes. The goal is to reach a consistency that is no longer fully liquid but also not completely solidified – it should be somewhere in between, almost like a thick, opaque liquid. If a slight “crust” forms on top, simply whisk it briefly to smooth it out. For the truly dedicated baker, the ideal temperature for this “in-between” butter is approximately 75°F (24°C).
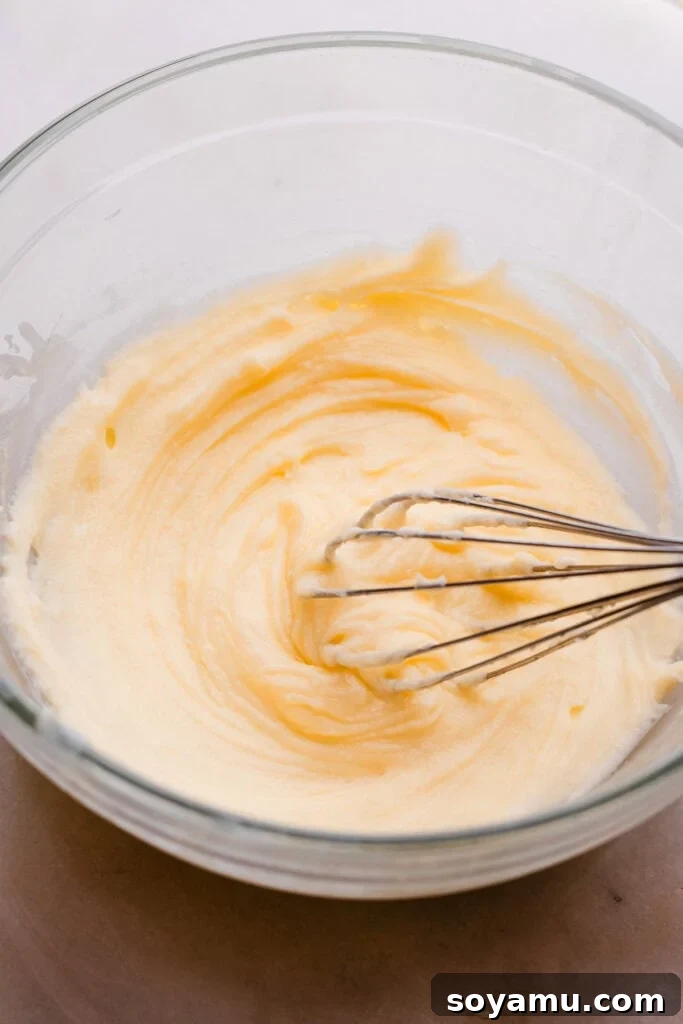
Step 2: Craft the Flavorful Cookie Dough Base. Once your butter is at the correct consistency, add both the dark brown sugar and granulated sugar to the bowl. Whisk vigorously until the sugars are thoroughly incorporated and the mixture is smooth and slightly thickened. Next, whisk in the large egg, the additional egg yolk, and the vanilla extract until everything is well combined and the mixture is lighter in color and fluffy. Finally, gently whisk in the milk. This wet mixture forms the rich foundation of your cookies.
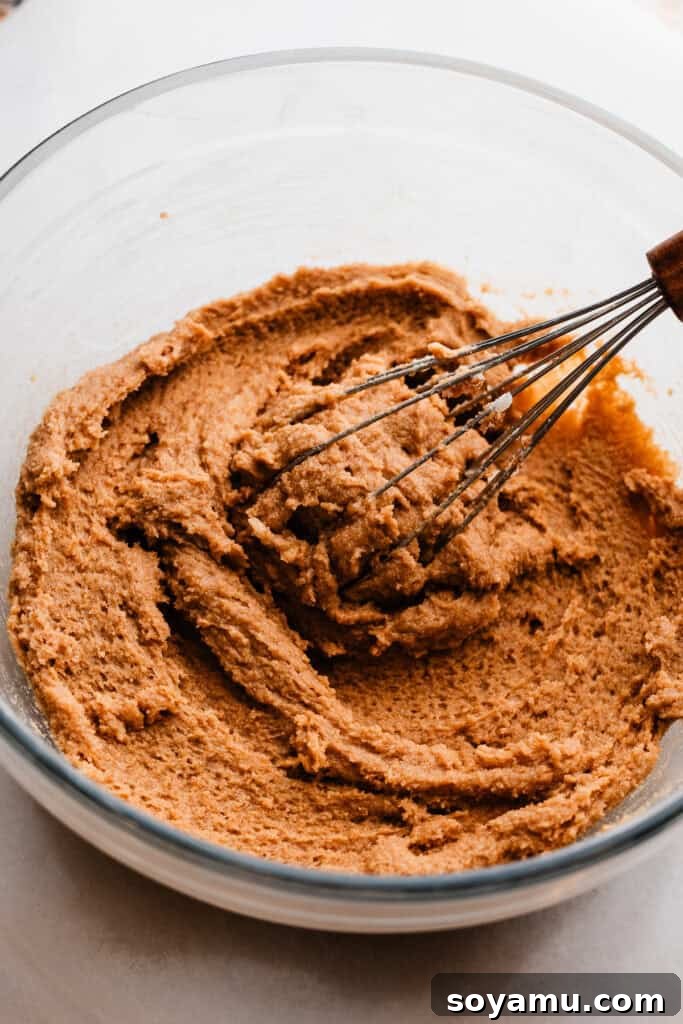
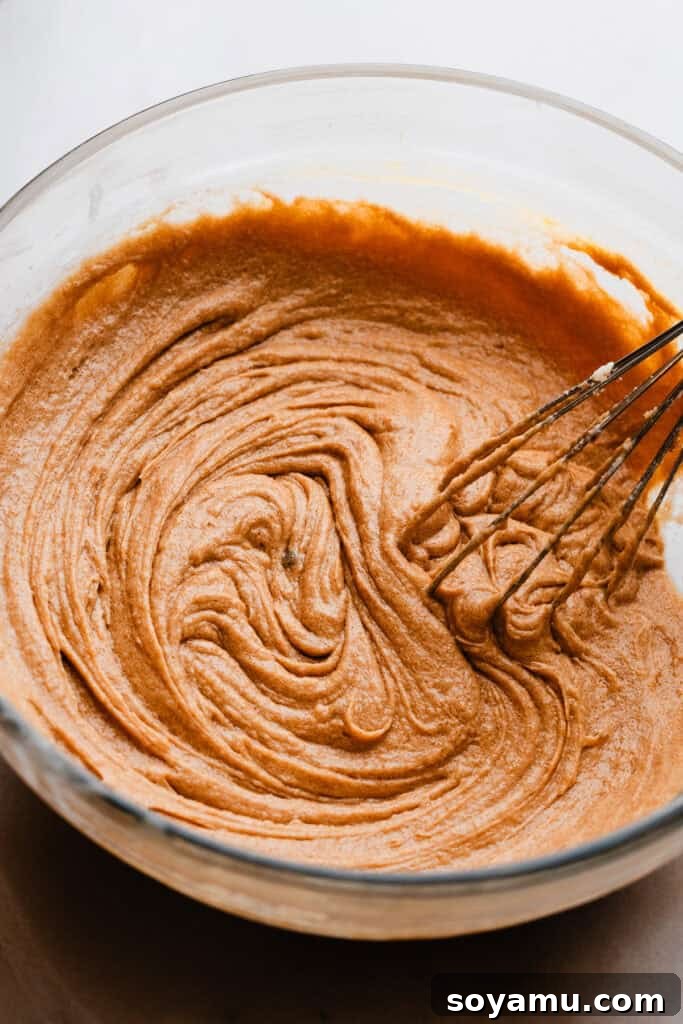
Step 3: Incorporate Dry Ingredients and Delectable Mix-ins. In a separate bowl, whisk together your all-purpose flour (ensuring it’s measured correctly), baking soda, and salt. Gradually add these dry ingredients to the wet mixture, stirring only until just combined. Be careful not to overmix, as this can develop gluten and lead to tough cookies. Once the flour streaks are almost gone, gently fold in the butterscotch chips and the majority of your chopped chocolate (reserving a small handful for topping the scooped dough balls later). The dough will be thick and slightly sticky, a perfect consistency for the next step.
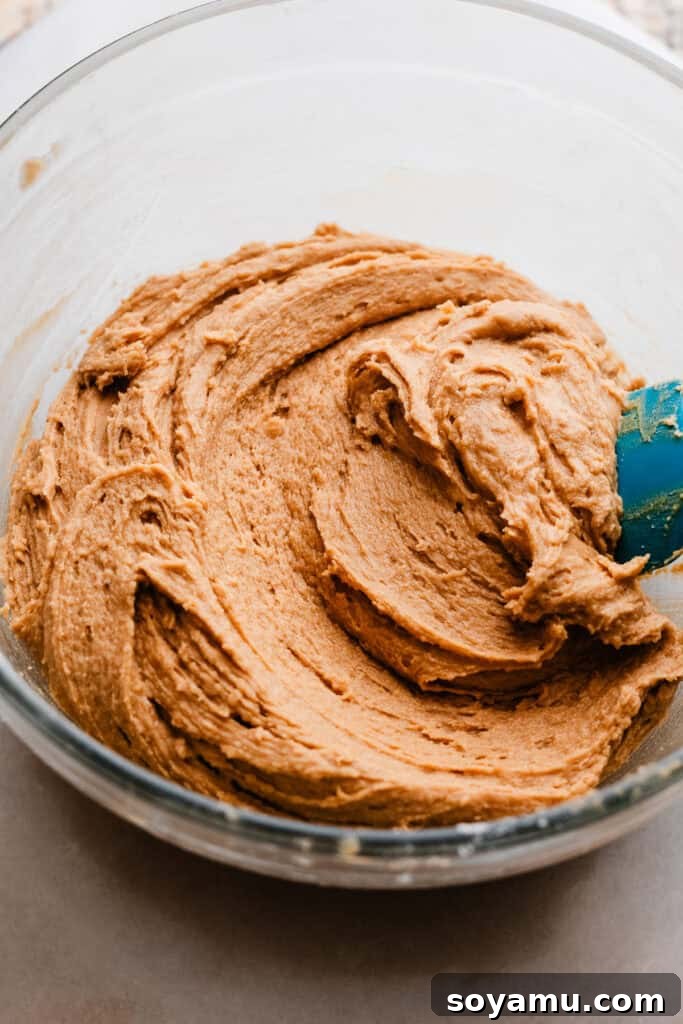
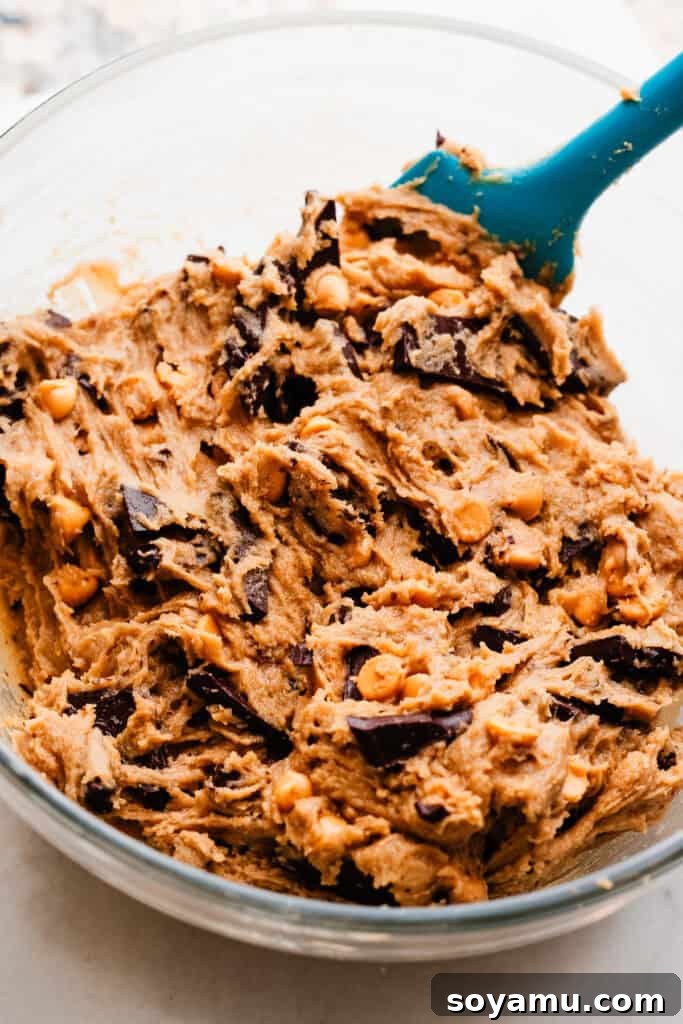
Step 4: Scoop, Top, and Chill for Enhanced Flavor. Using a cookie scoop, portion the dough into balls, aiming for approximately 75 grams each for consistently sized cookies. This ensures even baking. For a picture-perfect finish, gently press some of the reserved chocolate chunks onto any bare spots on top of each dough ball. Arrange the scooped dough balls in an airtight container and place them in the refrigerator. While a minimum chill of 2 hours is sufficient for good cookies, we highly recommend chilling for at least 24 hours, or even up to 72 hours. The longer chilling time allows the flavors to meld and deepen, resulting in a more complex and satisfying cookie experience, and helps prevent excessive spreading during baking.
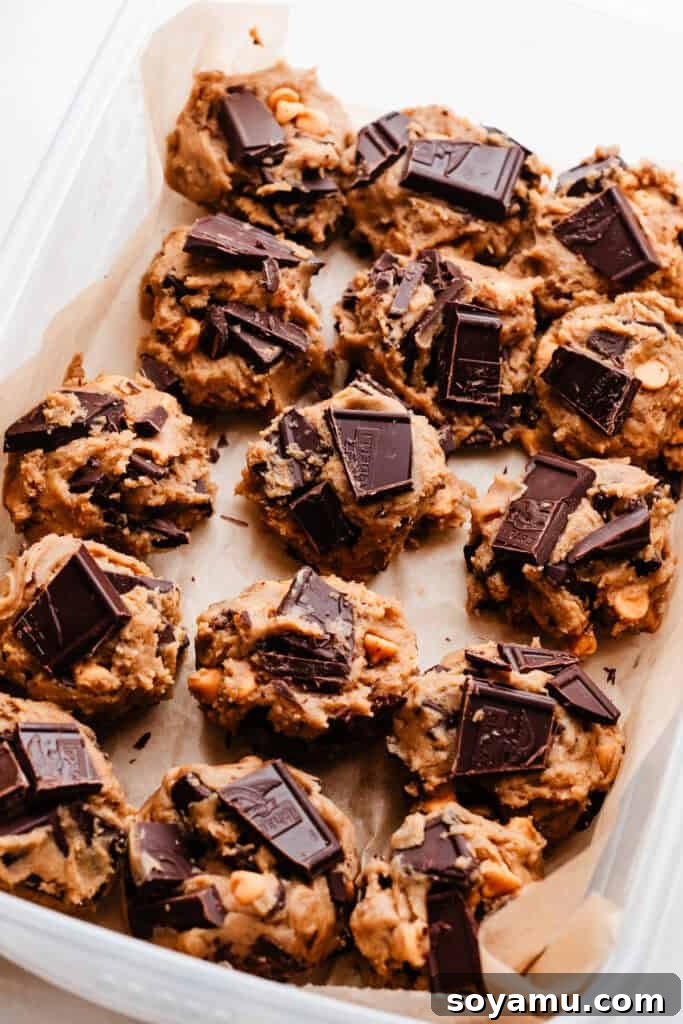
Step 5: Master the Pan-Banging Baking Technique. Preheat your oven to 350°F (175°C). Line a baking sheet with parchment paper or a silicone baking mat. Place no more than 4-6 cookie dough balls on each sheet, as these cookies will spread considerably. Bake for 10 minutes. At the 10-minute mark, carefully remove the baking sheet from the oven. Here’s where the magic happens: firmly bang the pan down onto your oven rack (or a sturdy, heat-safe surface). This technique, popularized by Sarah Kieffer of The Vanilla Bean Baking Blog, helps to deflate the cookies, encourage further spreading, and create those signature crisp, rippled edges with wonderfully chewy centers. Return the pan to the oven and bake for another 2-3 minutes. Repeat the pan-banging process one more time. The cookies should look golden brown at the edges with slightly set but still soft centers. Let them cool on the baking sheet for a few minutes before transferring them to a wire rack to cool completely. This resting period is crucial for setting their texture.
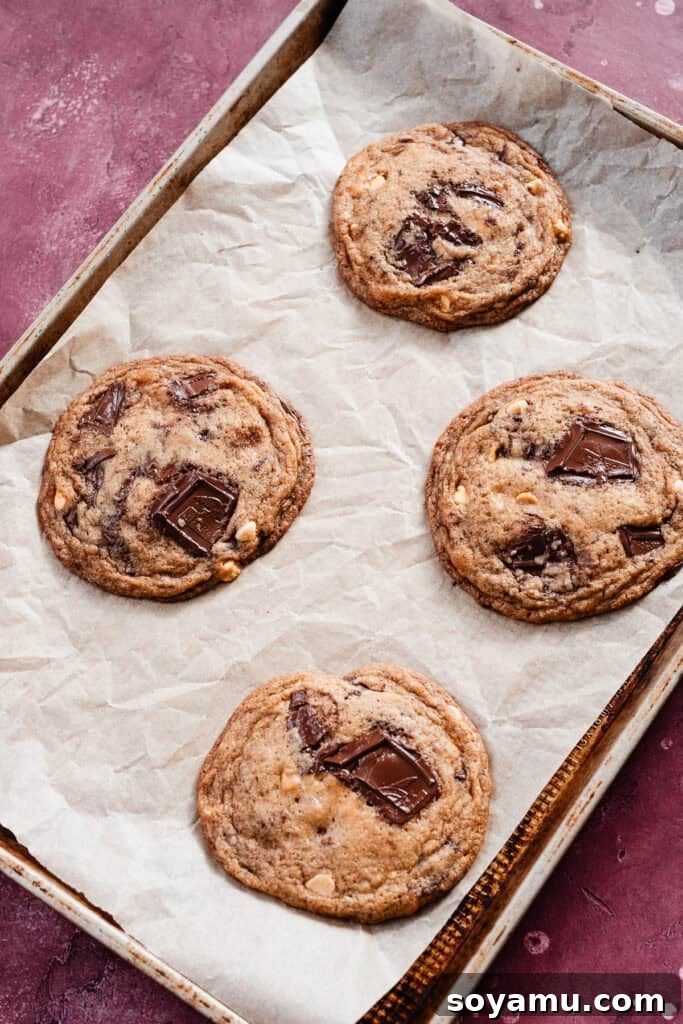
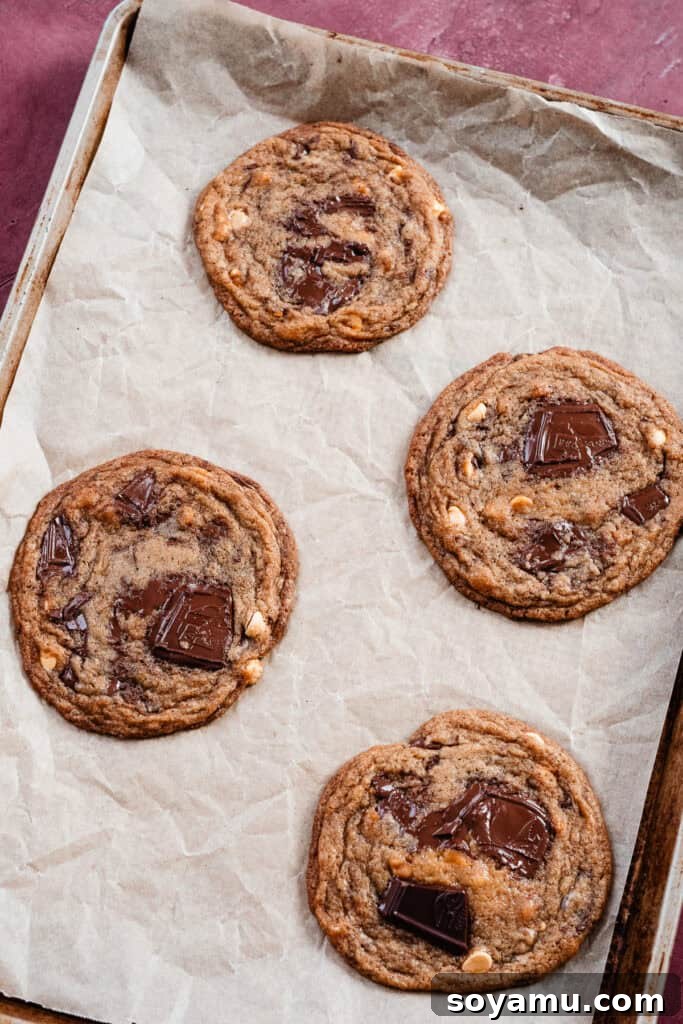
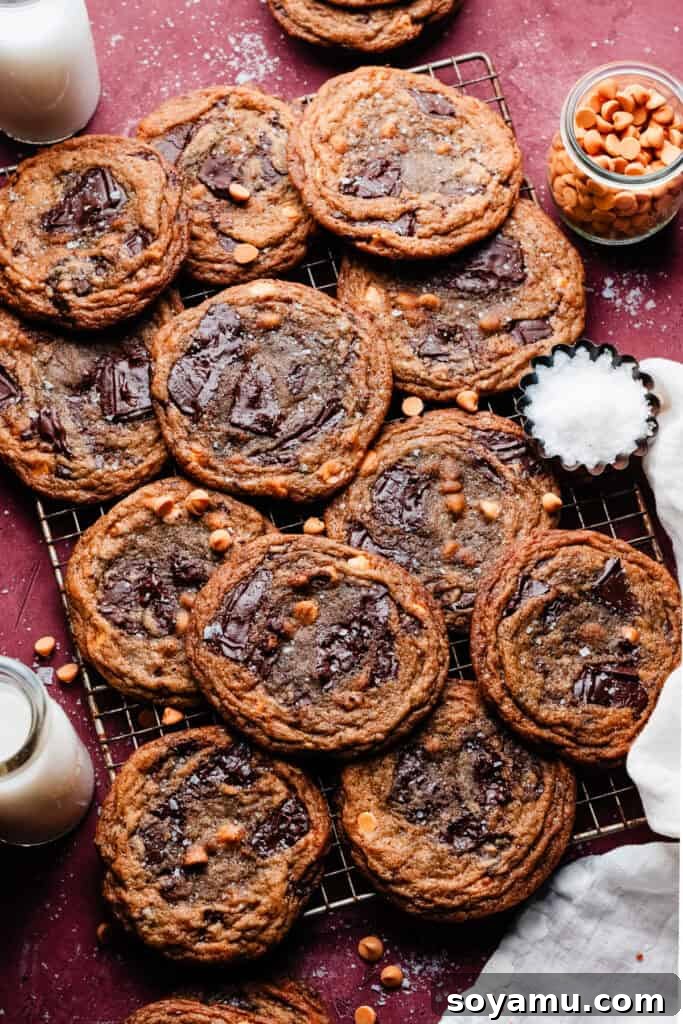
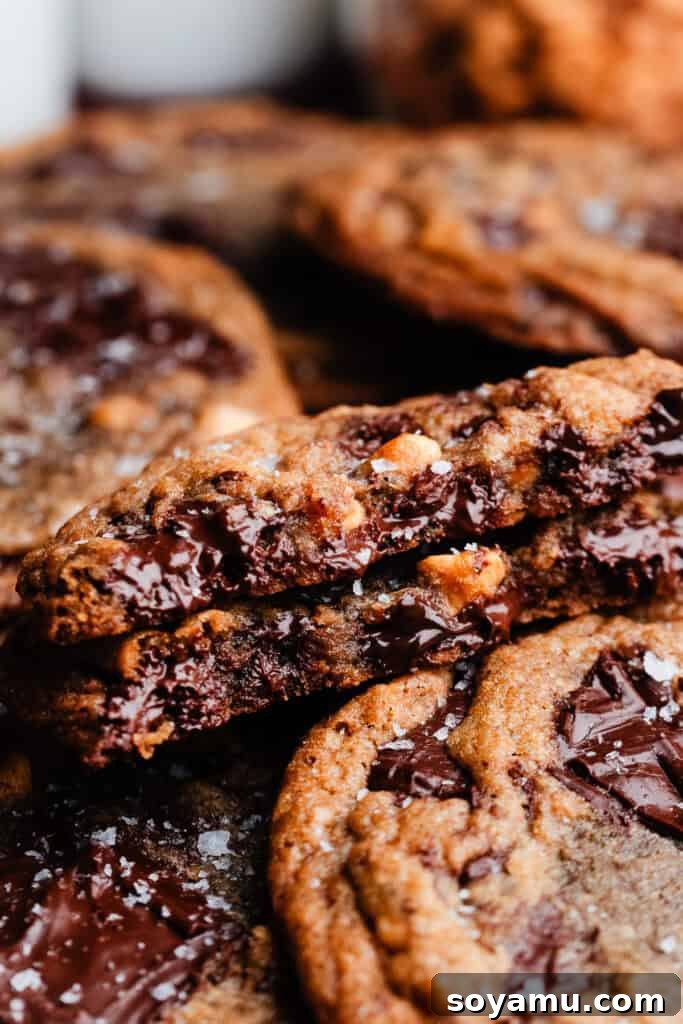
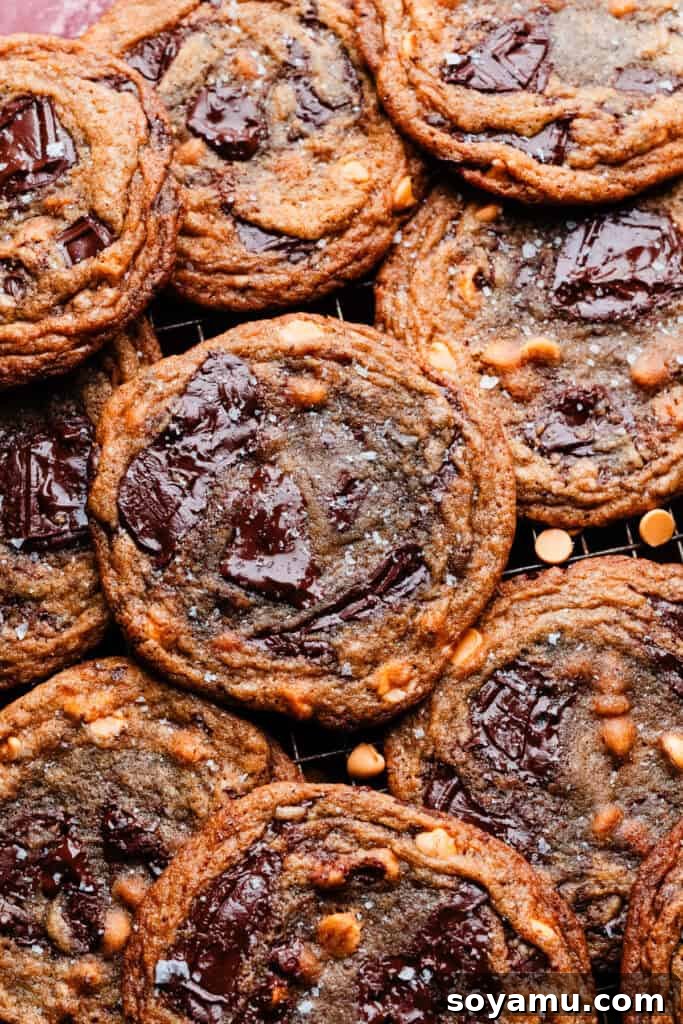
The image on the left illustrates the cookies as they appear after the initial bake, before the final pan-banging step. The image on the right vividly demonstrates how beautifully they flatten and develop their signature rippled edges after this crucial technique.
Serving & Storing Your Delicious Butterscotch Chocolate Chip Cookies
These cookies are truly best enjoyed warm from the oven, when the chocolate and butterscotch chips are perfectly melty, and the edges are at their crispiest. For an extra touch of indulgence, sprinkle them with a tiny pinch of flaky sea salt immediately after baking – it enhances all the flavors beautifully. Pair them with a cold glass of milk, a scoop of vanilla ice cream, or a warm cup of coffee for the ultimate treat.
To store any leftover cookies, ensure they have cooled completely to room temperature. Then, transfer them to an airtight container. They will stay fresh and delicious on your countertop for 3-4 days. If you’d like to enjoy them warm again, a quick zap in the microwave for 10-15 seconds will bring back that glorious gooeyness. Butterscotch is a truly underrated flavor, and we’re confident that after trying these, along with our Life-Changing Butterscotch Blondies, you’ll wholeheartedly agree!
Pro Tips for Baking the Best Butterscotch Chocolate Chip Cookies
Achieving bakery-quality cookies consistently comes down to a few key techniques and tools. Here are our expert tips to ensure your butterscotch chocolate chip cookies are nothing short of spectacular every time:
- Invest in an Oven Thermometer: This small, inexpensive gadget is a game-changer. An oven thermometer reveals your oven’s true temperature, which can often differ significantly from what the dial indicates. Accurate oven temperature is vital for proper cookie spread and doneness, so keeping one in your oven at all times ensures consistent baking results.
- Embrace the Kitchen Scale: For unparalleled accuracy, especially with flour, a food scale is your best friend. Measuring flour by volume (cups) can vary wildly depending on how it’s scooped and packed. Weighing ingredients eliminates this variability, guaranteeing you have the precise amounts needed for the perfect cookie texture.
- Don’t Overbake: It’s better to slightly underbake than overbake. Cookies continue to cook slightly on the hot baking sheet even after they are removed from the oven. Look for golden-brown edges and centers that still appear slightly soft and gooey. This ensures a supremely chewy interior.
- Use a Quality Baking Sheet & Liner: Heavy-duty, light-colored baking sheets prevent over-browning on the bottom of your cookies. Always line your baking sheets with parchment paper or a silicone baking mat. This prevents sticking, promotes even baking, and makes for easy cleanup.
- A Good Cookie Scoop is Key: For uniform cookies that bake evenly and look professional, a cookie scoop (ice cream scoop) is invaluable. It ensures each dough ball is the same size, leading to consistent results across your entire batch.
Frequently Asked Questions About Butterscotch Chocolate Chip Cookies
Here are answers to some common questions about making and storing these delightful cookies:
Absolutely! Freezing the dough is a fantastic way to enjoy freshly baked cookies anytime. First, follow the recipe instructions to chill the scooped dough balls in the fridge for at least 2 hours (or up to 72 hours) to allow the flavors to develop. After this initial chill, arrange the dough balls on a parchment-lined baking sheet and freeze them until they are completely solid, typically 1-2 hours. Once solid, transfer the frozen dough balls to a heavy-duty freezer bag or an airtight freezer-safe container. They can be stored in the freezer for 1-2 months. When you’re ready to bake, you can either bake them directly from frozen (adding 1-2 minutes to the bake time as needed) or thaw them overnight in the refrigerator before baking as usual.
Yes, you can! Freezing baked cookies is a great way to preserve their freshness for longer. Allow the freshly baked cookies to cool down completely to room temperature. To prevent them from sticking together and to maintain their quality, wrap individual cookies or pairs of two in parchment paper, then place them in a freezer-safe ziploc bag or an airtight container. Label with the date and freeze for 3-6 weeks. When you’re ready to enjoy them, simply take them out of the freezer and let them thaw on the countertop for 1-2 hours. For an extra treat, warm them slightly in the microwave for a few seconds after thawing to bring back that “fresh from the oven” feel.
Explore More Irresistible Cookie Recipes
If you’ve fallen in love with these butterscotch chocolate chip cookies, you’ll adore our other perfected cookie creations. Expand your baking repertoire with these fan favorites:
- The Best Eggless Chocolate Chip Cookies
- Classic Brown Butter Chocolate Chip Cookies
- Jumbo Bakery-Style Chocolate Chip Cookies
- Easy Brown Butter Chocolate Chip Cookie Bars
- Decadent Salted Caramel Chocolate Chip Cookies
Did you bake this recipe? We’d love to hear from you!
Please share your experience by leaving a comment and a star rating below. Your feedback helps our small business immensely and guides other bakers in their cookie journey. Thank you for your support!
The Ultimate Butterscotch Chocolate Chip Cookies Recipe
By Stephanie Simmons
These Butterscotch Chocolate Chip Cookies are the epitome of cookie perfection, offering irresistible crisp, rippled edges, wonderfully chewy centers, and a delightful combination of melty chocolate and rich butterscotch chips. This recipe, born from extensive testing, brings an incredible depth of flavor that will make these your new go-to cookie.
Prep Time: 30 mins | Cook Time: 12-14 mins | Chilling Time: 2 hrs 15 mins (up to 72 hrs) | Total Time: Approx. 2 hrs 57 mins
Yields: 17 cookies
Ingredients
- 1 cup salted butter, melted then cooled to “in-between” consistency (approx. 206 grams or 14.5 tbsp)
- 3/4 cup dark brown sugar, packed (165 grams)
- 3/4 cup granulated sugar (158 grams)
- 1 large egg, at room temperature
- 1 large egg yolk, at room temperature
- 2 tsp vanilla extract
- 1 tbsp milk (whole milk preferred)
- 2 cups all-purpose flour, spooned & leveled or weighed (260 grams)
- 1/2 tsp baking soda
- 1/2 tsp salt
- 10 ounces semi-sweet chocolate, roughly chopped and divided (use high-quality baking bars or chips)
- 1 cup butterscotch chips
- Flaked sea salt, for topping (optional, but highly recommended)
Instructions
- Melt & Cool Butter: In a medium mixing bowl, melt the salted butter until it’s almost completely liquid (about 30-60 seconds in the microwave). Stir until residual heat melts it fully. Then, place the bowl in the refrigerator for 12-15 minutes until the butter reaches an “in-between” state – no longer fully melted but not solidified. It should be thick and opaque. If a slight crust forms, whisk it gently to smooth it out. Ideally, the butter temperature should be around 75°F (24°C).
- Make Cookie Dough: Add both dark brown sugar and granulated sugar to the cooled butter. Whisk vigorously until well combined and slightly thickened. Whisk in the large egg, egg yolk, and vanilla extract until the mixture is light and fluffy. Then, whisk in the milk until fully incorporated.
- Add Dry Ingredients & Mix-ins: In a separate bowl, combine the all-purpose flour (properly measured by spoon and level method or scale), baking soda, and salt. Gradually add these dry ingredients to the wet mixture, stirring gently with a spatula or wooden spoon until just combined and no streaks of flour remain. Be careful not to overmix. Fold in 8 ounces of the chopped semi-sweet chocolate and all the butterscotch chips. Reserve the remaining 2 ounces of chopped chocolate for topping.
- Scoop Dough Balls & Chill: Using a 75-gram scoop (approximately 3 tablespoons), portion the cookie dough into uniform balls. Gently press some of the reserved chocolate chunks onto any visible bare spots on top of each dough ball. Place the scooped dough balls into an airtight container and refrigerate for a minimum of 2 hours, or for best results, 24 to 72 hours. Longer chilling develops richer flavor and better texture.
- Bake with Pan-Banging Technique: Preheat your oven to 350°F (175°C). Line a baking sheet with parchment paper. Place 4-6 chilled cookie dough balls on the prepared sheet, ensuring ample space between them as they will spread. Bake for 10 minutes.
- First Pan Bang: After 10 minutes, remove the baking sheet from the oven. Firmly lift and drop the baking sheet onto your oven rack or a heat-safe counter surface. This helps deflate the cookies, encourages spreading, and creates those desirable rippled, crisp edges. Return the cookies to the oven for another 2-3 minutes.
- Final Pan Bang & Cool: Remove the pan from the oven again and perform another firm bang. The cookies should now be thin with distinct ripples, golden brown edges, and still slightly soft centers. Let the cookies cool on the baking sheet for 5-10 minutes to set before carefully transferring them to a wire rack to cool completely. Sprinkle with flaky sea salt immediately if desired.
- Serve & Store: Enjoy these cookies warm for the ultimate gooey experience. Store any cooled leftovers in an airtight container on the counter for 3-4 days. They warm up beautifully in the microwave for a few seconds.
Notes
- A Note on Butter Measurement: When melting butter, some water content evaporates, reducing its volume. While 1 cup is 226 grams, for this specific recipe, after the melting and cooling process, we aim for approximately **206 grams (14.5 tablespoons)** of butter. If your melted and cooled butter quantity is slightly off, you can adjust by adding a tiny bit of water if too little, or removing some butter if too much, to hit the 206g mark. This precision helps achieve the perfect cookie spread. If you’re using regularly softened butter (not melted and cooled), still aim for 206g.
- Brown Sugar Preference: For a richer, deeper caramelized flavor that pairs exquisitely with butterscotch, dark brown sugar is highly recommended. However, light brown sugar can be used if that’s all you have, though the flavor profile will be slightly milder.