
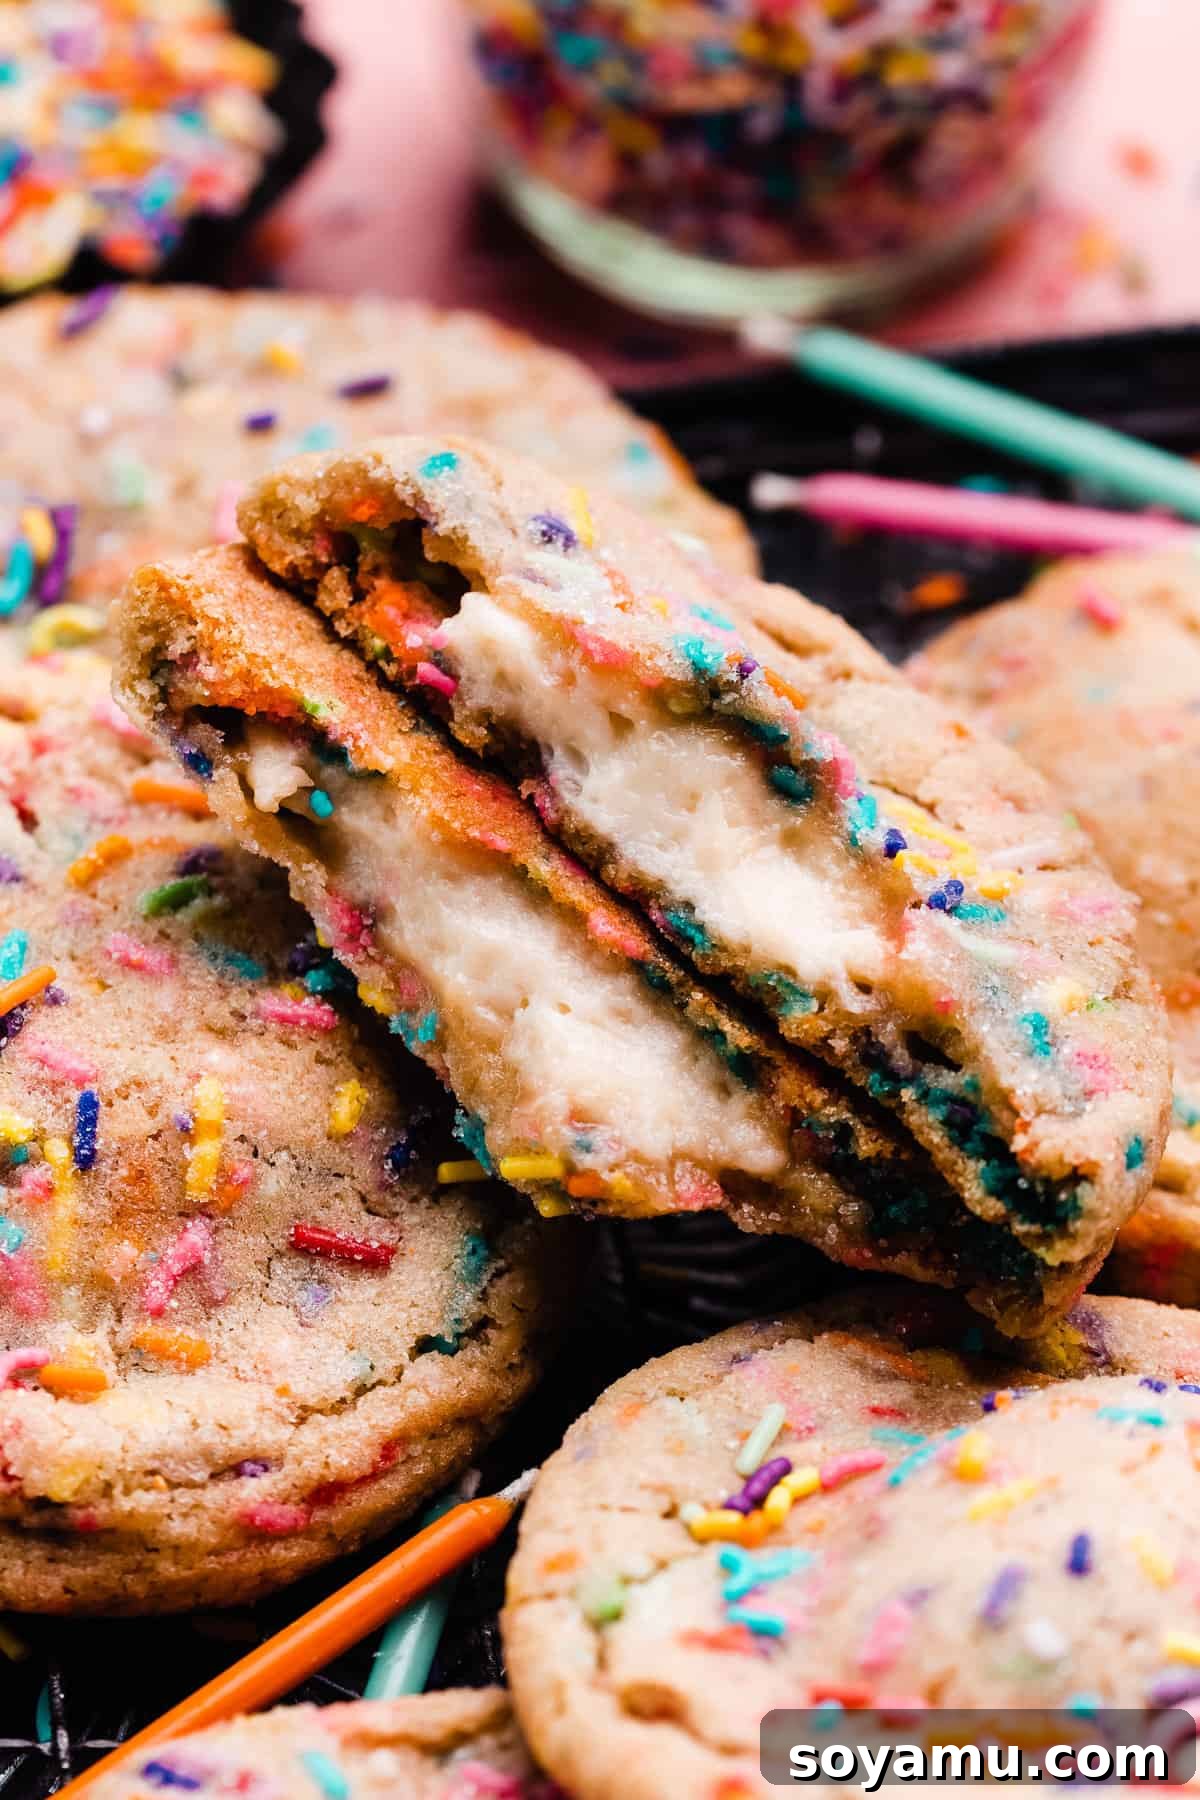
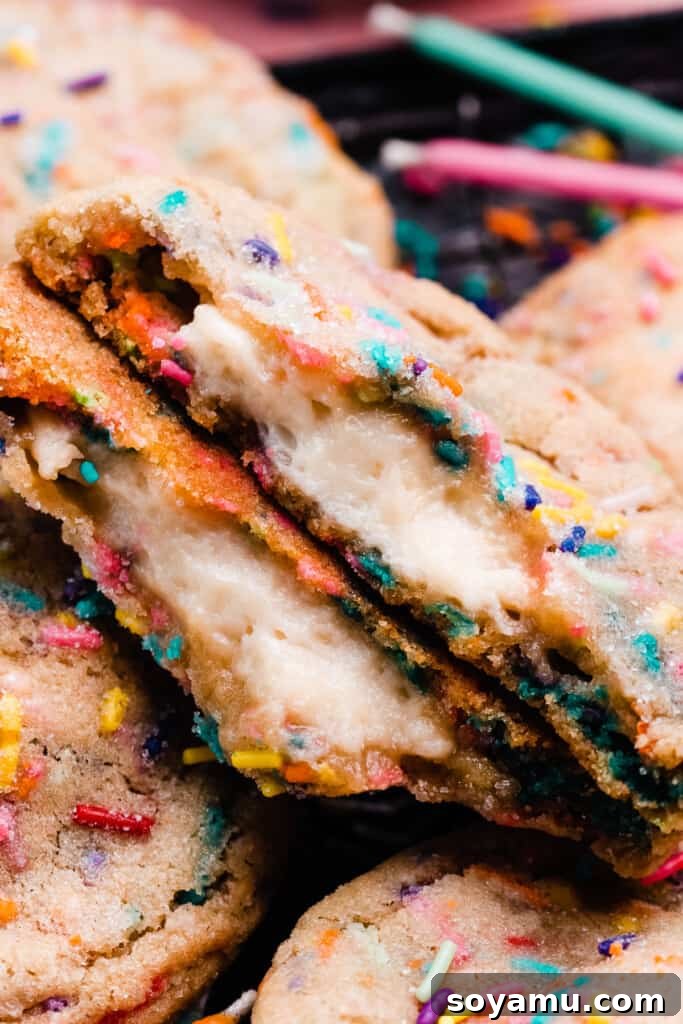
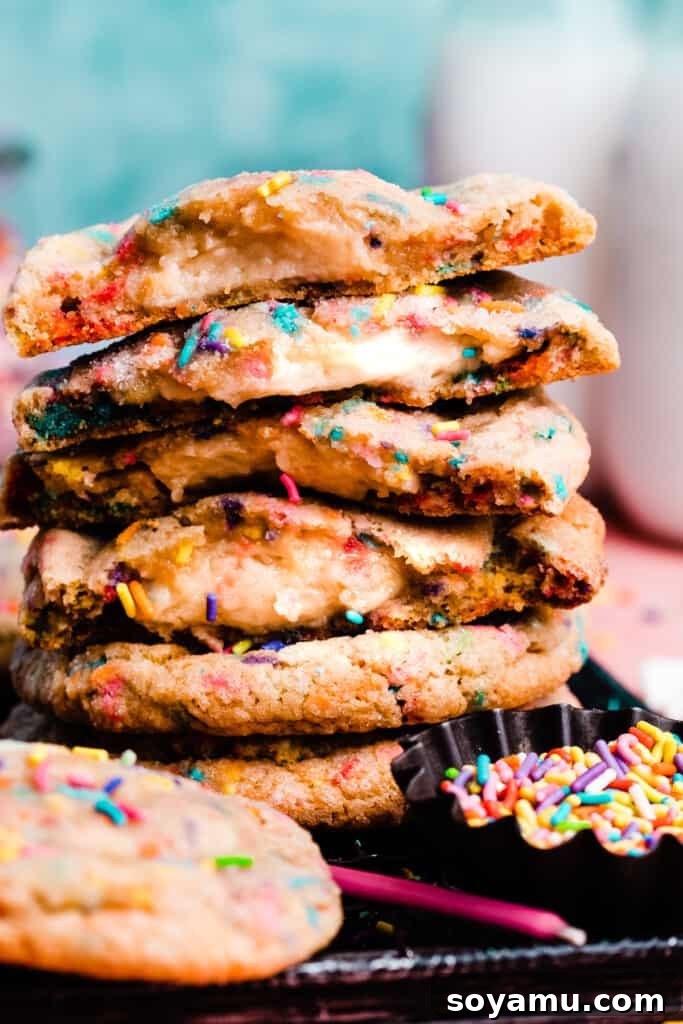
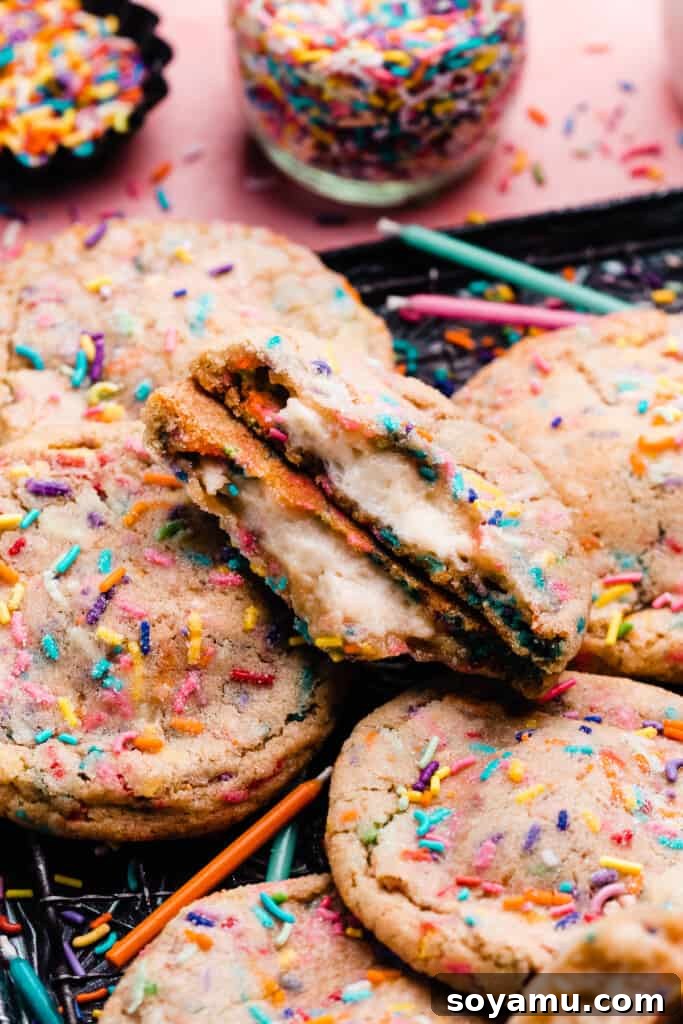
Funfetti Cookies are more than just a dessert; they’re a celebration in every bite! Imagine the joyful taste of a birthday cake transformed into a soft, chewy cookie, bursting with vibrant sprinkles. But the magic doesn’t stop there – each of these delightful cookies holds a secret: a creamy, quick cheesecake filling that tastes uncannily like rich vanilla cake batter. These aren’t your average sprinkle sugar cookies; they are a truly elevated funfetti experience, promising to bring a smile to anyone lucky enough to try them. Get ready to bake a batch of pure happiness that perfectly captures the spirit of a birthday party in a comforting, handheld treat.
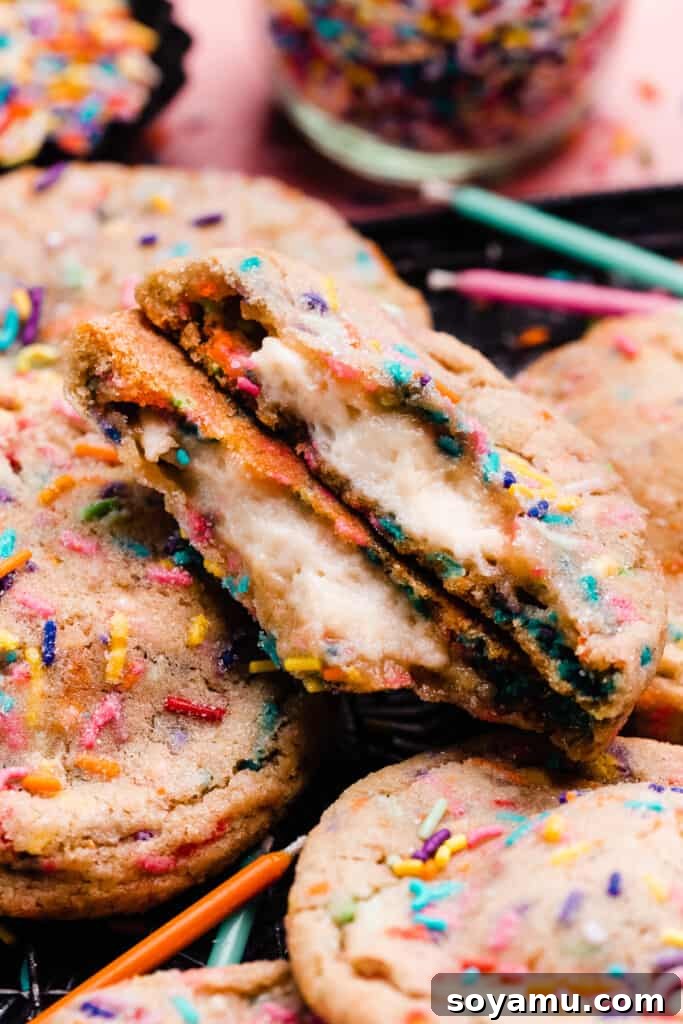
Why You’ll Fall in Love with These Funfetti Cookies:
Prepare to add these incredible Funfetti Cookies to your list of all-time favorite treats. They’re designed to deliver an unparalleled flavor and texture experience that goes far beyond traditional cookie recipes, offering a unique twist on a classic celebratory dessert.
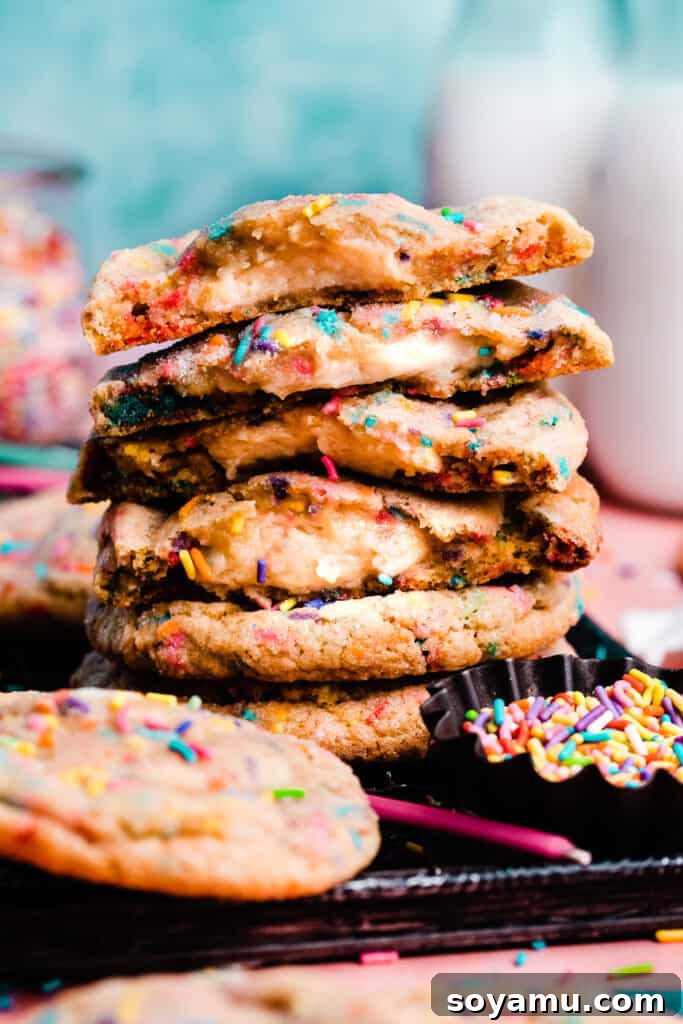
- Chewy Funfetti Perfection with Crisp Edges: These cookies are meticulously crafted to achieve that coveted balance: beautifully soft and delightfully chewy on the inside, with just the right amount of crispness around the edges. This creates a textural masterpiece that is truly the epitome of a perfect cookie. Each bite offers a satisfying give and a subtle crunch, making them utterly irresistible and memorable.
- Homemade Excellence – No Cake Mix Needed: Forget relying on a boxed funfetti cake mix! Our recipe empowers you to create these homemade funfetti cookies entirely from scratch, ensuring a fresh, authentic taste that a store-bought mix simply can’t replicate. Despite being homemade, they perfectly capture the quintessential funfetti flavor you know and love, proving that the most delightful desserts come from simple, quality ingredients and a little love.
- Explosion of Authentic Cake Batter Flavor: What truly sets these cookies apart is the remarkable depth of their flavor. Beyond the joyful bursts of colorful sprinkles, the thoughtful addition of a special bakery butter emulsion infuses the cookie dough with that unmistakable “funfetti” essence, distinguishing them from ordinary sugar cookies. This isn’t just a sugar cookie with sprinkles; it’s a meticulously flavored cookie that tastes genuinely like a festive birthday cake, enhanced by rich vanilla notes.
- The Ultimate Birthday Cake Cheesecake Filling: Elevating these cookies from great to extraordinary is their luxurious, quick cheesecake filling. This creamy core is made with just a few simple ingredients and is expertly flavored to taste exactly like rich vanilla cake batter. It’s an unexpected, delightful surprise tucked within each cookie, adding a layer of indulgence, creamy texture, and an irresistible tangy sweetness that transforms these into a truly gourmet sprinkle cookie experience.
Key Ingredients: A Detailed Overview
Crafting these extraordinary Funfetti Cookies starts with understanding the role of each ingredient. Here’s a detailed look at what you’ll need to gather to ensure baking success and achieve that perfect cake batter flavor. The full recipe with precise measurements and detailed directions can always be found at the bottom of this page.
- Butter: For the most robust and satisfying flavor profile in your funfetti cookies, I consistently opt for salted butter. Its subtle saltiness beautifully balances the sweetness of the dough and filling. However, if you prefer, unsalted butter works perfectly fine – just be sure to add a pinch more salt to the recipe to compensate. Crucially, allow your butter to come to a full room temperature before you begin creaming. Creaming cold butter is not only challenging but also results in an inferior dough texture and an inconsistent final product. Softened butter creams beautifully with sugar, creating an airy and smooth base for your cookies.
- All-Purpose Flour: Accurate flour measurement is paramount to avoid dry, crumbly, or tough cookies. For optimal results, gently spoon your flour into the measuring cup, then level it off with a flat utensil (like the back of a knife). Scooping directly from the bag can compact the flour, leading to using too much and a potentially dry or dense cookie. For ultimate precision and consistent baking results, a kitchen scale is always recommended for measuring flour by weight.
- Eggs: Always use large eggs for this recipe, and like butter, they should be at room temperature. Room temperature eggs emulsify more effectively with the fats and sugars in the dough, leading to a smoother, more uniform batter. This aids in creating a tender crumb and helps the cookies rise evenly, contributing to their perfect texture.
- Vanilla Extract: The quality of your vanilla extract truly shines through in baked goods, especially in a recipe where vanilla is a primary flavor. Invest in real, high-quality vanilla extract for the best, most aromatic flavor. It forms the essential backbone of both the funfetti cookie dough and the luxurious cake batter cheesecake filling.
- Rainbow Sprinkles (Jimmies): What’s funfetti without the sprinkles? Choose your favorite vibrant rainbow jimmy sprinkles (the long, cylindrical ones). These are ideal because they hold their shape relatively well during baking and contribute both dazzling color and a slight, pleasant textural element to each cookie. Avoid nonpareils, as they tend to bleed color excessively into the dough, which can result in a muted or muddy appearance.
- Bakery Butter Vanilla Emulsion: This ingredient is truly the unsung hero of this recipe, delivering an incredible flavor punch that makes the cheesecake filling taste strikingly like authentic vanilla cake batter! It’s a game-changer for achieving that distinct bakery-style taste. I strongly recommend ordering a bottle; it’s an affordable investment that will last a long time and can be used in any baking recipe where you’d typically use vanilla extract, adding a richer, more profound bakery-style flavor. (Please note: this is not a sponsored recommendation; I simply adore this ingredient and its transformative power!)
- Cream Cheese: For that perfectly rich, tangy, and stable cheesecake filling, always use full-fat cream cheese in block form. Avoid cream cheese spreads or whipped varieties, as their higher water content and stabilizers can lead to a “weepy” or runny filling that struggles to freeze correctly and maintain its consistency. Ensure it’s cold when you begin mixing the filling to help prevent overmixing.
- Sugars (Granulated, Light Brown, Powdered): Each type of sugar plays a vital role in these cookies. Granulated sugar provides sweetness, contributes to the crisp edges of the cookie, and helps with structure. Light brown sugar adds moisture, chewiness, and a subtle molasses flavor, enhancing the overall depth. Powdered sugar is essential for achieving the smooth, creamy, and lump-free texture of the cheesecake filling.
- Baking Powder & Baking Soda: These leavening agents work in harmony within the cookie dough to give the cookies their perfect rise and soft texture. They contribute to that desirable chewiness without making the cookies overly dense, ensuring a light yet substantial bite.
- Salt: A crucial flavor enhancer, salt plays a critical role in balancing the sweetness of the cookies and cheesecake filling, and it also heightens all the other delicate flavors present, making the overall taste more complex and satisfying.
- Almond Extract: A small but significant touch of almond extract in the cheesecake filling is what truly gives it that unmistakable “cake batter” aroma and taste. It beautifully complements the vanilla and butter emulsion, adding an extra layer of bakery-style complexity.
Thoughtful Ingredient Substitutions:
While this recipe has been perfected with specific ingredients to achieve its unique flavor and texture, here are some considerations if you need to make adjustments for dietary needs or ingredient availability:
- Dairy-Free Adaptation: If you’re looking to make this recipe dairy-free, you can experiment with your favorite trusted dairy-free butter and cream cheese alternatives. It’s important to note that results may vary depending on the specific brands and formulations of these substitutes, as they can behave differently in baking. For the best filling consistency, ensure you use a block-style dairy-free cream cheese rather than a spread.
- Gluten-Free Exploration: I have not personally tested a gluten-free version of this recipe. Baking with gluten-free flours can often require specific adjustments to liquid content, leavening agents, and overall mixing techniques to prevent dry or crumbly results. If you do attempt a gluten-free adaptation, I would be very interested to hear about your experience! Please share your success and any tips you discover; it would be wonderful to know how it turns out.
Crafting Your Masterpiece: Step-by-Step Funfetti Cookie Guide
Follow these detailed steps carefully to achieve perfectly chewy, cake batter cheesecake stuffed funfetti cookies. Each stage is crucial for the ultimate result, so pay close attention to temperatures and mixing times.
Step 1: Prepare the Irresistible Cookie Dough.
Begin by creaming your softened salted butter with both the light brown sugar and granulated sugar in a large mixing bowl. Beat these together with an electric mixer on medium-high speed for about 1-2 minutes until the mixture is visibly light, fluffy, and well combined. This aeration process is key to creating a tender and soft cookie. Next, incorporate the room temperature eggs one at a time, mixing thoroughly after each addition until fully incorporated. Stir in the vanilla extract and the highly recommended bakery butter emulsion until they are just combined; it’s important to avoid overmixing at this stage. In a separate, medium-sized bowl, whisk together the precisely measured all-purpose flour (remember to spoon and level it correctly), baking powder, baking soda, and salt. Gradually add these dry ingredients to your wet mixture, mixing on low speed until a soft, cohesive dough just forms. Be careful not to overmix, as excessive gluten development can lead to tough cookies. Finally, gently fold in the vibrant rainbow jimmie sprinkles until they are evenly distributed throughout the dough. Once combined, cover the bowl tightly with plastic wrap and chill the dough in the refrigerator for at least 30 minutes. This initial chill makes the dough much easier to handle and scoop later on, and begins to develop flavor.
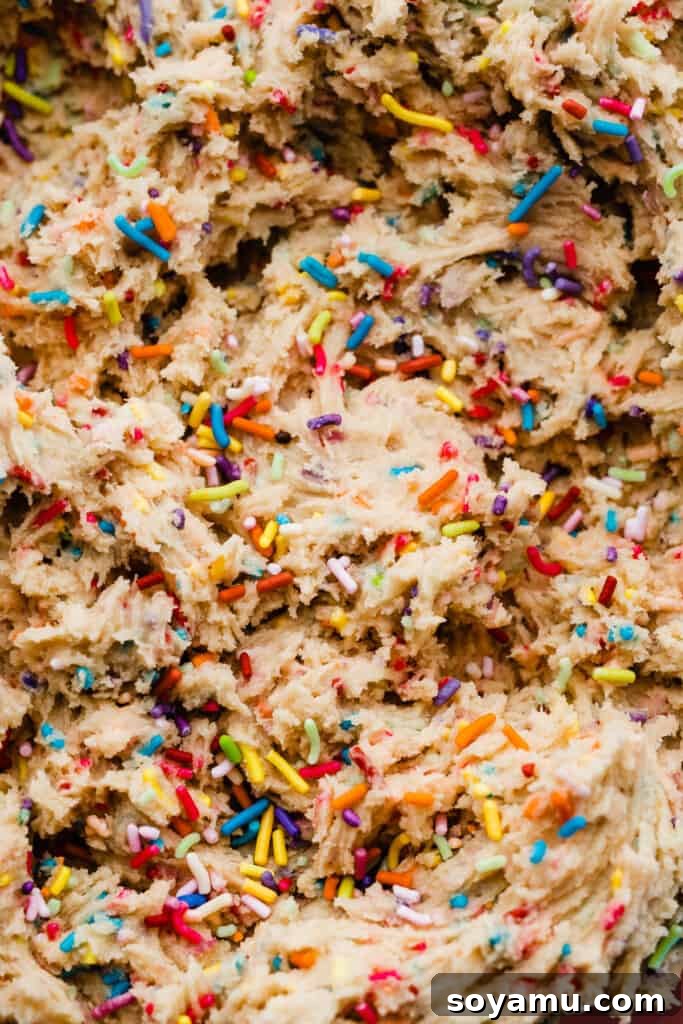
Step 2: Scoop and Chill the Dough for Optimal Texture.
After the initial 30-minute chill, the dough will be more manageable and less sticky. Use a large cookie scoop (approximately 3 tablespoons capacity) to portion out the dough into uniform balls. For ultimate precision and consistent baking, aim for about 80 grams per ball if you have a kitchen scale. Uniform size ensures that all your cookies bake evenly. Once scooped, place these dough balls into an airtight container and return them to the refrigerator. They need to chill for a minimum of 4 hours, or ideally, up to 48 hours. If you’re pressed for time, you can place them in the freezer for about 2 hours to achieve sufficient firmness. This extended chill time is absolutely vital: it allows the flavors to deepen and meld, prevents excessive spreading during baking, and allows the gluten in the dough to relax, ultimately resulting in a more tender, chewier, and flavorful cookie.

Step 3: Prepare and Freeze the Cake Batter Cheesecake Filling.
In a medium bowl, combine your cold, full-fat block cream cheese with the powdered sugar, brown sugar, vanilla extract, butter emulsion, and almond extract. Using a hand mixer or stand mixer, beat these ingredients together on medium speed until they are just combined and smooth. It’s absolutely crucial to avoid overmixing here, as excessive beating can introduce too much air and cause the cream cheese to become “weepy” or runny, making it difficult to freeze solid and messy to work with. Once mixed to a smooth consistency, spoon out tablespoon-sized dollops of the filling onto a baking sheet that you’ve lined with wax paper or parchment paper. Ensure you measure these accurately with a tablespoon for consistent filling amounts in each cookie. Transfer the baking sheet to the freezer and freeze the dollops until they are completely solid, which typically takes about 2 hours, but they can conveniently stay frozen for up to 24 hours (or even longer in an airtight container).
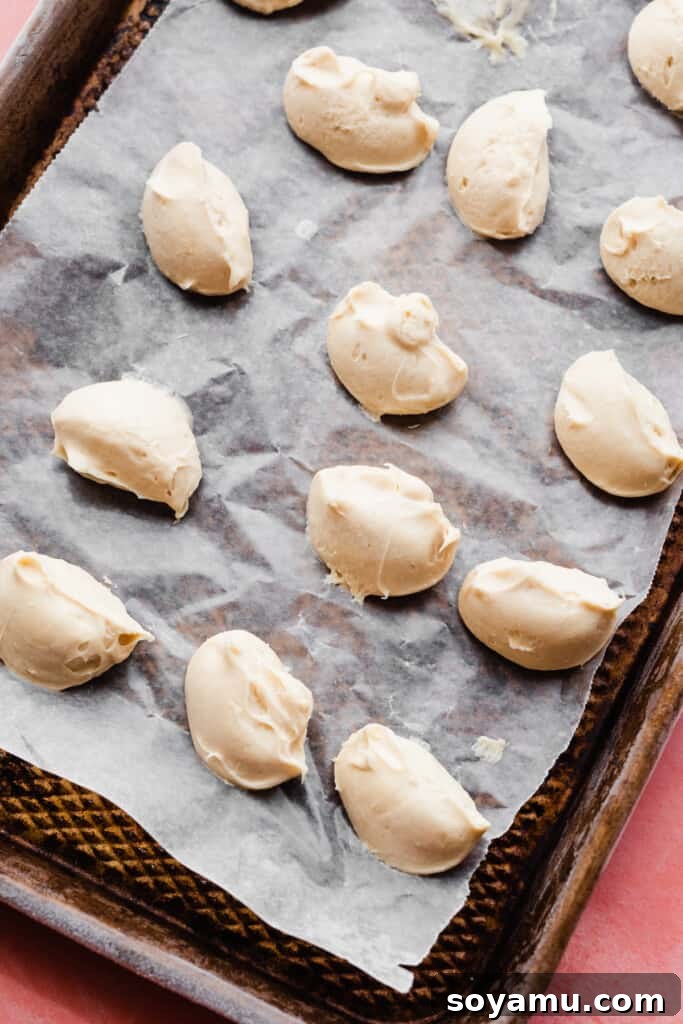
Step 4: Expertly Stuff Your Cookies.
Once your cookie dough balls are thoroughly chilled and your cheesecake dollops are frozen solid, it’s time for the most exciting part: the stuffing! Take one chilled cookie dough ball and gently flatten it in the palm of your hand to create a disc, roughly 3-4 inches in diameter. Place a single frozen cheesecake dollop directly in the center of the flattened dough. Carefully bring the edges of the cookie dough up and around the cheesecake filling, completely encasing it. Pinch the seams together firmly to ensure no cheesecake bits are peeking out. This is a critical step, as any exposed filling can leak during baking, causing the cookies to spread unevenly or burn. Gently roll the stuffed dough into a smooth, even ball. Repeat this process with all remaining cookie dough and frozen filling. As you stuff them, it’s beneficial to keep the finished stuffed dough balls in the freezer for a few minutes while you work on others, just to prevent the cheesecake from thawing prematurely. This ensures the filling remains solid and intact for baking.
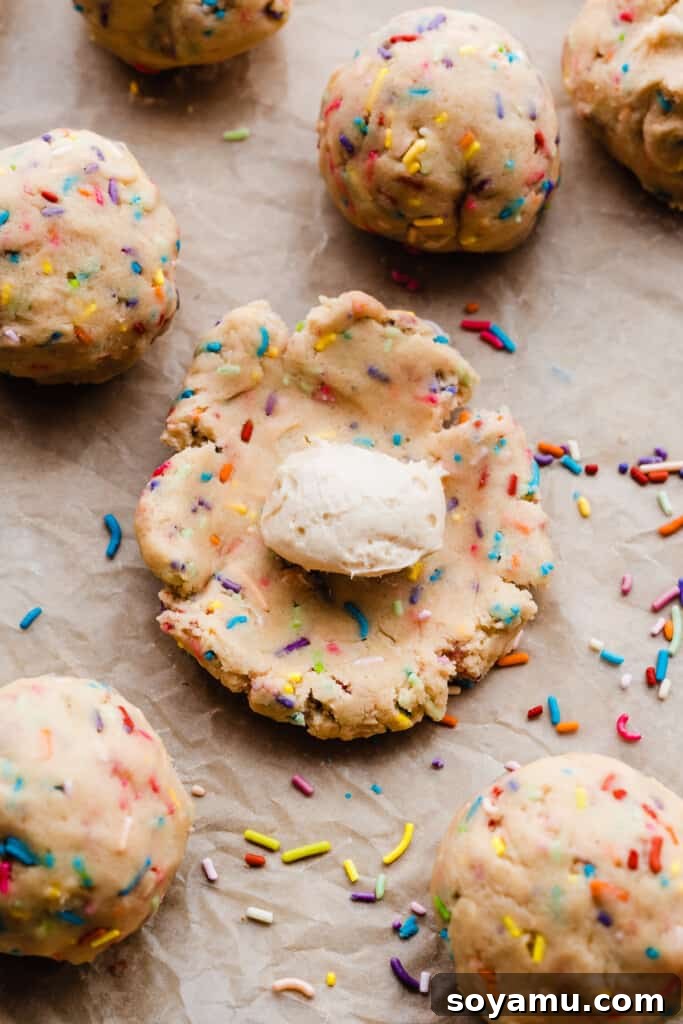
Step 5: Bake to Golden Perfection.
Preheat your oven to 350°F (175°C). Line several large baking sheets with parchment paper or silicone baking mats. Take your stuffed cookie dough balls (which should still be cold, ideally from a quick freeze after stuffing) and roll each one generously in granulated sugar. This sugar coating not only adds a lovely sparkle and festive appearance but also contributes a delicate crispness to the exterior of the cookie. Arrange about 6 cookies on each prepared baking sheet, ensuring adequate space (at least 2-3 inches) between them to allow for spreading during baking. Bake for approximately 12 to 13 minutes. You’ll know they’re done when the edges appear set and have a slight, golden-brown hue. The tops should look *just* set, possibly still appearing a little soft in the very center. Avoid overbaking at all costs, as this can dry out your cookies and diminish their wonderful chewy texture. Allow the baked cookies to cool on the baking sheet for a crucial 10-15 minutes. This resting period allows them to set up properly and prevents them from breaking before you carefully transfer them to a wire cooling rack to cool completely. Enjoy the irresistible aroma that fills your kitchen!
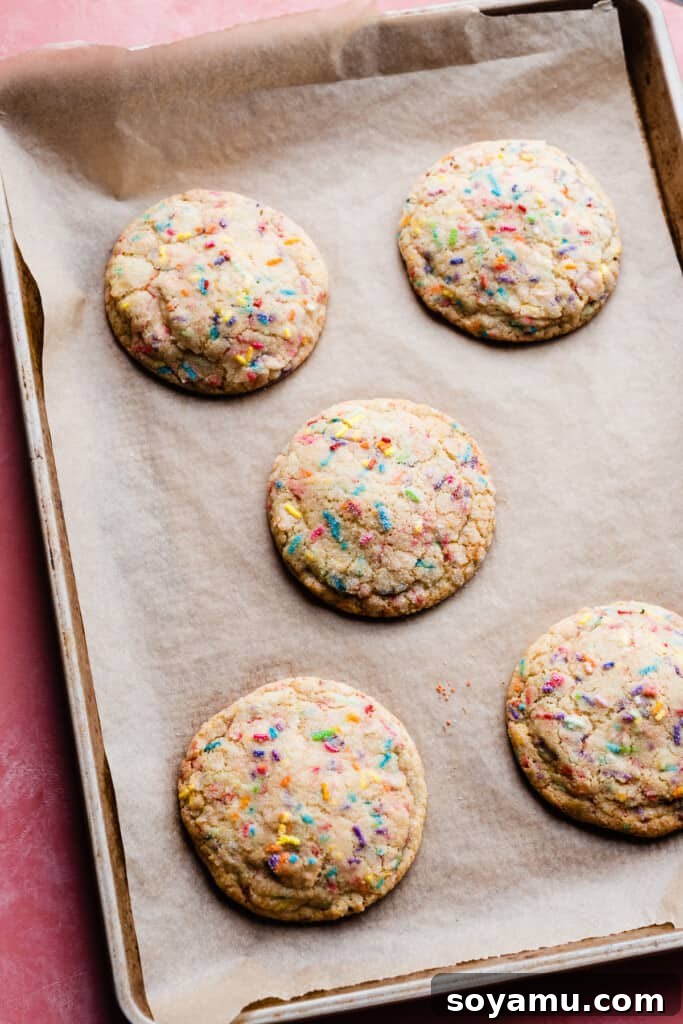
Serving Suggestions & Storage Best Practices:
These delightful Funfetti Cookies with Cake Batter Cheesecake Filling are a treat, and knowing how to serve and store them will ensure you enjoy them at their absolute best, preserving their incredible taste and texture.
When to Indulge: While it might be incredibly tempting to bite into these cookies fresh out of the oven, I personally find the warm cream cheese filling a bit unusual. For the absolute best and most satisfying experience, I highly recommend allowing the cookies to cool completely before digging in. This cooling period allows the cheesecake filling to firm up and achieve its optimal creamy, distinct cake-batter texture, which is truly magical. You can let them cool naturally at room temperature, or if you’re eager to enjoy them sooner, speed up the process by placing them in the fridge for about 15-20 minutes after they’ve had their initial rest on the baking sheet.
Perfect Pairings: These festive and flavorful cookies are fantastic on their own, making them an instant pick-me-up or a perfect party treat. However, they also pair wonderfully with a tall, cold glass of milk, a comforting cup of coffee for an afternoon indulgence, or even alongside a scoop of premium vanilla ice cream for an extra-decadent dessert experience.
Storage Essentials: Due to their luscious cream cheese filling, it is absolutely essential that these cookies *must* be stored in the refrigerator. Once completely cooled to room temperature, transfer them to an airtight container. Stored properly in the fridge, they will maintain their freshness, chewy texture, and deliciousness for 4-5 days. They are equally delightful served cold straight from the fridge or allowed to come back to room temperature for a softer bite. For more fun birthday-themed treats that are sure to impress, don’t forget to explore my Incredible Funfetti Cake recipe or my Better-Than-Bakery Vanilla Cupcakes!
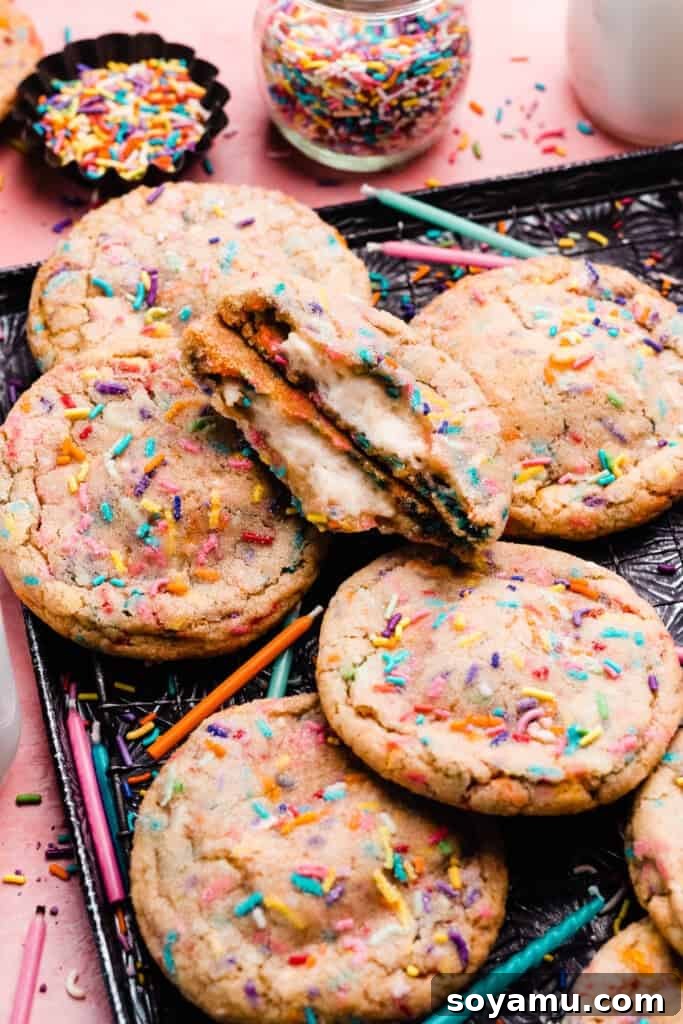
Master Baker’s Tips for Flawless Funfetti Cookies:
Achieving bakery-quality results at home is entirely within reach, especially with these expert tips tailored specifically for our funfetti cookies. These insights will help you avoid common pitfalls and ensure every batch is perfect:
- Invest in an Oven Thermometer: This simple, inexpensive tool is a true game-changer for consistent baking. Most home ovens are not perfectly calibrated and can run significantly hotter or colder than the temperature you set. An oven thermometer will provide accurate readings, ensuring your cookies bake perfectly every time, preventing over-baking or under-baking. I always keep one in my oven to constantly monitor its calibration.
- Precision with a Kitchen Scale: Measuring flour accurately by volume (with cups) is notoriously tricky. The amount can vary significantly based on how you scoop and the specific measuring cup used. A food scale is the most reliable and precise way to ensure you’re using the exact weight of flour specified in the recipe. This precision prevents common issues like dry, crumbly, or overly dense cookies and guarantees consistent, bakery-quality results batch after batch.
- Mastering the Cheesecake Filling: To avoid a “weepy” or runny filling that takes ages to freeze, remember two golden rules that are critical for success: always start with **cold, full-fat block cream cheese** and mix all the filling ingredients together **until just combined and smooth**. Overmixing is the enemy here, as it introduces too much air and can cause the cream cheese to break down, releasing its moisture and making it watery. A quick, gentle mix is all it needs to become creamy and perfectly ready for freezing.
- The Critical Dough Chill: Do not, under any circumstances, skip the chilling steps for the cookie dough! This isn’t just about preventing your cookies from spreading excessively in the oven; it’s a vital step that allows the flavors to deepen and meld beautifully. Furthermore, chilling allows the gluten to relax, resulting in a significantly more tender, chewier cookie with an enhanced, richer flavor profile. The dough also becomes much easier and cleaner to handle, making the stuffing process smoother.
- Don’t Overbake: For soft and chewy cookies with perfectly set centers, keep a very close eye on them during the final minutes of baking. They should be just barely set in the center with lightly golden edges. Overbaking, even by a minute or two, can quickly transform a perfect cookie into a dry and crumbly disappointment. Trust the visual cues and err on the side of slightly underbaked for maximum chewiness.
Frequently Asked Questions About Funfetti Cookies:
Absolutely! These cookies are perfect for making in advance, which is great for parties or busy schedules. You can prepare the cookie dough and scoop it into balls, then store them in an airtight container in the fridge for up to 3-4 days. When you’re ready to bake, simply flatten a dough ball, place a frozen cheesecake dollop in the center, encase it thoroughly, and then pop the stuffed ball back into the freezer for 5-10 minutes to ensure the filling is solid before rolling in sugar and baking as directed. This preparation method makes entertaining a breeze!
Yes, this cookie dough freezes beautifully, allowing you to have freshly baked cookies whenever a craving strikes! First, make sure the cookie dough has been chilled for at least 30-60 minutes in the fridge so it’s firm enough to easily work with. Then, scoop the dough into balls, stuff each with a frozen cheesecake dollop, and seal completely. Place the stuffed dough balls on a baking sheet and freeze until solid, then transfer them to a freezer-safe airtight container or bag. This prevents them from sticking together. When you’re ready to bake, you can bake them directly from frozen; just add an extra 2 minutes to the bake time. They will last wonderfully in the freezer for up to one month.
You certainly can make smaller cookies if you prefer a bite-sized treat, but you’ll need to adjust the filling size accordingly. If you reduce the cookie dough ball size by about 20 grams each (making them smaller than the recommended 80g), then you should use 2-teaspoon sized dollops of the cheesecake filling instead of the larger 1 tablespoon (which is equivalent to 3 teaspoons). I wouldn’t recommend going much smaller than that, as it becomes quite challenging to fully enclose the filling without it leaking, unless you’re comfortable skipping the filling entirely for miniature funfetti cookies.
Halving this recipe is perfectly fine and works well if you want a smaller batch of these delightful cookies without excess. However, I generally don’t recommend doubling it. The main reason is that the cream cheese filling can become weepy if mixed in a significantly larger volume, making it harder to handle and freeze properly. Additionally, a double batch of the cookie dough might be too much for most standard large mixing bowls, making it difficult to mix evenly without overworking the dough, which can lead to tough cookies. If you need more, it’s often better to make two separate full batches.
A weepy or runny cheesecake filling is almost always a sign of overmixing. Sugar is a hygroscopic ingredient, meaning it attracts water, and cream cheese has a high water content. When these are mixed for too long or too vigorously, the sugar pulls moisture out of the cream cheese, causing it to become watery and lose its firmness. This is why it’s crucial to start with cold cream cheese and mix all the ingredients together just until combined and smooth. If your filling does end up a bit weepy, don’t despair! You can likely still use it; it will just take significantly longer to freeze solid (sometimes up to 24 hours or more). If it’s still slightly soft after extended freezer time, use an offset spatula to quickly scoop the dollops into your flattened dough balls. I’ve had this happen before, and it still worked out fine in the end.
Yes, chilling the cookie dough is a non-negotiable and crucial step for these cookies! If you skip this, the dough will be too soft and sticky, leading to excessive spreading in the oven and resulting in flat, less flavorful, and often greasy cookies. The good news is that this requirement actually transforms the recipe into an excellent make-ahead option, allowing you to break up the baking process over a couple of days. The chill time is fundamental not just for preventing spread, but also for crucial flavor development and achieving that perfect chewy texture.
While jimmie sprinkles are specifically recommended for their ability to hold their shape and vibrant color during baking, you can certainly experiment with other types. Flat, disc-shaped confetti sprinkles also work well and contribute to the funfetti aesthetic without bleeding too much color. However, it’s best to avoid nonpareils (the tiny round ball sprinkles) as they tend to bleed their colors significantly into the dough, often leading to a muted or muddy appearance rather than distinct, vibrant pops of color in your cookies.
Several factors can cause cookies to spread excessively, leading to flat results. The most common culprits include: butter that was too warm or partially melted when creamed, insufficient chilling time for the cookie dough (which needs to be firm and cold), an oven that isn’t hot enough (always check with an oven thermometer, as mentioned in our expert tips!), or inaccurate flour measurement (too little flour can make the dough too wet). Ensure your ingredients are at the correct temperatures, your dough is thoroughly chilled, and your oven is preheated accurately to minimize spreading.
Delicious Recipe Variations to Explore:
While the classic Funfetti Cookie with cake batter cheesecake filling is a delightful experience on its own, don’t hesitate to experiment and customize this recipe with these exciting variations:
- Option to Skip the Cheesecake Filling: If you’re short on time, prefer a simpler cookie, or are looking for a more traditional funfetti sugar cookie, you can certainly omit the cheesecake filling. To do this, simply roll the dough into balls of the same size as directed (around 80 grams), ensure they are well chilled for the same amount of time, and then bake them for approximately 9-11 minutes, or until the edges are lightly golden and the centers are just set.
- Alternative to Bakery Butter Vanilla Emulsion: If you really don’t want to purchase the specialized bakery butter vanilla emulsion, you can substitute it with an equal quantity of good quality pure vanilla extract. While the cookies will still be absolutely delicious and rich in vanilla flavor, they might lack that deep, authentic “cake batter” note that the emulsion specifically provides. This is truly one of those rare instances where a special ingredient makes a noticeable and highly recommended difference in the final flavor profile!
- Add Citrus Zest for Brightness: For a brighter, more refreshing flavor profile that beautifully cuts through the sweetness, consider adding 1-2 teaspoons of finely grated lemon or orange zest to your cookie dough. This introduces a lovely, fragrant tang that complements the vanilla and funfetti notes.
- Chocolate Funfetti Delight: For all the chocolate lovers out there, you can easily create a chocolate funfetti cookie! Simply swap out a quarter cup of the all-purpose flour for unsweetened cocoa powder in the cookie dough. You could even use chocolate sprinkles for a fun, monochrome twist, or keep the rainbow sprinkles for a vibrant contrast against the chocolate base.
Essential Baking Tools for Your Funfetti Journey:
Having the right tools in your kitchen can significantly elevate your baking experience, making it smoother, more enjoyable, and ensuring you achieve consistent and professional-looking results with these funfetti cookies. Here are a few essential recommendations:
- Stand Mixer or Hand Mixer: While you can certainly mix the cookie dough by hand, an electric stand mixer or a powerful hand mixer makes the process of creaming butter and sugar, and combining ingredients, much easier and more efficient. It ensures a consistently smooth and well-aerated dough, which is crucial for the cookies’ texture.
- Cookie Scoops: For perfectly uniform cookies, which are essential for even baking and a professional appearance, a large cookie scoop (typically about 3 tablespoons capacity) is an invaluable tool. It ensures each cookie is the same size, leading to consistent results across your batch.
- Parchment Paper or Silicone Baking Mats: These baking essentials prevent your cookies from sticking to the baking sheets, promote even baking by insulating the bottoms, and make cleanup an absolute breeze. They are much preferred over simply greasing a baking sheet.
- Wire Cooling Racks: Essential for allowing air to circulate freely around your baked cookies as they cool. This prevents the bottoms from becoming soggy due to trapped steam and helps them set properly, maintaining their crisp-chewy texture.
- Round Cutters (for post-bake shaping): While not for cutting the raw dough, a large round cutter can be a secret weapon for creating perfectly round, bakery-style cookies. Immediately after taking the hot cookies out of the oven, place the round cutter around each cookie and gently swirl it to neaten up the edges and create a perfectly circular shape. Remember, you’re not actually cutting off the edges, just reforming them.
- Oven Thermometer: As highlighted in our expert tips section, an oven thermometer is crucial for accurate oven temperature readings, directly impacting the success and consistency of your baking results.
- Digital Kitchen Scale: For truly precise ingredient measurements, especially for flour, a digital kitchen scale is a baker’s best friend. It eliminates the inconsistencies of volume measurements and ensures your recipe turns out perfectly every time.
More Irresistible Cookie Recipes to Love:
If these Funfetti Cookies have ignited your passion for baking, be sure to check out these other fantastic cookie recipes from our collection. There’s a perfect cookie for every mood and occasion!
- Raspberry Cheesecake Cookies
- Peach Cobbler Cookies
- Brown Butter Chocolate Chip Cookies
- Bakery-Style Monster Cookies
- Lemon Blueberry Thumbprint Cookies
- Caramel Apple Cider Cookies
- Nutella Stuffed Cookies
Did you whip up a batch of these delightful cookies? We’d absolutely love to hear from you!
Please consider leaving a comment and a star rating below. Your valuable feedback not only helps us to continuously improve our recipes but also supports our small business immensely. Look for the stars in the recipe card header to share your wonderful experience!
Funfetti Cake Batter Cookies

By Stephanie Simmons
These Funfetti Cookies taste exactly like a birthday cake in cookie form! Soft, incredibly chewy, and loaded with festive colorful sprinkles, each cookie is generously stuffed with a quick cheesecake filling that mirrors the rich, comforting flavor of vanilla cake batter. Far from being just ordinary sprinkle sugar cookies, these truly deliver an authentic funfetti birthday cake experience, making them perfect for any celebration or simply to brighten your day!
- Prep Time: 35 mins
- Cook Time: 13 mins
- Total Time: 48 mins (excluding chilling/freezing)
- Yields: 14 cookies
Ingredients
For the Cookie Dough:
- 15 tbsp salted butter, softened at room temperature (this is two sticks, less one tablespoon, or 212 grams, or one tablespoon shy of 1 cup)
- 3/4 cup light brown sugar, packed (165 grams)
- 3/4 cup granulated sugar (156 grams)
- 2 large eggs, at room temperature
- 2 tsp vanilla extract
- 2 tsp bakery butter emulsion (see note below for details)
- 3 cups all-purpose flour, spooned & leveled or weighed out (390 grams)
- 1 tsp baking powder
- 1 tsp baking soda
- 1/2 tsp salt
- 1 cup rainbow jimmies (sprinkles)
For the Cake Batter Cheesecake Filling:
- 4 ounces cream cheese, cold (113 grams, full-fat block recommended)
- 1/4 cup powdered sugar (29 grams)
- 1/4 cup brown sugar (55 grams)
- 1 and 1/2 tsp vanilla extract
- 2 tsp butter emulsion (see note below)
- 3/4 tsp almond extract
Instructions
-
Make the Cookie Dough: In a large bowl, cream the softened salted butter with both light brown sugar and granulated sugar using an electric mixer on medium-high speed until light and fluffy, about 1-2 minutes. Beat in the room temperature eggs one at a time, mixing well after each addition. Stir in the vanilla extract and bakery butter emulsion until just combined. In a separate bowl, whisk together the all-purpose flour (spooned & leveled), baking powder, baking soda, and salt. Gradually add the dry ingredients to the wet mixture, mixing on low speed until a soft dough forms. Fold in the rainbow jimmies. Cover the bowl and chill the dough in the refrigerator for 30 minutes to make it easier to handle.
Make-Ahead Tip: Dough can be balled and frozen for up to 1 month before using. Thaw overnight in the fridge before filling & baking.
-
Scoop & Chill the Dough: Scoop the dough into uniform balls, aiming for about 80 grams each, using a large cookie scoop. Place these dough balls in an airtight container and chill them in the fridge for at least 4 hours, or up to 48 hours. Alternatively, freeze them for 2 hours if you’re short on time.
-
Make Cheesecake Filling: In a medium bowl, combine the cold cream cheese, powdered sugar, brown sugar, vanilla extract, butter emulsion, and almond extract. Beat on medium speed until just combined and smooth. Be careful not to overmix, as this can make the filling weepy. Spoon tablespoon-sized dollops of the filling onto a wax paper-lined baking sheet and freeze until solid, about 2 hours or up to 24 hours.
-
Assemble & Bake Cookies: Preheat your oven to 350°F (175°C). Line several baking sheets with parchment paper or silicone mats. Flatten a chilled cookie dough ball with your palm and place a frozen cheesecake dollop in the center. Carefully enclose the dough around the filling, sealing it completely, and roll into a smooth ball. Roll the stuffed dough ball generously in granulated sugar. Place 6 cookies on each prepared baking sheet, ensuring enough space between them. Repeat with remaining dough and filling, keeping stuffed dough balls in the freezer while you work to prevent thawing.
-
Bake and Cool: Bake for 12 to 13 minutes. The edges should appear set and lightly golden brown, and the tops should look *just* set. Avoid overbaking. Let the cookies cool on the baking sheet for 10-15 minutes, then transfer them to a wire cooling rack to cool completely.
-
Serve & Store: While some enjoy them warm, I recommend letting the cookies cool completely for the best cheesecake filling texture. Store cooled cookies in an airtight container in the fridge for 4-5 days due to the cream cheese filling. These are delicious served at room temperature or cold!
Notes
Bakery Butter Vanilla Emulsion: The Bakery Butter Emulsion is the secret to getting that authentic vanilla cake batter taste in the filling! I highly recommend purchasing a bottle and using it, along with regular vanilla (or sometimes in its place), in other baking recipes for a professional bakery flavor boost.
Nutrition Information
Serving: 1 cookie
- Calories: 405 kcal
- Carbohydrates: 60 g
- Protein: 4 g
- Fat: 17 g
- Saturated Fat: 10 g
- Polyunsaturated Fat: 1 g
- Monounsaturated Fat: 4 g
- Trans Fat: 0.5 g
- Cholesterol: 67 mg
- Sodium: 329 mg
- Potassium: 76 mg
- Fiber: 1 g
- Sugar: 39 g
- Vitamin A: 523 IU
- Calcium: 50 mg
- Iron: 2 mg
Nutrition information is automatically calculated and should only be used as an approximation.
Like this recipe? Leave a comment below!
We love hearing from you! Share your thoughts and rate the recipe to help us grow.