
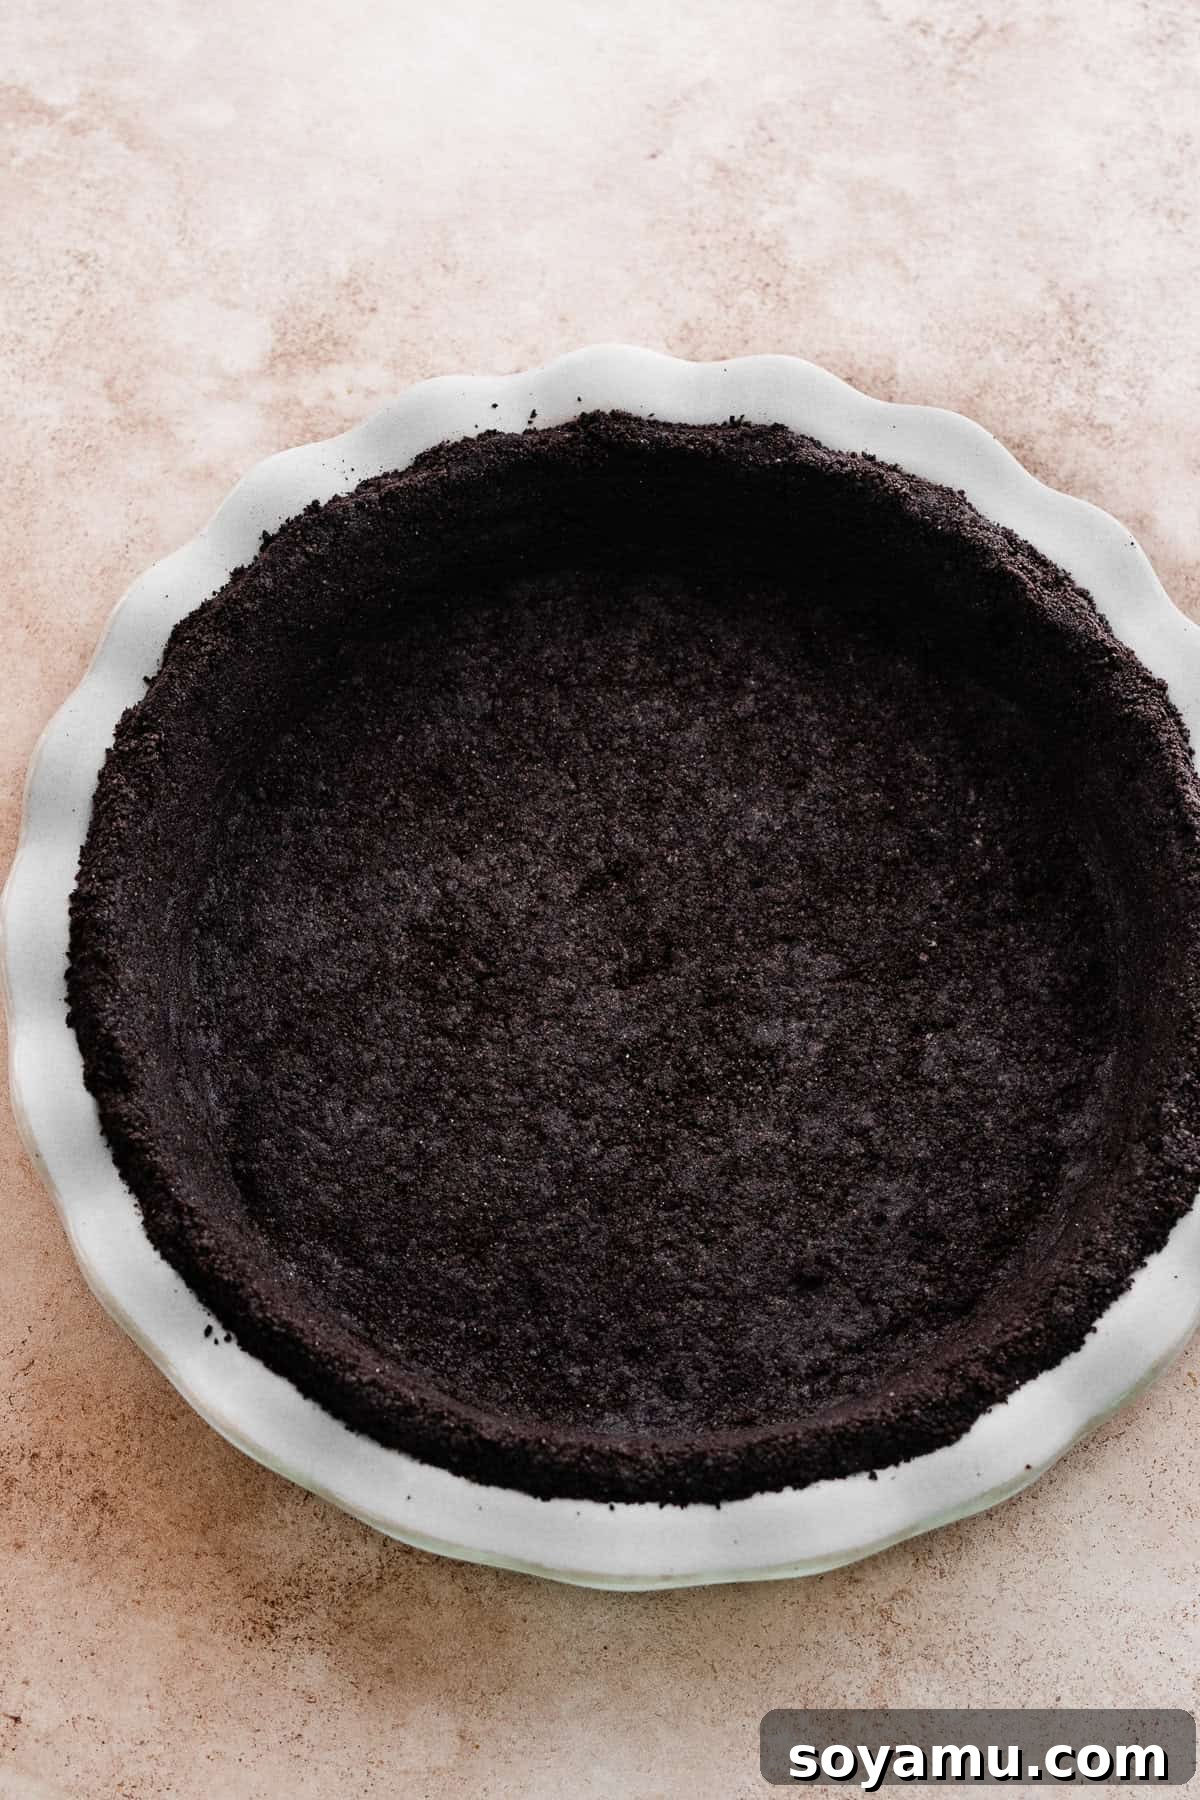
Creating a decadent dessert doesn’t have to be complicated, especially when you start with a truly amazing base. This incredible 2-Ingredient Oreo Crust is undeniably the easiest and most versatile crust you’ll ever master, perfectly suited for both elegant pies and creamy cheesecakes. Imagine a rich, chocolatey foundation made simply from crushed Oreo cookies and melted butter – it’s the ideal canvas for a myriad of sweet creations, from a vibrant Black Forest Pie to an indulgent Peanut Butter Cheesecake. Forget fussing with complicated pastry doughs; this press-in crust comes together in minutes, offering a delightful crunch and deep chocolate flavor that elevates any dessert it accompanies. Get ready to transform your baking with this effortless and unbelievably delicious Oreo cookie crust!
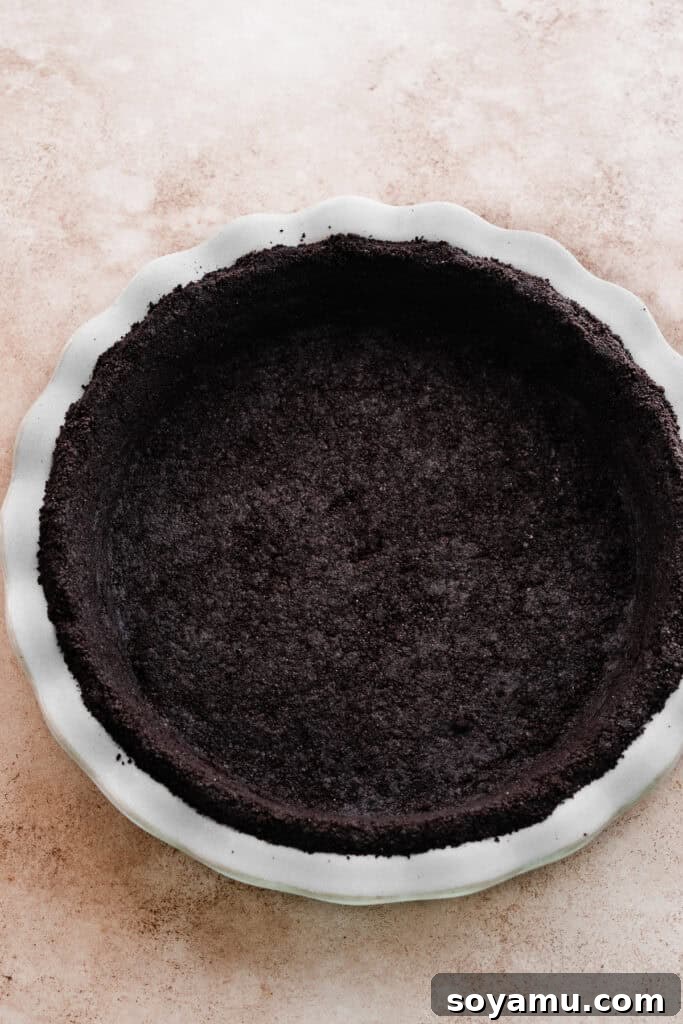
The Easiest 2-Ingredient Oreo Crust for Pies & Cheesecakes
Are you searching for a foolproof dessert crust that’s quick, delicious, and incredibly versatile? Look no further! This comprehensive guide will walk you through creating the ultimate Oreo crust using just two simple ingredients: classic Oreo cookies and melted butter. Whether you’re dreaming of a rich, creamy chocolate pie or a decadent cheesecake, this press-in crust provides the perfect foundation, promising a robust flavor and satisfying crunch without any of the usual baking stress. Discover the secrets to a sturdy, flavorful, and easy-to-make Oreo crust that will impress every time, simplifying your dessert preparations and opening up a world of culinary possibilities.
Why You’ll Adore This Oreo Crust
This isn’t just another dessert crust; it’s a culinary revelation that will become your go-to recipe for countless sweet treats. Here’s why this 2-Ingredient Oreo Crust will quickly earn a permanent spot in your recipe collection:
- Effortlessly Easy: With only two fundamental ingredients and minimal steps, this crust is astoundingly simple to prepare. Bid farewell to the complexities of traditional pastry doughs, lengthy chilling times, and cumbersome rolling pins. You’ll be genuinely surprised at how swiftly you can conjure up a professional-quality crust that looks and tastes fantastic.
- Unbelievably Versatile: From luscious, creamy cheesecakes to light, fruit-filled pies and even individual dessert cups, this chocolate cookie crust adapts beautifully to almost any dessert filling you can imagine. Its robust, sweet flavor complements both rich and slightly tart profiles, making it an ideal choice for a vast array of recipes.
- Rich Chocolate Flavor: Crafted from beloved Oreo cookies, this crust delivers a deep, satisfying chocolate taste that inherently elevates the overall experience of any dessert. The unique cream filling within the cookies contributes to a subtly sweet, almost fudgy consistency that perfectly binds with the butter.
- Perfect Texture: When properly pressed and optionally baked, this crust achieves a delightful balance of crumbly goodness and firm structural integrity. It holds its shape beautifully when sliced, eradicating those frustrating crumbly catastrophes often associated with homemade crusts.
- Remarkably Time-Saving: This recipe is ingeniously designed for speed and convenience. In less than 15 minutes of active preparation time, you can have a perfectly formed, ready-to-fill crust, significantly cutting down on your overall dessert creation timeline.
- Guaranteed Crowd-Pleaser: Is there anyone who doesn’t love Oreos? This universally appealing crust is an absolute guaranteed hit with guests, family, and friends, infusing a comforting touch of nostalgic delight into every single bite. It’s the secret ingredient for turning ordinary desserts into extraordinary experiences.
Key Ingredients for Your Perfect Oreo Crust
The beauty of this recipe lies in its elegant simplicity, requiring only two core ingredients. Understanding the role of each component can further help you achieve optimal results and a truly exceptional dessert base.
- Oreo Cookies: The indisputable star of our show! You’ll need whole Oreo cookies, and crucially, this includes their iconic white cream filling. The filling plays a dual role: it not only contributes to the rich flavor profile but also acts as a natural binding agent, working in perfect synergy with the melted butter to create a cohesive crust. Do not attempt to remove the cream – it’s an integral part of the magic that makes this crust so easy and delicious.
- Butter: Melted butter serves as the essential liquid binding agent that transforms your crushed Oreo crumbs into a solid, pressable crust. I consistently advocate for using salted butter in this recipe. In my extensive baking experience, its subtle saltiness provides a wonderful counterpoint to the inherent sweetness of the Oreo cookies, dramatically enhancing the overall depth of flavor in your finished crust. However, if unsalted butter is what you have on hand or aligns better with your personal preference, it will work perfectly well. The most important aspect is to ensure the butter is completely melted before combining it with the crumbs. This guarantees even distribution throughout the mixture, leading to a consistently firm and well-bound crust.
Recipe Substitutions & Creative Variations
This fundamental Oreo crust recipe is incredibly versatile and serves as an excellent starting point for customization. Here are several imaginative ideas to adapt it to specific dietary requirements or to infuse new and exciting flavor dimensions:
- Gluten-Free Adaptation: Making this delightful crust gluten-free is remarkably simple. Opt for high-quality gluten-free Oreo cookies, which are now widely available from most major brands and offer a flavor profile very similar to the originals. When working with gluten-free Oreos, you might observe that the crumbs tend to absorb a slightly greater amount of butter due to variations in their crumb texture. To check for optimal consistency, take a small handful of the mixed crust and gently scrunch it together in your palm. If it holds its shape firmly, you’re all set. If it appears excessively dry or too crumbly, gradually incorporate 1-2 additional tablespoons of melted butter until you achieve that perfect “wet sand” consistency.
- Dairy-Free Option: For those adhering to a dairy-free diet, this crust can be easily modified. The excellent news is that original Oreo brand cookies are typically dairy-free by formulation (though it’s always prudent to meticulously double-check the ingredient labels, especially for any seasonal or limited-edition flavors). To create an entirely dairy-free crust, simply substitute traditional butter with a reputable brand of high-quality dairy-free butter sticks, ensuring it is melted just as you would regular butter.
- Enhanced Flavor Boosts: Elevate the classic chocolate profile or introduce an exciting new twist!
- Mint Chocolate Harmony: Utilize Mint Oreos to impart a refreshing and cool undertone, making this crust an ideal companion for mint-flavored cheesecakes, ice cream pies, or rich chocolate tarts.
- Peanut Butter Swirl Extravaganza: For the ultimate peanut butter enthusiast, consider using Peanut Butter Oreos. Alternatively, add a tablespoon of unsweetened cocoa powder and a tablespoon of powdered peanut butter to regular Oreo crumbs for a DIY peanut butter chocolate blend.
- Warm Spiced Chocolate: A subtle addition of spices can add remarkable depth. A pinch of cinnamon, a whisper of nutmeg, or even a tiny dash of cayenne pepper can introduce a warming complexity that perfectly complements the rich chocolate flavor. Begin with a mere 1/4 teaspoon and carefully adjust to your preferred taste.
- Coffee Infusion: Incorporate 1-2 teaspoons of finely ground instant espresso powder directly into the crushed Oreos before mixing with butter. This creates a sophisticated mocha-flavored crust, ideal for coffee-based desserts like tiramisu cheesecakes.
- Creative Cookie Alternatives: While Oreos are a time-honored classic, feel free to experiment with other types of chocolate sandwich cookies, or even completely different cookies like graham crackers. If opting for different cookies, you may need to slightly adjust the amount of melted butter, as various cookie types possess distinct fat absorption properties. The objective remains a “wet sand” texture. Chocolate wafers, gingersnaps, or even Biscoff cookies can lead to uniquely flavored and equally delicious crusts.
Crafting Your Perfect Oreo Pie Crust: A Step-by-Step Guide
Making this impressive and versatile crust is a remarkably straightforward process, requiring minimal culinary expertise. Follow these detailed steps carefully for a flawless, sturdy, and flavorful foundation for your next dessert creation every single time:
Step 1: Achieve Perfectly Fine Oreo Crumbs.
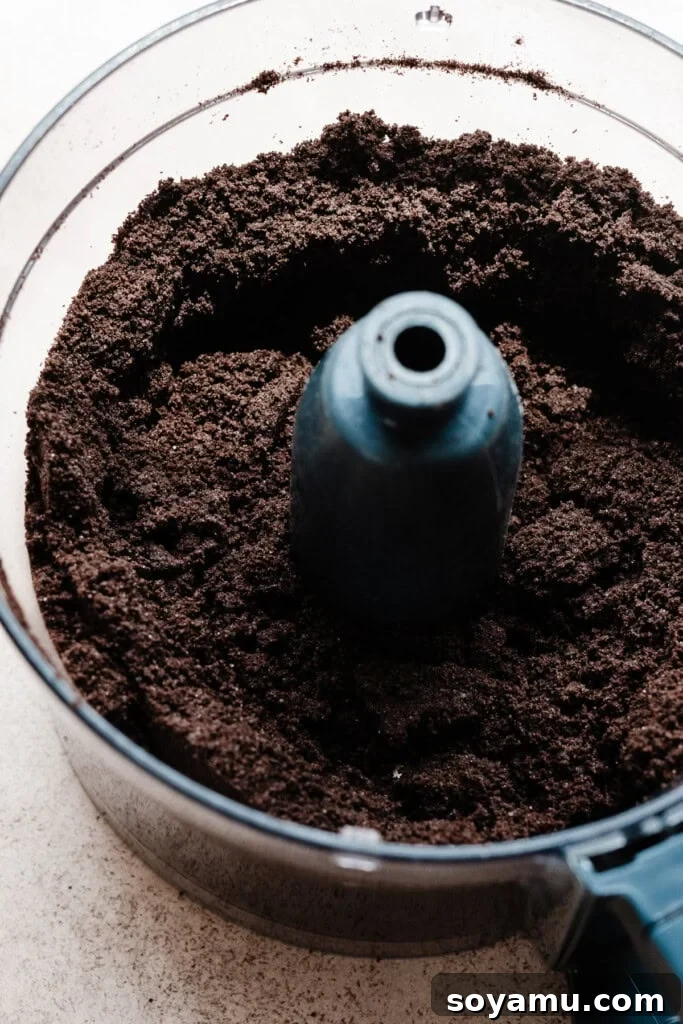
The initial and most crucial step is to efficiently transform your whole Oreo cookies into consistently fine, uniform crumbs. This meticulous crushing is paramount as it ensures the melted butter can evenly coat and bind every particle, which is essential for creating a solid, non-crumbly crust. Begin by adding your whole Oreo cookies – and yes, this absolutely includes their delightful cream filling – into the bowl of a food processor. Pulse them in short bursts until you achieve a consistently fine, sandy texture. Be mindful to avoid over-processing, which can cause the cookies to release their oils prematurely and turn into a paste, rather than light crumbs. If you don’t possess a food processor, fret not! Simply place the cookies into a sturdy, heavy-duty Ziploc bag, carefully squeeze out as much air as possible, and securely seal it. Then, using a rolling pin, the flat bottom of a heavy pan, or even a meat mallet, firmly roll and pound the cookies until they are broken down into crumbs that are as fine as possible. This method might require a little more “elbow grease” but yields equally excellent results.
Step 2: Thoroughly Incorporate the Melted Butter.
Once your Oreo crumbs have reached their ideal consistency, it’s time to introduce the melted butter. Pour the warm, completely melted butter directly over the crumbs, whether they are in a mixing bowl or still in your food processor. Stir everything together meticulously, using a sturdy spoon, a flexible spatula, or by pulsing gently a few times in the food processor. Continue mixing until every single crumb is evenly moistened and the entire mixture visibly resembles wet sand. It’s imperative that all crumbs are coated with butter, as this is the fundamental component that allows the crust to bind together firmly and hold its shape. If, after thorough mixing, the mixture still appears overly dry or refuses to clump together when pressed, gradually add a tiny bit more melted butter, one teaspoon at a time, until the ideal, slightly cohesive consistency is achieved. Patience here ensures a well-bound crust.
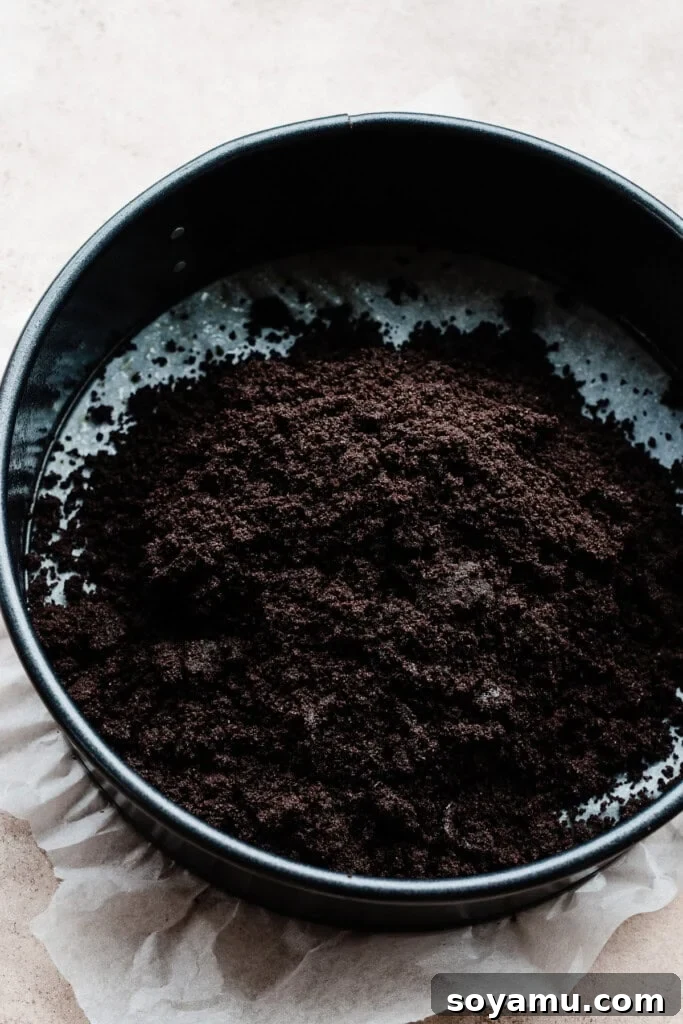
Step 3: Press and Pack the Crust Tightly into the Pan.
Now, carefully transfer the butter-coated Oreo crumb mixture into your chosen baking vessel – either a standard pie plate for traditional pies or a springform pan for elegant cheesecakes. This particular step is paramount for preventing a crumbly and messy crust later on. Begin by evenly spreading the crumbs across the bottom of the pan. Then, employing a flat-bottomed object such as a small juice glass, the base of a flat-bottomed measuring cup, or even the palm of your clean hands, firmly and consistently press the crumbs into the bottom and gently up the sides of the pan. For cheesecakes, you typically press the mixture slightly up the sides to create a distinct edge; for pies, you’ll want to press it all the way up to the rim of the pie plate. Apply good, even pressure across the entire surface to ensure a dense, compact, and perfectly smooth crust. The more tightly and uniformly you pack it, the more stable and less likely it will be to fall apart when you delicately slice into your finished dessert.
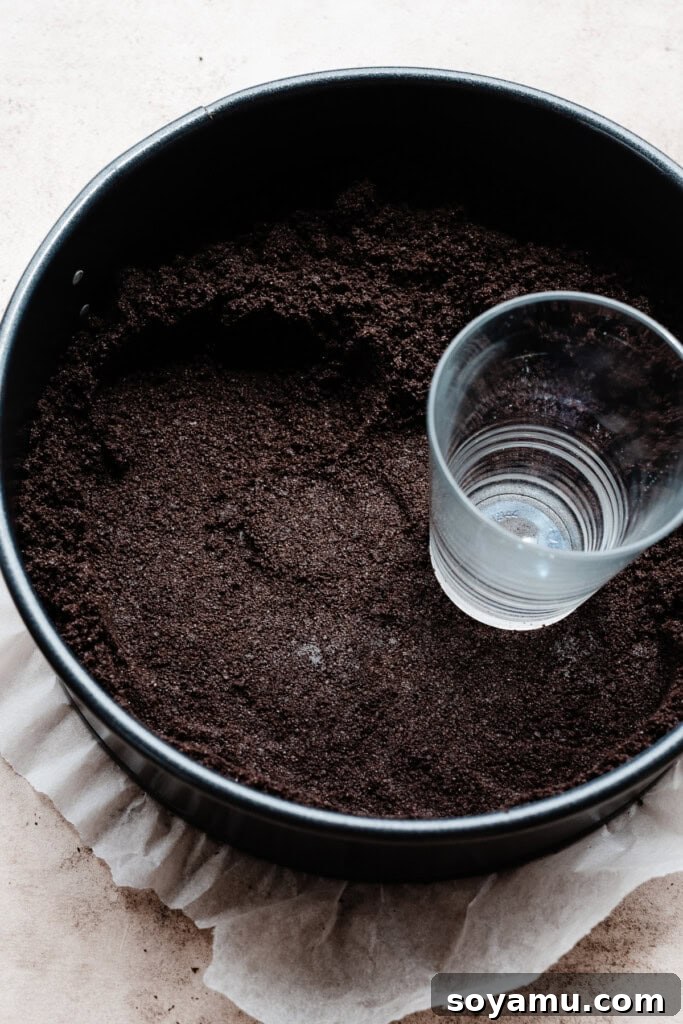
Step 4: Bake (Optional but Highly Recommended) or Chill.
Once your crust has been meticulously pressed and packed into the pan, you have two distinct options before adding your filling: you can either bake it or chill it. While many recipes for cookie crusts are promoted as strictly “no-bake,” I wholeheartedly recommend a quick pre-bake for a mere 10 minutes at 350°F (175°C). This brief period in the oven performs a magical transformation: it helps to firmly set the butter and subtly “toast” the cookie crumbs, resulting in a significantly sturdier, crispier, and remarkably less crumbly crust once it has cooled. Even for dessert recipes that are fundamentally designed to be “no-bake,” this quick pre-bake of the crust ensures it will hold together beautifully and maintain its integrity when you eventually slice and serve your finished masterpiece. If, however, your specific recipe explicitly forbids any baking, or if you prefer a truly no-bake approach, simply chill the firmly pressed crust in the refrigerator for at least 30 minutes (or expedite the process with 15 minutes in the freezer) before proceeding with your filling. This crucial chilling time allows the butter to thoroughly solidify and firm up the crust sufficiently.
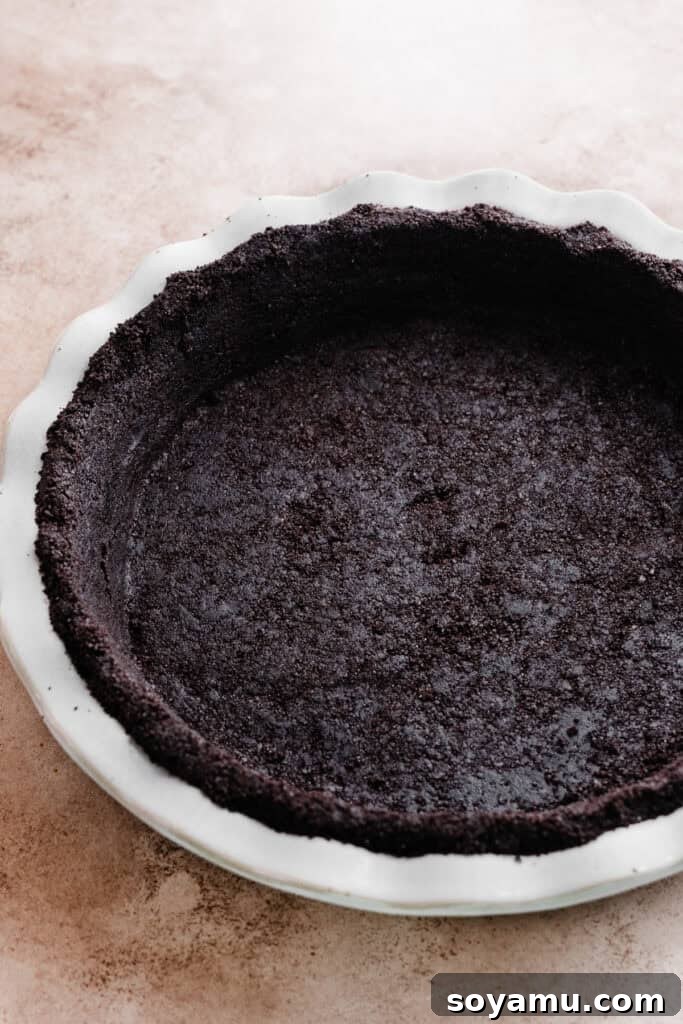
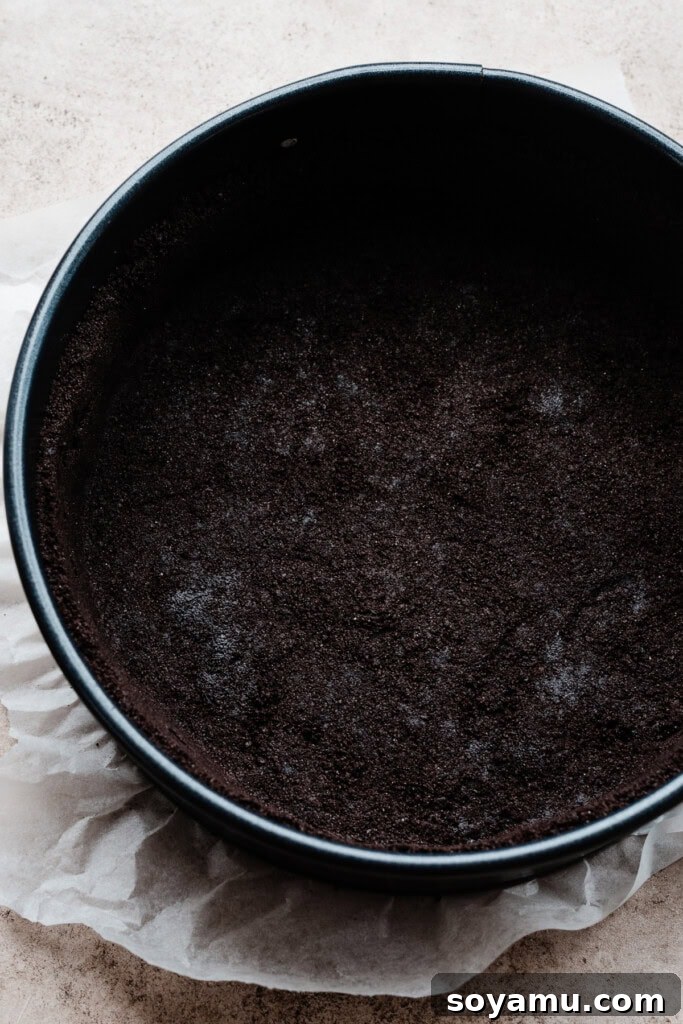
Desserts Perfect for Your Oreo Pie Crust
Once your rich, chocolatey Oreo crust is pressed and either perfectly baked or thoroughly chilled, it stands ready to embrace almost any delicious filling your heart desires. This exceptionally versatile base pairs beautifully with an extensive variety of dessert profiles, from simple and comforting to complex and sophisticated. Here are some fantastic and inspiring ideas to get you started, spanning the spectrum of sweet indulgences:
- Creamy Cheesecakes: The robust, dark chocolate flavor and satisfying crunch of an Oreo crust form an absolutely heavenly match for smooth, tangy, and often rich cheesecake fillings.
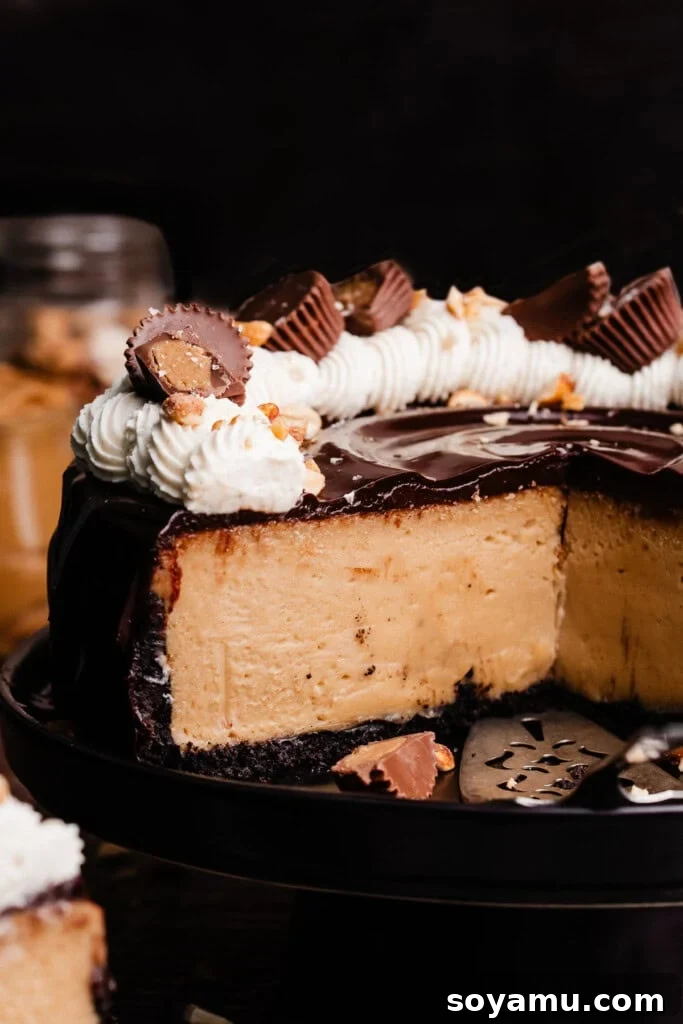
- Peanut Butter Cheesecake: An undeniably irresistible combination of classic chocolate and creamy, salty peanut butter. The Oreo crust provides the perfect foil for this rich filling.
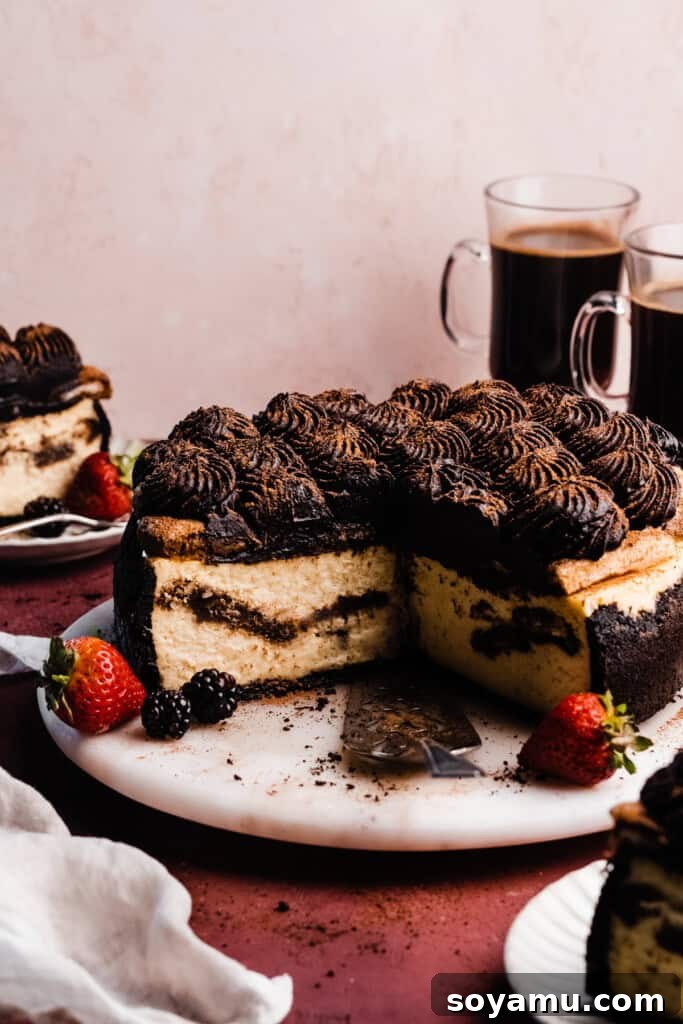
- Tiramisu Cheesecake: The delicate espresso and coffee notes characteristic of Tiramisu are beautifully enhanced and grounded by the deep chocolate foundation of the Oreo crust.
- Classic Vanilla Bean Cheesecake: Allow the subtle elegance and comforting sweetness of a pure vanilla bean filling to truly shine against the rich, dark chocolate backdrop provided by this crust.
- Chocolate Swirl Cheesecake: For the ultimate chocolate lover, amplify the delight with a creamy cheesecake filling infused with generous swirls of melted chocolate, perfectly complementing the chocolate crust.
- Decadent Pies: Whether you’re crafting a baked pie or a quick no-bake wonder, most pies find a wonderfully flavorful and structurally sound home in an Oreo crust.
- No-Bake Peanut Butter Pie: This classic, quick, and always-adored dessert benefits immensely from the Oreo crust, which provides essential structure, a complementary flavor, and a satisfying texture.
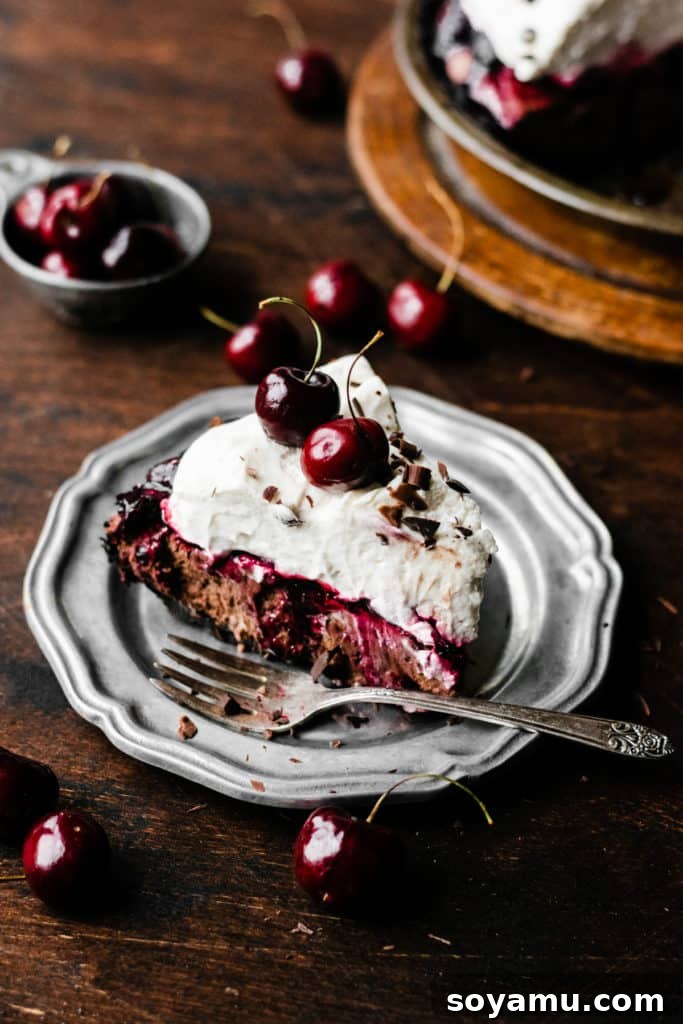
- No-Bake Black Forest Pie: The timeless chocolate and cherry combination is dramatically elevated and given a robust base by this dark cookie crust, ensuring every bite is rich and harmonious.
- French Silk Pie: A truly rich, airy, and intensely chocolatey mousse filling finds its perfect textural contrast in the crispy, slightly bittersweet chocolate crust.
- Banana Cream Pie: A perhaps surprising, yet utterly delightful pairing; the comforting sweetness of fresh banana and light cream is wonderfully grounded and given depth by the chocolate crust.
- Beyond Pies & Cheesecakes: Don’t feel confined to traditional pie and cheesecake formats! This adaptable crust can be creatively utilized for a variety of other sweet applications:
- Effortless Dessert Bars: Press the crust mixture into a square or rectangular baking pan for easy-to-slice and serve dessert bars, perfect for potlucks or parties.
- Individual Parfaits & Trifles: Layer crushed crust with luscious mousses, creamy puddings, or fresh fruit in individual serving glasses for elegant single-serving desserts.
- Homemade Ice Cream Cakes: This Oreo crust makes an absolutely perfect and flavorful base for a homemade ice cream cake, adding delightful texture and a deep chocolate foundation to your frozen treat.
Pro Tips for a Flawless Oreo Crust Every Time
While this Oreo crust recipe is celebrated for its incredible simplicity, a few expert tips can further ensure your success, helping you achieve a consistently perfect and robust crust every single time. These insights move beyond the basics to guarantee a truly professional outcome:
- Invest in an Oven Thermometer: Your Baking Ally: An oven thermometer is genuinely one of the most underrated and essential tools in any baker’s arsenal. It provides an accurate, real-time reading of your oven’s internal temperature, revealing if it is truly reaching and maintaining the temperature you’ve set. Many home ovens can deviate significantly, sometimes by as much as 25-50 degrees Fahrenheit, which can have a profound impact on baking times, ingredient performance, and the final texture of your crust. For consistently superior results, always keep an oven thermometer inside to monitor and understand your oven’s precise calibration.
- Don’t Skimp on the Butter (But Don’t Drown It): The melted butter is the non-negotiable binding agent for your crushed cookie crumbs. It’s vital to ensure that every single crumb is thoroughly coated. If, after initial mixing, the mixture appears too dry, flaky, or lacks cohesion when you try to press it, incorporate a little extra melted butter, adding it gradually one tablespoon at a time. Continue mixing until the texture truly resembles wet, pliable sand that can hold its shape when squeezed.
- Pack It Tightly – This Is Key!: This tip is arguably the most critical for achieving a robust, sliceable crust. The firmer and more consistently you press the butter-coated crumbs into your pan, the sturdier and more resilient your finished crust will be. Utilize a flat-bottomed object – such as a small juice glass, the base of a measuring cup, or even the back of a large spoon – to apply even and firm pressure across the entire surface. A well-packed crust is your best defense against crumbling when you eventually slice into your delicious dessert.
- Allow for Proper Cooling: The Patience Pays Off: If you opt to bake your crust, it is absolutely essential to allow it to cool completely and thoroughly before you add any filling. Introducing a cold filling to a warm crust can cause the butter to soften or even re-melt, leading to a disappointingly soggy bottom. For no-bake applications, adequate chilling time (allowing the butter to solidify) in the refrigerator or freezer is equally crucial for the crust to set properly and maintain its firm structure.
- Prevent a Soggy Bottom with a Chocolate Barrier: For desserts that feature very wet or moisture-rich fillings (such as custards, fresh fruit fillings, or some mousses), you can add an extra layer of protection against sogginess. Once your baked crust has completely cooled, brush a thin, even layer of melted chocolate (dark, milk, or white, depending on your dessert’s flavor profile) onto the entire surface. Allow this chocolate barrier to set completely in the refrigerator before adding your main filling. This creates a delicious, waterproof seal.
- Uniform Crumbs Are Essential: Regardless of whether you’re using a high-powered food processor or the manual rolling pin method, strive for uniformly fine crumbs. Large chunks of cookie will not bind as effectively with the butter and can compromise the overall cohesion and stability of your crust, leading to a less pleasant eating experience.
Frequently Asked Questions About Oreo Crusts
Got more questions about mastering this simple yet spectacular Oreo crust? We’ve compiled answers to common queries to help you achieve baking perfection and troubleshoot any concerns.
Absolutely, freezing this crust is a fantastic strategy for efficient meal prep or holiday baking! Once you have baked and completely cooled the crust (if you chose to bake it), wrap it meticulously. First, use several layers of plastic wrap, ensuring it’s airtight. Then, add an additional protective layer of aluminum foil. Properly wrapped, you can confidently freeze the crust for up to 1-2 months without compromising its quality. When you’re ready to use it, simply transfer the frozen crust to the refrigerator and allow it to thaw completely overnight before adding your desired filling. This method is perfect for streamlining your holiday dessert preparations or for preparing for unexpected guests.
While it’s technically possible to use this as a purely no-bake crust, a quick 10-minute bake at 350°F (175°C) is genuinely highly recommended for superior results. Baking the crust significantly helps the butter set more firmly and gives the crumbs a slightly toasted, richer flavor, making the crust much sturdier and considerably less prone to crumbling when it comes time to slice your dessert. If your recipe specifically mandates a no-bake approach, or if you simply prefer not to use your oven, ensure you chill the pressed crust in the refrigerator for a minimum of 30 minutes (or a faster 15 minutes in the freezer). This chilling time is crucial for allowing the butter to sufficiently firm up and hold the crust together.
Yes, you most certainly can get creative with your cookie choice! While Oreos provide a classic and universally loved chocolate flavor, this fundamental technique works beautifully with a wide array of other cookie types. Graham crackers, vanilla wafers, chocolate wafers, gingersnaps, Biscoff cookies, or even shortbread cookies can be used to create wonderfully unique and delicious crust flavors. The essential aspect is to ensure the cookies are finely crushed. You may need to slightly adjust the amount of melted butter, as different cookie types have varying absorbency levels and fat content. Always aim for that familiar “wet sand” consistency that holds together when pressed.
Combating a soggy crust, especially with moist fillings, is a common concern, but there are effective strategies. First and foremost, ensure you press the crumbs very firmly and tightly into the pan. This creates a dense barrier. Second, if you opt to bake your crust, it is crucial that it cools completely before any filling is added. For fillings with particularly high moisture content (such as custards, fresh fruit-based fillings, or certain creamy mousses), a clever trick is to brush a very thin, even layer of melted chocolate (dark, milk, or white) onto the cooled, baked crust. Allow this chocolate layer to set completely in the refrigerator before introducing your main filling. This creates a delicious, impervious moisture barrier.
No food processor available? No problem at all – you can still achieve perfectly fine Oreo crumbs with a bit of manual effort! Gather your whole Oreo cookies (cream filling included, of course) and place them into a sturdy, heavy-duty Ziploc bag. Press out as much air as possible from the bag and seal it securely. Then, lay the bag flat on a sturdy surface and use a rolling pin, the flat bottom of a heavy-duty pan (like a cast-iron skillet), or even a clean meat mallet to pound and roll over the cookies. Continue this process until the cookies are uniformly reduced to fine crumbs. While it requires a bit more physical exertion, this method yields excellent results for a cohesive crust.
Essential Tools for Your Oreo Crust Success
While this recipe is celebrated for its incredible simplicity and minimal ingredient list, having the right tools on hand can make the preparation process even smoother, more efficient, and ultimately contribute to a more professional-looking finished crust. These are the tools that will make your Oreo crust journey a breeze:
- Food Processor: This is unequivocally the most highly recommended tool for quickly and effortlessly crushing your Oreo cookies into perfectly fine, uniform crumbs. Its speed and efficiency ensure a consistent texture, which is a key factor for a cohesive and sturdy crust. If a food processor isn’t available in your kitchen, a sturdy, heavy-duty Ziploc bag paired with a rolling pin works as an excellent manual alternative, though it will require a bit more physical effort and time.
- 9-inch Pie Plate or Springform Pan: The specific pan you’ll need depends entirely on the type of dessert you’re creating. For traditional, rustic pies, a standard 9-inch pie plate is ideal. For elegant, towering cheesecakes, a 9-inch springform pan (often lined with parchment paper on the bottom for easy removal) is absolutely essential for achieving those clean, beautiful slices.
- Small Juice Glass or Flat-Bottomed Measuring Cup: This seemingly simple item is critically important for firmly and evenly pressing the butter-coated crumbs into the pan. The flat, smooth surface allows you to apply consistent pressure, which is vital for creating a dense, compact, and sturdy crust that will hold together impeccably when sliced.
- Mixing Bowl & Sturdy Spatula/Spoon: These basic kitchen items are, of course, necessary for thoroughly combining the crushed Oreos and the melted butter. Choose a bowl that allows ample space for mixing without spilling, and a spatula or spoon strong enough to incorporate the sticky crumb mixture.
- Oven Thermometer (Optional but Highly Recommended): As emphasized in our expert tips, an oven thermometer is an invaluable investment. It provides accurate temperature readings, ensuring your oven is precisely calibrated, which is particularly beneficial if you choose to pre-bake your crust for added sturdiness.
Tried this incredibly easy Oreo Crust recipe? We’d love to hear from you!
Please take a moment to leave a comment and a star rating. Your feedback not only helps other home bakers discover this fantastic recipe but also supports our small business immensely. Just click the little stars in the header of the recipe card below to share your experience and brighten our day!
2-Ingredient Oreo Crust (for Pie and Cheesecake!)
Pin
Rate
Ingredients
For a 9-inch Oreo Pie Crust
- 25 oreo cookies, whole, with the cream filling
- 1/4 cup salted butter, melted, 56 grams
For a 9-inch Springform Pan Cheesecake Crust
- 35 oreo cookies, whole, with the cream filling
- 4-5 tbsp salted butter, melted, 56 to 70 grams
Instructions
-
Preparation: Before you begin, decide whether you are making a pie or a cheesecake, and use the corresponding ingredient quantities listed in the “Ingredients” section above. This recipe typically yields one 9-inch crust.
-
Make the Crumbs and Mix: Add whole Oreo cookies (with their cream filling) to a food processor and pulse until fine crumbs are formed. Alternatively, place them in a sturdy bag and crush with a rolling pin. Transfer crumbs to a bowl, then add the melted butter. Stir thoroughly until all crumbs are evenly moistened and resemble wet sand.25 oreo cookies (for pie), 1/4 cup salted butter, melted (for pie), 35 oreo cookies (for cheesecake), 4-5 tbsp salted butter, melted (for cheesecake)
-
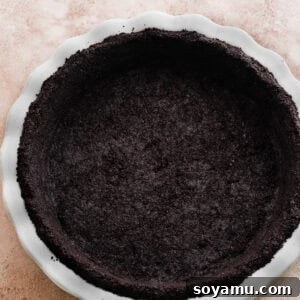
Press into Pan: Evenly spread the crumb mixture into your prepared pie plate or springform pan. Use the bottom of a small juice glass or measuring cup to firmly and tightly press the crumbs onto the bottom and up the sides of the pan. For cheesecakes, press up the sides a bit; for pies, press all the way up to the rim. Refer to the photos above for visual guidance.
-
Bake (Recommended): While this crust can be no-bake, baking it helps create a much sturdier base that is less likely to crumble when you cut into your dessert. Preheat your oven to 350℉ (175°C). Bake the pressed crust for 10 minutes. This applies to both pie and cheesecake crust sizes.
-
Cool & Serve: Once baked, remove the crust from the oven and allow it to cool completely on a wire rack before adding your desired filling. This prevents a soggy crust and ensures the butter sets properly. Your perfect Oreo crust is now ready for its delicious destiny!
Notes
Nutrition
Nutrition information is automatically calculated, so should only be used as an approximation.
Love this recipe? Show some love by leaving a comment!