
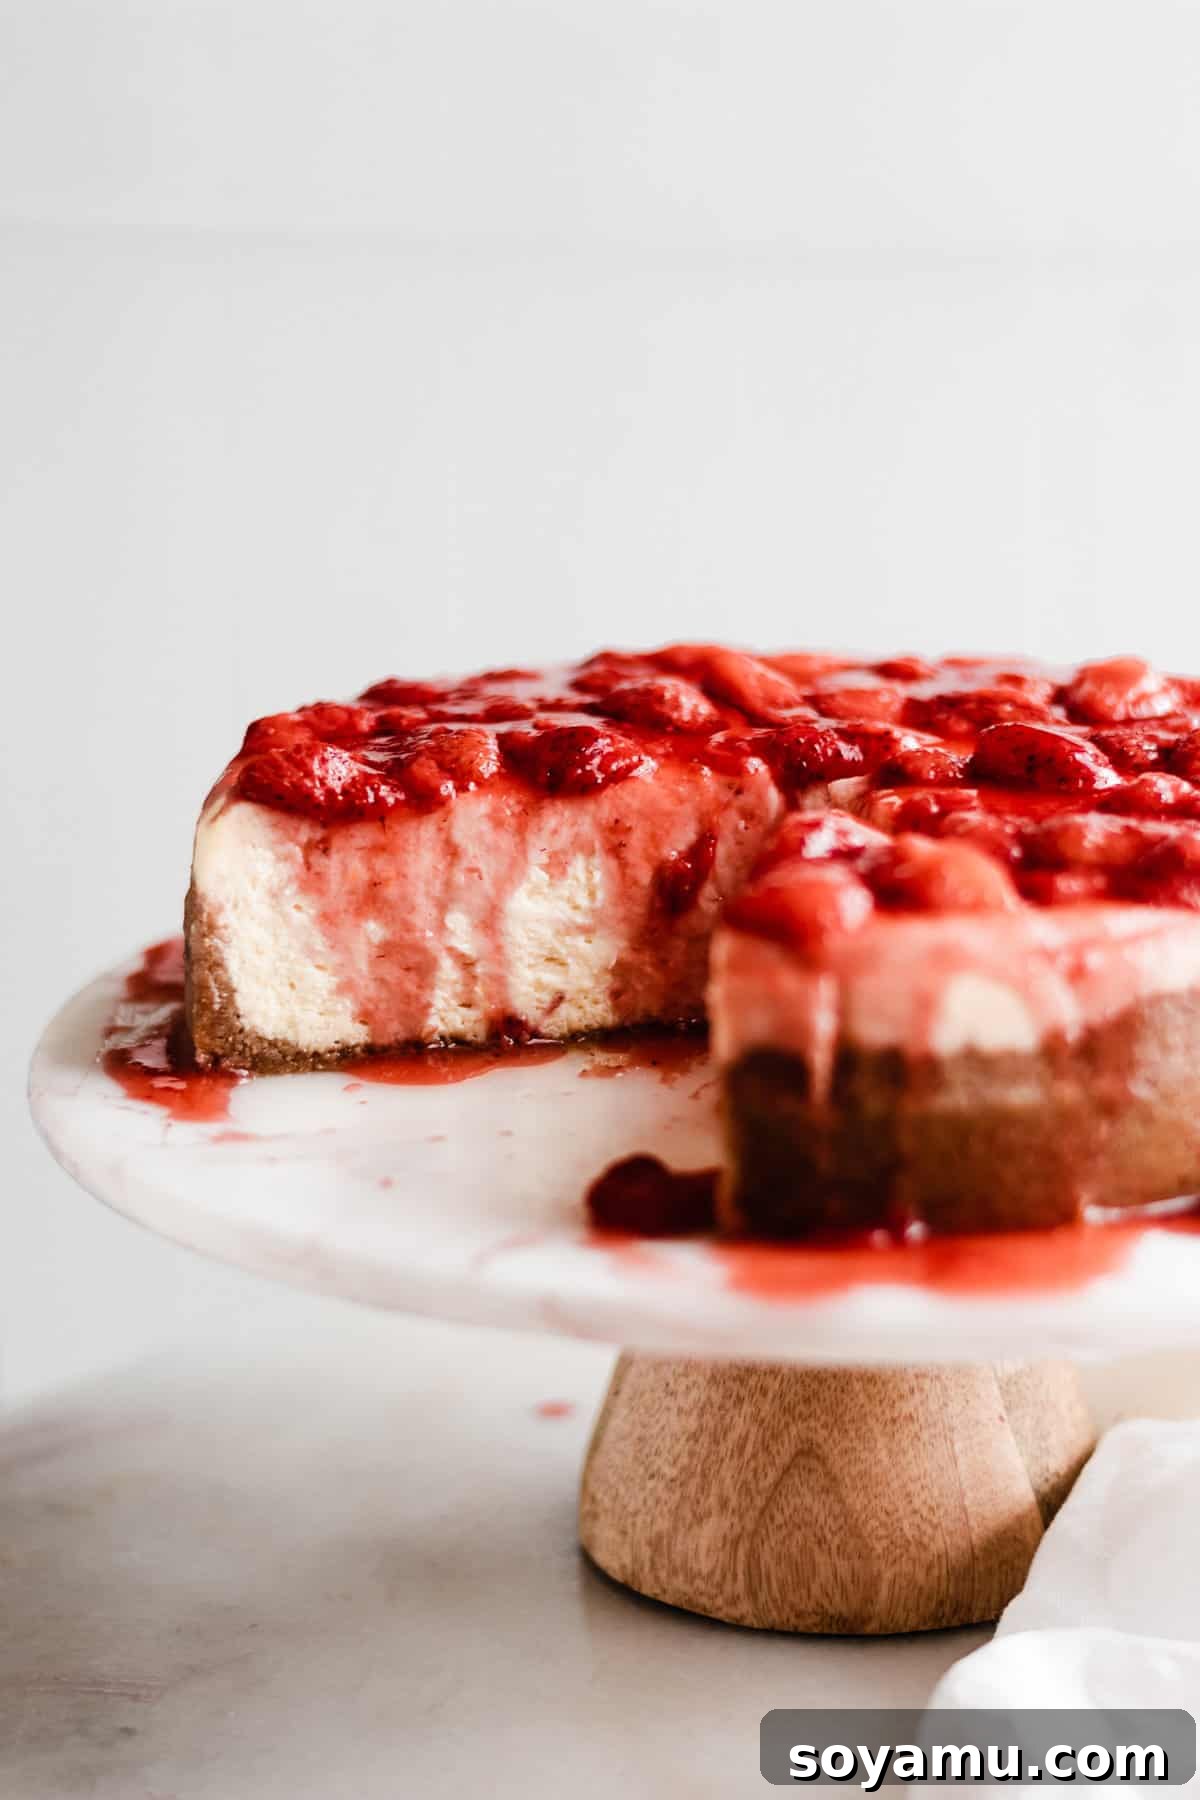
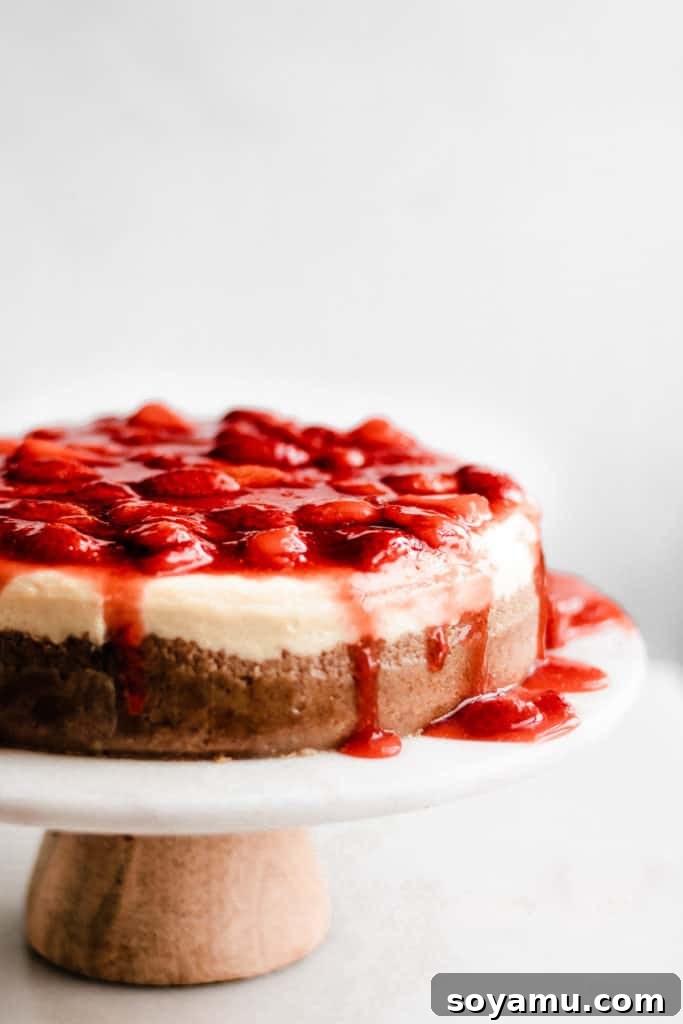
Prepare to create a dessert masterpiece that will impress everyone! This **Classic Strawberry Cheesecake** recipe delivers sheer perfection in every bite – a symphony of light and unbelievably creamy texture, nestled atop a crisp, buttery graham cracker crust, and crowned with a luscious, vibrant homemade strawberry sauce. Many home bakers find the idea of making cheesecake from scratch intimidating, but there’s no need to be. We’re about to demystify the entire process, providing clear, step-by-step instructions and invaluable expert tips to ensure your success, guaranteeing a flawless, delicious cheesecake every single time you bake this stunning dessert.
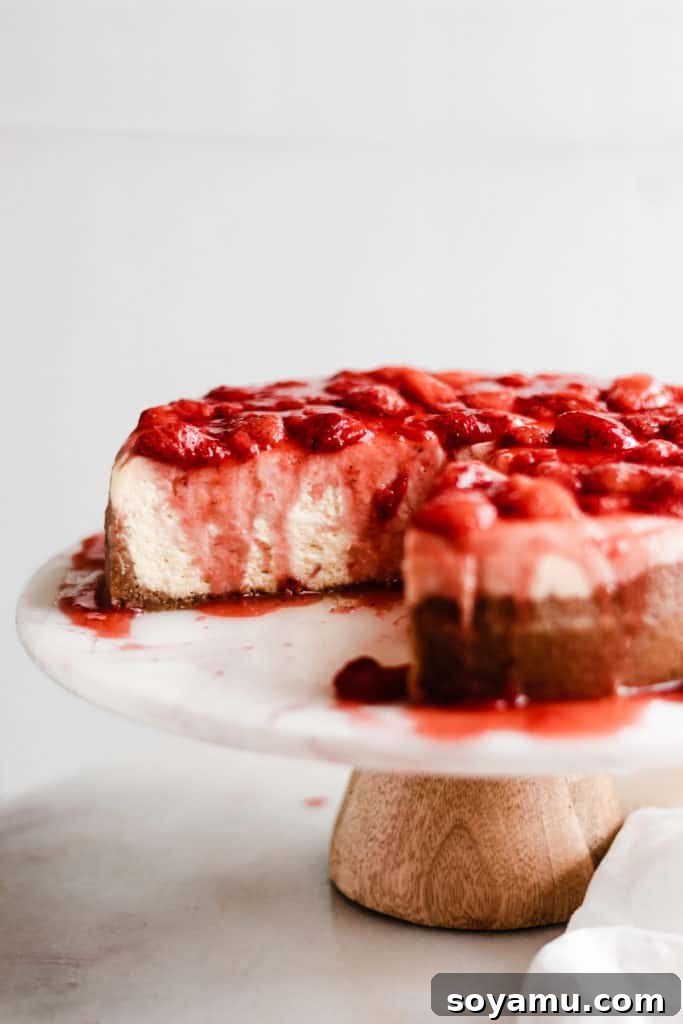
If the thought of baking a magnificent cheesecake from scratch has ever seemed daunting, rest assured that this comprehensive guide will transform you into a confident cheesecake baking champion. With a few simple, yet crucial, techniques and careful attention to detail, you’ll be creating bakery-quality desserts right in your own kitchen that taste as good as they look. Get ready to indulge in pure strawberry cheesecake bliss!
Why You’ll Absolutely Adore This Homemade Strawberry Cheesecake
- Unforgettable Classic Flavor: This isn’t just any dessert; it’s a timeless classic for a reason. Our recipe captures the quintessential vanilla cheesecake essence, elevated by a perfectly balanced, sweet, and tangy strawberry topping. The rich creaminess of the filling beautifully complements the bright fruit flavor, creating a harmonious and utterly addictive taste experience that will leave your guests asking for the recipe. It’s a flavor profile that evokes comfort, celebration, and pure joy, making it a staple for special occasions or simply a delightful treat.
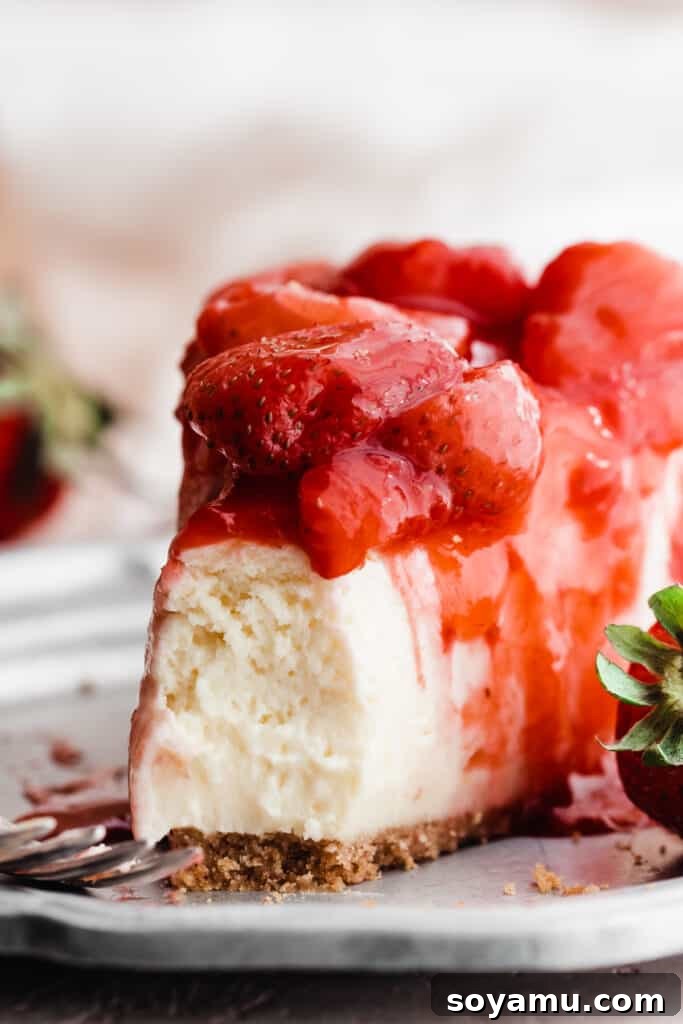
- Luxuriously Creamy, Melt-in-Your-Mouth Texture: The hallmark of an exceptional cheesecake is its texture, and this recipe absolutely delivers a heavenly experience. From the very first moment your fork glides through a slice, you’ll notice the ultra-creamy, smooth, and luscious consistency that defines perfection. It truly melts in your mouth, leaving behind a delightful richness that will convince you this is the best cheesecake recipe you’ll ever encounter. This velvety texture is meticulously achieved through precise ingredient ratios, diligent temperature control, and careful mixing techniques, ensuring every bite is pure bliss.
- An Approachable Recipe for All Skill Levels: Don’t let the seemingly intricate nature of cheesecake baking deter you. While there are a few distinct steps involved in crafting this magnificent strawberry cheesecake, the entire process is surprisingly manageable and completely doable, regardless of your baking experience. Our detailed, step-by-step instructions break down each stage with clarity, making it incredibly easy to follow along and achieve professional-level results even if you’re a novice baker. We provide all the guidance and insider tips you need to succeed, turning intimidation into pure baking triumph.
Essential Ingredients for Your Perfect Cheesecake: A Detailed Look
Crafting that iconic, rich cheesecake flavor and irresistible texture begins with selecting the right, high-quality ingredients and ensuring they are prepared correctly. Below is a comprehensive overview of what you’ll need. For precise measurements and detailed step-by-step instructions, please refer to the complete recipe card conveniently located at the bottom of this page.
- Cream Cheese: This is unequivocally the undisputed star of your cheesecake! For that signature dense and luxurious cheesecake texture, always opt for full-fat, block-style cream cheese. Steer clear of whipped or spreadable varieties, as they often contain added water or stabilizers that will prevent your cheesecake from setting properly and achieving the desired richness. Crucially, ensure your cream cheese is completely at room temperature before you begin mixing. This is vital for achieving a smooth, lump-free batter that bakes evenly.
- Eggs: Large eggs are the standard for most baking recipes, and this cheesecake is no exception. Just like the cream cheese, your eggs should be at room temperature. Cold eggs don’t emulsify or blend properly with other ingredients, which can lead to a curdled or lumpy batter, potentially resulting in a cheesecake with an undesirable texture. Room temperature eggs, on the other hand, incorporate seamlessly into the batter, contributing significantly to the cheesecake’s silky smooth and uniform finish.
- Sour Cream: A true unsung hero in the cheesecake recipe, full-fat sour cream plays a key role in achieving that signature tangy richness and supremely moist, tender texture. It adds a subtle, refreshing tang that beautifully balances the sweetness of the cheesecake, preventing it from being cloyingly sweet. Furthermore, sour cream contributes to the delicate custardy structure of the cheesecake and helps prevent common issues like cracking during the baking process. Ensure it’s also at room temperature for optimal blending.
- Vanilla Extract: For the best and most authentic flavor profile, it is highly recommended to use a high-quality, pure vanilla extract. Avoid artificial vanilla if possible. Real vanilla extract enhances all the other flavors within the rich cheesecake filling, providing a warm, inviting, and deeply aromatic note that elevates the entire dessert.
- Butter: This essential ingredient is used for the graham cracker crust. Melted butter acts as the binding agent, holding the graham cracker crumbs together to form a sturdy and flavorful base. It also imparts a rich, satisfying, and slightly salty flavor to the crust. While salted butter is often preferred for its flavor depth, unsalted butter works perfectly fine if you wish to control the salt content precisely. The key is to melt it thoroughly but avoid overheating it to prevent scorching.
- Strawberries: The magnificent crown jewel of this dessert! You have the flexibility to use either fresh or frozen strawberries for crafting the homemade topping. If you’re opting for frozen strawberries, there’s absolutely no need to thaw them beforehand; they will cook down beautifully and efficiently in the saucepan, releasing their juices and flavor. Fresh, ripe strawberries, however, will offer an even brighter, more intense, and summery flavor profile, especially when in season.
- Graham Crackers: These form the delicious and essential foundation of our cheesecake. You’ll need finely crushed graham cracker crumbs for a consistent and sturdy crust. If you only have whole graham crackers on hand, simply pulse them in a food processor until they achieve a fine, uniform crumb texture. This meticulous preparation ensures a cohesive, buttery, and incredibly flavorful crust that perfectly complements the creamy filling.
- Granulated Sugar: An indispensable ingredient, granulated sugar is essential for sweetening both the luxurious cheesecake filling and the vibrant strawberry topping. It provides the perfect balance to the tangy cream cheese and the naturally tart notes of the fresh strawberries, creating a harmonious flavor symphony.
- Corn Starch: This is a crucial thickening agent specifically for the strawberry sauce. When properly mixed and heated, corn starch ensures that your topping achieves a beautifully glossy, luscious, and syrupy consistency. This allows the sauce to cling elegantly to each slice of cheesecake without being too runny or watery, providing a delightful textural contrast.
- Lemon Juice & Zest (for the topping): While listed as optional, incorporating a pinch of finely grated lemon zest and a small splash of fresh lemon juice into the strawberry topping will truly brighten and awaken all the flavors. The subtle acidity provides a wonderful zing that cuts through the richness of the cheesecake and the sweetness of the fruit, adding an extra layer of deliciousness and complexity that should not be overlooked.
Recipe Adaptations and Substitutions: Tailoring Your Cheesecake
This beloved classic strawberry cheesecake recipe is wonderfully versatile and can be adapted to suit a variety of dietary needs, ingredient availability, or personal flavor preferences. Here are some thoughtful substitutions and variations you might consider:
- Gluten-Free Version: Making this cheesecake gluten-free is remarkably simple. You only need to substitute standard graham crackers with your preferred brand of gluten-free graham crackers for the crust. The rest of the cheesecake filling and strawberry topping ingredients are naturally gluten-free, making this an easy adjustment for those with gluten sensitivities or dietary requirements.
- Dairy-Free Adaptation: For a completely dairy-free cheesecake, you’ll need to use your trusted, high-quality dairy-free cream cheese, dairy-free sour cream, and a plant-based butter alternative for the crust. It’s important to choose brands specifically formulated for baking, as the performance and texture of dairy-free products can vary significantly. Experiment with brands you’ve had success with in other baking endeavors to ensure the best possible outcome.
- Crust Alternatives: If traditional graham crackers are difficult to source in your region, especially outside of North America, digestive biscuits make an excellent and widely accepted alternative, offering a similar texture and flavor profile for the crust. You can also get creative by experimenting with other types of cookie crumbs, such as vanilla wafers, shortbread cookies, or even chocolate wafer cookies for a different, equally delicious flavor foundation.
- Exploring Berry Variations: While the strawberry topping is undeniably divine and a perfect match for this classic cheesecake, feel free to experiment with other fruit toppings if you’re looking for a twist! Homemade raspberry, blueberry, or a mixed berry compote would also be incredibly delicious and visually stunning atop this versatile cheesecake base. Each berry offers its unique tartness and sweetness, allowing for delightful seasonal variations.
Mastering the Art of Strawberry Cheesecake: Your Comprehensive Step-by-Step Guide
Follow these meticulously detailed steps to bake a show-stopping strawberry cheesecake from scratch. Remember, precision and patience are your best friends throughout this delightful baking journey!
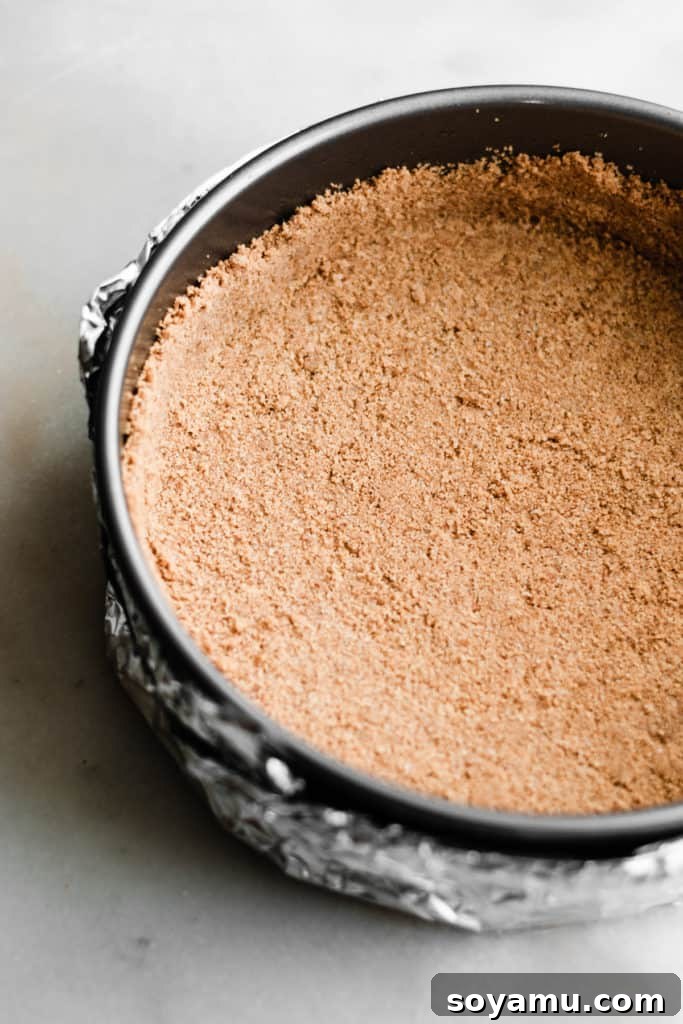
Step 1: Craft and Bake the Golden Graham Cracker Crust. Begin by preheating your oven to 350°F (175°C). Lightly grease a 9-inch springform pan with nonstick cooking spray, paying extra attention to the base and sides, and ensure the bottom is securely fastened to prevent any leaks during baking. In a medium-sized mixing bowl, combine the finely crushed graham cracker crumbs, the completely melted butter, and a touch of granulated sugar. Stir these ingredients thoroughly with a spoon or your hands until the mixture is uniformly moist and resembles wet sand. Press this mixture firmly and evenly into the bottom of the prepared springform pan, extending it slightly up the sides to create a small rim (refer to the accompanying images for visual guidance on achieving the perfect crust depth). This firm pressing creates a sturdy and cohesive foundation for your cheesecake. Bake the crust for precisely 8 minutes, just until it’s lightly golden around the edges and wonderfully fragrant. Remove the pan from the oven and set it aside on a wire rack to cool slightly while you prepare the filling. It’s crucial to keep your oven on at 350°F, as you’ll be using it again immediately for the cheesecake itself. Now is also an opportune time to start heating a large pot of water on your stovetop until it comes to a boil, and retrieve your large roasting pan, as these will be essential components for the water bath later.
Step 2: Prepare the Silky Smooth Vanilla Cheesecake Batter. Remember our golden rule for cheesecake success: all cold ingredients – specifically the cream cheese, eggs, and sour cream – *must* be at proper room temperature before you begin the mixing process. This is the single most important tip for achieving a truly smooth, lump-free batter and ultimately, a flawless cheesecake texture. In a large mixing bowl, using either an electric hand mixer or a stand mixer fitted with the paddle attachment, beat the softened cream cheese on medium-high speed for about 1 to 2 minutes until it becomes exceptionally creamy, light, and completely free of any visible lumps. Gradually add the granulated sugar to the creamed cheese, mixing on low speed only until it is just incorporated. Avoid overmixing at this stage to prevent incorporating too much air. Periodically scrape down the sides and bottom of the bowl frequently with a rubber spatula to ensure all ingredients are evenly combined. Next, add the large, room-temperature eggs, one at a time. After each egg addition, mix on medium-low speed only until the egg is just combined into the batter. Again, it is crucial to avoid overmixing after adding the eggs, as excessive air incorporation can cause your baked cheesecake to puff up and then rapidly deflate, often leading to unsightly cracks on the surface. Finally, gently stir in the pure vanilla extract and the room-temperature sour cream until the batter is just smooth and silky. Don’t worry if you see a few tiny, almost imperceptible lumps; these are perfectly acceptable and will typically disappear during the baking process. Your impeccably smooth batter is now ready for the next stage!
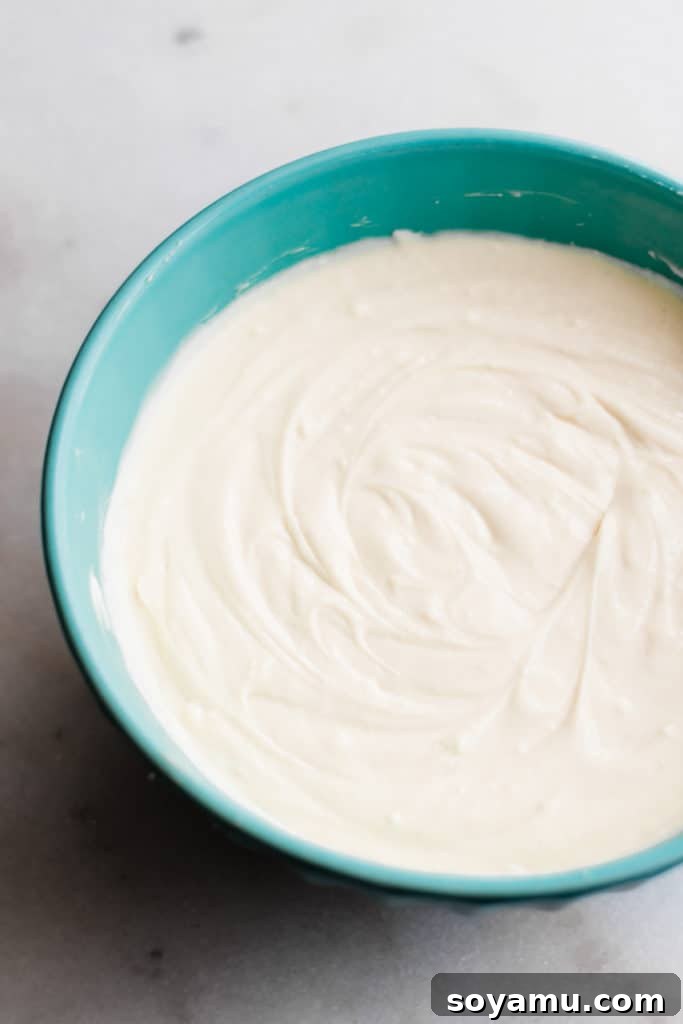
Step 3: Bake the Cheesecake to Golden Perfection Utilizing a Water Bath. Carefully pour your wonderfully smooth, prepared cheesecake batter over the pre-baked and cooled graham cracker crust in the springform pan. Use a rubber spatula to gently smooth the top of the batter, ensuring an even layer from edge to edge. Now, let’s prepare the crucial water bath (also known as a bain-marie), which is indispensable for preventing cracks, ensuring even baking, and achieving a supremely moist, perfectly textured cheesecake. You have two excellent options for setting up your water bath for maximum security and ease:
Option 1 (Direct Water Bath, with caution): Carefully place your springform pan directly onto the center rack of your oven. Position a large roasting pan on the oven rack immediately below it. Pour boiling water into the roasting pan until it reaches about 1 inch (2.5 cm) up the sides of the springform pan. Exercise extreme caution to avoid splashing any water directly into the cheesecake batter itself.
Option 2 (Recommended for Extra Security and No-Leak Confidence): For the ultimate protection against any potential water seepage into your crust, wrap the base and sides of your springform pan tightly with two layers of heavy-duty aluminum foil. Then, for an additional buffer, place the foil-wrapped springform pan inside a slightly larger 10-inch cake pan. Position this entire assembly inside your large roasting pan. Carefully pour the boiling water into the roasting pan, ensuring the water level comes about halfway up the sides of the outer cake pan. This robust, double-layer method virtually eliminates any risk of a soggy crust and ensures maximum moisture for your cheesecake.
Bake the cheesecake for approximately 88 to 94 minutes. This may appear to be a considerably long bake time, but it is entirely normal and necessary for cheesecakes, allowing them to set slowly and evenly without over-browning. The cheesecake is done when the edges appear set and firm, but the very center still has a slight, delicate wobble (about 2-3 inches in diameter) when gently shaken. A thin knife inserted into the edge of the cheesecake should come out clean, while a knife inserted into the absolute center may still have a bit of thick batter clinging to it – this is a good sign! Once the cheesecake has reached this stage of doneness, turn off the oven, crack the oven door open slightly (about 1 inch), and allow the cheesecake to cool slowly inside the oven for exactly 1 hour. This gradual cooling process is absolutely critical for preventing drastic temperature changes that can shock the delicate custard and lead to unsightly cracks on the surface.
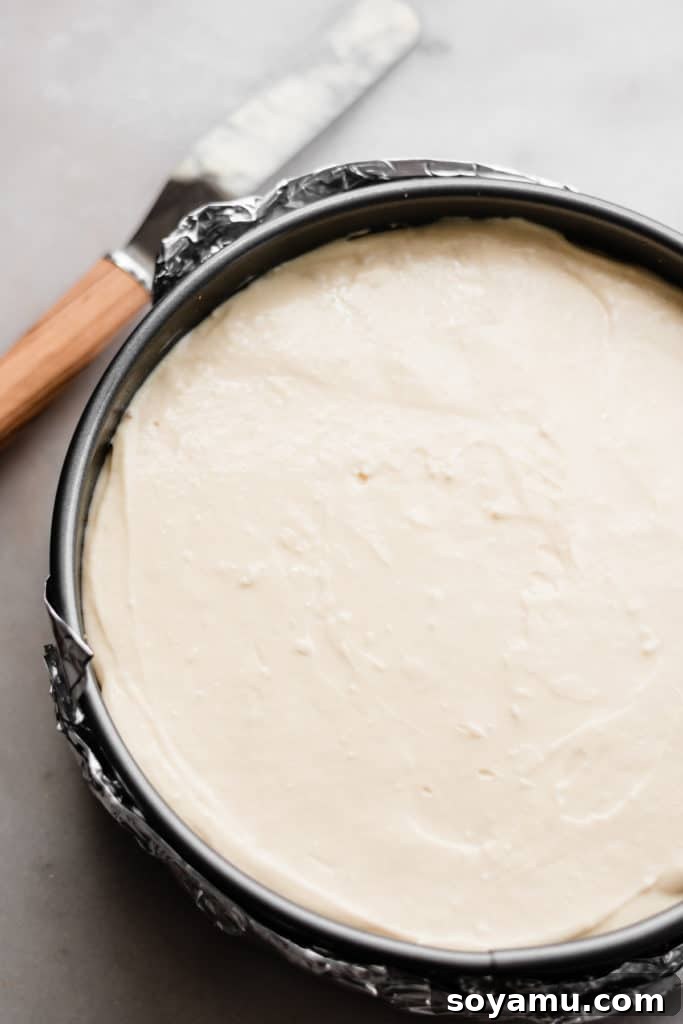
Step 4: The Essential Chilling Process for a Flawless, Firm Cheesecake. After the initial 1-hour cooling period in the turned-off oven, carefully remove the cheesecake from the oven and gently lift it out of the roasting pan. If you used foil wrapping around the springform pan, carefully remove it now. Transfer the springform pan, with the cheesecake still securely nestled inside, to a wire rack and allow it to cool completely to room temperature. This can often take several hours, so be patient. Once the cheesecake has reached ambient room temperature, cover the springform pan securely with plastic wrap or aluminum foil, making sure the wrap doesn’t touch the delicate surface of the cheesecake. Then, transfer the covered cheesecake to the refrigerator and chill for a minimum of 6 hours, or ideally, overnight (up to 24 hours). This extended chilling time is absolutely vital: it allows the cheesecake to fully set, develop its signature dense and creamy texture, and become perfectly firm enough to slice cleanly without crumbling. Rushing this crucial step will result in a soft, unset cheesecake that lacks its characteristic structural integrity and irresistible mouthfeel. Patience during this stage will be greatly rewarded with a truly perfect cheesecake!
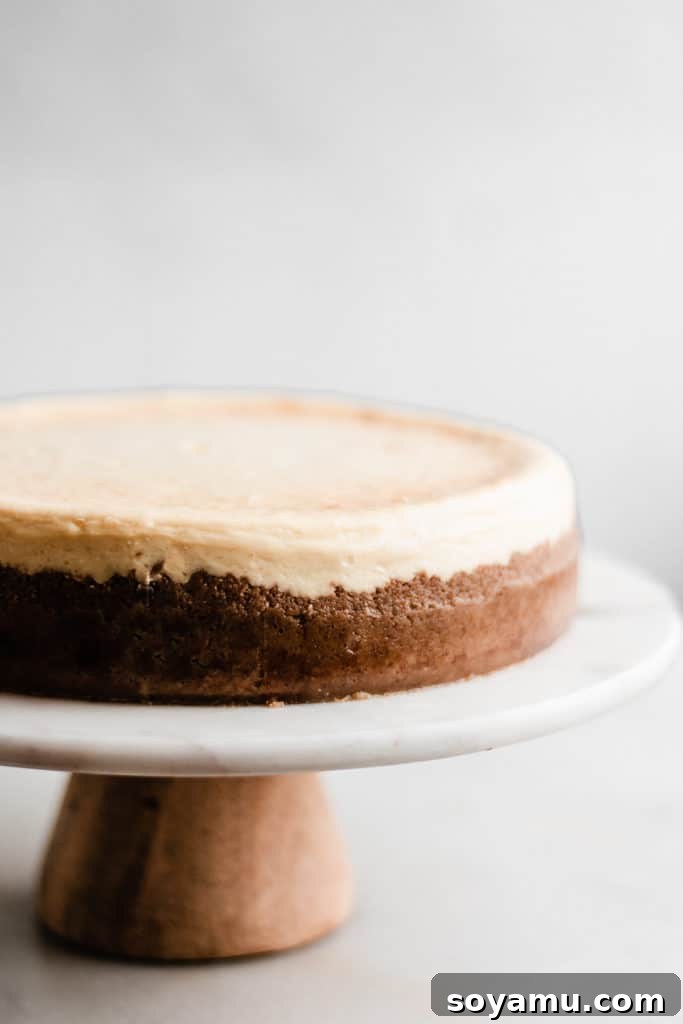
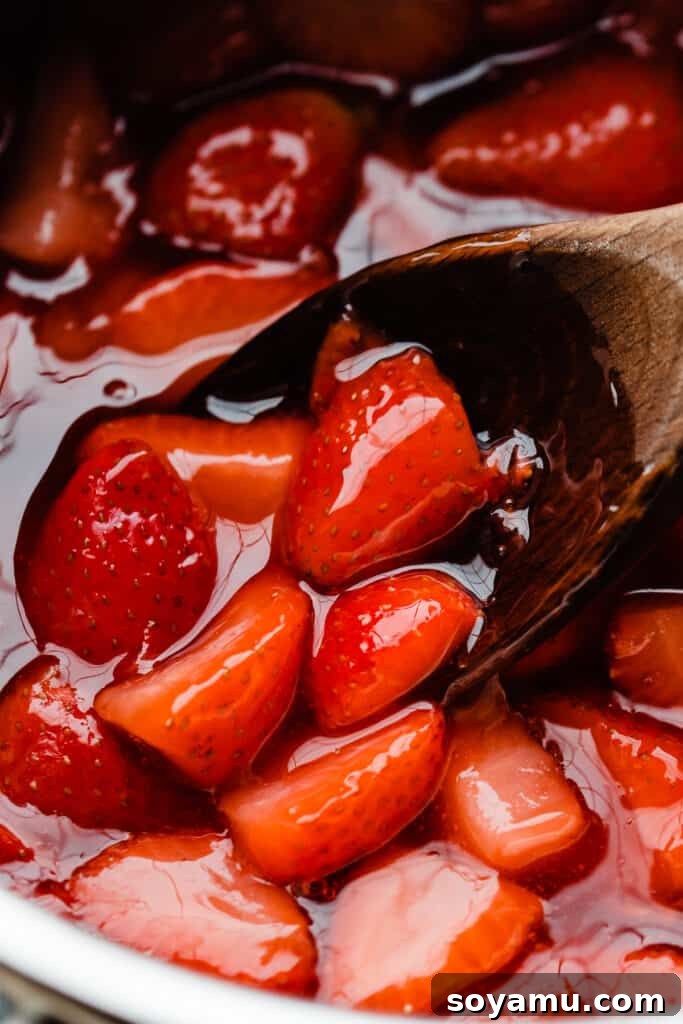
Step 5: Prepare the Luscious Homemade Strawberry Topping. This vibrant, homemade strawberry sauce is the perfect classic accompaniment to your baked cheesecake and, remarkably, takes just about 10 minutes to prepare! In a small bowl, whisk together the corn starch with the 3 tablespoons of water until the corn starch is fully dissolved, creating a smooth slurry. This prevents lumps in your sauce. Now, in a medium saucepan, combine your quartered strawberries (whether fresh or frozen), granulated sugar, the corn starch slurry, pure vanilla extract, and optionally, a pinch of finely grated lemon zest and a squeeze of fresh lemon juice. Place the saucepan over medium heat. Stir the mixture frequently and bring it to a gentle simmer. Once the mixture is simmering, continue to cook for approximately 5 minutes, stirring constantly to prevent sticking and burning. During this time, the sauce will thicken beautifully to a glossy, syrupy consistency that coats the back of a spoon. Be careful not to boil it too vigorously, as this can affect the clarity and texture. Remove the saucepan from the heat and allow the strawberry topping to cool completely before using. As it cools, it will continue to thicken and develop that desirable luscious, spreadable texture. Transfer the cooled sauce to an airtight container and store it in the refrigerator until you’re ready to serve your magnificent cheesecake. This versatile topping isn’t just for cheesecake; it’s also incredible served over ice cream, pancakes, waffles, or even yogurt for a delightful treat!
Serving & Storing Your Delectable Strawberry Cheesecake:
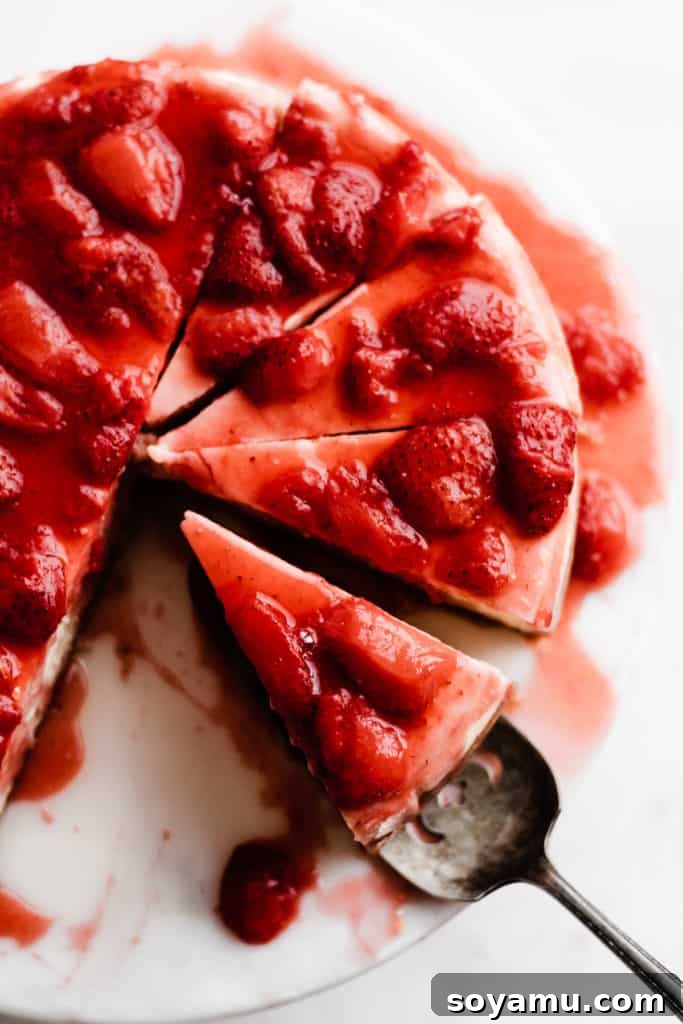
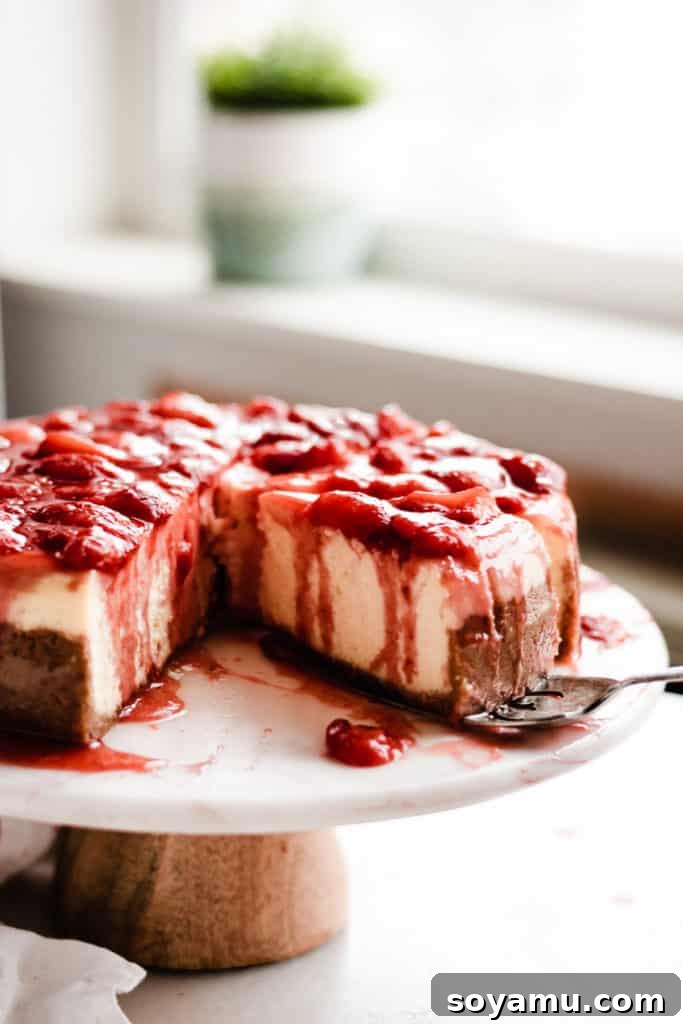
Once your magnificent cheesecake has been thoroughly chilled and allowed to fully set, it’s time for the grand reveal and the moment of pure indulgence! Carefully run a thin, sharp knife around the inner edge of the springform pan before releasing the side clasp and gently lifting the rim away. This step helps ensure a clean release and preserves the cheesecake’s beautiful shape. Then, generously spoon the fresh, vibrant strawberry compote over the entire top of the cheesecake for a stunning presentation, or serve it on the side in a small bowl so each guest can add their desired amount. To achieve pristine, bakery-perfect slices, use a warm, sharp knife (dipping the knife in hot water and wiping it clean between each slice works wonders). Slice and serve immediately! This classic strawberry cheesecake is a truly delightful dessert – rich and satisfying, yet surprisingly light and refreshing. Its generous size makes it perfect for stretching to yield 12 to 16 elegant slices, making it an ideal showstopper for any party, family gathering, holiday celebration, or special occasion like Mother’s Day.
To preserve any delicious leftovers and maintain their freshness, place the remaining cheesecake slices in an airtight container or cover the remaining cheesecake tightly with several layers of plastic wrap. Store it in the refrigerator for 3-4 days. For longer storage options, refer to our freezing tips outlined in the FAQs section below, ensuring you can enjoy this treat for weeks to come.
Expert Success Tips for Baking a Flawless Cheesecake Every Time:
Achieving a picture-perfect, crack-free, and incredibly creamy cheesecake is easier than you think when armed with these professional insights and careful techniques:
- Embrace Room Temperature Ingredients: This tip is paramount and cannot be stressed enough! Your cream cheese, sour cream, and eggs absolutely *must* be at proper room temperature. Cold ingredients will not blend smoothly, resulting in a lumpy, inconsistent batter that yields a cheesecake with an undesirable texture. For optimal results, plan ahead and take these items out of the refrigerator anywhere from 30 minutes to 2 hours before you plan to start baking, depending on the ambient temperature of your kitchen. Fully softened ingredients combine effortlessly into a wonderfully uniform and airy batter.
- The Art of Gentle Mixing – Critically Avoid Overmixing: When combining your cheesecake batter, especially after adding the eggs, it is crucial to resist the urge to overmix. Excessive mixing incorporates too much air into the batter. This trapped air causes the cheesecake to puff up significantly during baking and then rapidly deflate as it cools, which almost always leads to unsightly cracks on the surface and sometimes a slight “waist” around the middle. While the taste will still be incredible, it won’t have that pristine, smooth, and elegant surface. Mix only until the ingredients are just combined and smooth, then stop.
- Never Overbake Your Cheesecake – Understand Doneness Cues: Overbaking is an incredibly common culprit for dry, crumbly cheesecakes and, most notably, severe cracks. Pay very close attention to the specific doneness cues provided in the recipe card below. The center of the cheesecake should still have a slight jiggly wobble, resembling unset Jell-O or gelatin (about 2-3 inches in diameter), while the edges appear set and firm. Remember that the cheesecake will continue to cook slightly from residual heat as it cools, and will firm up significantly during the chilling process. An overbaked cheesecake will be firm all the way through, leading to a drier texture and sacrificing its signature creaminess.
- The Indispensable Oven Thermometer: Believe it or not, your oven’s built-in thermometer can often be surprisingly inaccurate, sometimes by as much as 25-50 degrees Fahrenheit. Investing in a simple and affordable oven thermometer is one of the most valuable tools any baker can own. Leave it in your oven at all times to monitor the true, precise temperature. Accurate oven temperature is absolutely paramount for most baked goods, and especially crucial for the delicate balance required to bake a cheesecake perfectly, preventing both under- and overbaking.
- The Water Bath (Bain-Marie) is Your Best Friend: While it may seem like an extra step, setting up a water bath is invaluable for cheesecake baking and a non-negotiable for crack-free results. It creates a moist, steamy environment within the oven, which helps the cheesecake bake gently and evenly. This slow, even baking drastically reduces the risk of cracks by preventing the outer edges from setting and drying out faster than the center. It also contributes significantly to the ultra-creamy, custardy texture that is highly sought after in a classic cheesecake. Do not skip this critical step!
- Slow Cooling is the Ultimate Key to a Smooth Top: Once your cheesecake is perfectly baked, resist the overwhelming urge to pull it straight from the hot oven into a cool kitchen. The drastic and sudden temperature change can shock the delicate custard, almost certainly leading to severe cracks across the surface. Instead, meticulously follow the instructions to turn off the oven, crack the door open slightly, and allow the cheesecake to cool gradually inside the cooling oven. This gentle transition from hot to warm is absolutely vital for maintaining a beautifully smooth, crack-free, and picture-perfect top.
Frequently Asked Questions About Baking Strawberry Cheesecake:
Yes, this recipe would generally be classified as a traditional New York Style Cheesecake. This classification typically refers to cheesecakes made with a significant amount of full-fat cream cheese, a good number of eggs, and the inclusion of sour cream (rather than heavy cream) for its signature rich, dense, and exceptionally creamy texture, often with a subtle tangy finish. Despite its inherent richness and density, our version remains wonderfully light on the palate and utterly decadent, capturing the best qualities of a classic New York cheesecake.
Absolutely! If you wish to make a smaller portion, perhaps for a smaller gathering or just fewer servings, we highly recommend halving this recipe. For baking, it’s best to use an 8×8 or 9×9 inch square pan to create delicious cheesecake bars, rather than a smaller springform pan. The halved batter would still be a bit too much for a standard 6-inch springform pan, potentially resulting in an overly thick cheesecake that bakes unevenly. When halving the recipe, reduce the baking time significantly; typically, it will bake for approximately 30-42 minutes. Always check for doneness using the same method (set edges, slight wobble in the center) and adjust baking time as needed. Crucially, ensure all ingredients are still at room temperature for the best texture and consistency.
While technically possible, attempting to double the entire recipe in one go is generally not recommended for optimal results. Mixing such a large quantity of batter can lead to overmixing, which, as we’ve discussed, can negatively impact the cheesecake’s delicate texture and significantly increase the risk of cracks. If your goal is to produce two cheesecakes, the absolute best approach is to prepare two separate batches of the batter, mixing each one individually from start to finish. This ensures the best possible outcome for both cheesecakes, guaranteeing the desired smooth, creamy texture and elegant appearance.
Yes, the extensive chilling time is absolutely essential and, frankly, non-negotiable for any classic baked cheesecake. This prolonged chilling is simply the nature of this particular dessert, allowing its delicate custard structure to fully mature! After it finishes baking and cools gradually to room temperature, transferring it to the refrigerator for at least 6 hours – or even better, overnight (up to 24 hours) – allows the cheesecake to fully set, firm up, and develop its perfect dense, creamy texture. This process ensures that it becomes easy to slice cleanly without crumbling or squishing. Rushing this crucial step will invariably result in a soft, unset, and messy cheesecake that sadly lacks its signature appeal and structural integrity.
Yes, absolutely! Baked cheesecake freezes beautifully, making it an excellent make-ahead dessert. To freeze, first ensure the cheesecake is completely baked and has cooled fully to room temperature, then chilled in the refrigerator. Before freezing, remove the cheesecake from the outer rim of the springform pan, but leave it on the base for support. It’s crucial not to add any toppings before freezing. Wrap the entire cheesecake tightly with two layers of plastic wrap, followed by one layer of heavy-duty aluminum foil. For extra protection against freezer burn, you can also place it in a large, freezer-safe airtight container if you have one that will accommodate its size. It can be frozen for 1 to 2 months without any significant loss of quality or texture. To thaw, simply transfer the frozen cheesecake to the refrigerator overnight (about 8-12 hours). Once thawed, add your fresh homemade strawberry topping just before slicing and serving.
Special Tools for Cheesecake Success: Essential Equipment
While basic kitchen tools are sufficient for many recipes, having these specific items will significantly streamline your cheesecake baking process and contribute to a more successful and enjoyable experience:
- 9-Inch Springform Pan: This is an absolutely non-negotiable and essential tool for cheesecake baking. A springform pan is uniquely designed with a removable bottom and a clasp-release side, allowing you to easily release the delicate, baked cheesecake without having to invert it or damage its beautiful structure. A 9-inch pan is standard for this recipe, ensuring the correct thickness of the cheesecake and optimal baking time.
- Large Roasting Pan: This large pan is essential for creating the crucial water bath (bain-marie). Choose a roasting pan that is large enough to comfortably hold your 9-inch springform pan with ample space around its perimeter to pour boiling water. It should also have sides tall enough to contain enough water to come about halfway up the sides of your springform pan.
- Electric Mixer (Hand or Stand Mixer): While it is technically possible to mix cheesecake batter by hand, an electric mixer is highly recommended. It makes the process of creaming the cream cheese until perfectly smooth and incorporating all the ingredients without overmixing much more efficient and effective, guaranteeing a smooth and uniform batter.
- Rubber Spatula: An incredibly versatile and indispensable tool in any kitchen, a rubber spatula is perfect for scraping down the sides of your mixing bowl. This ensures that all ingredients are thoroughly incorporated into the batter, preventing any unmixed lumps or streaks, and helps achieve a consistently smooth mixture.
- Oven Thermometer: As highlighted in our expert tips, an oven thermometer provides accurate temperature readings of your oven’s interior, which is crucial for preventing over or underbaking your delicate cheesecake. Relying solely on your oven’s dial can often lead to inconsistent results, making an external thermometer a wise investment for precise baking.
More Irresistible Cheesecake Recipes to Explore and Savor:
If you’ve fallen in love with cheesecake baking, or simply adore this creamy dessert, you’ll be thrilled to discover these other delightful cheesecake recipes:
- Charming Mini S’mores Cheesecakes
- Decadent Pecan Pie Cheesecake
- Rich Black Forest-Inspired Chocolate Cherry Cheesecake
- Creamy Bailey’s Chocolate Cheesecake with Ganache
- Effortless No Bake Cherry Cheesecake Parfaits
- Dreamy Triple Biscoff Cheesecake
- Boozy Key Lime Rum Cheesecakes with Whipped Cream
Discover More Delightful Strawberry Recipes: Perfect for Any Season
Beyond cheesecake, there are countless ways to enjoy the sweet and tangy flavor of strawberries. Explore these other fantastic strawberry-focused recipes:
- Rustic Strawberry Rhubarb Galette
- Classic Homemade Strawberry Shortcakes
- Sweet and Tangy Strawberry Blueberry Pie
- Fluffy Homemade Strawberry Scones
- Irresistible Strawberry Caramel Crumble Bars
- Best Ever One-Bowl Strawberry Rhubarb Crumble
- Quick and Versatile 10-Minute Strawberry Compote
Did you try this irresistible Classic Strawberry Cheesecake recipe? We’d absolutely love to hear from you!
Your invaluable feedback helps our small business immensely and inspires other home bakers in our community. Please take a moment to share your experience and leave a star rating below in the comments section. Thank you for your support!
Classic Strawberry Cheesecake with Homemade Sauce
By Stephanie Simmons
Indulge in the ultimate homemade dessert with our Classic Strawberry Cheesecake. This recipe guides you to create a light yet incredibly creamy cheesecake with a crisp graham cracker crust, crowned by a luscious, vibrant homemade strawberry sauce. Easy to follow steps and expert tips ensure a perfect, show-stopping dessert every time!
Prep Time: 35 minutes
Cook Time: 1 hour 43 minutes
Total Time: 2 hours 18 minutes (Excludes Essential Chilling Time)
Yields: 12 to 16 slices
Ingredients
For the Graham Cracker Crust:
- 3 cups graham cracker crumbs (approximately 276 grams)
- 1/2 cup salted butter, melted (approximately 113 grams) – See note below if mixture appears dry
For the Creamy Cheesecake Filling:
- 32 ounces full-fat cream cheese, at room temperature (block style recommended)
- 1 1/2 cups granulated sugar (approximately 315 grams)
- 4 large eggs, at room temperature
- 1 cup full-fat sour cream, at room temperature (approximately 240 grams)
- 2 tsp pure vanilla extract
For the Luscious Homemade Strawberry Topping:
- 1 lb strawberries, quartered (can use fresh or frozen – no need to thaw if frozen)
- 1/3 cup granulated sugar (approximately 70 grams)
- 3 tbsp water
- 1 tbsp corn starch
- 1 tsp pure vanilla extract
- Pinch of lemon zest (optional, but highly recommended for brightness)
- Splash of fresh lemon juice (optional, but highly recommended for tang)
Instructions
- Make the Crust: Preheat your oven to 350°F (175°C). Lightly spray a 9-inch springform pan with nonstick cooking spray and ensure the bottom is securely fastened. In a medium bowl, combine the graham cracker crumbs, melted butter, and sugar. Stir well. Press this mixture firmly and evenly into the prepared pan and slightly up the sides. Bake for 8 minutes. Remove from oven and set aside to cool. Keep your oven on at 350°F. Begin heating water in a large pot on the stove and prepare a large roasting pan for the water bath.
- Make the Cheesecake Filling: Ensure all cold ingredients (cream cheese, eggs, sour cream) are at room temperature. In a large mixing bowl, beat the softened cream cheese with an electric mixer until very creamy and smooth, about 1-2 minutes. Add the granulated sugar and mix on low speed until just combined. Scrape down the sides of the bowl. Add the eggs one at a time, mixing on medium-low speed only until each is just incorporated. Finish by mixing in the vanilla extract and sour cream until the batter is smooth. Avoid overmixing. Pour the silky batter over the baked and cooled crust, smoothing the top with a spatula.
- Prepare the Water Bath & Bake: Bring the pot of water to a boil. For best results, wrap the base of your springform pan tightly with two layers of heavy-duty aluminum foil, then place it inside a slightly larger 10-inch cake pan. Position this entire assembly inside your large roasting pan, placed on the center rack of your preheated oven. Carefully pour boiling water into the roasting pan until it reaches about halfway up the sides of the outer cake pan. Bake for 88-94 minutes. The cheesecake is done when the edges are set and firm, but the center (about 2-3 inches) still has a slight, delicate wobble. Turn off the oven, crack the door open slightly, and let the cheesecake cool inside the oven for 1 hour.
- Cheesecake Cooling & Chilling: After 1 hour in the oven, carefully remove the pan from the oven and lift it out of the roasting pan. Gently remove any foil. Transfer the springform pan to a wire rack and let the cheesecake cool completely to room temperature (this can take several hours). Once cooled, cover the cheesecake securely with plastic wrap or aluminum foil and refrigerate for at least 6 hours, or ideally, overnight (up to 24 hours), before removing from the pan and serving. This chilling time is crucial for setting.
- Make the Strawberry Sauce: In a small bowl, whisk together the corn starch and 3 tbsp water until fully dissolved to create a slurry. In a medium saucepan, combine the quartered strawberries, granulated sugar, corn starch slurry, vanilla extract, and optional lemon zest/juice. Bring the mixture to a gentle simmer over medium heat, stirring frequently. Once simmering, cook for 5 minutes, stirring constantly, until the sauce thickens and becomes syrupy. Remove from heat and allow to cool completely. The sauce will continue to thicken as it cools. Store in an airtight container in the fridge until ready to use.
- Serve & Store: Once the cheesecake is fully chilled, gently release it from the springform pan. Top generously with the homemade strawberry sauce. Slice with a warm, sharp knife (wiping the knife between slices for clean cuts) and serve. Store any leftover cheesecake, well covered, in an airtight container in the fridge for 3-4 days.
Recipe Notes:
Graham Cracker Crumbs: If you’re starting with whole graham crackers, simply use a food processor to blend them into fine crumbs. You might find you need an additional 1-3 tablespoons of melted butter compared to using pre-packaged crumbs, as homemade crumbs can sometimes be drier and require more binder.
Crust Alternatives: For those in regions where graham crackers aren’t readily available, digestive biscuits are an excellent and widely accepted alternative for a delicious, sturdy crust. Ensure they are finely crushed and adjust butter slightly if needed.
Nutrition Information
(Approximation per 1 slice serving)
- Serving: 1 slice
- Calories: 596 kcal
- Carbohydrates: 52g
- Protein: 9g
- Fat: 41g
- Saturated Fat: 23g
- Polyunsaturated Fat: 2g
- Monounsaturated Fat: 11g
- Trans Fat: 0.3g
- Cholesterol: 170mg
- Sodium: 421mg
- Potassium: 234mg
- Fiber: 1g
- Sugar: 41g
- Vitamin A: 1466 IU
- Vitamin C: 22mg
- Calcium: 122mg
- Iron: 1mg
Nutrition information is automatically calculated and should be used as an approximation. Exact values may vary based on specific ingredients and preparation methods.
Enjoyed this recipe? Share your thoughts!
Your feedback is incredibly valuable to us and helps our community of bakers. Please consider leaving a comment and a star rating below after you’ve made this delicious cheesecake!